Installing and Configuring OpenVPN (Microsoft Windows)
To access vSphere/NSX-T, you must install the OpenVPN client software and establish a VPN connection. The OpenVPN client is open-source software that enables you to establish a VPN connection that is protected through SSL.
This article explains how to install and configure the OpenVPN client software on your local computer.
Installing OpenVPN
Requirements
You have administrator rights.
You have logged in on your local PC.
Please Note
To use OpenVPN, you must enable the following ports in your router and firewall:
PortProtocol
1194 UDP
443 TCP
Alternatively, OpenVPN can be used with port 1194 TCP. In this case, this port should also be opened.
Download the OpenVPN software. This is offered as a 32-bit and a 64-bit version.
To start the installation, double-click on the installation file.
Click on Install Now.
The OpenVPN software is installed.Click on Close.
Click OK in the OpenVPN GUI window.

Downloading the Configuration File
To configure OpenVPN, you need a specific *.ovpn file. To download it, proceed as follows:
Open the Cloud Panel.
To download the configuration file, click VPN in the Private Cloud section.
The configuration file is downloaded in the form of a zip file.
Configuring OpenVPN
Open your Windows Explorer.
Open the folder that contains the zip file you downloaded.
Unzip the zip file in the desired folder.
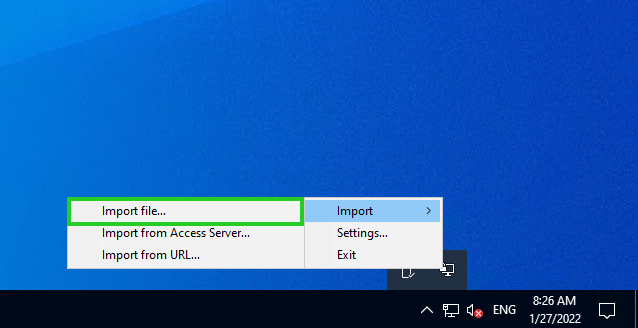
Click the upward pointing arrow on the right side of the taskbar.

Right-click on the OpenVPN icon.

Click Import > Import File.
Open the directory where you unzipped the ZIP file.
Select the configuration file with the *.ovpn file extension.
Click Open.
The configuration file is imported.