Setting up an email account on iPhone (iOS 18)
For Mail Basic and Mail Business
This article explains how to configure an email account with an email address created at IONOS on an Apple iPhone with iOS 18.
Note
These instructions were created using an iPhone with the iOS 18.2.1 operating system. The menu navigation for other iOS versions may differ.
Requirements
- An existing email address
- The password for the email address
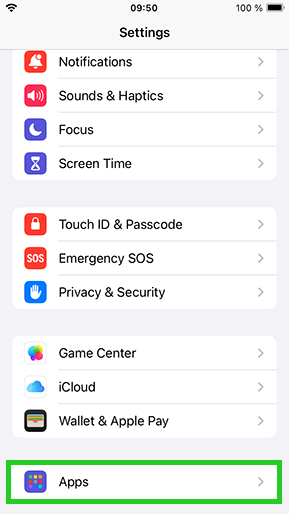
- Open the settings. To do this, tap Settings on the Home screen.
- Tap on Apps.
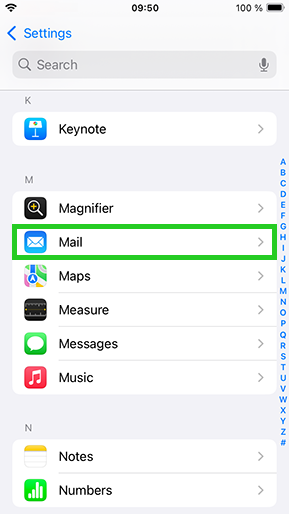
- Tap on Mail.
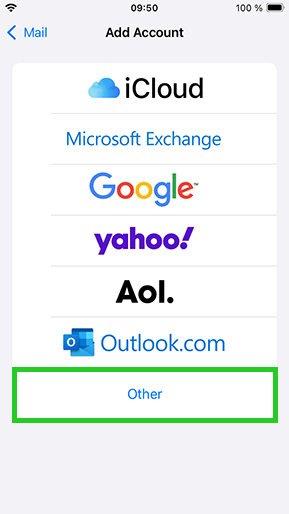
- If you have already set up an email account, tap on Mail accounts and then on Add account... . If you have not yet set up an email account, tap Add account... .
- Tap on Other.
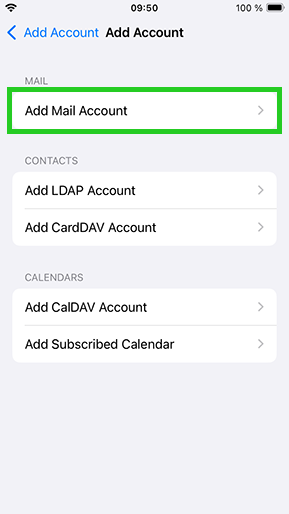
- Tap on Add mail account.
- Enter the following information:
| Field | Input |
|---|---|
| Name | The sender name displayed in outgoing mail. You can enter any name. |
| The full email address of your IONOS email account. | |
| Password | The password you assigned when setting up the IONOS email address. |
| Description | Enter a description for your account here. This information is only used to make it easier to distinguish the account from other accounts once it has been set up in the mail app. |
Please Note
It is essential that you enter the username and the corresponding password. Otherwise, both receiving and sending emails will fail and you will receive an error message.
| Field | Enter |
|---|---|
| Hostname | IMAP: imap.ionos.co.uk or POP3: pop.ionos.co.uk |
| Username | The full email address of your IONOS email account. |
| Password | The password you assigned when setting up the IONOS email address. |
- Enter the following information in the SERVER FOR OUTGOING EMAILS area:
| Field | Enter |
|---|---|
| Hostname | smtp.ionos.co.uk |
| Username | The full email address of your IONOS email account. |
| Password | The password you assigned when setting up the IONOS email address. |
- Tap on Next.
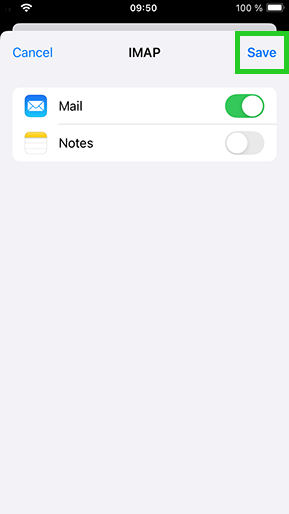
- The email account is automatically set up with SSL encryption. The device automatically carries out the correct configuration. Then, select which data (mail, notes) you would like to sync and tap Save.
The account is added.
Note
The SSL settings can also be checked at a later date. You can find more information on this under Activating SSL encryption on iPhone/iPod/iPad.