How to use an SSH key with GitHub
Using an SSH key with GitHub enables passwordless access to Git repositories. Instead of identifying a user by username and password, your machine is authenticated via the SSH key.
Try out your VPS for 30 days. If you're not satisfied, we'll fully reimburse you.
What is an SSH key?
The Secure Shell (SSH) is the standard tool for encrypted access to remote systems. SSH allows you to log into a server from your home machine. Git uses SSH as a transfer protocol and allows read and write access to remote repositories.
An encrypted connection is used to enable authentication of the machine and to ensure that the transmitted data cannot be falsified. Without this, it would be possible for unknown parties to make arbitrary changes to repositories.
GitHub via SSH uses asymmetric encryption as a cryptographic method. First, a pair of private and public keys is created. This is also referred to as a 'public / private key pair'. The private key remains on the user’s own computer. The public key is shared with third parties, e.g., GitHub.
If you use an SSH key to access GitHub repositories, you don’t need to enter a password. In general, passwordless logins are considered more secure because a password can be picked up on by keyloggers or trojans. Instead of a person knowing the password, a machine is authenticated on which the private key is stored.
Using GitHub via SSH is extremely convenient. Once it’s set up, the SSH key allows permanent access to GitHub without further intervention. Other protocols and services also benefit from SSH keys for an encrypted network connection. In addition to Git with SSH, the secure SFTP protocol can be used to exchange files with servers without the need for further configuration.
Connecting to Git repositories is usually done from the command line. If an SSH key has been set up, a push to a custom repository can be performed without any problems:
cd ./folder-with-git-repo/
git push
Besides the command line application, GUI applications also benefit from an established SSH key. Modern FTP programs support the SSH File Transfer Protocol (SFTP). This is based on SSH and uses existing SSH keys.
How do you use SSH keys with GitHub?
To access your GitHub account with an SSH key, you deposit the public key with GitHub. The private key remains on your own computer. Your machine is authenticated to GitHub by comparing the key data. This allows write access to your own repositories. This method also works with alternatives to GitHub like Gitlab or Bitbucket.
As convenient as SSH keys are, you must exercise caution when using them. Do not share your private key under any circumstances. The private key may allow another party to impersonate you. A third party could log into a server or modify code in repositories in your name.
Requirements for using GitHub with an SSH key
We’re assuming here that you work in a Linux-like environment. This includes Linux/Unix, macOS, as well as Windows with WSL2 installed. In addition, the following conditions must be met:
- Git has been installed
- SSH has been installed
- A GitHub account has been created
First, let’s check if the local requirements are met. With the following command, we test if Git and SSH are installed. Unless you get a 'git not found' or 'ssh not found' error message, both are present:
which git sshmkdir -vp ~/.ssh/We’ll explain below how to create and register an SSH key to use GitHub. Once this step is complete, we’ll show you how to deposit the public SSH key with GitHub and explain how to access Git repositories using SSH:
- Create SSH key pair on your own system
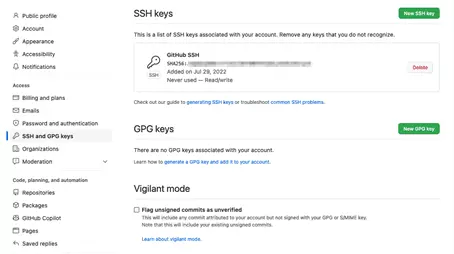
- Deposit public SSH key with GitHub
- Access GitHub repository with SSH key
Create and register an SSH key on your own system
As a first step, we’ll create a public / private SSH key pair on our local system. Copy the commands used for this in the exact same order and run them from your command line.
We follow the official documentation from GitHub here. The procedure changes from time to time so, to fix SSH errors, it can’t hurt to look there.
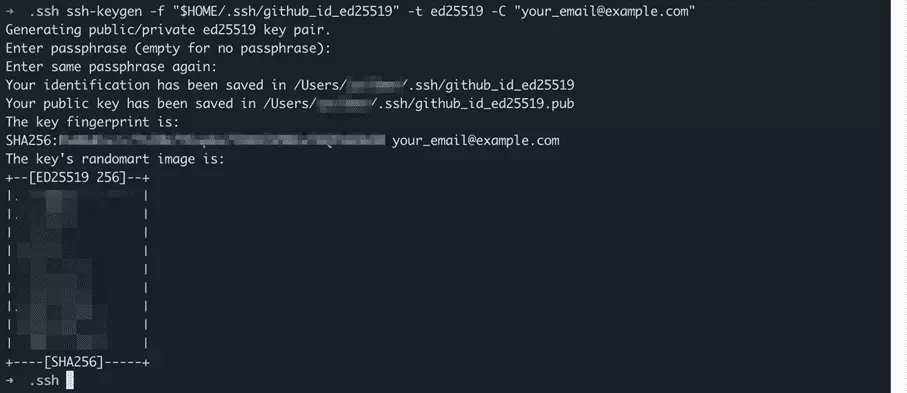
First, we start the SSH key generator to create a public / private key pair for GitHub. We use the ssh keygen command, which is present by default as part of the OpenSSH installation on the system:
We call up ssh keygen from the command line and are presented with three options:
- Option -f followed by path and name of the new key
- Option -t followed by the name of the algorithm, in this case ed25519
- Option -C followed by email address as a comment
ssh-keygen -f "$HOME/.ssh/github_id_ed25519" -t ed25519 -C "your_email@example.com"You can use any email address to generate the SSH key pair. It only serves as a label and doesn’t have to be the same address you use to log into GitHub.
The SSH keygen command asks us to specify a 'passphrase' for the private key. Unlike a password, a passphrase can contain spaces. The passphrase should be several words long and is then just as easy to remember as it is difficult to guess. Include some digits or special characters for increased security. Type the passphrase and press 'Enter'. Repeat the process to complete the creation of the SSH key pair.
We use the Ed25519 algorithm for our key pair. In fact, there’s a whole range of algorithms available. We present the encryption methods at a glance in a separate article.
Before we can use our freshly generated SSH key with GitHub, we perform one more step. This is optional, but highly recommended. We add the private key to the 'SSH agent'. This is a background program that runs on the local system. Run the following command from the command line and enter the passphrase when asked:
- Windows / Linux
ssh-add ~/.ssh/github_id_ed25519- macOS to 11 Big Sur
ssh-add -K ~/.ssh/github_id_ed25519- macOS from 12 Monterey
ssh-add --apple-use-keychain ~/.ssh/github_id_ed25519The SSH agent has access to added private keys and allows you to use them to connect without entering the passphrase every time. But the SSH agent can do even more:
'SSH agent is a program that can keep a user’s private key, so that the private key passphrase only needs to be supplied once. A connection to the agent can also be forwarded when logging into a server, allowing SSH commands on the server to use the agent running on the user’s desktop.' / Source: https://www.ssh.com/academy/ssh/keygen#adding-the-key-to-ssh-agent
Deposit SSH key with GitHub
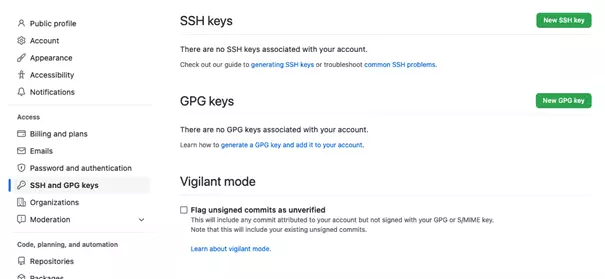
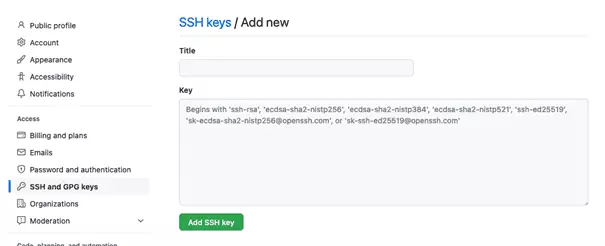
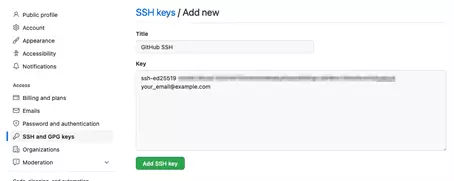
We have created an SSH key pair on our local system. This provides one half of the encrypted communication when using GitHub with SSH. The remaining step is to deposit the public SSH key with GitHub.
Now we need the contents of the public key. Switch to your local command line and enter the following command:
cat ~/.ssh/github_id_ed25519.pubCaution: the filename ends in .pub for the 'public key'. However, the private key doesn’t end in .priv or the like. Instead, the private key has no ending. Only share the public key with GitHub and other third parties.
Access GitHub repository with an SSH key
We have generated the keys locally and deposited the public SSH key with GitHub. First, let’s test if the connection works using the following command:
ssh -T git@github.comIf this is your first time connecting to GitHub from this machine, you’ll also be prompted to add the server to the 'known hosts':
When accessing GitHub repositories, we distinguish between read and write access. Public repositories can be read by anyone. No authentication, i.e., no SSH key, is required.
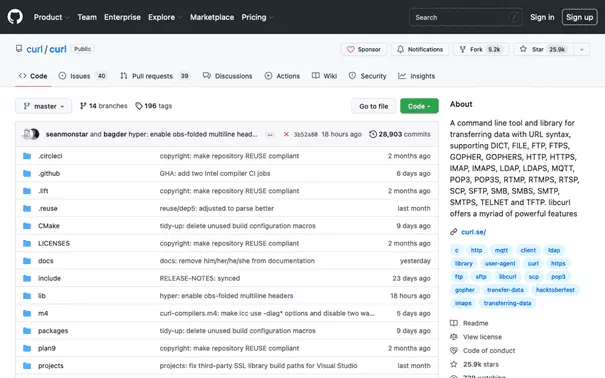
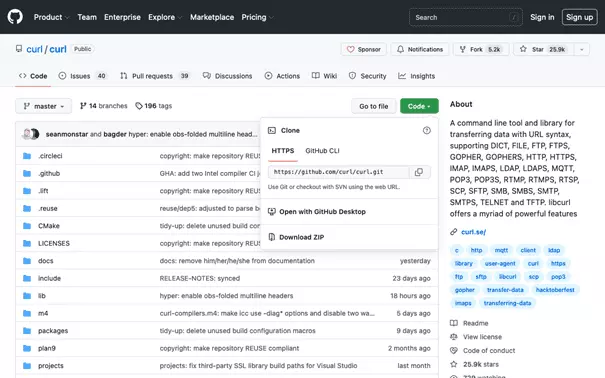
To download a repository as a local copy, use the Git clone command. We’ll demonstrate this using the repository of the popular network tool cURL as an example. We visit the GitHub page of the public cURL repository and copy the clone URL:
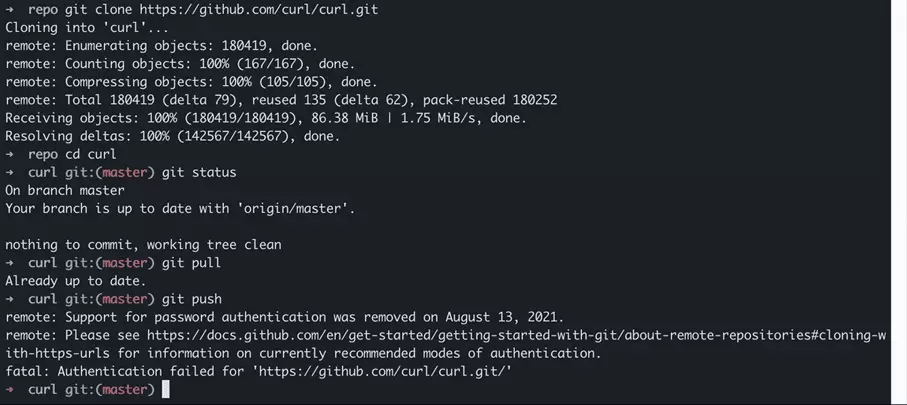
Equipped with the clone URL, we switch back to the local command line. We create a sample folder repo on the desktop and switch to that. We then clone the cURL repository by calling up Git clone with the clone URL:
cd ~/Desktop/
mkdir -p repo && cd repo
git clone https://github.com/curl/curl.gitWe switch to the cURL repository folder and use the Git status command to display the status of the repository:
cd ~/Desktop/repo/curl/
git statusThe Git pull command, which brings a repository up to date, also requires read-only access. We run Git pull in the repository folder. In principle, this works even if there are likely no changes yet:
git pullNow, we try to write to the GitHub repository using the Git push command:
git pushWhat’s going on here? The clone URL used to clone the public cURL repository starts with HTTPS. Accordingly, for our local clone, an HTTPS URL is stored as 'Origin'. We check the origin with the Git show command:
git remote -v showFor read access, an HTTPS URL is sufficient, but an SSH key is required to write to GitHub repositories. This is because user authentication via username / password is no longer supported on GitHub as of August 2021.
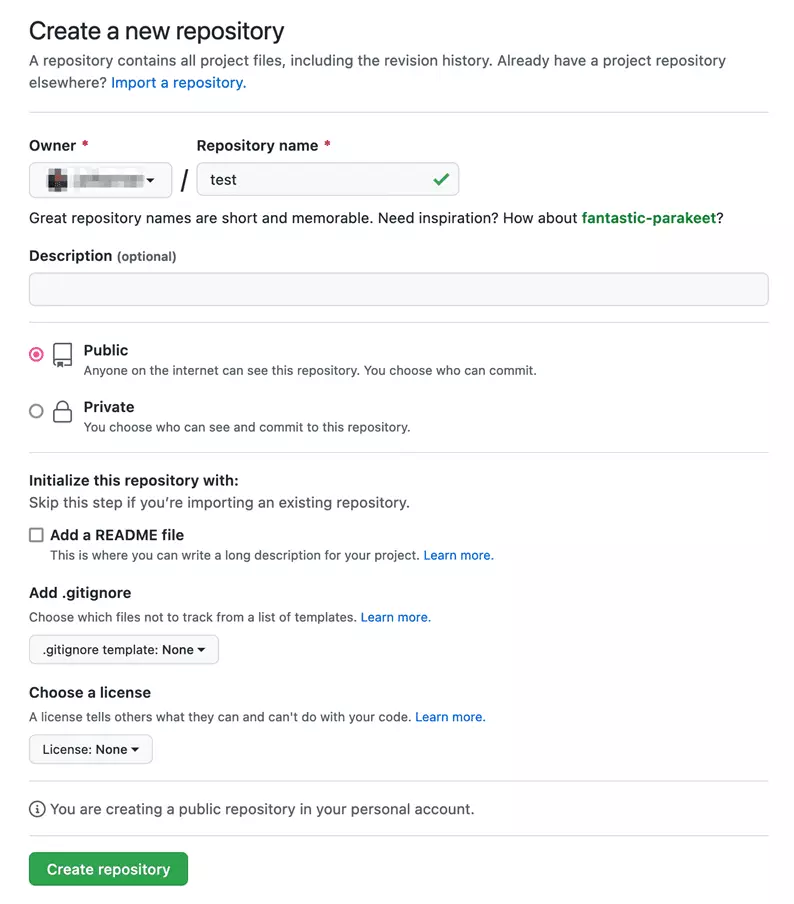
We use a trick to test Git push anyway. First, we create on GitHub our own empty repository:
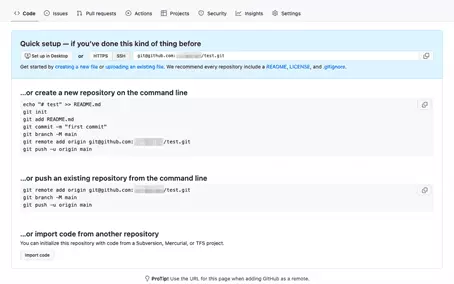
Following the instructions on GitHub, we change the push URL of the local cURL clone on our system to use our empty GitHub repository as origin. Furthermore, we set the branch to 'main'. We then execute the Git push. The operation completes successfully and uses our previously created SSH key to authenticate us to GitHub.
git remote set-url origin git@github.com:<user>/test.git</user>
git branch -M main
git push -u origin mainUse multiple SSH keys for different GitHub accounts
It’s possible to use only one SSH key for different GitHub or other accounts without any problems. Remember: we can share the public key without hesitation.
Technically, it’s quite possible to use your own SSH keys for different services and sites. There are two possible methods:
- Call up SSH command with parameters
- Create SSH config file
SSH commands with parameters may turn out to be very long, which is why we’re not showing this approach here. In general, it’s more convenient to work with an SSH config file. This requires a little more effort to configure your own system, but it only needs to be done once. Here’s an overview of the folders and files involved in SSH configuration:
| SSH configuration | Path | Explanation |
|---|---|---|
| Config folder | ~/.ssh/ | Contains SSH configuration and key pairs. |
| Private key | ~/.ssh/key-name | Private key from a key pair. |
| Public key | ~/.ssh/key-name.pub | Public key from a key pair. |
| Config file | ~/.ssh/config | SSH configuration file. |
| Known hosts | ~/.ssh/known_hosts | List of hosts connected in the past. |
First, we create the SSH config file. We create the file, adjust the user rights and open it in the command line editor:
touch ~/.ssh/config
chmod 600 ~/.ssh/config
nano ~/.ssh/config
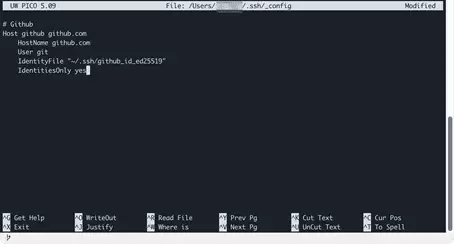
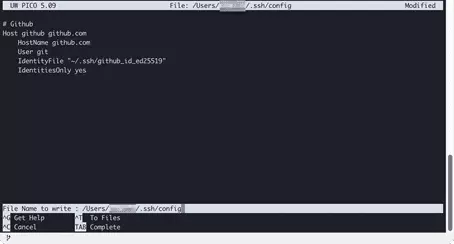
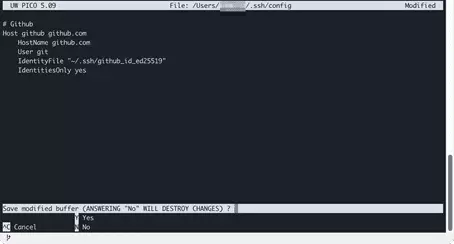
Then, copy the following block into the editor and follow the screenshots to save the file:
# Github
Host github github.com
    HostName github.com
    User git
    IdentityFile "~/.ssh/github_id_ed25519"
IdentitiesOnly yesAfter inserting the GitHub configuration block, an SSH connection can be established by specifying the specified host abbreviation github:
ssh -T githubFollow the schema shown to add configuration blocks for additional services or accounts to the SSH config file. Here’s an overview of the parameters that are used:
| Setting | Explanation | Example |
|---|---|---|
| Host | Can contain any number of names. | github.com github |
| HostName | Host name of the remote system running SSH. An IP address can also be used. | github.com |
| User | Git user on the remote system. Must be applied exactly. | git |
| IdentityFile | Absolute path to the private key. Adjust this if you use multiple keys. | ~/.ssh/github_id_ed25519 |
| IdentitiesOnly | Specifies that access for this host must be by key only. | yes |
One final tip. If you create SSH configurations for multiple hosts with their own keys, you should add a block of settings for unlisted hosts at the end of the file:
# For all hosts
Host *
IdentitiesOnly no
IgnoreUnknown UseKeychain, AddKeysToAgent
UseKeychain yes
AddKeysToAgent yes
This allows access without an SSH key to unspecified hosts. You can connect to a host via SSH command with your username and enter the password when connecting:
ssh user@hostWithout the line 'IdentitiesOnly no' in the final configuration, SSH tries all keys in ~./ssh/ one after the other to connect to the server. If there’s no matching key, the error 'Too many authentication failures' occurs.


