Learn how to code using Scratch – A quick tutorial
If you are looking for an easy way to learn to code, look no further. Although Scratch is primarily geared toward children, anyone can use it to learn how to code. In this tutorial, we’ll explain what Scratch is and how coding with Scratch works.
What is unique about coding with Scratch?
Scratch is based on a graphical user interface, making it possible to code without complicated language syntax or having to type lines of code. Scratch has been designed first and foremost to introduce newcomers to coding. This is why usability takes priority over having a wide variety of functions. Despite these constraints, however, Scratch retains some of the important properties of traditional programming paradigms. Scratch is:
- visual: all Scratch elements are represented through a comprehensible, graphic representation. For example, program commands are represented with blocks. In addition, they can be conveniently inserted and put together via drag and drop.
- object-oriented: scratch programming doesn’t have classes or an inheritance system. When it comes to data encapsulation (controlled access to data via defined interfaces) and polymorphism (objects can assume different data types), however, Scratch demonstrates characteristics of the object-oriented programming paradigm.
- imperative: some of the scripts in Scratch follow the imperative programming paradigm. Instruction sequences, for example, specify the sequence that actions should be executed in.
- event-oriented: every script that you use in a Scratch project starts as soon as the event defined in its header block occurs. The Wait Until block allows you to delay the loading of a project until a specific event occurs.
- equipped to handle parallelism: from the very beginning, Scratch provides support for dividing computer programs into individual subcomponents, which is a key feature of parallel programming.
Scratch coding tutorial
The saying ‘practice makes perfect’ applies to Scratch coding too. Though the language’s entry hurdles are clearly lower than classic programming languages, a certain amount of time is still required to familiarise yourself with the Scratch environment and how to skilfully use the Scratch coding blocks. In the following tutorial, we’ll show you how to code with Scratch.
If you want to help children learn how to code with Scratch, it’s best to first get acquainted with the open-source platform yourself. The better you understand the language and its user interface, the more you will be able to help children as they take their initial steps into the world of coding. If you want to learn more about fun approaches for teaching children to code, have a look at our article ‘Coding for kids: how children learn to program and have fun doing it’.
How to navigate the user interface
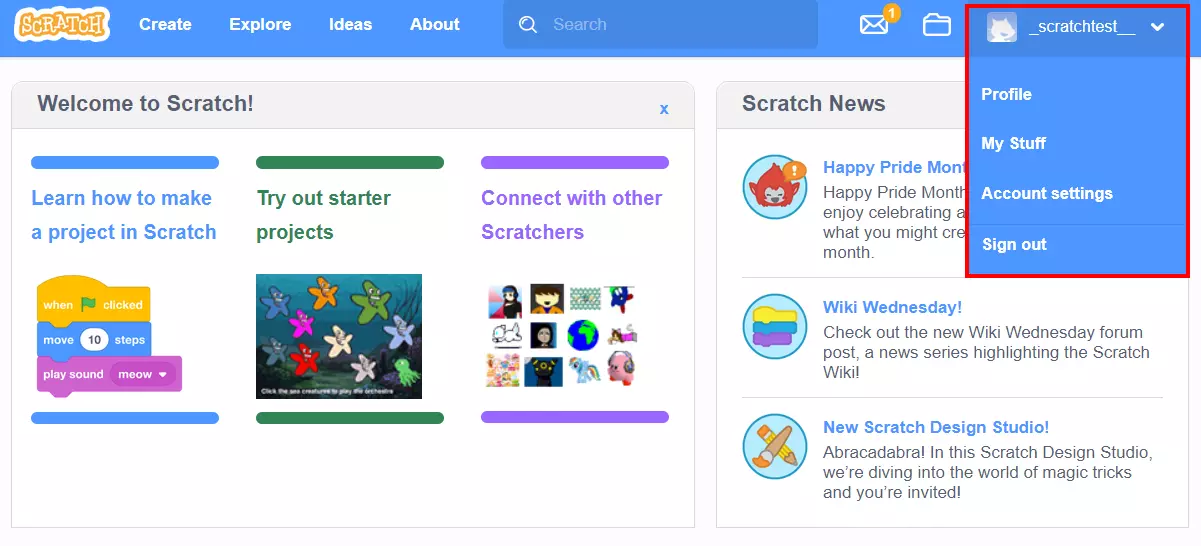
If you’ve set up a user account and are logged into your profile, you can choose from a number of different options in the menu bar located in the upper right corner of your screen.
When you click on the Account button, you can manage your personal profile, change your location settings, password and email address, or bring up the overview of active projects (My Stuff). You can also log out here as well:
Other menu items provide the following features:
- Development: the central component of Scratch is the visual development environment, which you can launch using the Development tab. With the help of this web editor, you can program all of your Scratch applications directly into the browser.
- Explore: in this category, you can access other users’ projects. In doing so, you cannot only watch or, in some cases, play them, but also view how they are programmed. Projects that are similar are grouped together in a Studio.
- Ideas: the Ideas section grants you access to different tutorials and guides, which assist you with developing your own projects – in particular, when it comes to brainstorming. There is also a redirect link for downloading the Scratch app (Windows, macOS, ChromeOS, Android) here, which enables you to program without an active internet connection.
- About Scratch: if you click on About Scratch, you’ll be directed to a general information page about the platform. Among other things, you will find links for additional material for parents and teachers as well as tips and a FAQ section.
How coding with Scratch works
The Scratch development environment is reminiscent of a website builder, which given the building-block nature of the scripts isn’t very surprising. In addition to these scripts, which make up the majority of the usable components, you can also add costumes and sounds to a project. You can then manage or implement them via script. By clicking on Add Extension, the selection of scripts can be enlarged, for example, with a crayon, code for video recording, or a text-to-speech feature.
Scratch provides you with a variety of costumes, sounds and scripts that you can immediately integrate into your projects. Alternatively, you can also import or record your own images or sounds if you aren’t able to find what you need in the options available to you. You can also generate your own scripts.
Bring figures and objects to life with costumes
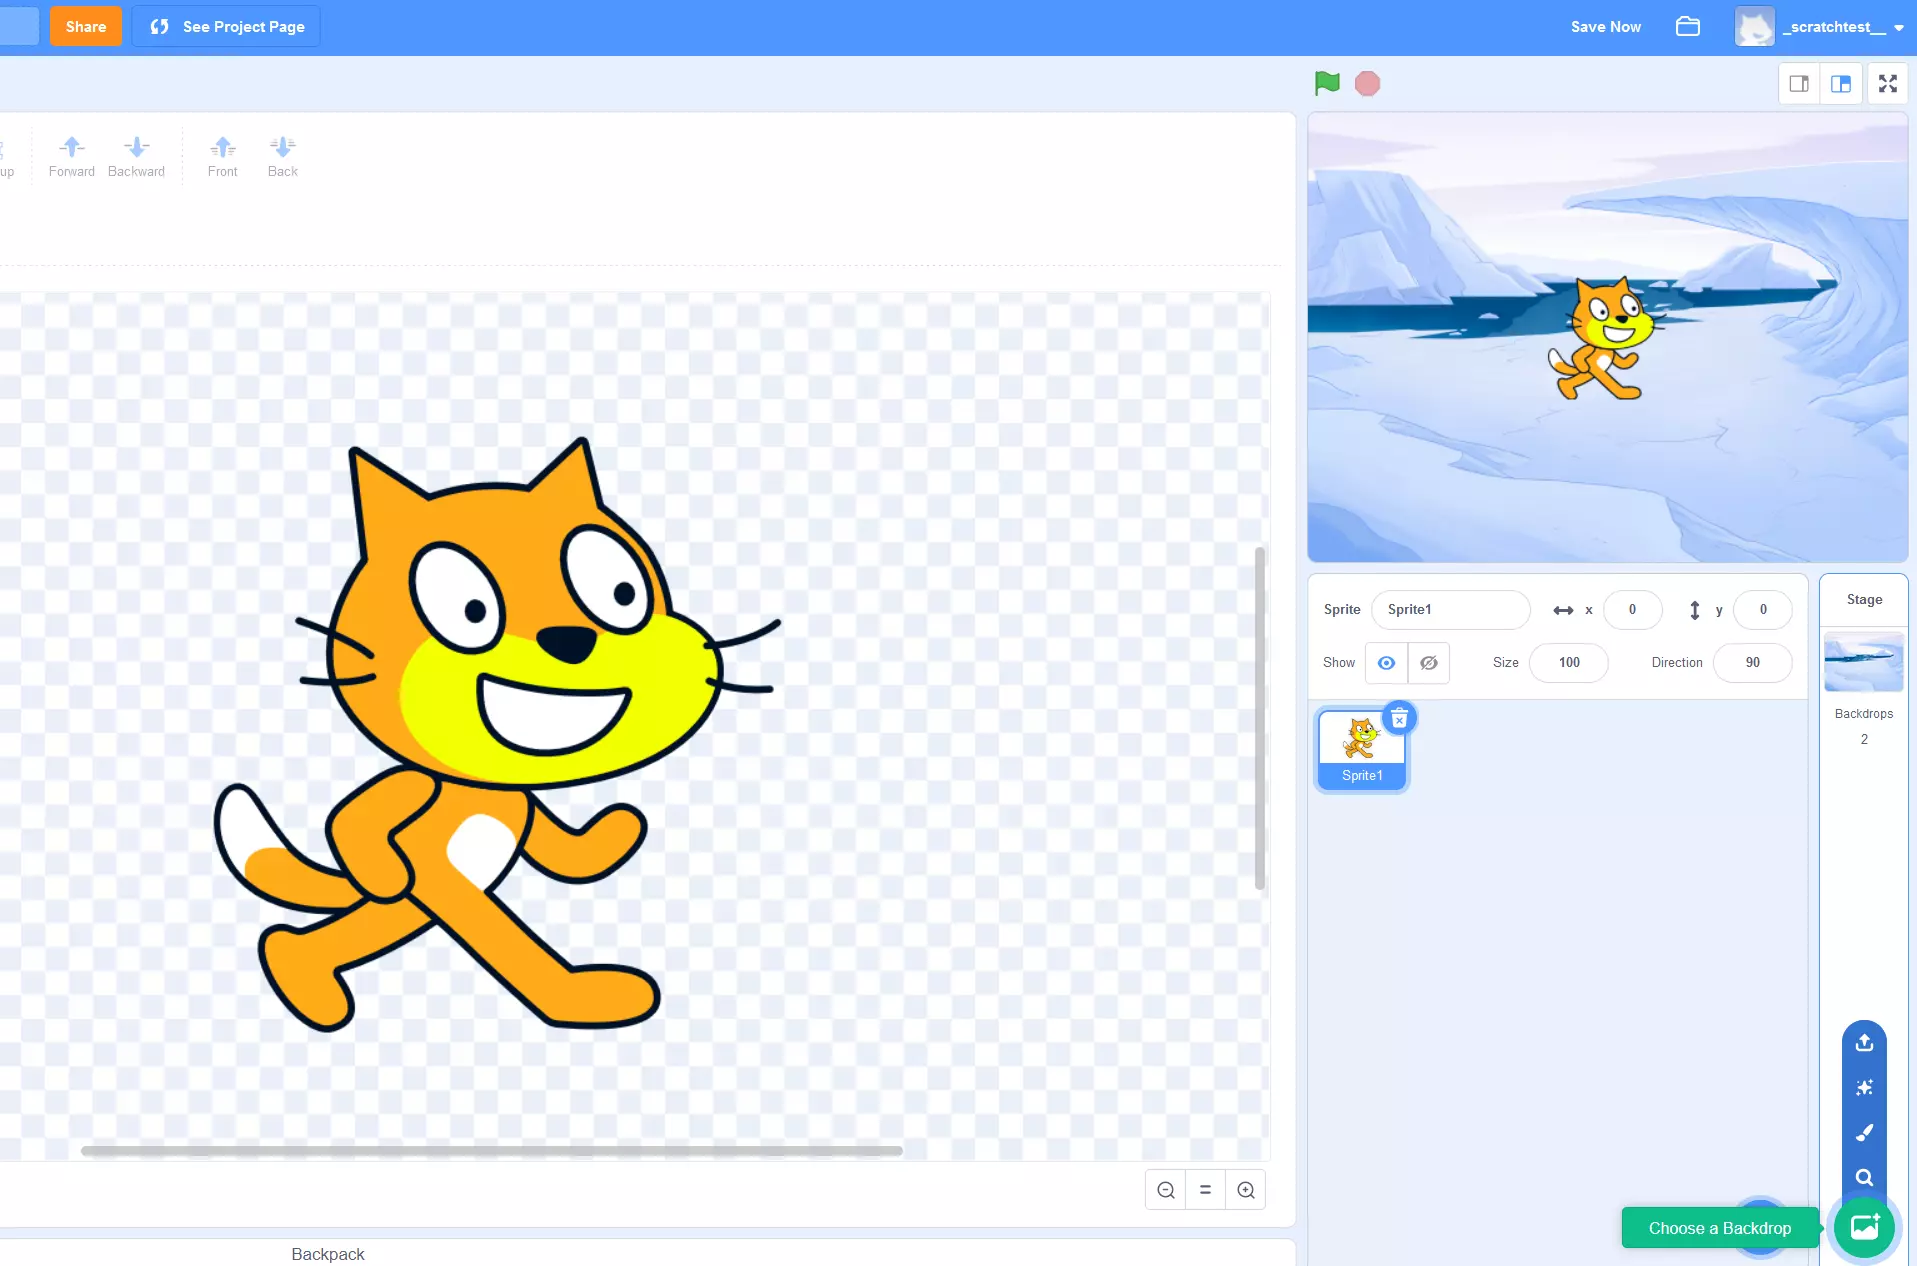
Whether you want to program a game, video, animation or just a simple comic, sprites (figures and other objects) are the central building blocks for your story. Under the Costumes tab, you can select and integrate any number of graphics into your project. You can choose from the available image options, draw objects by hand, or import locally stored graphics. If your device has a camera, you also have the option of taking a photo.
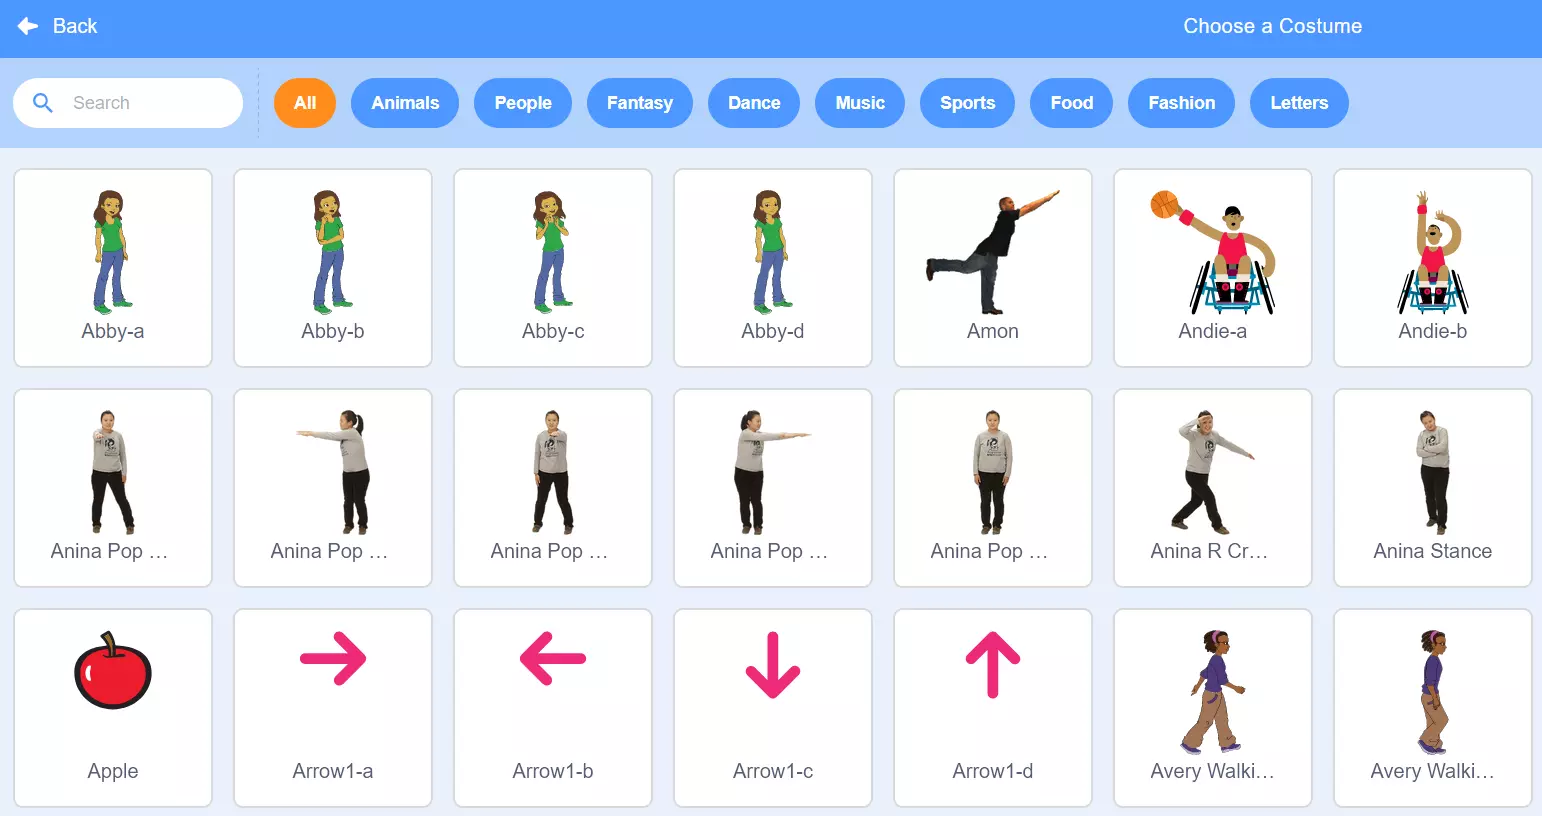
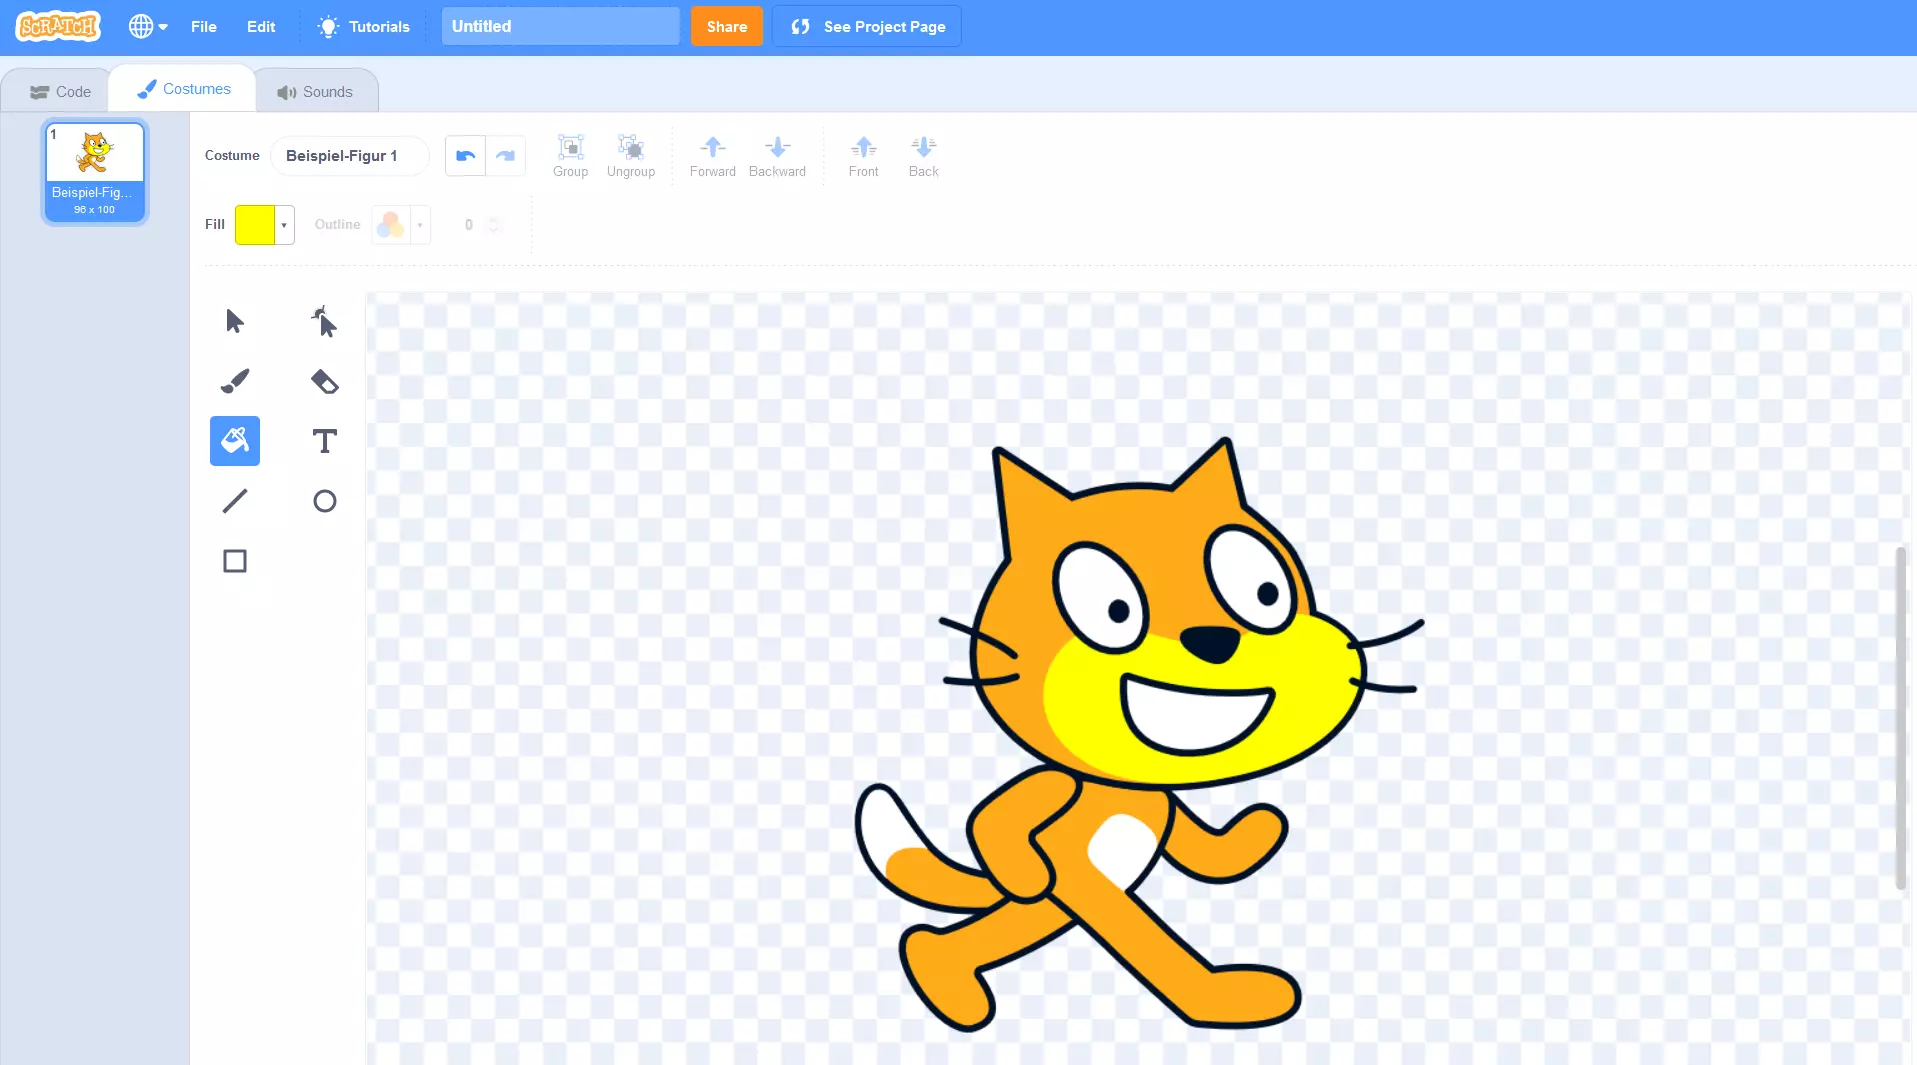
After selecting a costume, you can customise it. To do this, select the object you want to customise from the menu on the left-side of the screen (where you can delete it at any time by clicking on the Recycle Bin icon). Then use the available editor tools to, for example, change colours, remove specific details with an eraser, add text or warp the object. A conversion of the graphic into a raster or vector graphic is also possible. In the Costume field, you can also choose a name for the costume, which scripts can later use as a reference value.
On the right lower margin of the window, you will find the Choose a Backdrop button. With this option, you can choose the background image for your projects. Scratch provides a selection of stock images, or you can import your own images or even paint your own background.
Sounds and background music
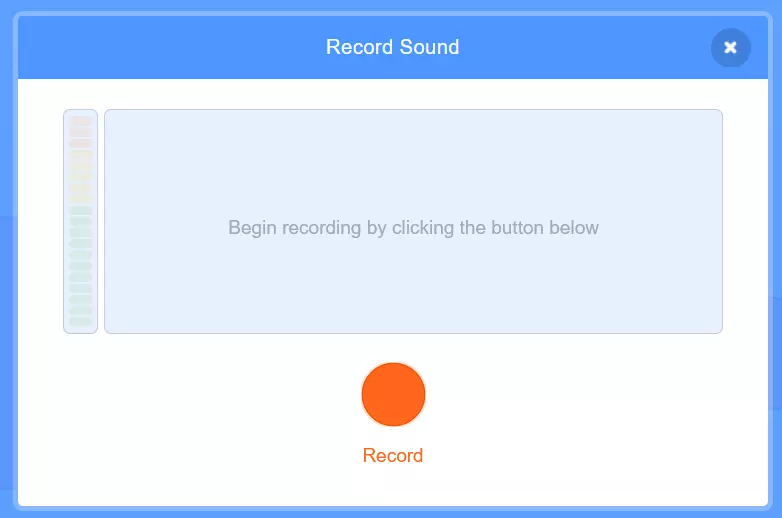
For many creative projects, the appropriate soundtrack is just as essential as different characters. When coding with Scratch, you implement and manage all sounds via the Sounds menu. Similar to the graphic elements, you have a selection of pre-created Scratch sounds available to you via Choose Sound. You also have the option to import or record sounds, provided that you have a microphone.
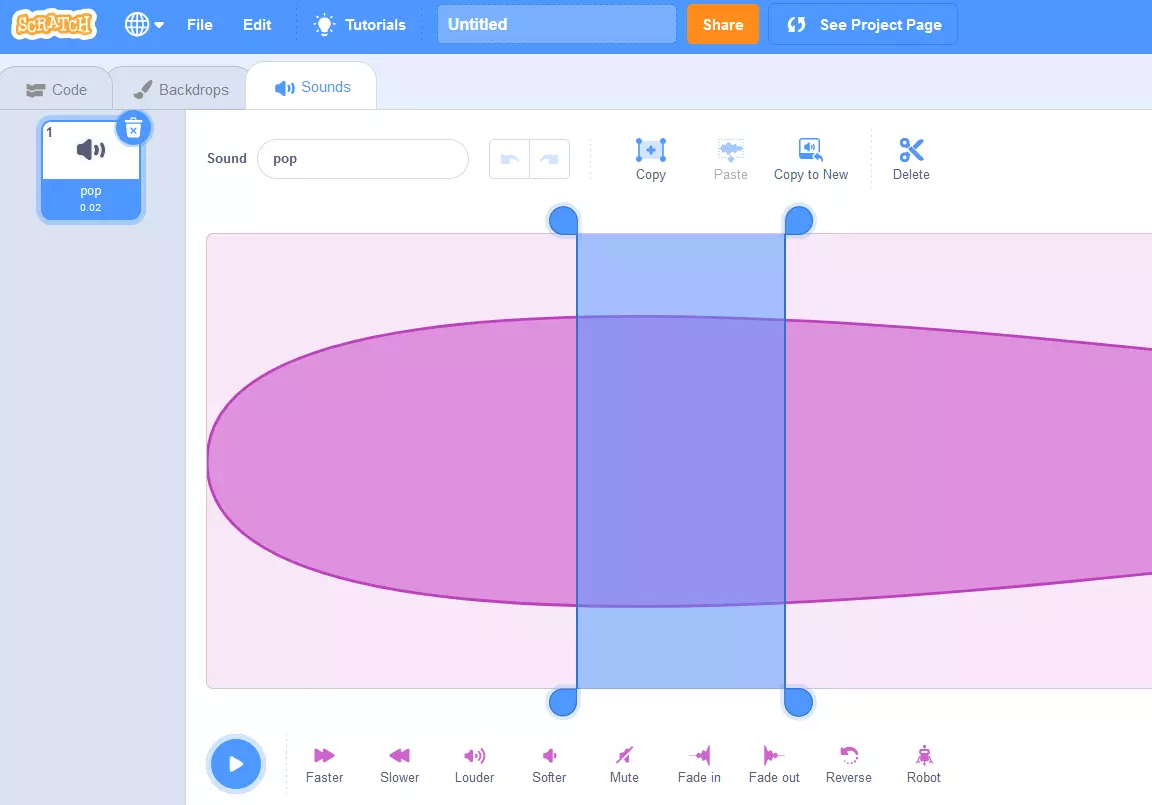
Sounds that you have inserted can be selected in the menu on the left side by clicking on the corresponding thumbnail. You can then edit the sounds in different ways. You can, for example, cut out selected sequences, adjust the volume, or increase or reduce the playing speed. Because sounds are integrated into the Scratch project with the use of scripts, each sound also requires a unique name, which you can assign in the Sound field.
Scripts are the essence of Scratch coding
In order to successfully program with Scratch, it’s necessary to practice using the Scratch scripts. The actual code behind these scripts is automatically generated when you drag a block into your project—regardless of whether it’s an event, function, operator or variable. As a user, you can focus on filling the scripts with individual values and assigning them to images and sounds.
All pre-created scripts have descriptions that precisely describe the functions they have. If you want to implement a script in your project, simply drag the block into the middle editor window. On the block, you will find any values or options that need to be defined, which you can then select or directly type into the box. If you have a new script that references a script that is already in your program, simply attach the corresponding block as if you were putting together a puzzle.
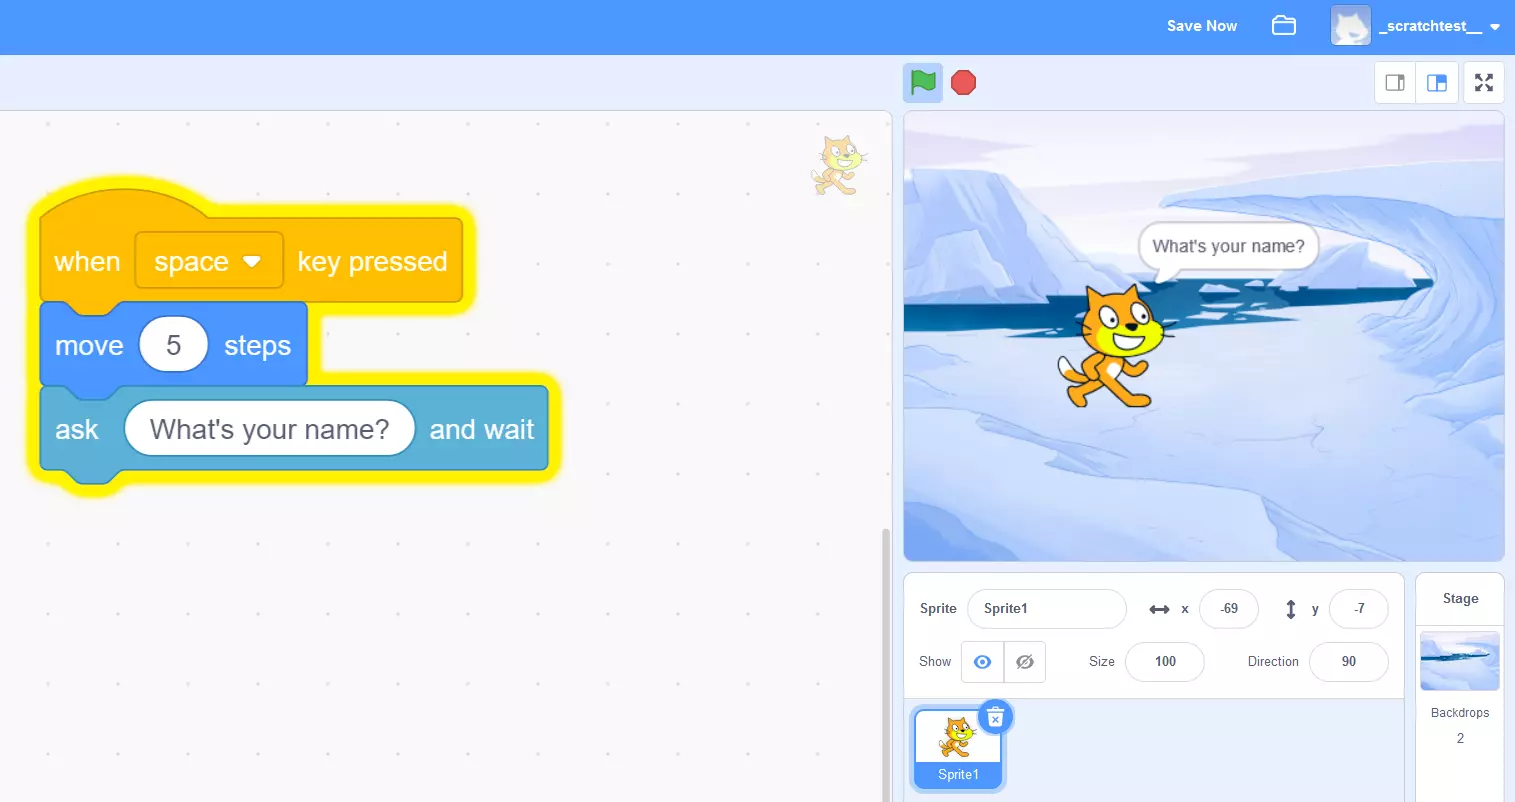
The challenge of learning Scratch doesn’t lie in memorising syntactic rules or a formatting structure, but rather in grasping the purpose of the individual scripts and learning how to effectively utilise them and combine them with each other.
How to create a short animation sequence in Scratch
Now that we’ve covered the most important components of the programming platform, let’s take a look at what Scratch can do with an example project.
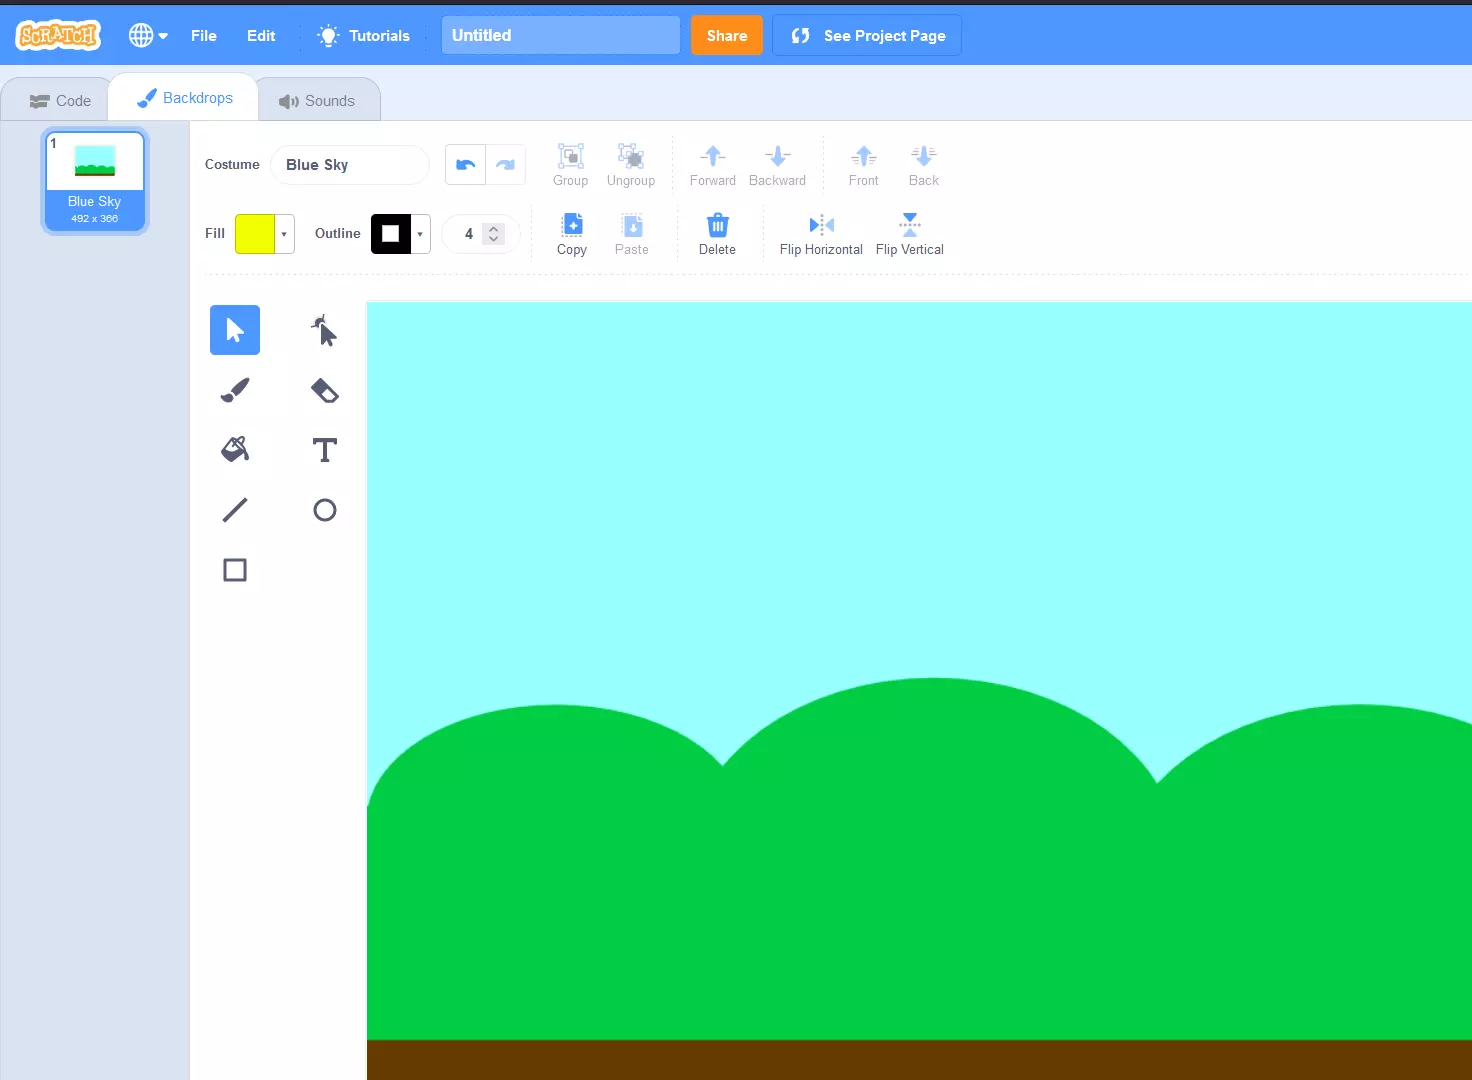
In the first step, we are going to look for a backdrop by moving the mouse over the backdrop icon at the lower edge of the screen and clicking on Choose a Backdrop. We have chosen the Blue Sky theme, which we’ve selected without making any changes to it:
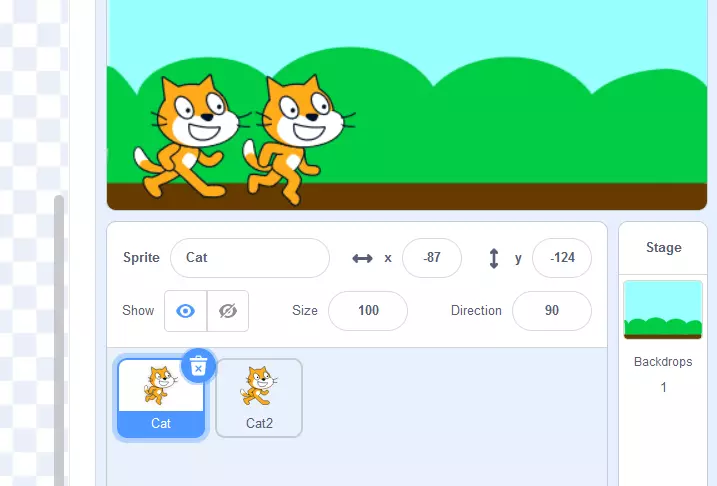
Next, we are going to insert a figure into the project example. Because the Backdrops tab is currently where the Costumes tab normally is, we’ll click on the Choose a Sprite button on the bottom right of the screen. In the Scratch selection, there are various figures with several costumes that can be used to simulate motion sequences. The Cat sprite, for example, is available in two versions: ‘Cat’ and ‘Cat2’. When the images are played one after the other, it gives the impression that the cat is walking.
Custom versions of a sprite make it easier for a motion sequence to be programmed with Scratch.
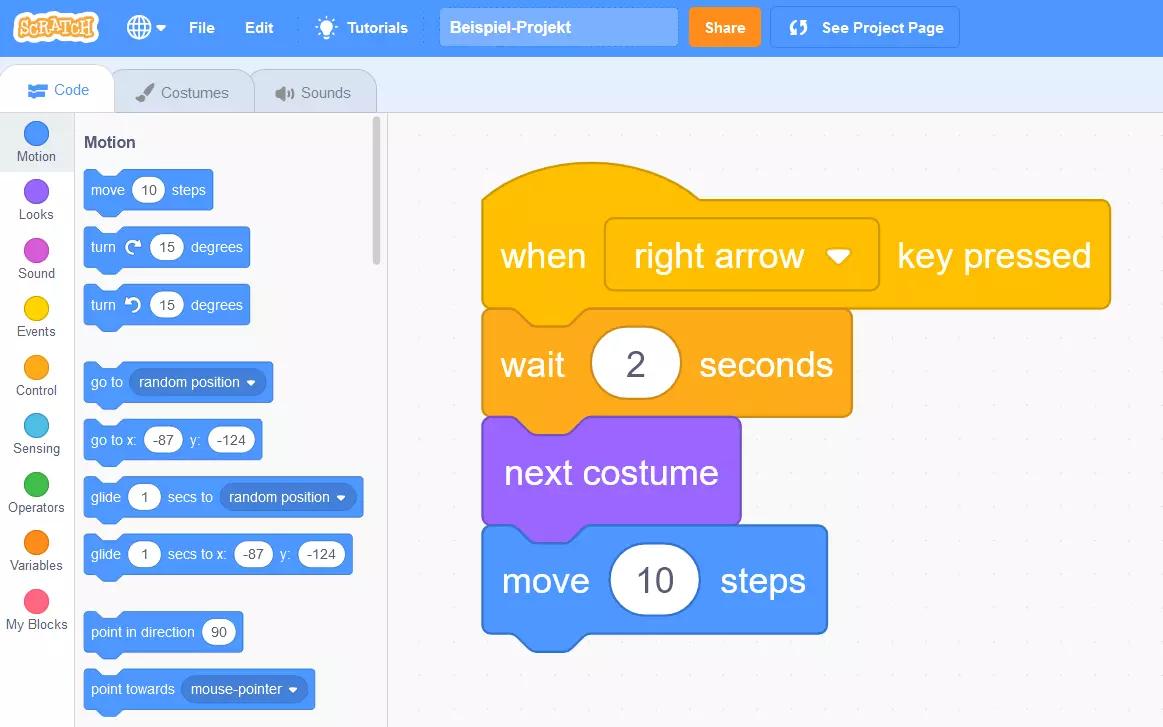
In the last step of this short example, we want to show you how to control the figure and code with Scratch. For example, to make the cat walk from left to right by holding down the right arrow, insert the following scripts:
- Events: when [ ] key pressed
- Control: wait [ ] seconds
- Looks: next costume
- Motion: move [ ] steps
With the event script, assign the desired key – in the case of our Scratch tutorial ‘right arrow’. Next is the Control script where you set a buffer for the costume change. If you insert ‘2’, two seconds will pass before the sprite changes its look, which can make the motion sequence seem more natural. The Looks script ensures that the image switches between ‘cat’ and ‘cat2’ as long as the arrow key is held down. Using the fourth script from the Motion section, the figure also moves to the right when the costume is switched. For this example, we used 10 steps:
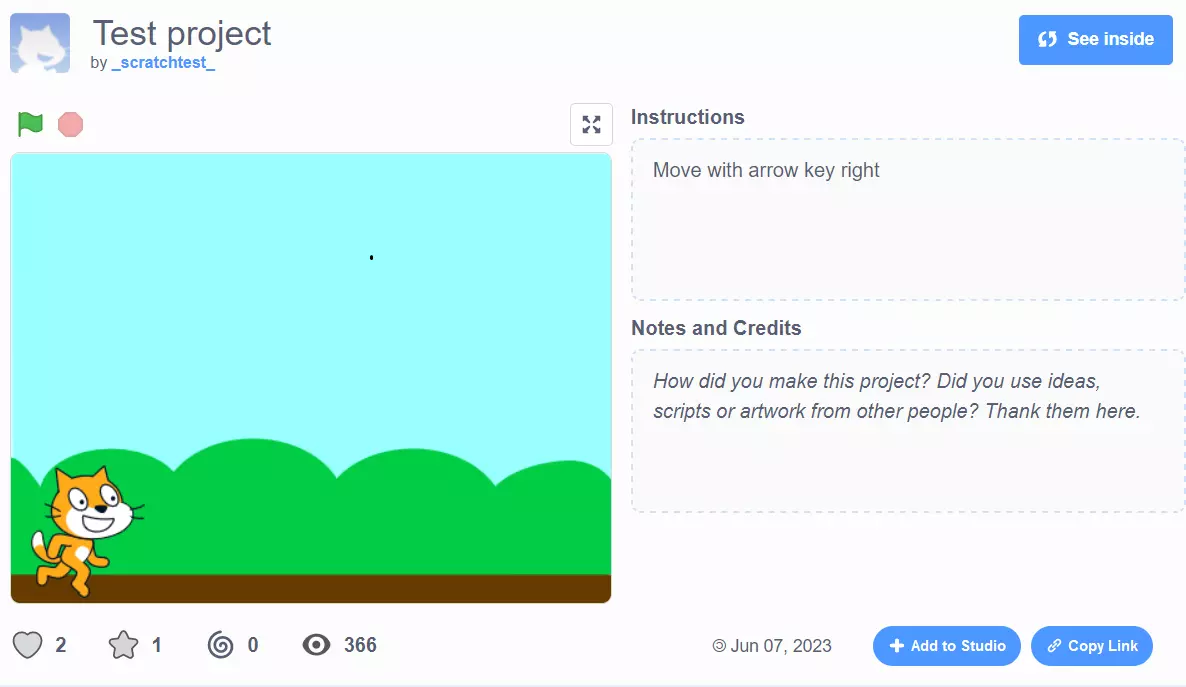
You can test the result of this coding example on the Scratch project page
How to publish your Scratch coding project
After you have created your own user account and officially become a Scratcher, you can publish your programming projects on the Scratch platform. To do this, click on the Publish button in the menu bar at the top of the screen.
In the window that launches, you now have the option of changing the project title and adding instructions, comments or acknowledgments. If you move the toggle switch next to Commenting on to the left, you can also turn off the comments feature for your project.
