How to clear Browser History in Internet Explorer
When it comes to web browsers, Internet Explorer has definitely had its day. Microsoft released version 11, the last official release of the web browser in 2013. For years, Internet Explorer struggled to win the browser wars with competitors like Netscape and Firefox.
Internet Explorer is not recommended as a web browser for personal use because it is no longer being developed. Use the new Edge browser instead, or try other alternatives like Firefox, Chrome or Safari.
Though Internet Explorer is no longer a good choice for personal use, many companies still rely on it for running an intranet application, even though it no longer meets the security standards common to other modern browsers. That means you have to be all the more careful when using it: Among other things, you should clear your history in Internet Explorer on a regular basis. We’ll show you how.
How to clear history in Internet Explorer: A quick guide (including shortcut)
It can be useful to clear your Internet Explorer history not only for security reasons, but also for space reasons: The more pages Internet Explorer stores in your cache, the more space they take up on your device. Here’s the quickest way to clear your history:
- Open Internet Explorer.
- Go to the Tools menu (gear icon) and click Internet Options. Alternatively, you can use the keyboard shortcut [Alt] + [X] + [T].
- Open the General tab if it isn’t open already.
- In the “Browsing History” section, click the Delete button.
- Select the “History” checkbox and choose Delete again.
If there are certain websites that you regularly open using the autocomplete feature, we recommend saving these addresses as favourites before you clear your browsing history in Internet Explorer, especially if you don’t know the domain addresses by heart.
How to clear history in Internet Explorer: A step-by-step guide
As you can see from the brief summary above, clearing history in Internet Explorer isn’t too complicated. But we’d also like to address a few other options in Internet Explorer that can be very useful when it comes to maintaining your history over longer periods. For example, you can also specify how long you want to save the list of websites you’ve visited. Or you can have the browser automatically delete your history when you exit Internet Explorer. The following sections explain the steps of the process in a little more detail to better illustrate the different options.
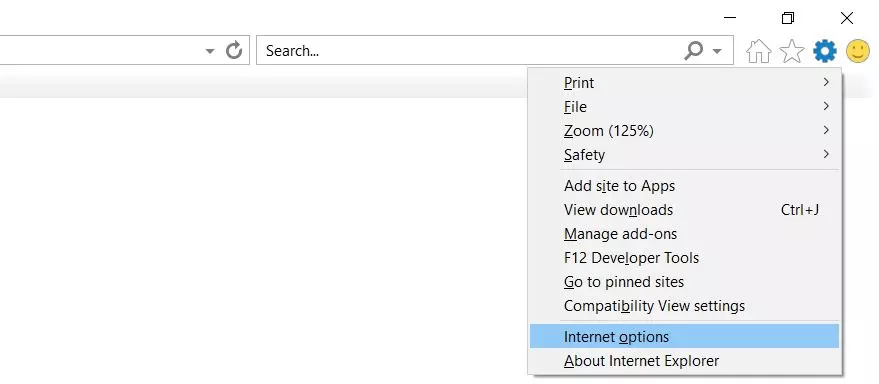
Once you’ve launched Internet Explorer, the first step in the deletion process is to open the Tools menu. To do this, click the gear icon next to the address bar at the top right:
Then select Internet Options to display the Internet Options menu:
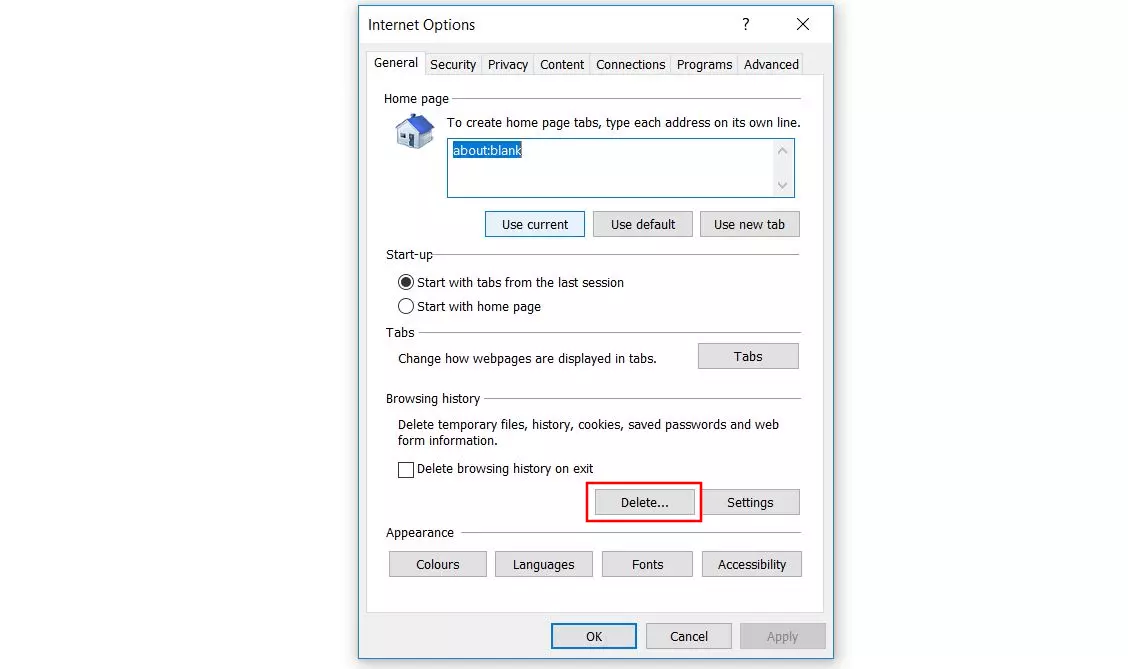
Navigate to the General tab, where you can make two important settings in the “Browser History” section before proceeding with the process of clearing your history in Internet Explorer:
- Select the delete browser history on exit checkbox if you want to automatically clear the list of web pages you’ve visited when you close the browser.
- Click the settings button, go to the History tab and specify how many days Internet Explorer should keep pages in your browsing history.
Regardless of whether you use either of these options, continue the deletion process by clicking the delete button:
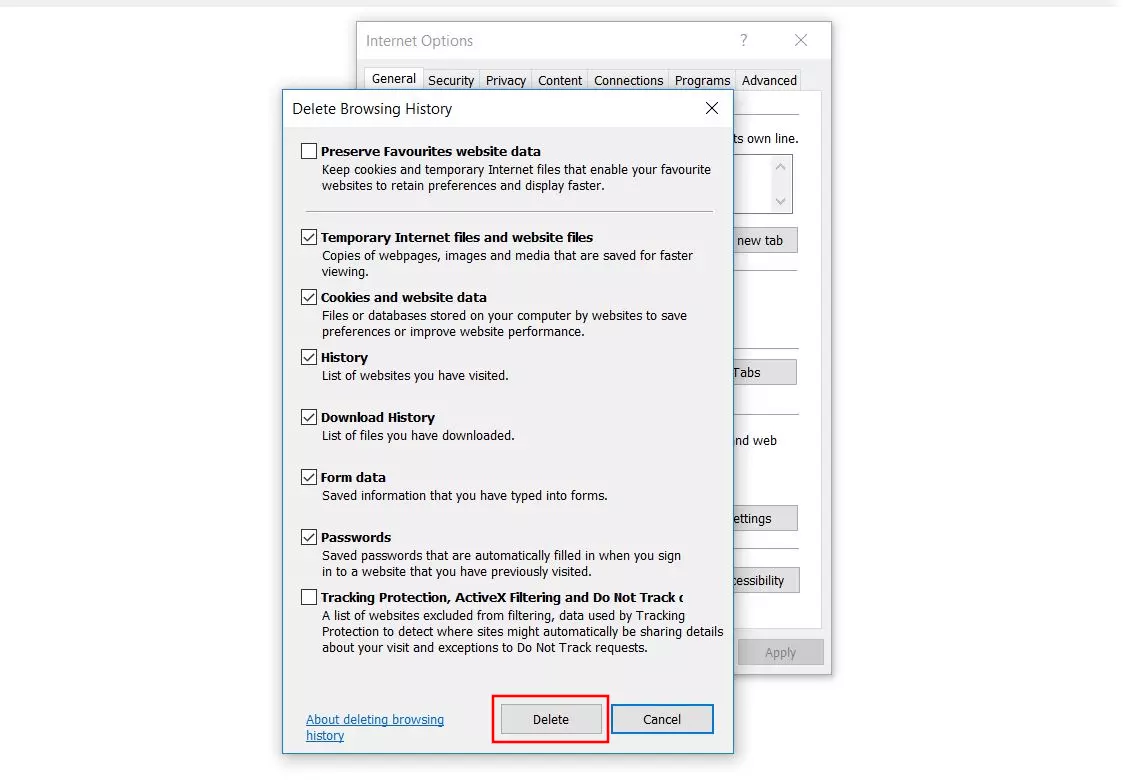
In the dialog box that opens, you can choose to delete the following data along with the history:
- Cookies and website data
- Download history
- Form data
- Passwords
- Tracking protection data
If you also want to delete cookies and website data, you have to select these checkboxes and uncheck the appropriate checkbox next to Preserve Favourites website data.
Once you’ve selected all the data you want to clear, just click Delete to delete your history in Internet Explorer (including all other selected information):
 To display this video, third-party cookies are required. You can access and change your cookie settings here.


