How to delete an iCloud account in a few simple steps
When switching from iCloud to one of the iCloud alternatives, it’s recommended for cloud security reasons to either deactivate iCloud or, preferably, delete your personal iCloud account.
How to remove your iCloud account step by step
Do you want to keep your Apple ID but delete your iCloud account from your iPhone or iPad? Note that the steps vary slightly depending on which iOS version you’re using.
Deleting iCloud from a device
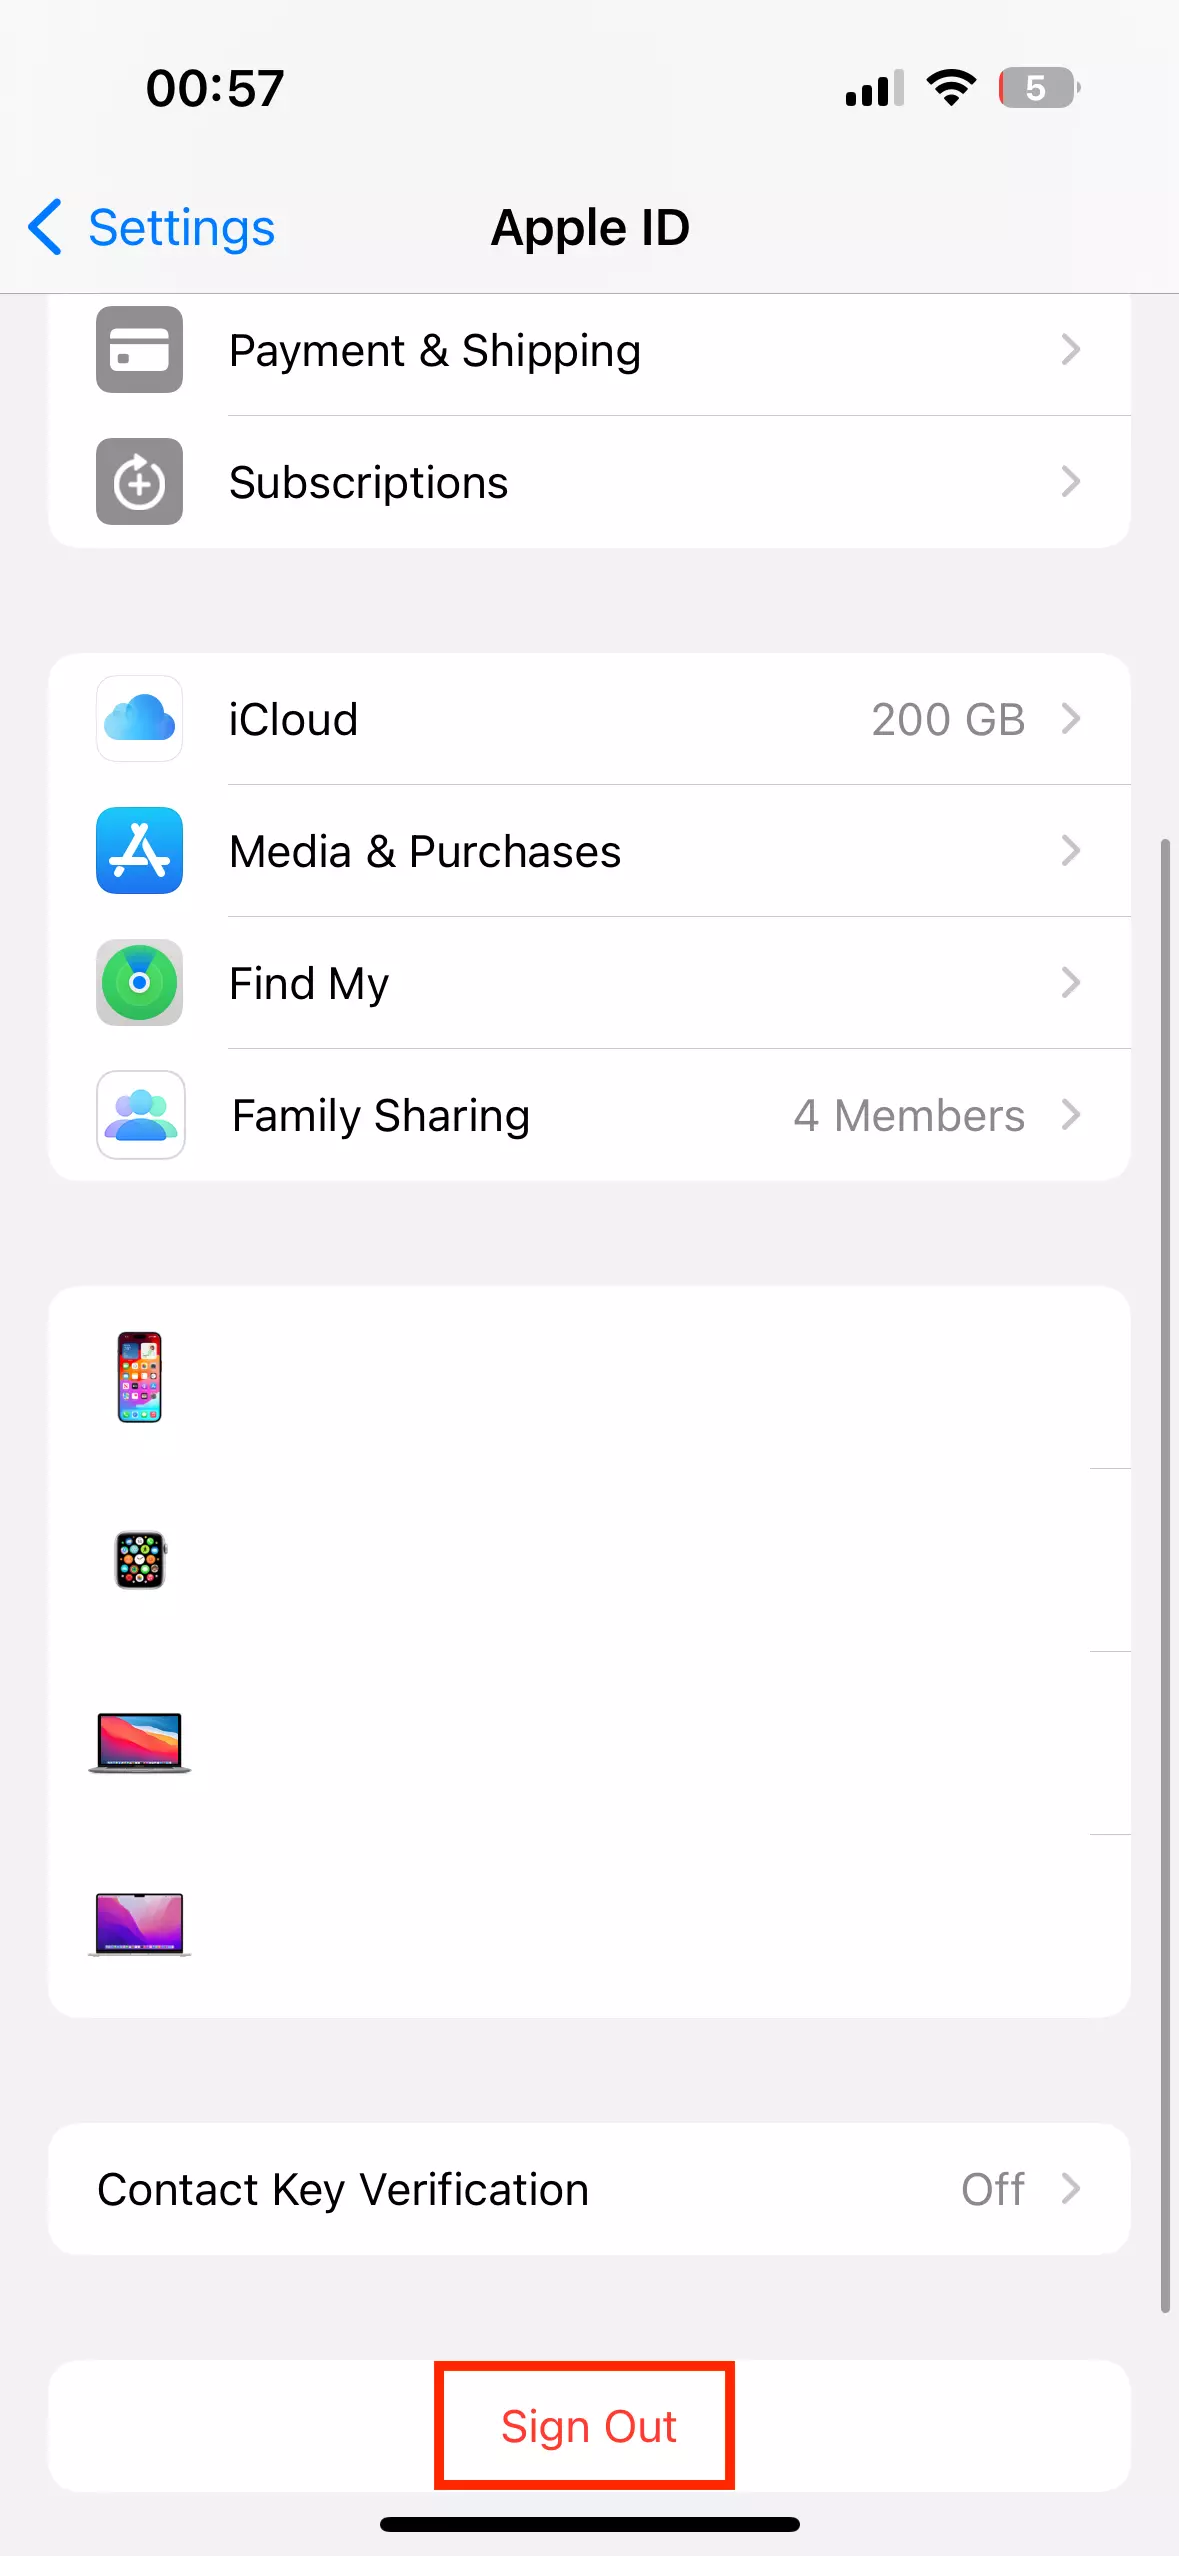
Step 1: Open ‘Settings’ and go to ‘iCloud’. In newer iOS versions, tap on your profile picture or profile name in the settings.
Step 2: Scroll all the way down. Here you’ll find the ‘Delete Account’ button, or in newer versions, ‘Sign Out’. Confirm that you want to deactivate iCloud. With this step, you’ll not only deactivate iCloud functions or automatic iCloud backups, but also delete your iCloud account including associated data (e.g., photos and videos). However, your Apple ID and the iCloud account itself remain active, since iCloud is part of the Apple ID.

Step 3: Tap ‘Delete account’ to delete the iCloud account on your current device.
Deactivating individual iCloud services on your phone
If you don’t want to delete your entire iCloud account, you can also disable individual services by stopping them from syncing with the cloud. To do this, go to ‘Settings’ and then ‘iCloud’. Here you can toggle the green slider for items like Contacts, Mail, Calendar, or Safari. Once you do this, locally stored data won’t be synced with iCloud anymore. But in the event of data loss or theft, you won’t be able to recover lost data via the cloud.
Are you looking to backup images, videos, or important docs? Try HiDrive Cloud Storage from IONOS and set up highly secure automatic backups.
Deleting your iCloud account including your Apple ID
If ‘delete’ really means ‘delete’ to you, then you probably don’t just want to delete your iCloud account but wipe all iCloud files. Since iCloud is automatically linked to your Apple ID, you’ll also need to delete your Apple ID to move ahead. However, an Apple ID is necessary to use Apple services, and by deleting it, you will lose access to all Apple features and remove all stored data, contacts, and settings.
If this is what you want, follow these steps:
Step 1: Sign in on the Apple Privacy website with your Apple ID.
Step 2: Click the ‘Manage your data’ > ‘Delete your account’ button.
Step 3: Select a reason for deleting your account and choose ‘Continue’.
Step 4: Provide a contact that Apple can send your deletion information to. This contact will provide you with the access code to request the deletion.
Step 5: Select ‘Delete account’. Deleting your Apple account can take up to 7 days.
Step 6: Next, delete your Apple ID from all your devices by going to ‘iTunes & App Store’ and choosing ‘Sign Out’ in the settings.
Are you looking to clear up some space on your cloud because your iCloud storage is full? Start out by deleting pictures on your iCloud or by deleting your iCloud backup.
What happens to my iCloud files?
If you only delete the iCloud account from a device, all data associated with iCloud will simply be removed from your iPhone or iPad. However, the data itself is still in your iCloud account and can be accessed and restored. To do this, simply log in to iCloud with your Apple ID. If the iCloud account has been removed from the device, there won’t be any automatic backups of your local data. Backups on other devices, like the regular Mac backup, are unaffected.
- Store, share and edit data easily
- ISO-certified European data centres
- Highly secure and GDPR compliant

