How to deploy WordPress in Docker containers
Learn how to run a WordPress installation in Docker containers, both manually and with Docker Compose. WordPress developers will find it useful to run WordPress in Docker containers. Docker makes it easy to test multiple WordPress configurations and start a new WordPress installation with just a few simple commands.
- Stress-free, no matter your skill level with easy AI tools
- Full customisation with themes and plugins
- Hassle-free updates and less admin
Requirements
For WordPress to run smoothly in Docker containers, you need a current and supported Linux distribution. Older versions like CentOS 7 or Ubuntu 14.04 are outdated and should be replaced with modern alternatives. Recommended options include:
- Ubuntu 22.04 LTS or newer
- Debian 12 or newer
- A current version of Red Hat Enterprise Linux (RHEL) or AlmaLinux
You must also have Docker installed and ready to use. The minimum requirement is Docker 20.10 or higher to benefit from the latest security and performance enhancements. If you want to use Docker Compose, make sure you’re using at least version 2.x, since older versions are no longer actively maintained.
Basic command-line skills and familiarity with Docker Compose and Docker are helpful. If you’re planning a larger or scalable setup, it’s worth exploring Kubernetes for professional-grade container orchestration.
How to run WordPress in Docker containers
A successful WordPress installation consists of three elements:
- The WordPress software
- A MySQL or MariaDB database
- The final installation steps completed in a browser
In the examples below, WordPress and MySQL/MariaDB will run in separate, linked containers. The container running the WordPress software will be mapped to a port on the host so you can access it via a browser.
Running a MySQL/MariaDB container
Once Docker is running, the first step is to set up the database. Start by running a container named my-db. You can use either MySQL or MariaDB, which is a drop-in replacement for MySQL.
MySQL
Start a container with the following command:
sudo docker run --name my-db -e MYSQL_ROOT_PASSWORD=SECURE_PASSWORD -d mysql:latestMariaDB
Start a container with the following command:
sudo docker run --name my-db -e MYSQL_ROOT_PASSWORD=SECURE_PASSWORD -d mariadb:latestMake sure to always use a secure password for your database. Storing passwords as environment variables can also pose a potential security risk. Instead, it’s best to use a Docker Secret or a secured configuration file.
Creating a database
After creating your container, you need to create a database for your WordPress installation.
MySQL
Connect to your newly created database container using the following command:
docker exec -it my-db mysql -u root -pCreate a database:
CREATE Database wordpress-db;MariaDB
Connect to your newly created database container using the following command:
docker exec -it my-db mariadb -u root -pCreate a database:
CREATE Database wordpress-db;Running a WordPress container
Next, run a container using the official WordPress image. It will be mapped to host port 8080 and linked to the database container.
Two notes:
- If you have a firewall, you may need to allow access to port 8080.
- If another service is already running on port 8080, you can choose a different port on the host.
The command varies slightly depending on whether you’re using MySQL or MariaDB:
MySQL
Start a WordPress container using the following command:
sudo docker run --name my-wordpress -p 8080:80 --link my-db:mysql -d wordpress:latestMariaDB
Start a WordPress container using the command:
sudo docker run --name my-wordpress -p 8080:80 --link my-db:mariadb -d wordpress:latestThere are many other environment variables you can add to this command if you want to override the default settings, including:
-e WORDPRESS_DB_HOST=[hostname]: The default is the IP address and port of the linked MySQL/MariaDB container. This variable allows you to connect to a MySQL/MariaDB database on another server.-e WORDPRESS_DB_USER=[username]: The default isroot.-e WORDPRESS_DB_PASSWORD=[password]: The default is theMYSQL_ROOT_PASSWORDenvironment variable from the linked MySQL/MariaDB container.-e WORDPRESS_DB_NAME=[name]: The default is"wordpress".
For improved security, it may be helpful not to run containers on the default bridge network. Instead, you can create a custom network:
docker network create my-wp-network
docker run --name my-db --network my-wp-network -e MYSQL_ROOT_PASSWORD=SECURE_PASSWORD -d mysql:latest
docker run --name my-wordpress --network my-wp-network -p 8080:80 -d wordpress:latest
Here, your containers are more isolated from others, reducing the risk of unwanted connections. You can also configure network rules in more detail, such as using custom firewall settings or deploying a reverse proxy.
How to complete the installation in a browser
For the final installation steps, you need to access the WordPress container using a browser.
In the example above, we mapped port 8080 on the host to port 80 (web services) in the container. This means you can now access the container via your browser either through the server’s IP address or a domain name:
http://<server-ip>:8080http://example.com:8080
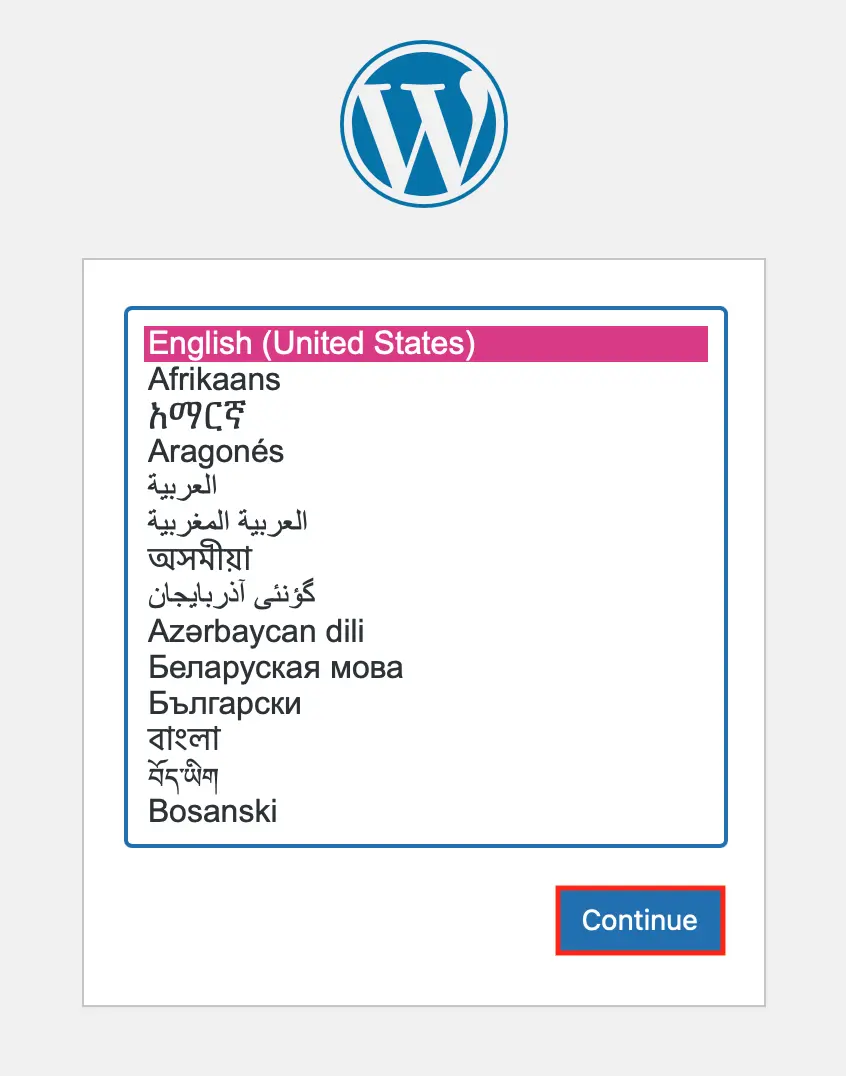
Visit the URL in your browser, select your installation language, and click Continue.
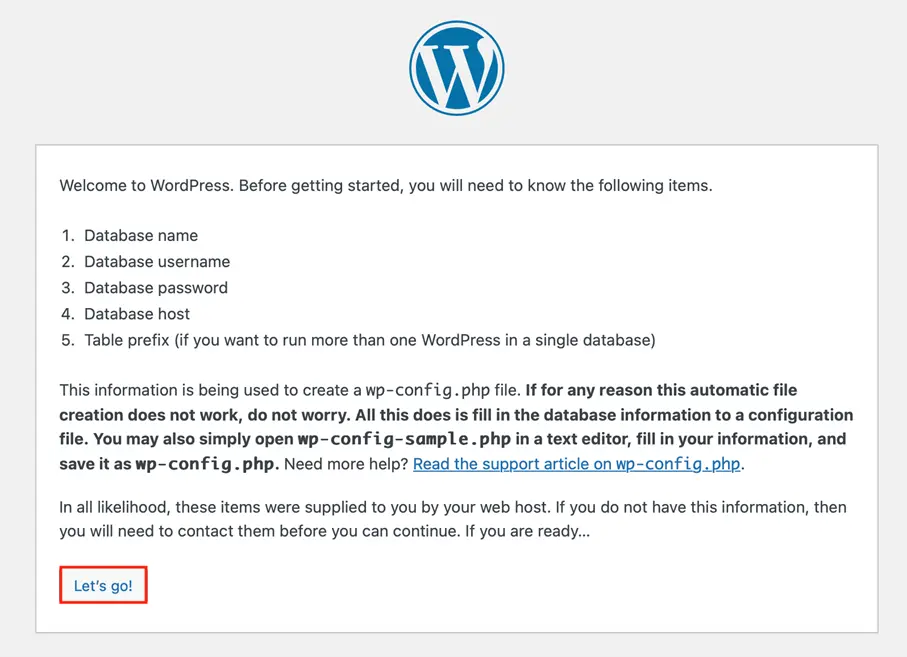
On the next screen, you’ll see a message preparing you for the next step of the setup. Click the Let’s go! button to continue.
Now, enter your database information so that the wp-config.php file can be created:
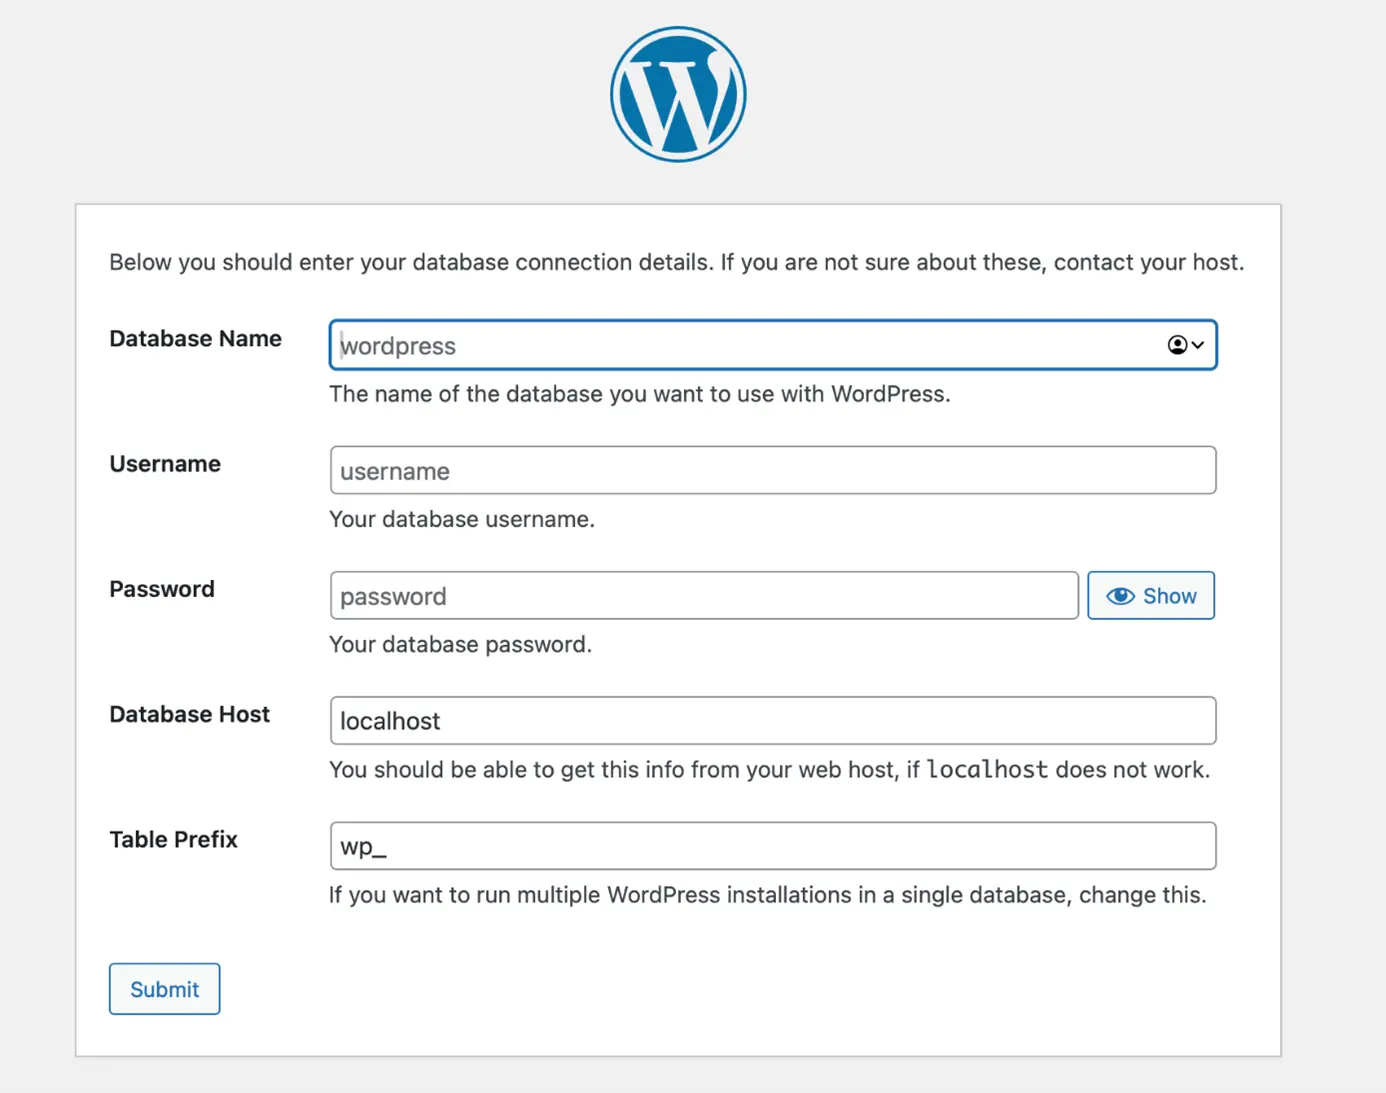
Note that the default user is ‘root’ unless otherwise specified. Enter the name of the database you created and the password you chose. Clicking ‘Submit’ will guide you through the next steps of the installation.
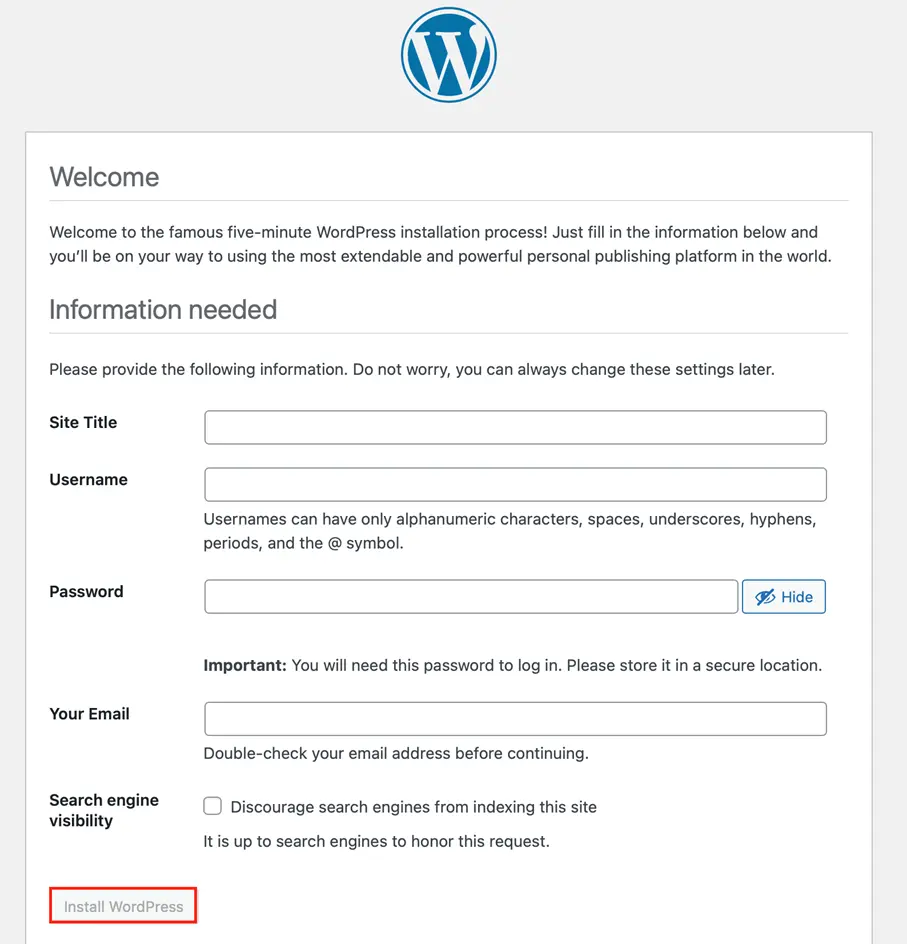
- Site title: Enter your website’s title.
- Username: This is the primary admin username for your website. Tip: For security reasons, we recommend not using ‘Admin’ or your domain name/URL.
- Password: Make sure to write this down before continuing.
- Your email: This is the email address associated with the admin account.
Then click the Install WordPress button to complete the installation.
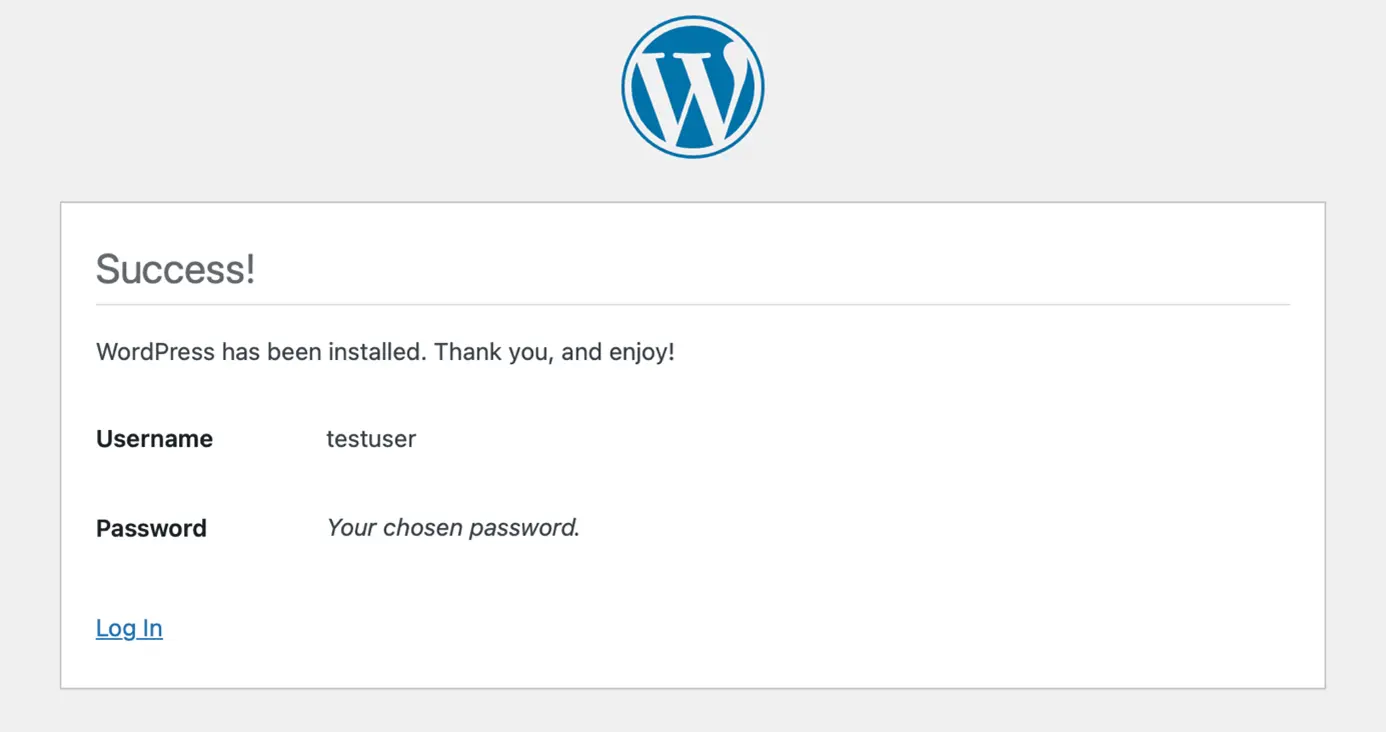
Once the installation is complete, you’ll see a confirmation message and can then log in to WordPress.
How to run WordPress with Docker Compose
Using Docker Compose is another way to run WordPress. You can find installation and usage instructions in our article on Docker orchestration with Swarm and Compose. Essentially, the tool lets you define all required services in a single file and start them together.
Creating the YAML file
First, create a directory for your project and navigate into it:
sudo mkdir wordpress
cd wordpress
Create a YAML file named docker-compose.yml using the following command:
sudo nano docker-compose.ymlThe content of the file varies slightly depending on whether you are using MySQL or MariaDB:
MySQL
Add the following content to the file:
wordpress:
    image: wordpress:latest
    links:
        - wordpress_db:mysql
    ports:
        - 8080:80
wordpress_db:
    image: mysql
    environment:
        MYSQL_ROOT_PASSWORD: SECURE_PASSWORD
Save and exit the file.
MariaDB
Add the following content to the file:
wordpress:
    image: wordpress:latest
    links:
        - wordpress_db:mariadb
    ports:
        - 8080:80
wordpress_db:
    image: mariadb
    environment:
        MYSQL_ROOT_PASSWORD: SECURE_PASSWORD
Save and exit the file.
Starting the containers
Next, use Docker Compose to start the containers with the following command:
sudo docker-compose up -dUse the following command to check whether the containers were created:
sudo docker-compose psTo complete the installation, visit the WordPress container in a browser. You can use either the server’s IP address or its URL:
http://192.168.0.1:8080http://example.com:8080
Kubernetes for scalable WordPress deployments
For larger and production-grade setups, Kubernetes (K8s) can be used. Kubernetes allows you to orchestrate and automatically manage WordPress containers across multiple nodes. Using a Kubernetes cluster offers several advantages such as automatic scaling, self-healing mechanisms, and centralised resource management. One way to implement this is with Helm, a package manager for Kubernetes:
helm repo add bitnami https://charts.bitnami.com/bitnami
helm install my-wordpress bitnami/wordpress --set service.type=LoadBalancer
This enables a highly available, scalable WordPress deployment with load balancing, automatic updates, and failover support.


