How to set up a Project Zomboid server
The open world survival game Project Zomboid has been on the market since 2013. The indie game still enjoys great popularity, especially in multiplayer mode. A dedicated Project Zomboid server will allow you to host private games for you and your friends. Let the survival adventure begin!
Never set up a server before? Don't worry, it’s easy to create a Project Zomboid server with our step by step guide. Our article `What is a server?´ will delve deeper into the server topic and provide you with all the information you need to know.
Project Zomboid server: A comparison of the options
You can also host servers on your own PC. However, this may cause difficulties as you cannot easily adjust the server capacity to an increased number of players. You would have to upgrade the hardware of your entire PC to achieve this. The operating costs should also not be underestimated. Therefore, it is worthwhile to rely on a professional provider such as IONOS.
Different server variants are available for rent:
- Dedicated Server: Hardware 100% for your use
- vServer (Virtual Private Server): Access to virtualised server environments
- Cloud Server: Access to virtualised server environments, customisation on demand
You are allocated 100 percent of the available hardware resources with dedicated servers. However, this powerful performance comes at a price, but you only pay for the server power used thanks to minute-by-minute billing.
The VPS Server and Cloud Server are alternative virtualized server solutions, which allow you to share hardware resources with other users. The Cloud Server is billed by the minute and is scalable at any time, while the VPS server has a fixed monthly price.
A Cloud Server is a suitable choice for a Project Zomboid server. The power is sufficient to host the game and you can adjust the performance if more players want to join your server. The vServer is also a good alternative as the monthly fixed price means you can play as much as you want without higher costs.
Different Project Zomboid server applications and the corresponding IONOS plans
The different server models are suited to different application scenarios. The overview table below illustrates typical gaming scenarios and the corresponding IONOS server plans:
| Recommended vServer | |||
| Project Zomboid Server for 2-4 players | IONOS VPS Server XL | ||
| Project Zomboid Server for 4-8 players | IONOS VPS Server L RAM | ||
| Project Zomboid Server for more than 8 players | IONOS VPS Server XL RAM |
The minimum requirements presented would not be sufficient for more than eight players. The Project Zomboid server would require a memory upgrade in this case.
Tips for beginners
The IONOS VPS Server XL with IONOS offers a simple server for two players and has the best value. The loading times are short thanks to the SSD storage which is included in the configuration. The four-core processor also ensures a smooth gaming experience.
Try out your VPS for 30 days. If you're not satisfied, we'll fully reimburse you.
Step by step to your own Project Zomboid Server
Once you have found a suitable server configuration, the next step choosing an operating system for your server. Whether you choose Windows or Ubuntu is up to you, but both operating systems are equally suitable for the Project Zomboid server.
The following instructions will show you how to set up a server for you and your friends. The server system used in the example is Windows Server 2016.
Step 1: Establish server connection
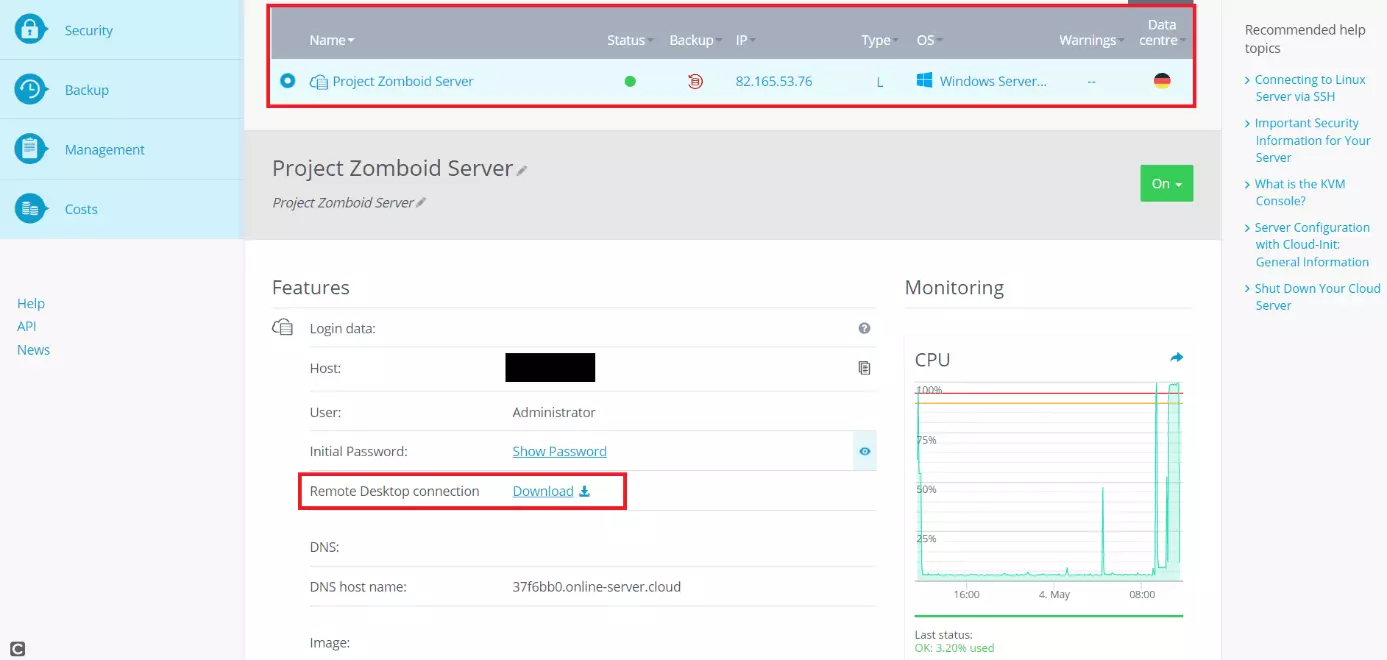
Firstly, you need to establish a remote connection to the server. You can easily set up a connection using the Cloud Panel if you have chosen a server solution from IONOS. The first step is to log in to the IONOS login page with your account data. Clicking on the category `Server & Cloud´ will take you to an overview of your packages. There you can select the server solution you have booked for your Project Zomboid server.
The start page for your server package will then open. Use the Access Data tab to find `Remote Desktop Connection´ and the corresponding download link.
Download the Remote Desktop Connection. Click the `Connect´ button in the following step to start setting up your Project Zomboid server.
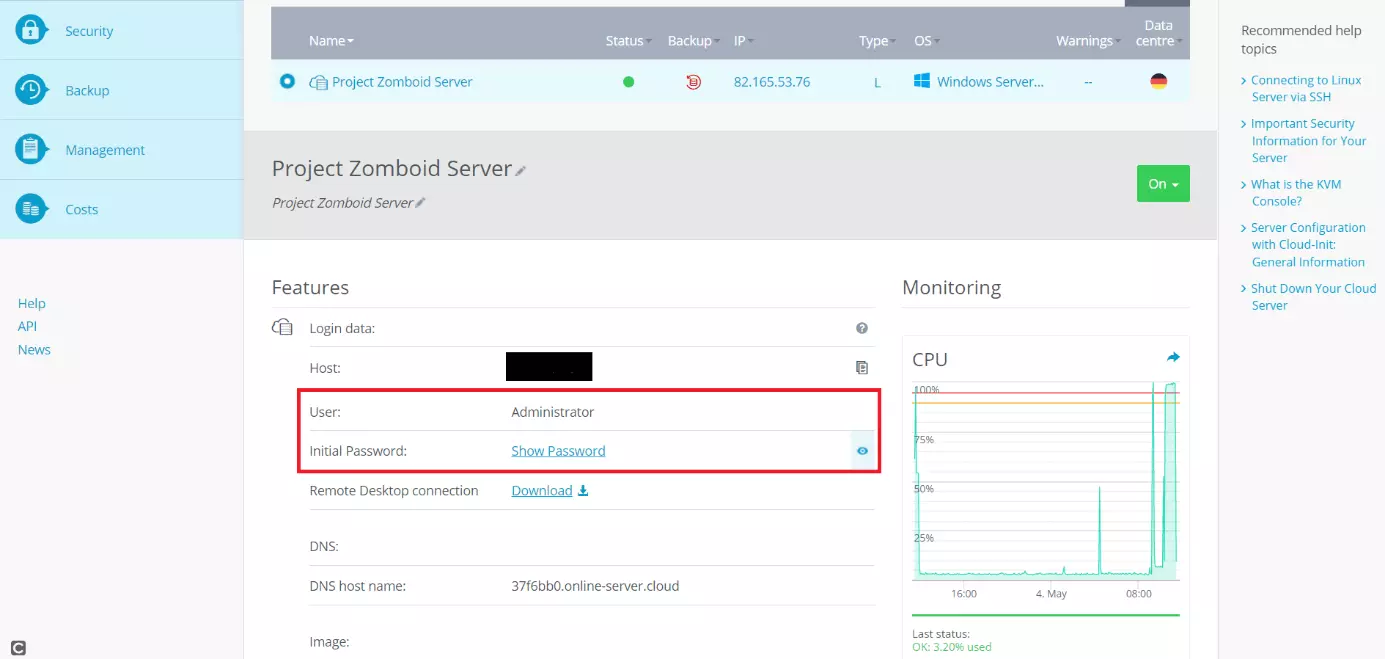
You will be prompted to enter your login information. You will find the standard login information in the IONOS Cloud Panel under the keywords `User´ and `Initial Password´ in case you have not entered any individual data yet.
Windows will show a warning message when connecting to your Project Zomboid server for the first time as your server’s certificate has not been used before. Simply continue the setup by clicking on `OK´. Click the checkbox “Do not ask me again for connections to this computer” to prevent Windows from showing you this warning message again in the future.
Your server will open once you have logged in with the appropriate login data.
Step 2: Installing the Project Zomboid server using the Steam client
Like the game, the software required to set up your game server can be found on Steam. You will need Steam on your server for this. Firstly, download the Steam client and log in with your login data.
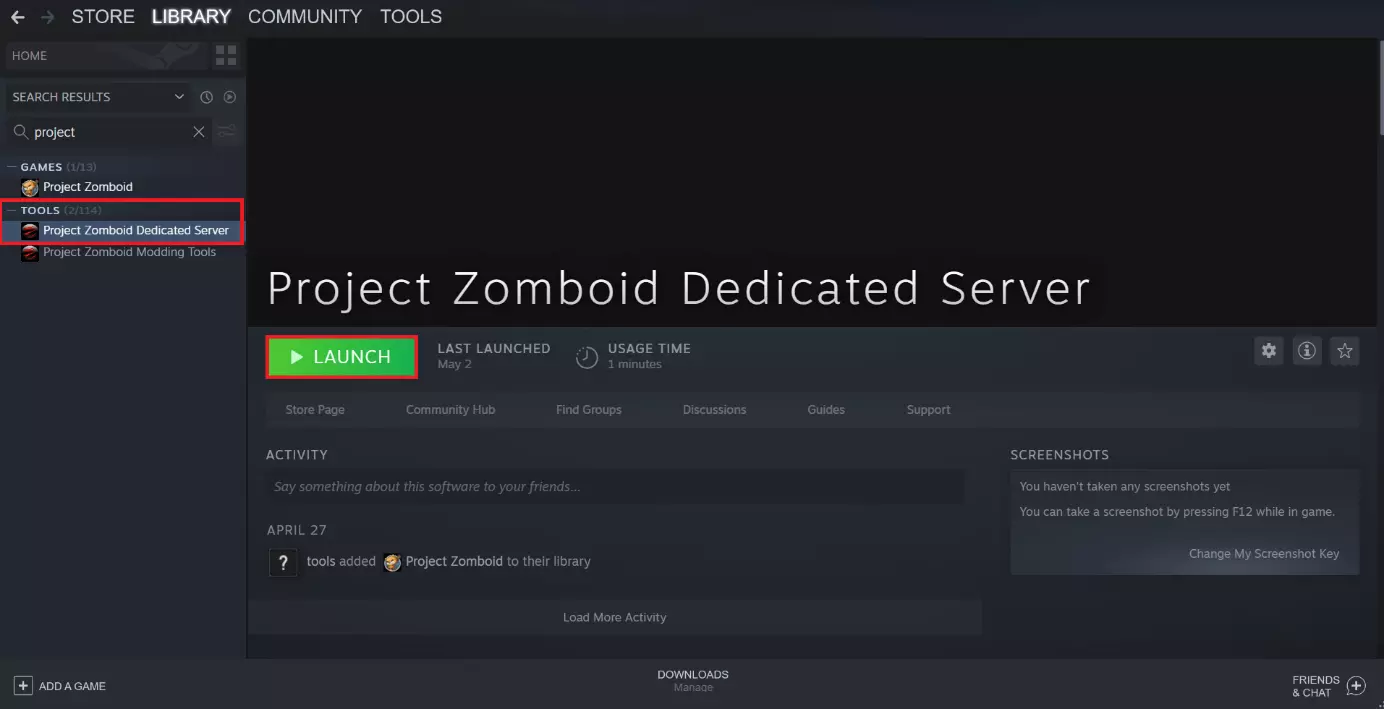
You can use the `Search´ button in the Steam game library to find the dedicated server software for Project Zomboid. Search the game title, select from the list on the left side of the screen, and install the Project Zomboid Dedicated Server application.
Step 3: Release ports
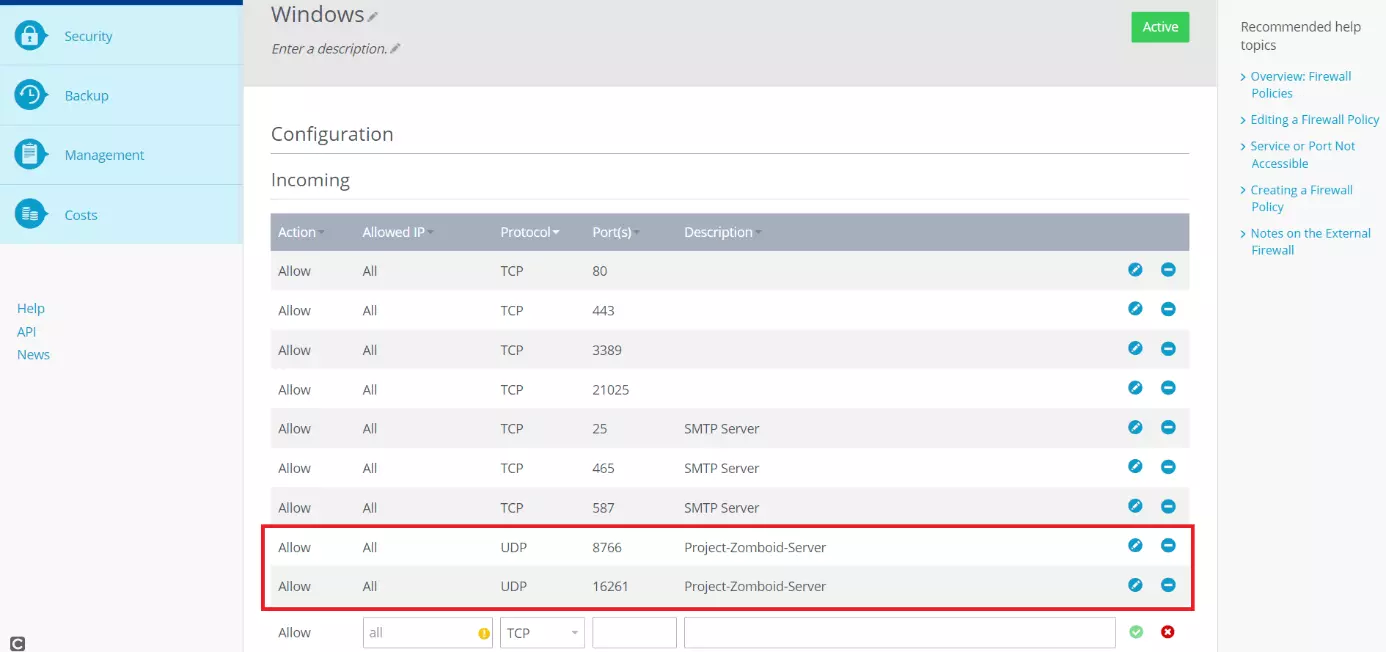
After downloading the Dedicated Server software, you need to release the ports relevant to your Project Zomboid server in the IONOS Cloud Panel.
Open the Cloud Panel again. Click on “Network” to open the drop-down menu and select “Firewall Policies”. You will need to unblock the UDP ports 8766 and 16261 for your server to be ready for Project Zomboid. Simply create the corresponding rules in the Cloud Panel and add them by clicking on the green plus icon.
Step 4: Adjust the server’s configuration file
The server’s configuration file must be adjusted in the next step. You can usually find it under the following path: C:\Program Files (x86)\Steam\steamapps\common\Project Zomboid Dedicated Server
Right click on the file to edit it. The RAM that you want your server to use can be assigned here. Delete the following piece of code from the file to do this:
-Xms16gEdit the following code snippet where the number 16 is and enter the RAM in gigabytes which you want to allocate to your server:
-Xmx16gYou may need to make another change in the batch file. Whether this is necessary depends entirely on your operating system. You will need to replace the code section `-XX:+UseZGC´ with `-XX:+UseG1GC´ on Windows 2016 and older.
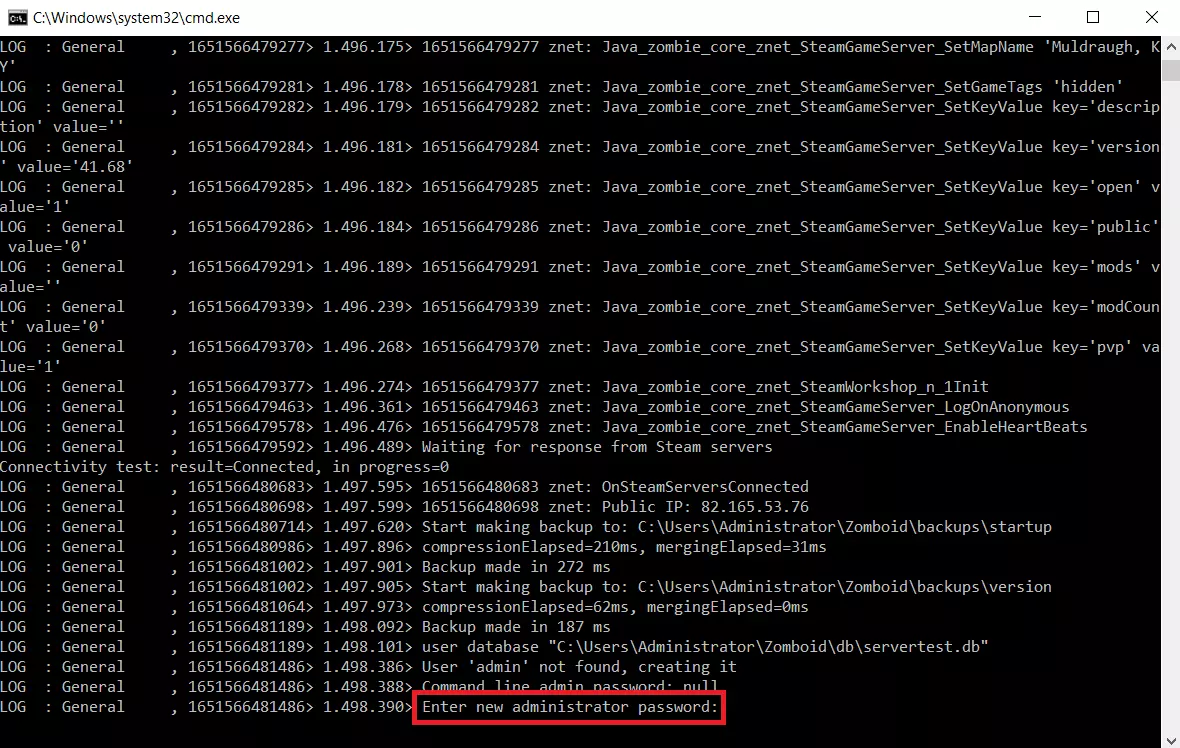
Step 5: Start your Project Zomboid server
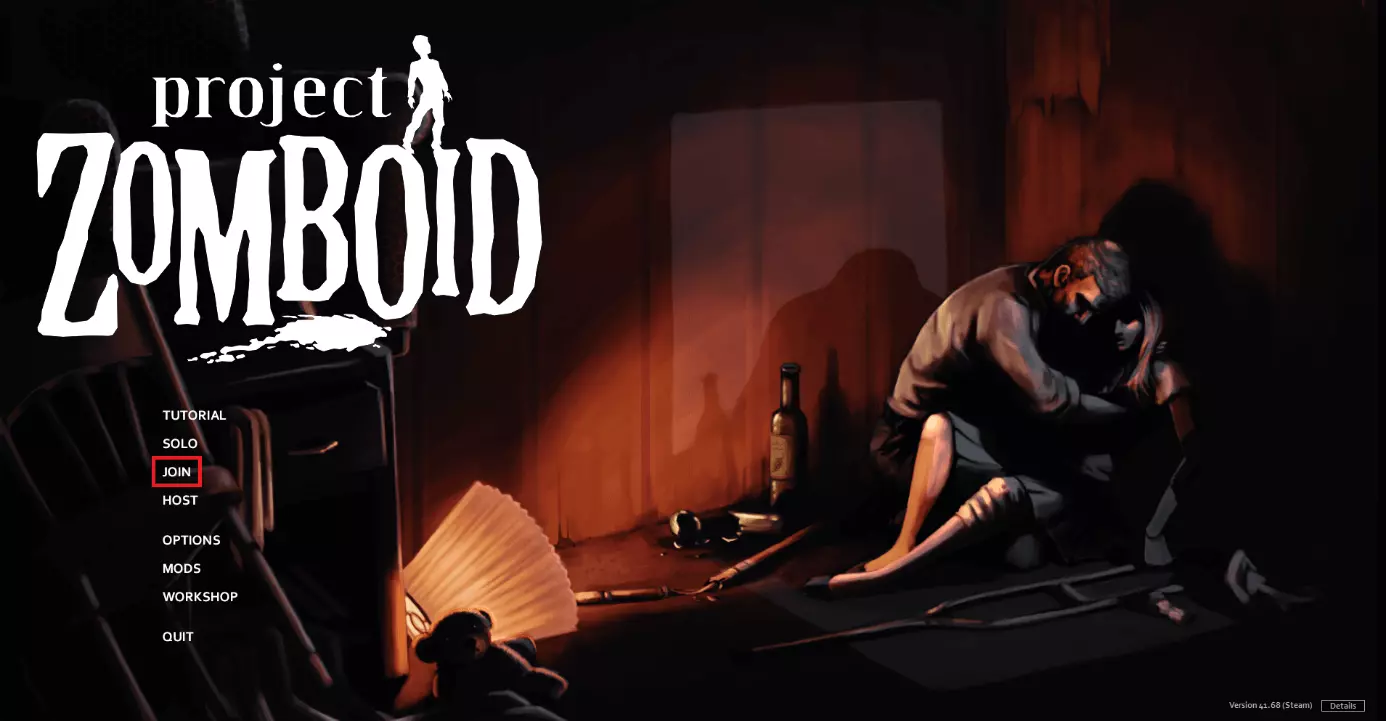
Step 6: Open Project Zomboid
The Project Zomboid server isn’t the only one which is suitable for playing with friends. Create your own Discord server to easily speak with your fellow players over voice chat. Teamspeak server or Mumble server are also great options.
Step 7: Find server in game
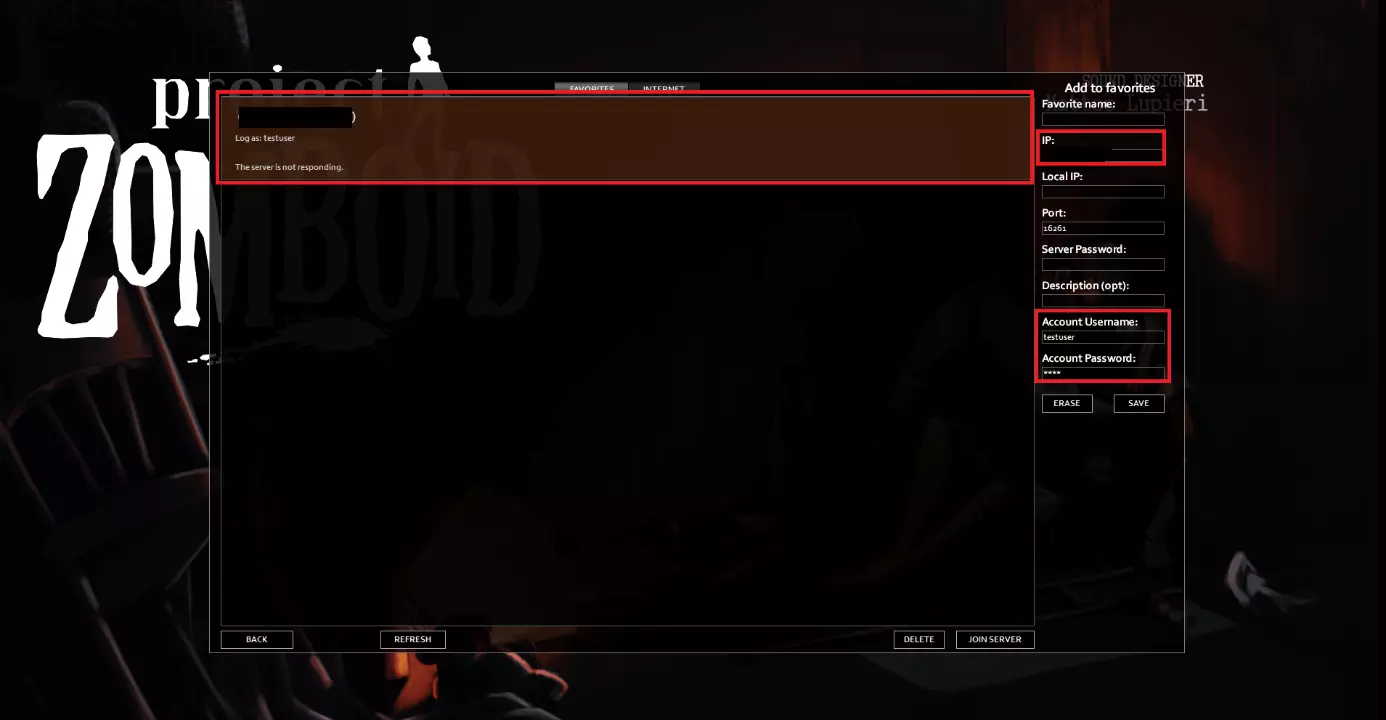
You must find your server in the server settings. Enter the server’s IP address under `IP´. You can also find this in the IONOS Cloud Panel. You can also choose a username and password which are stored to access the server. Then click on `Save´. The servers which you register this way will appear in the server menu. Select your server and click the `Connect´ button. The server will connect and the game will start.
Step 8: Select map
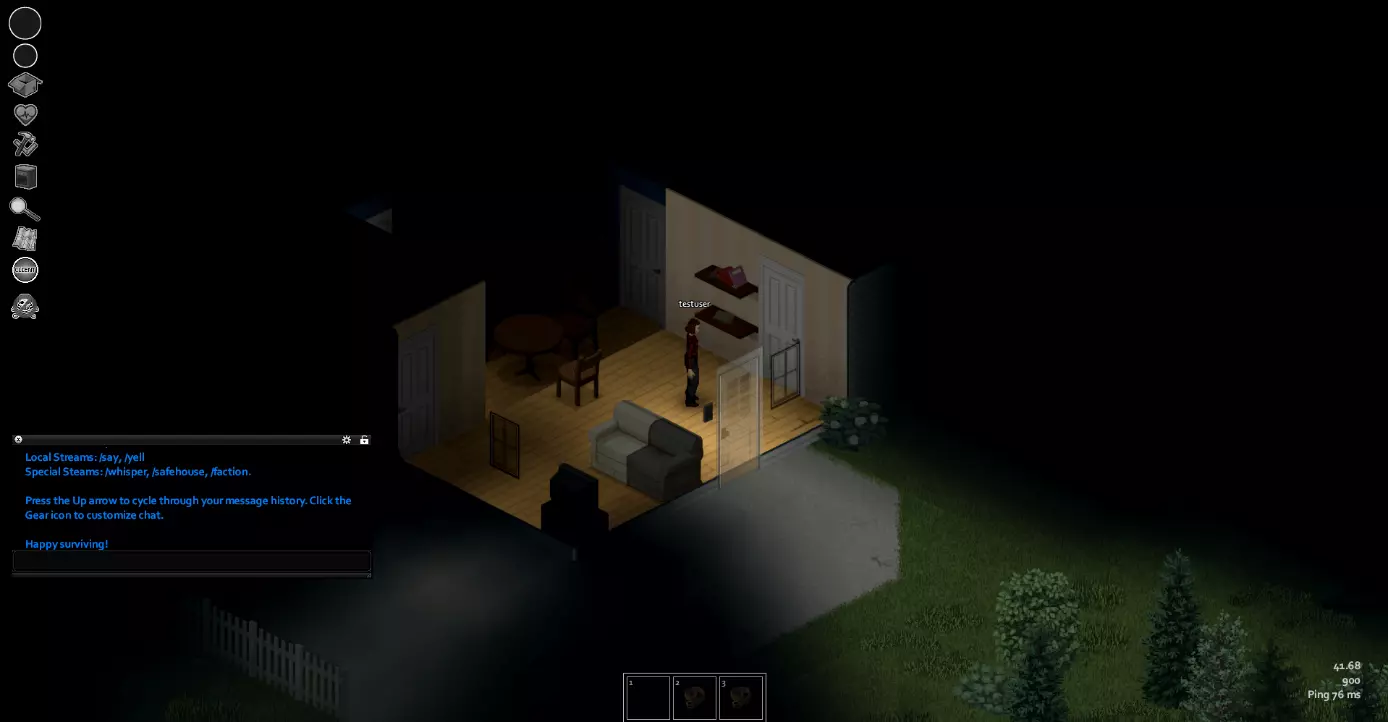
The game will start after you have successfully connected. First, select a map where you want to play with your friends.
Step 9: The fight for survival can begin
Make a statement with your own .gg domain and let the games begin. Register your own .gg domain now with IONOS.


