How to set up a Myth of Empires server
In the medieval sandbox game Myth of Empires, released at the end of 2021, you can fight epic battles together with your friends. Simply set up your own Myth of Empires server. We’ll show you what you need to do it.
Try out your VPS for 30 days. If you're not satisfied, we'll fully reimburse you.
A comparison of the options
For your own Myth of Empires server, you’ll first have to think about which kind of server you want to use. We’ll give you a quick explanation of the different options here.
Both Cloud Servers and vServers or VPS (Virtual Private Server) are virtualised server solutions. This means that you and other users of the server share the available hardware resources. Cloud server tariffs can be adapted to your needs and scaled at any time, meaning that billing is by the minute. With VPS servers, you pay a fixed monthly amount for the services used.
A different approach is found with Dedicated Server. Here, the entire hardware resources are made available exclusively for you. However, this exclusivity is also reflected in the price. Nevertheless, the minute-by-minute billing of dedicated server tariffs ensures an ideal price-performance pay off.
For your Myth of Empires server, the Cloud Server could be an ideal choice. The high scalability of this server solution guarantees that you can flexibly change the plan such as an increased number of players at any time. The vServer is also a good choice for a game server. The monthly fixed amount means that you won’t incur unexpected costs even during the most intensive gaming sessions.
Try out your VPS for 30 days. If you're not satisfied, we'll fully reimburse you.
Our top budget tip for those just starting out
If you want to try Myth of Empires first, the RAM-optimised Virtual Private Server in sise L is a suitable choice. Thanks to the discounted rate for the first six months, it’ll offer you enough to test the game extensively without having to commit fully. The vServer is perfectly suitable for gaming sessions with up to eight friends. Of course, if you need more slots, the tariff can be adjusted and upgraded to your needs at any time.
Step by Step to your own Myth of Empires Server
Step 1: server connection
First, you need to establish a remote connection to your server. If you have chosen one of the IONOS server solutions, you can use the IONOS Cloud Panel for this purpose, which contains all information about your server.
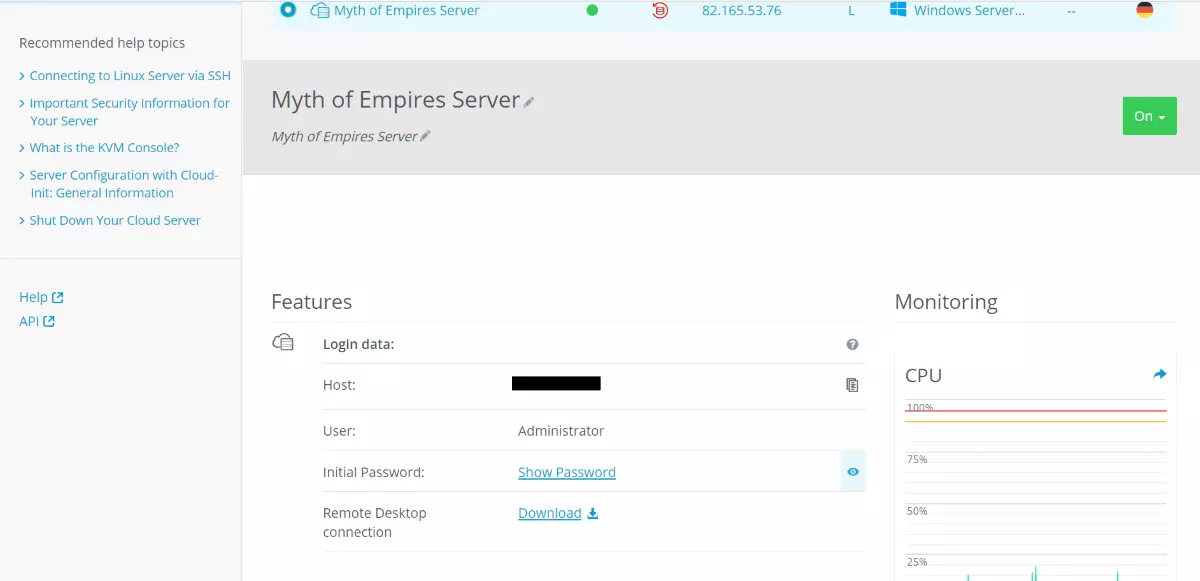
To do this, first log in to the IONOS Cloud Panel and select the desired server. Clicking on the category ‘Server & Cloud’ will take you to the overview page of your server. Here you can click the download button to download the remote connection.
In the following dialog, select ‘Connect’ to establish a connection with your server. If you have not yet stored any individual login data, you will find the default password and username you need to log in to your server in the server overview under the ‘Initial password’ and ‘User’ tabs.
Step 2: Download game onto your server
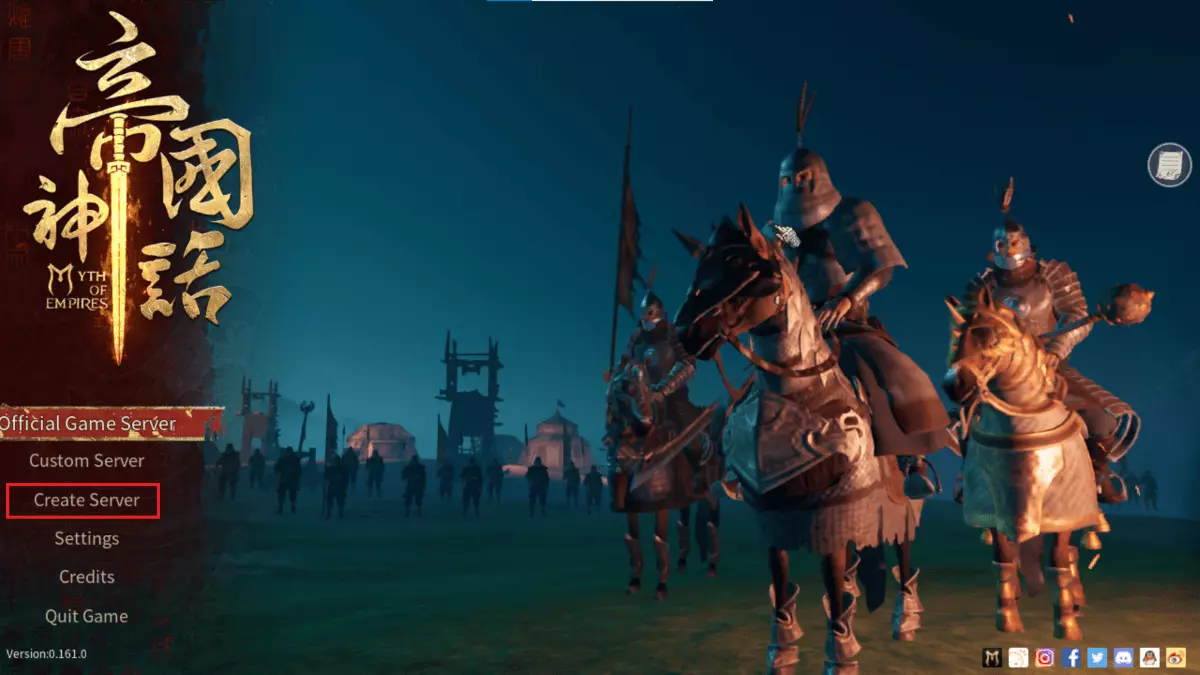
The next step is to install Myth of Empires on your server. The download of the game is done via the official website. Click on the ‘Download’ button to start downloading the Myth of Empires launcher. Follow the instructions there to complete the installation of the game on your server.
Step 3: Create Myth of Empires Server
Step 4: Server Settings
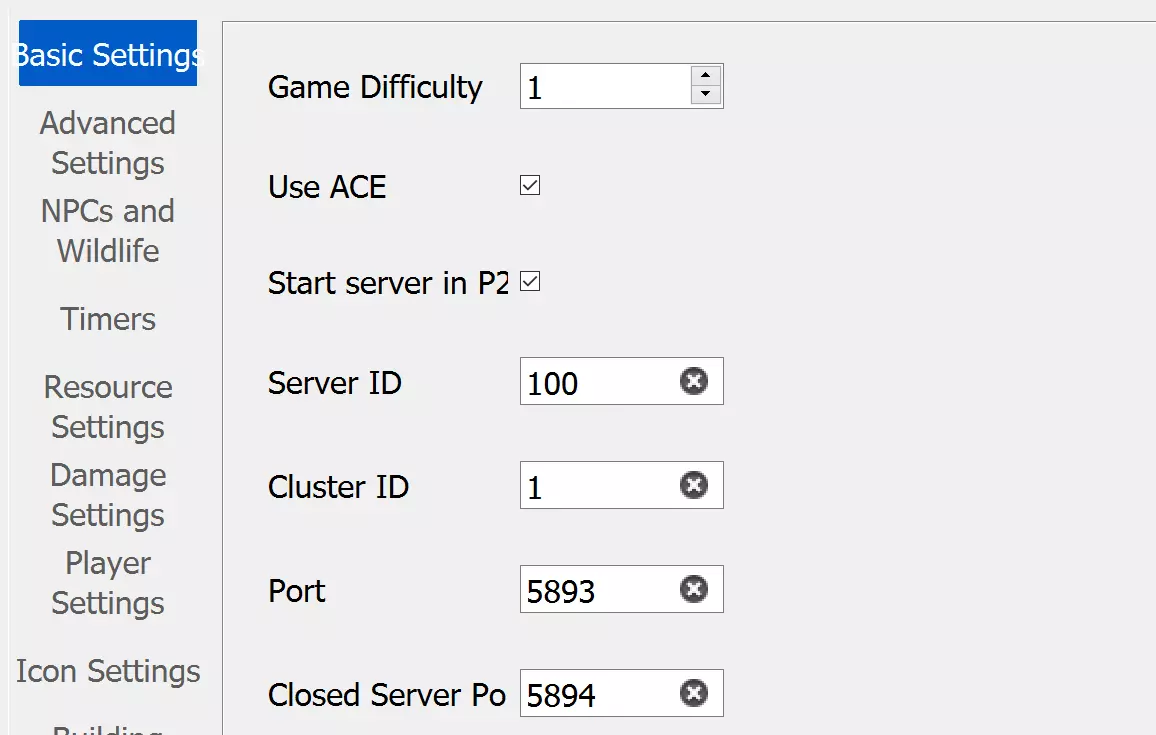
When you create your own Myth of Empires server, there are virtually no limits to how you configure your server. The server settings offer you plenty of customisation options. For example, you can adjust the drop or spawn rates, or even change the growth rate of plants in the game.
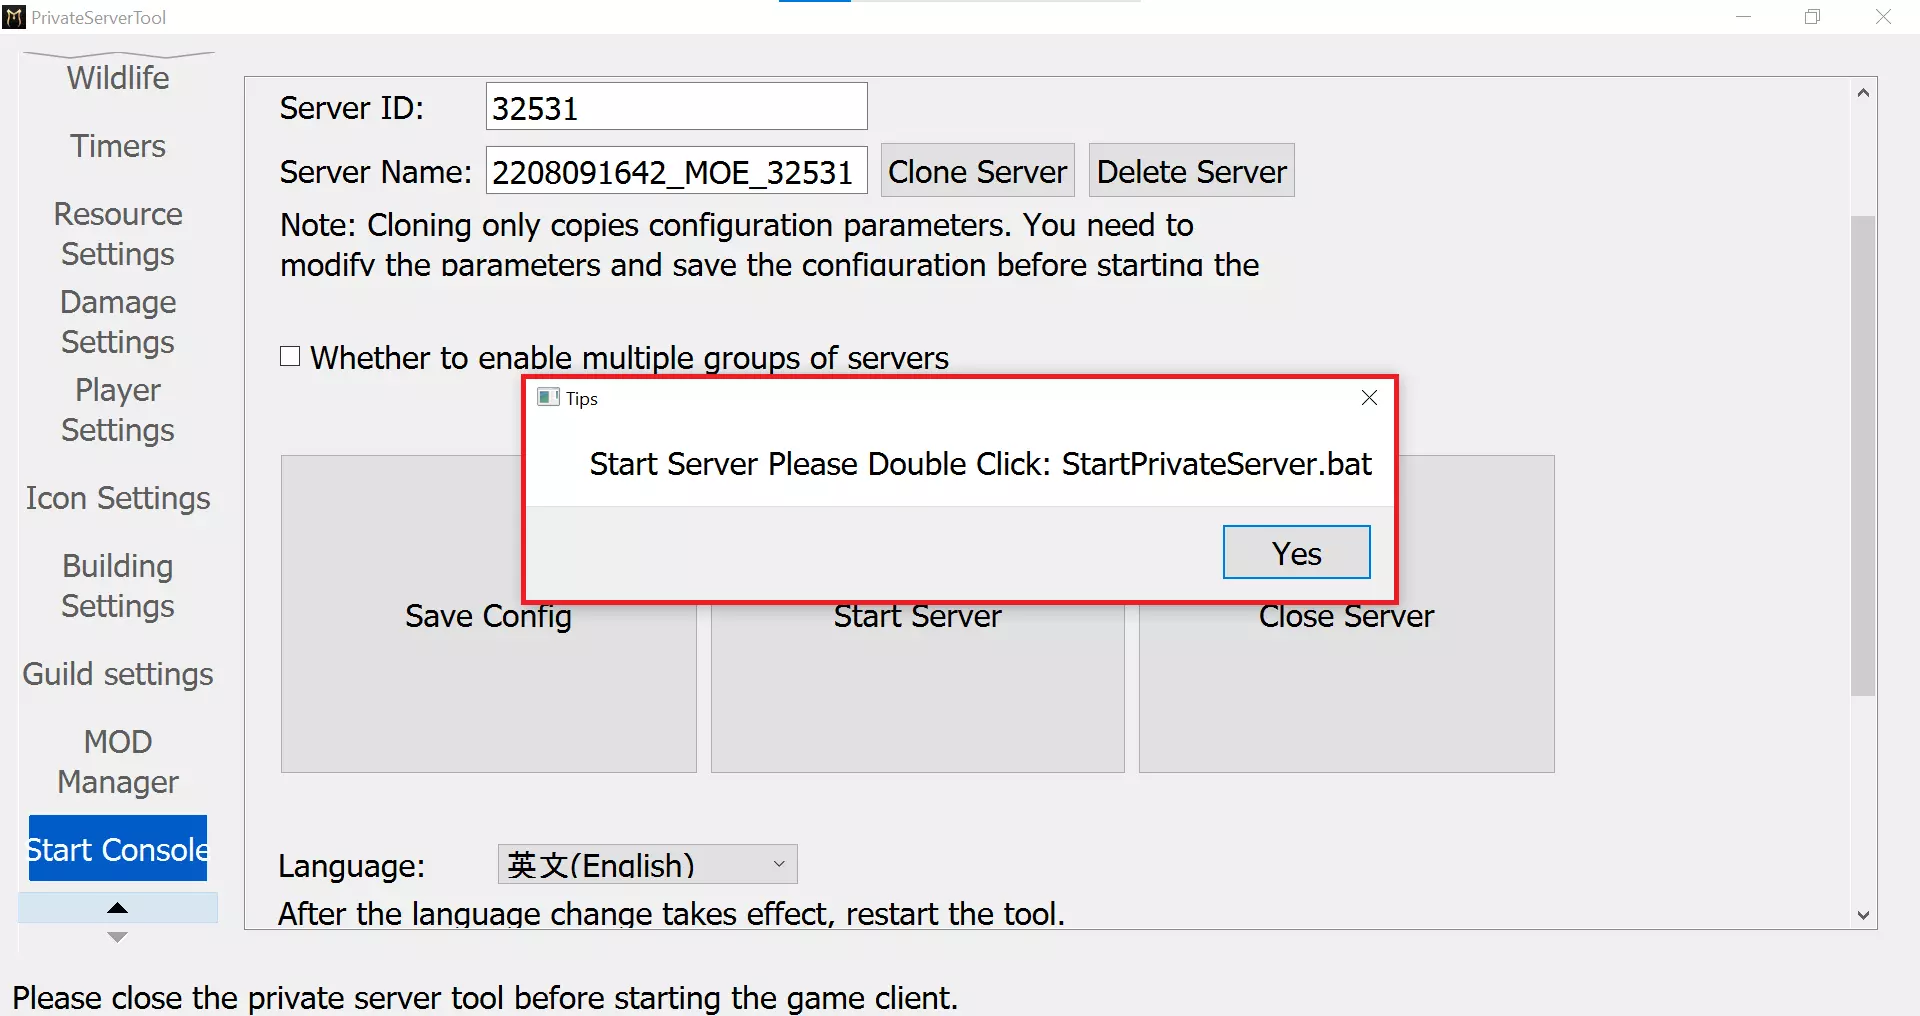
Once you are satisfied with the settings, all you have to do is save them. This is easily done by selecting the ‘Start Console’ tab in the menu on the right. Clicking on the ‘Save Config’ button will save the settings you have made for your server.
Step 5: Start your Myth-of-Empires Server
To start your server, select the ‘Start Server’ button from the ‘Start Console’ menu. This will open a dialog box requesting that you to run the batch file ‘StartPrivateServer.bat’. Clicking on ‘Yes’ will take you directly to the location of the corresponding file. Double-clicking the file will start the Myth of Empires server.
Step 6: Your medieval adventure can begin!
Make a statement with your own .gg domain and let the games begin. Register your own .gg domain now with IONOS.


