How to install and configure a Plex Media server
In order to access your media collection at any time and from wherever you are, you can set up a Plex Media server on a computer that is connected to your home network. This fremium software is available for Windows, iOS and Linux, and you can install it easily in just a couple of steps.
Why should you consider using a Plex Media server?
A Plex Media server is similar to an FTP server and is used to manage music, films and photos. With a Plex Media server, you can use an app to access your media via a private network. This can be done on different devices and from different locations. The Plex Media server is available on the following devices and systems (as of February 2023):
- Android (mobile)
- iOS
- PlayStation 4 and 5
- Xbox One
- Smart TVs
- Chromecast
- Android TV, FireTV, Apple TV
It’s not just your own media that you can access with a Plex Media server. If you have it installed, you can access streaming services via the Plex app. This includes YouTube, Netflix, Amazon Prime and Vevo.
The Plex Media server can be set up on various devices: not only is it available on almost all computers thanks to its desktop app, it can also be installed on a compatible NAS system or NIVIDA SHIELD. Additionally, it’s also possible to install the Plex Media server on a Raspberry Pi.
What are the OS requirements for installing a Plex Media server?
To install the Plex Media server on a computer, you need to first make sure it meets the necessary requirements. It’s possible to install the software on Windows, macOS and Linux. Below are the system requirements for each operating system:
- Windows 32-bit: Windows 7 SP 1/Windows Server 2008 R2 SP1 or newer
- Windows 64-bit: Windows 8/Windows Server 2012 or newer
- Mac: 10.11 El Capitan or newer
- Linux: minimum CentOS 7, Debian 8, Fedora 27, SUSE 15, Ubuntu 16.04
Depending on how you plan to use the Plex Media server, the processor and memory requirements may vary. The amount of processing power and memory you will need depends on which Plex apps you use and how many users are using the server at the same time. The developer of the software recommends at the very least having anIntel Core i3 processor as well as a minimum of 2 GB RAM.
If you get the paid version Plex Pass, you can also access your media offline. If you want to use this feature, you will need version 1.16.3 (or newer) of the Plex Media server.
How to set up a Plex server: a quick step-by-step tutorial
Before you actually start the installation, you’ll want to make sure that your files are correctly named so that they can be found and sorted by the Plex Media server. For example, films and series should be organised into different folders. Films should carry their full name and their release year and series should have their full names and episode numbers. Music can be organised according to artist and album. Organising your media beforehand can help you to avoid indexing issues.
Step 1: set up a Plex account
Go to the Plex website and set up an account. Depending on how much you intend to use the media server, you can choose either a free account or one of the various paid versions.
Step 2: download the installation program and run it
Download the correct Plex installation program for your operating system and then start the program. Follow the instructions provided by the installation assistant. You then need to open a firewall for Plex. Once you have successfully installed Plex on Windows or macOS, the Plex icon will appear on the bottom right (Windows) or top left (macOS) of the navigation bar.
Step 3: set up the Plex Media server
Set up the server using the Plex web client. When you open the Plex Media server, the web interface will open automatically. From here you can log in to your account. The window will then show that a server has been found on the system. Here you can give your server a name. Choose a name that will be easy to recognise when you’re setting up apps on other devices.
If you want to access the Plex Media server when you’re on the road, you also need to tick the box in the field Allow access to my media from outside my home network.
Step 4: add media to the server
When setting up the server, you will have the option to add media to it. However, you can also choose to skip this step and add media later.
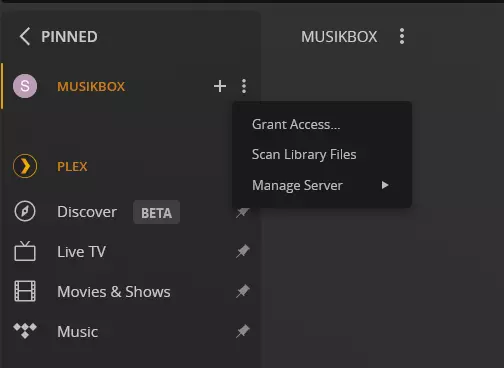
If you want to finish the setup here, click on Next and then Complete. To add media, click on Add to library. Later on when you want to add media to your library, click on the plus symbol next to the name of your server on the main menu.
Select what type of media you would like to add. You can choose films, series, music or other types of videos. You can also give each library a separate name. This might be useful if you want to store some collections separately. Additionally, can choose a language for each library. For example, if you want to add English-language films, you can choose English. This allows you to add relevant information such as the cover, content, etc. in English.
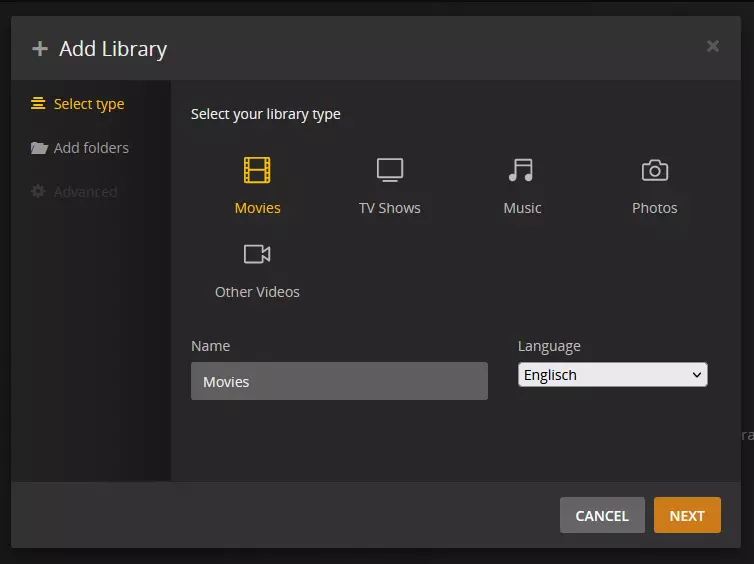
You can then add a folder to the library. The folder can be stored in different places. Make sure to choose a suitable name for the folder to avoid any indexing errors. UnderAdvanced, you can change other options for the different media types. In most cases though, this isn’t necessary.
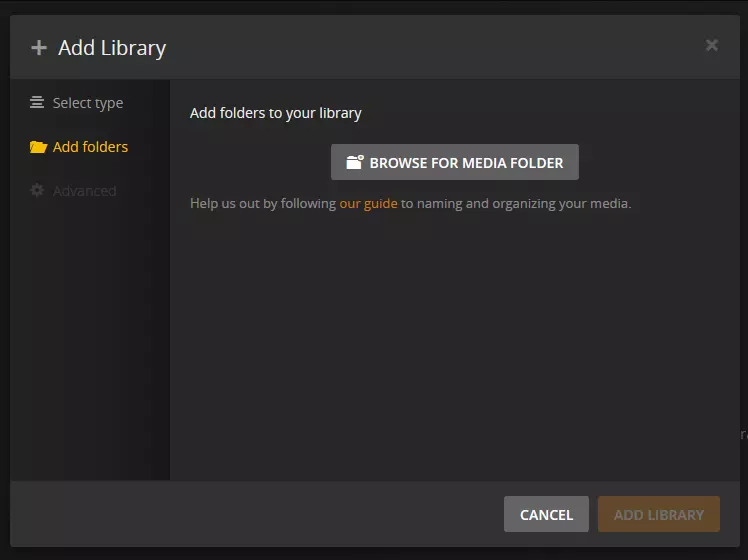
Now click Add library. The Plex Media server will now add the selected files and download any additional information such as the cover, content, artist, etc. from the internet.
Step 5: download the Plex Media Player apps
Your Plex Media server is now set up and ready to be used. Now you need to download the Plex Media Player from the app store of each device that you want to stream content from. Once you’ve logged into your Plex account, your server should be automatically recognised and displayed. You can also stream via the web client if necessary. You can find this at app.plex.tv/desktop. You will need to log in again to access your server.
Edit and manage your library
If you want to edit your library, click on the three dots next to the name of your library and select Edit library. In the next menu, click on Edit. The same window you used to set up the library will now appear. Here you can change the name, language and settings. In this window, you can also add new files to the library.
If a file has been misnamed or the incorrect cover has been added to a file, you can correct such errors by hovering over the file with your mouse and selecting Correct information from the menu. A window will appear with suggestions for how to correct this information. If none of the suggestions provided by Plex Media server match, you can use the search function to find the correct information. Your server will then correct the data accordingly.
Configure your Plex Media server
If you have any issues with streaming or video quality, you can use the settings to make improvements. To open the settings, click on the three dots to the right of the server name and then on Manage server and Settings.
Account settings
From here you can make changes to the general settings in your Plex account and see information about your Plex Pass if you have the paid version.
These settings include:
- Approved devices
- Select online media sources
- Set up web hooks
- Add streaming services
- Manage Plex Home
- Manage library access
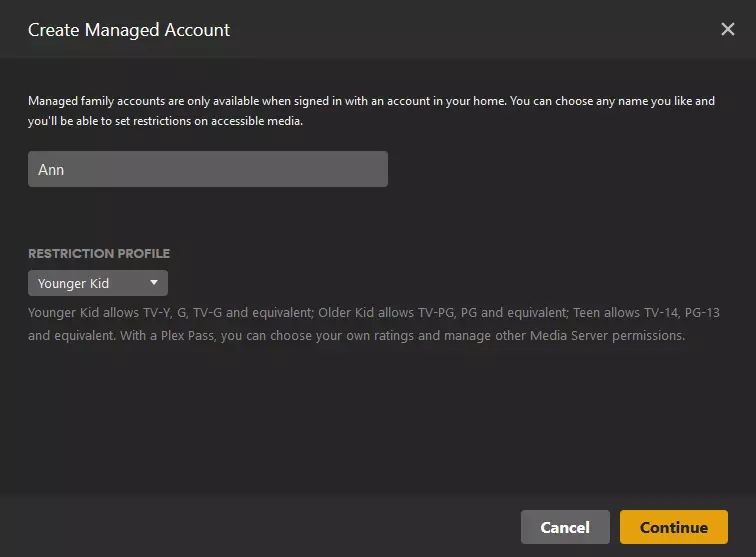
From Plex Home, you can also add and manage different users. This is particularly useful if you use Plex with other people such as your family. From here you’re also able to decide who has access to which libraries. You can also add age limits to prevent children from accessing any content that is not suitable for them.
Plex Web settings
The Plex Media server can be accessed through the apps or through the web client. To log in to the web client, go to plex.tv. You can also enter the following URL in your browser’s search bar and add your IP address: http://server.local.ip.address:32400/web
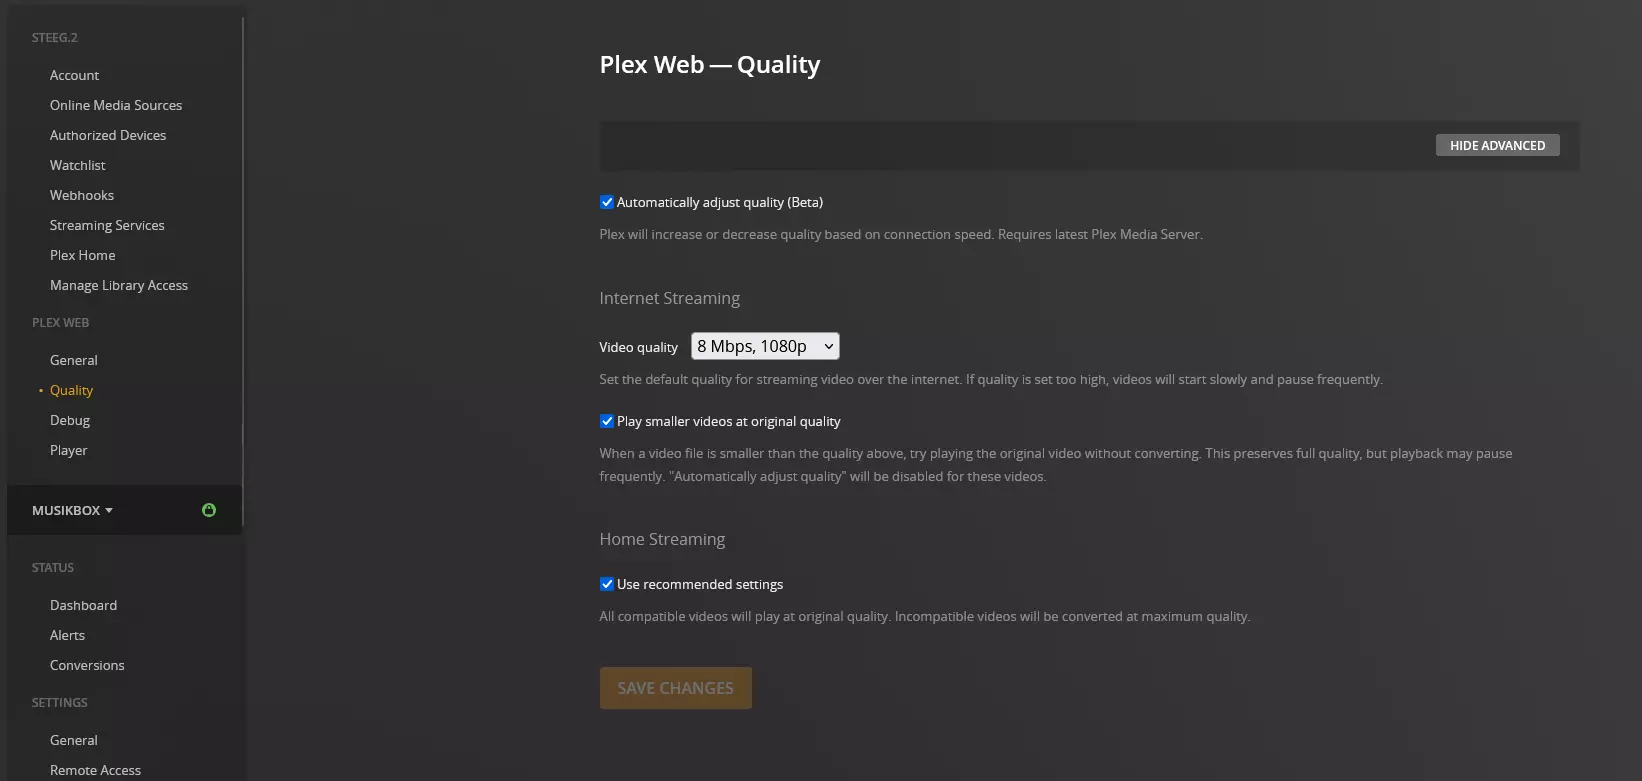
Finally, if you have any problems with the streaming or video quality, you can change the stream quality of the web client. The option Automatically adapt quality ensures that Plex automatically adapts the video stream to the speed of the internet connection. The quality will depend on how good your upload and download speeds are. You can also manually set the video quality. If you have a poor connection, the stream may still struggle or take longer to load.
If you want to stream on your home network, you should use the recommended settings to ensure films are played in their original format and do not need to be converted every time. Select Use recommended settings. To avoid any unnecessary conversion, you should also activate the Direct Play and Direct Stream settings which you can find in Errors.
Server settings
Your server settings are located further down the navigation menu. You can make changes to them, for example, if you have problems with remote streaming (i.e. away from your home network). Remote access is normally set up automatically. If this isn’t possible. you will receive a message that says: ‘Not available outside of your network’. You will now have to set up a port on your router for remote access. Click the box that says Manually define a public port and set the port redirect on your router.
You can also set the upload speed in your server settings. This will depend on your internet speed at home. If the upload speed is too slow, it may cause problems when you’re streaming from outside of your home network. The upload speed you’ll need depends on file size and the number of users.

