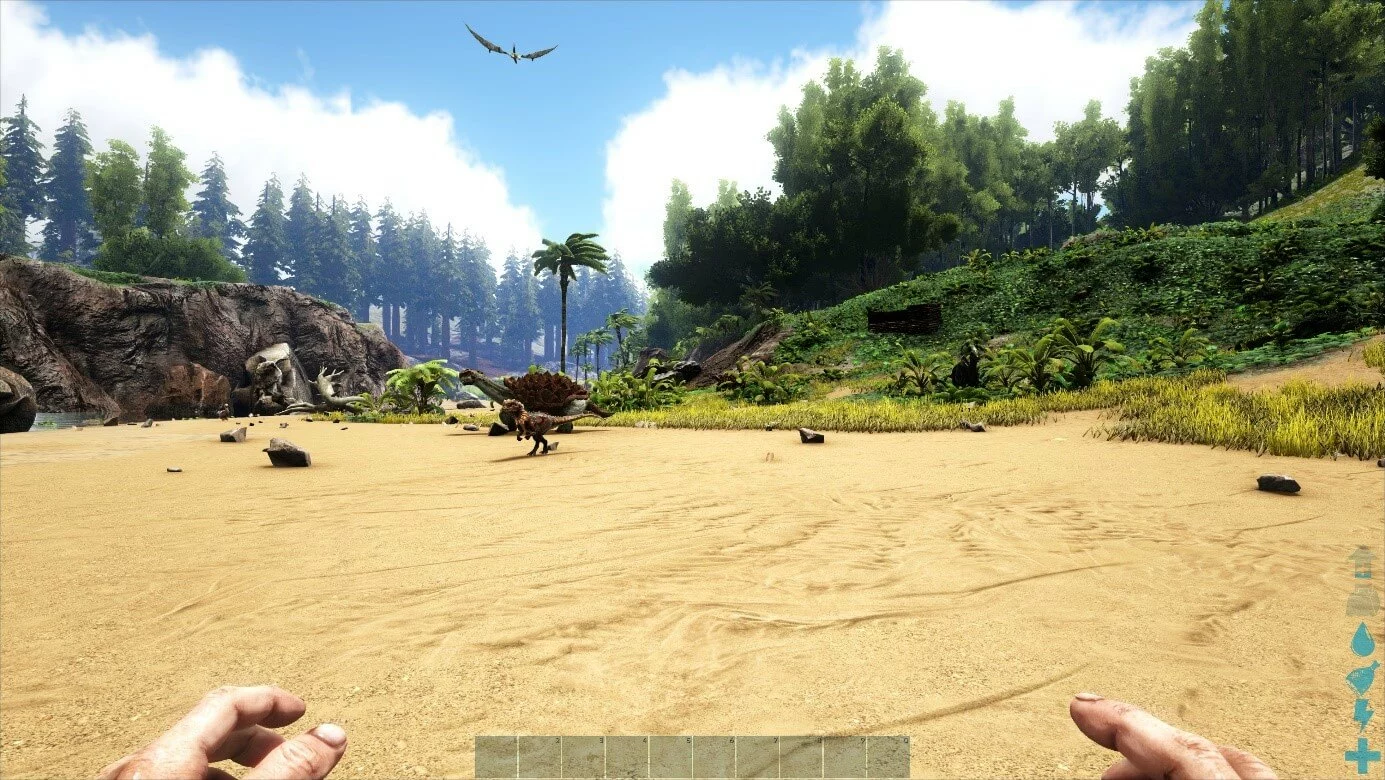
ARK server: How to create your own dedicated “ARK: Survival Evolved” server
After a two-year Early Access phase, ARK: Survival Evolved was officially released on August 29, 2017. Since then, the in open-world dinosaur survival game has had numerous adaptations and extensive updates, which is why it is still one of the most popular games in the genre. Collecting resources, cultivating plants, and taming a land or water dinosaur or fleeing from a fearsome Tyrannosaurus —all this is quotidian in ARK.
ARK: Survival Evolved is the basic edition of the online game, which is also used in this guide. The developer team also regularly provides the player community with new DLC content such as the expansions ARK: Aberration or ARK: Extinction, which, however, will not be discussed further here.
We’ll show you how to set up your own ARK server to gain maximum freedom in exploring the game world — whether alone or in a team with friends and acquaintances.
Thanks to free starting credit, you can test the IONOS cloud server for 1 month free of charge (or until the credit is used up) and experience the perfect combination of performance and security!
ARK server: Hosting on your own PC or renting a server?
Your own ‘ARK: Survival Evolved’ server offers you the possibility to freely design the game world and modes according to your wishes. Unlike playing on a publicly available multiplayer server, you are not bound to the operator’s configurations and rules. You decide for yourself how much PvE and PvP elements should be weighted, who you play with, and when the server is online.
In principle, you can create and host an ARK dedicated server directly on your home computer. With a high-end PC, you theoretically cover the basic hardware requirements. However, the ongoing resource consumption risks regular crashes and lags for you and all other players — even with an excellent Internet connection. In addition, the server does not run when you shut down your device.
If you rent the hardware for your ARK server from a provider, it can run without interruption if necessary, so that the game world is always available online. You can also rely on excellent download and upload capacities that come with the hosting providers’ state-of-the-art data centres.
If you start looking for a suitable provider for hosting your own ARC server, you will most likely come across shared and dedicated hosting offers. Read our article ‘Shared Hosting vs. Dedicated Hosting’ to find out how these two concepts differ from each other.
What are the system requirements for an ARK dedicated server?
Getting ARK: Survival Evolved to run on your own server gives you maximum fun and freedom when exploring the game world. The question of system requirements depends on several factors. For example, how many players should be able to be on the ARK server at the same time? What size is the game world? Should mods and plugins be used and if so, how many?
We have summarised the most important performance data for smoothly running an ARK dedicated server for you.
Processor (CPU)
The right CPU setup forms the basis for a well-running ARC server. Even for smaller private servers, two physical cores with over 3 GHz are recommended, for example. The larger and busier the world becomes, the more power is advisable. The ARK dedicated server software is basically designed as follows: One core handles the main calculations and one core is responsible for handling the network activities. For this reason, a host system with two physical cores with high CPU performance is recommended to ensure optimal performance, as distributing it over several virtual cores is suboptimal and automatically reduces the performance potential.
Working memory (RAM)
What applies to processor performance is equally recommended for the memory of your server setup: the larger and busier the game world is, the more RAM you should plan for. If you plan to use plugins and mods, you will need to add more RAM capacity. As a minimum recommendation for a small ‘ARK: Survival Evolved’ server without extensions, a value of 6 to 8 gigabytes of RAM can be established.
Always be aware of the additional resources to plan for when you expand and customise your ARK server with mods or plugins later on!
Hard disk space
The basic installation of ARK server software takes up 10 to 15 gigabytes of hard disk space. You will subsequently need additional storage space for the user files and possible extensions. For long-term hosting of the gaming server, we therefore recommend a storage contingent of 30 gigabytes or more.
Choose a storage setup with SSDs — due to the faster write and read speeds, the modern storage solutions are clearly superior to the classic HDD hard disks.
Broadband connection
The Internet connection of your ARK server is as elementary for the later game fun as the hardware of the server itself. A low ping (also known as ‘latency’) on the server and player side will increase the fun of exploring the huge dinosaur world. From a server perspective, the upload value (‘uplink’ or ‘upstream’) is crucial. The more upload speed your server has available per player, the faster the server data will reach the participants.
The upload capacities of Internet connections are significantly lower than the download speed: Classic DSL 16,000 lines, for example, offer up to 16 Mbit/s download speed, but often only between 1 to 2 Mbit/s upload speed!
Operating system
For the operating system, you can choose between Microsoft (Windows Server 2019, Windows Server 2016) and Linux (Ubuntu, Debian, CentOS, OpenSUSE). The server software ‘SteamCMD’, which you can also use to create other dedicated game servers such as a Rust server, is also available for macOS — but there are always problems when installing it on the Apple system.
The system of your choice also takes up server resources, which you should consider from the start. For example, Windows Server 2016 has the following minimum requirements:
- 1.4 GHz processor (64-bit)
- 512 MB or 2 GB of memory (without or with graphical user interface, respectively)
- 32 GB of hard disk space
If you use the Linux distribution Ubuntu instead, you can orient yourself on the following minimum values (version 20.04):
- 2 GHz processor (64-bit)
- 4 GB of RAM
- 25 GB hard drive space
The stripped-down Ubuntu Server Edition without graphical user interface already runs with a 1 GHz processor (64-bit), 1 GB RAM, and 2.5 GB hard disk space.
Host an ARK-Server at IONOS: Which solution works best?
The demonstrated requirements for hosting a dedicated ARK server make it clear why it is a better idea to rent resources from a provider. Firstly, only absolute high-end PCs offer the necessary computing power for stable gameplay - especially if you want to take part in the adventure in ARK: Survival Evolved yourself on the same device. Additionally, you can be sure that a server in an external data centre has a consistently good Internet connection.
Typically, the common providers have several different server options to choose from at once, which differ in points such as administration options, billing model, and hardware setup. With IONOS, for example, you can choose between the following three types:
- Cloud Server
- vServer (Virtual Private Server)
- Dedicated server (either self-administered or administered by IONOS)
Of course, the above offers are not only interesting for creating your own ARK server. The powerful hardware also offers you the perfect basis if you want to create a LS19 server or a Minecraft server setup. You can also easily create your own Teamspeak server.
How are the three different IONOS server models different?
When you rent a cloud server from IONOS you enjoy maximum flexibility. You get access to virtualised resources that you can scale up or down at any time. Server performance is billed by the minute, so you only pay for the hardware resources you actually use.
Billing method and scalability are the decisive differences to a IONOS vServer. Resource virtualisation is also on the daily schedule when it comes to this model. However, you get a fixed hardware setup that you are billed for monthly.
Best suited for single-core applications like ARK server software is the third server option - a dedicated server. A powerful hardware package including CPU performance with up to 3.8 GHz (4.2 GHz or 4.4 GHz Turbo Boost) is explicitly provided for you at a fixed monthly price in this case.
Three typical ARK server scenarios including matching IONOS plans
The three server models from IONOS are available in different price and performance classes. To make it easier for you to choose a suitable package for your own ARK dedicated server, we have compared three typical scenarios for an ‘ARK: Survival Evolved’ server in the following table and assigned suitable rates of all three server types.
| Minimum requirements (including operating system) | Recommended vServer | Recommended Cloud Server | Recommended Dedicated Server | |
| Server for 2-10 players (standard map without/with few mods) | Windows Server 2016: 3.0 GHz (min. 3 cores), 8 GB RAM, 60 GB storage space | Virtual Server Cloud XL | Cloud Server XL | Dedicated Server AR6-32 SSD |
| Server for 10-25 players (individual map/mods) | Virtual Server Cloud XXL | Cloud Server XXL | Dedicated Server AR6-32 SSD | |
| PvP server for up to 100 players | Linux (Ubuntu): 3.0 GHz (min. 3 Cores), 10 GB RAM, 50 GB storage space | Virtual Server Cloud RAM XL | Cloud Server XXL | Dedicated Server AR6-32 SSD |
Try out your VPS for 30 days. If you're not satisfied, we'll fully reimburse you.
ARK: Survival Evolved – Server Tutorial
Once you have access to your ARK server hardware, you can start setting up and configuring the server. The steps for IONOS customers (vServer, Cloud Server, Dedicated Server) are described in the following instructions. In this case, the operating system is Windows Server 2016.
Step 1: Connect to the server (hardware)
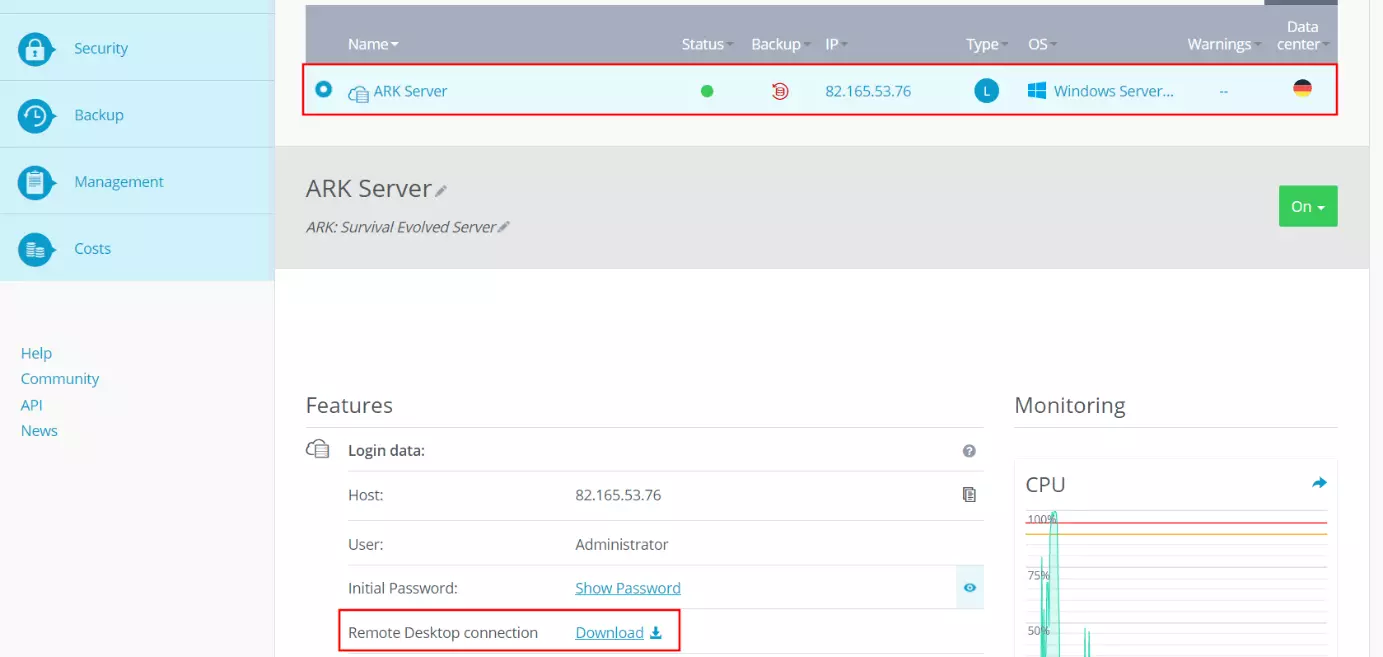
To access the rented hardware, the first step is to establish a remote connection to the server. As an IONOS customer, you can conveniently set up this connection via the Cloud Panel. To do this, log in with your customer data in the Login area. Then switch to the ‘Server & Cloud’ section.
Select the server which you want to set up the ARK server on to get an overview of the most important server information and access data. Under the entry ‘Remote Desktop Connection’ you will find, among other things, a download link for setting up remote access, which you should click on:
Windows will open the file with the default choice (Remote Desktop Connection) after you select ‘OK’ in the pop-up window. Confirm the connection attempt, which is still of unknown origin, via ‘Connect’.
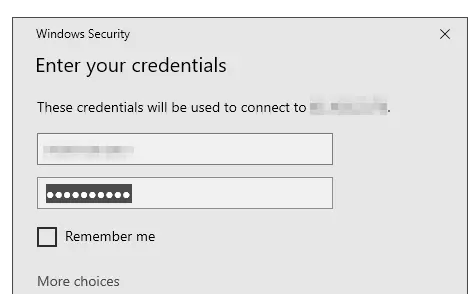
Now the access data for your server will be requested. Click on ‘More options’ and ‘Use other account’ one after the other and finally enter the username and password. If you have not defined any individual credentials for server access so far, you will find these details in the panel under ‘User’ and ‘Initial password’.
When you connect to your server for the first time, Windows will display a security warning. This is because the server security certificate is not yet trusted. By clicking on ‘Yes’ you agree to the certificate and thus to the remote connection.
Step 2: Install SteamCMD
On the server, you will now install SteamCMD, the command line version of the Steam client that you will later use to obtain the software for your ARK dedicated server. For Windows, you can download the setup files from the following download link.
You want to use Linux as the operating system on your ARK server? In the official forum of the Steam developer Valve you can find detailed instructions for installing SteamCMD on Ubuntu and similar distributions.
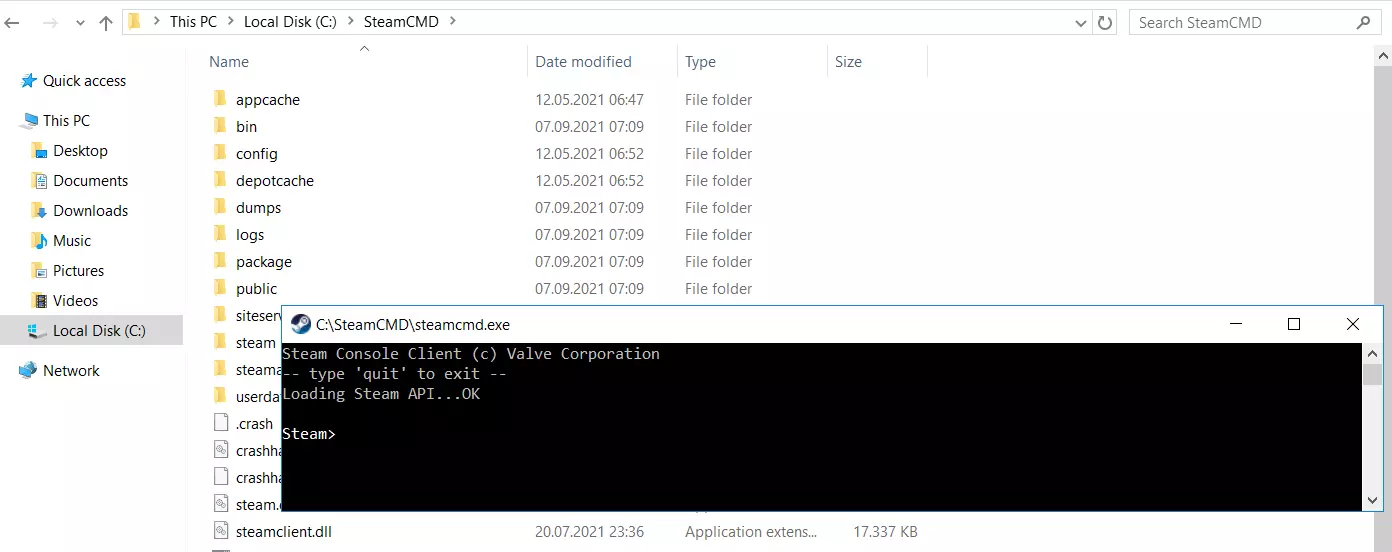
After downloading, unzip the zipped file to a directory on your server. Run the unzipped application file then double-click to install the software. Afterwards, the command prompt including the ‘Steam>‘ input line will start automatically. If this is not the case, you can also start the tool via steamcmd.exe.
Step 3: Install ‘ARK: Survival Evolved’ server
The first step is to create a directory for your ARK server. In this tutorial we use the directory ‘C:\ark-server’ as an example. The appropriate command is:
force_install_dir C:\ark-server\After creating the directory, log in to the Steam servers (Steam Public) as an anonymous user:
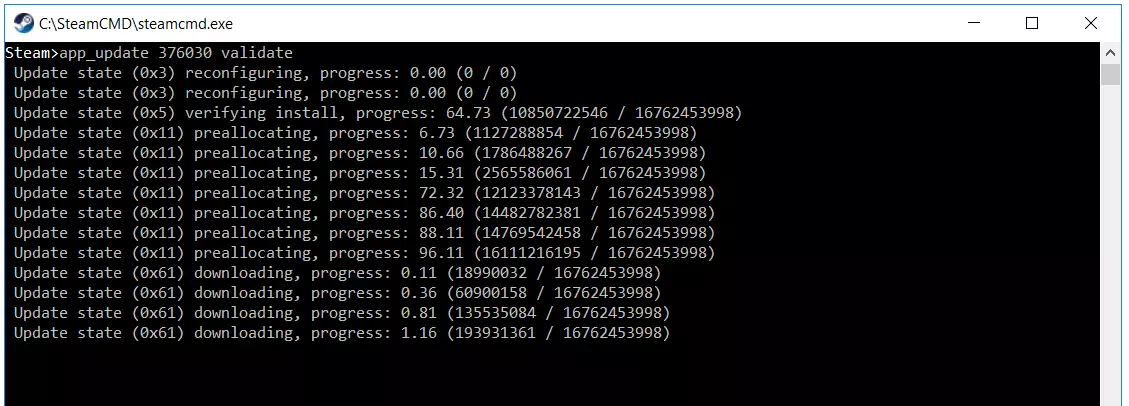
login anonymousThe last step is to install the ARK dedicated server software. For this you need the Steam app ID (376030) and the following SteamCMD command:
app_update 376030 validateIf you want to update the software at a later time, the command ‘app_update 376030’ is sufficient!
Step 4: Open server ports
For your ARK server to be able to communicate with the game clients later, it is necessary to open the corresponding ports for data transmission. Specifically, these are the TCP / UPD ports 7777, 27015, and 27020.
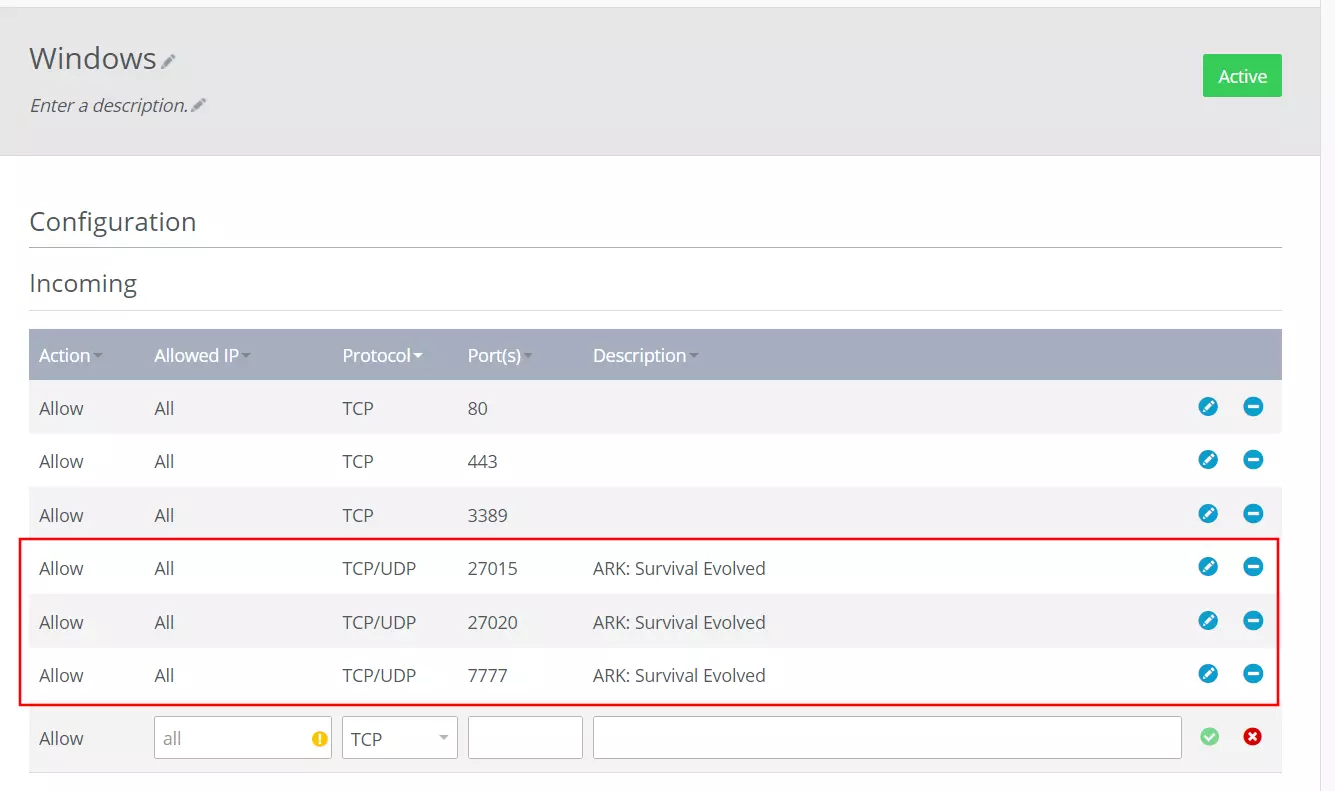
You can also open the ports via the Cloud Panel. Do this by logging in there with your customer data and select the ‘Server & Cloud’ section and your ARK server. In the left side menu, now click on ‘Network’ and ‘Firewall Policies’ one after the other. Select the operating system to open the configuration menu for the port policies. Under the ‘Incoming’ section, generate the entries for the three ports one after the other and according to the following pattern:
- Allowed IP: all (just leave the field blank for this)
- Protocol: TCP/UDP
- Port(s): port number (7777 / 27015 / 27020)
- Description: individual description of the port release
Step 5: Start ARK dedicated server
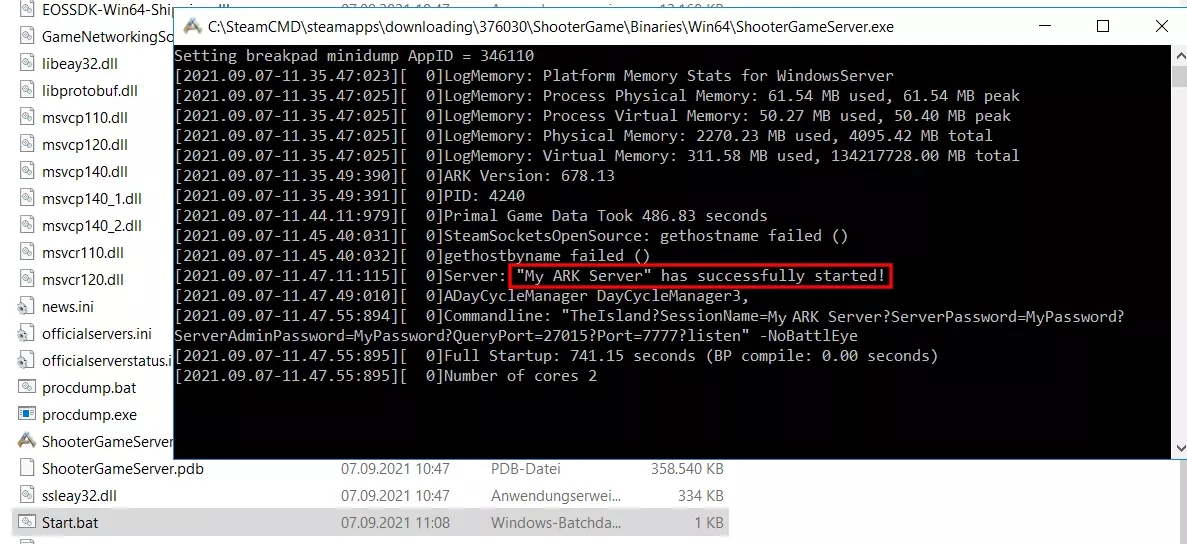
You have now completed all the necessary steps to be able to start your ARK server. The easiest way to do this is to create a batch file in the subfolder ‘ShooterGame\Binaries\Win64’ with the following content:
start ShooterGameServer.exe "TheIsland?SessionName=My ARK Server?ServerPassword=MyPasswort?ServerAdminPassword=MyPasswort?QueryPort=27015?Port=7777?listen"Under ‘SessionName’ you enter the desired name for your ARK server instance, your individual server or administrator password you assign after the equal sign of the entries ‘ServerPassword’ or ‘ServerAdminPassword’.
For a detailed listing of server commands for the startup BAT or configuring the ARK server via command line, see the official ARK: Survival Evolved Wiki.
Step 6: Join ARK server
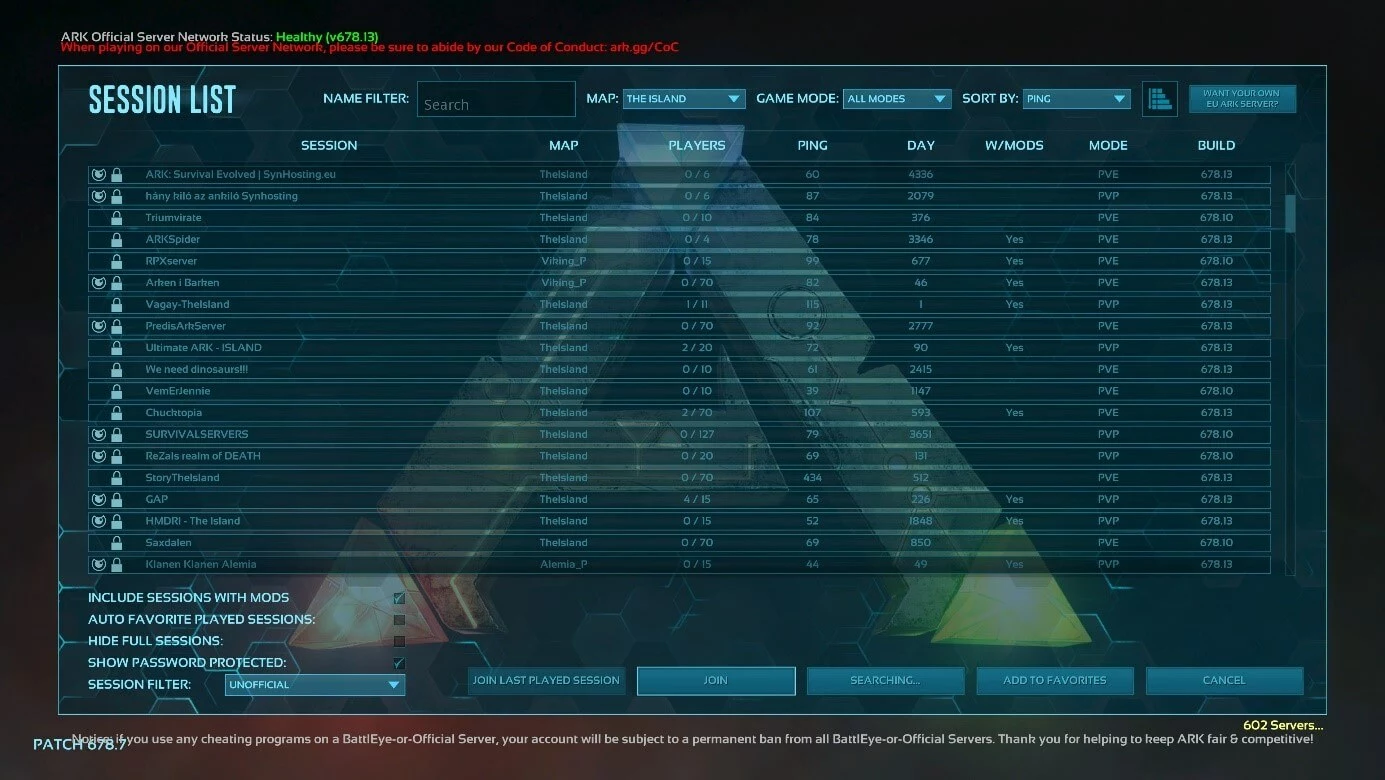
The server will now run with the default setup selected - until you exit SteamCMD or shut down the server. To join the game world, the following steps are required.
- Launch ARK: Survival Evolved via Steam on your computer.
- Click on ‘Join ARK’.
- Set the server filter to ‘Unofficial’.
- Find your ARK server in the listing and click Join.
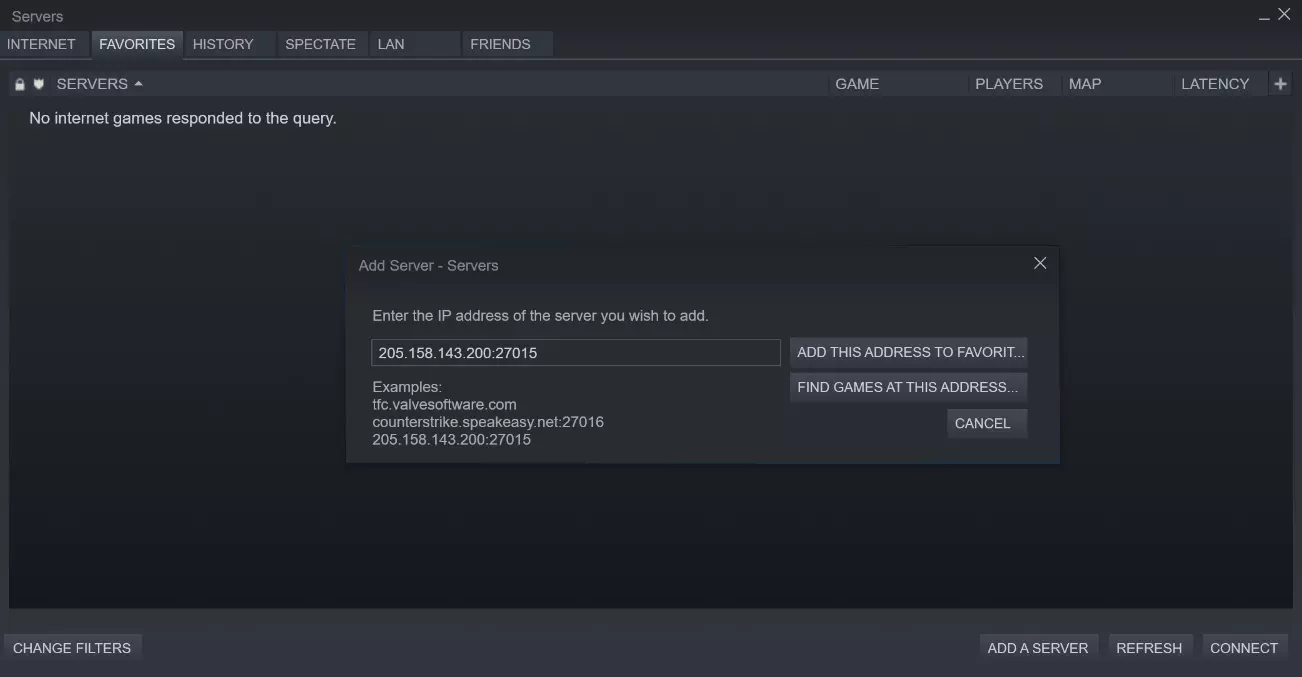
If your server does not appear in the online server list, you can also add it to your favourites. To do this, click on ‘View’ and ‘Servers’ in the Steam client one after the other. Switch to the ‘Favorites’ tab and type in the IP address of your ARK server with port 27015 appended. Finally, press ‘Add this address to favorites’:
Make a statement with your own .gg domain and let the games begin. Register your own .gg domain now with IONOS.


