How to back up Windows 8 computers: tutorial
To ensure that your data is not lost in the event of a system crash, it’s a good idea to create backups regularly. In Windows 8, you won’t have to install any additional software to backup important files. The operating system provides all the necessary backup features as standard. While Windows 7 included the option to create automatic backups at certain intervals, Windows 8 can also maintain a file history. This option acts like a mini backup, saving only the files in your libraries (documents, music, images, videos, and desktop).
Another option in Windows 8 is to manually create a system image. This ensures that the entire system and not only your personal files can be restored in case of a crash. We’ll show you how to use both options to create a Windows 8 backup.
Windows 8 backups: how to configure the file history
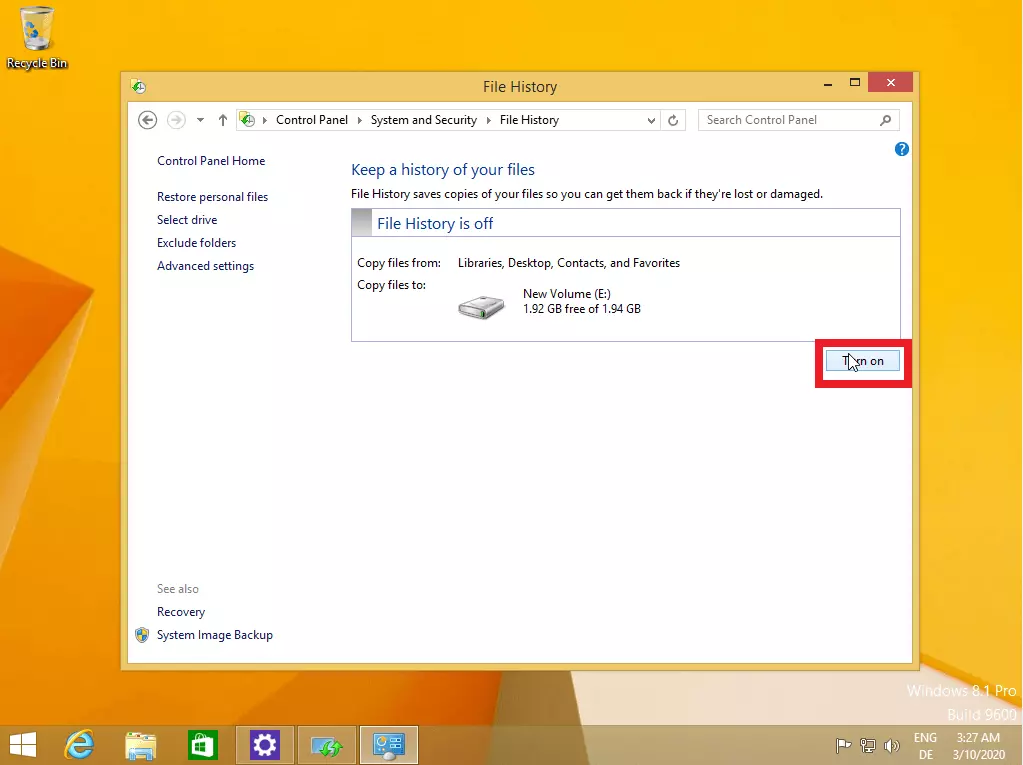
The easiest way to backup in Windows 8 backup is by making use of the automatic file history. Although this method only stores data from personal folders in the partition, Windows automatically saves the data in the background. The key steps to configuring the backup process are summarised below:
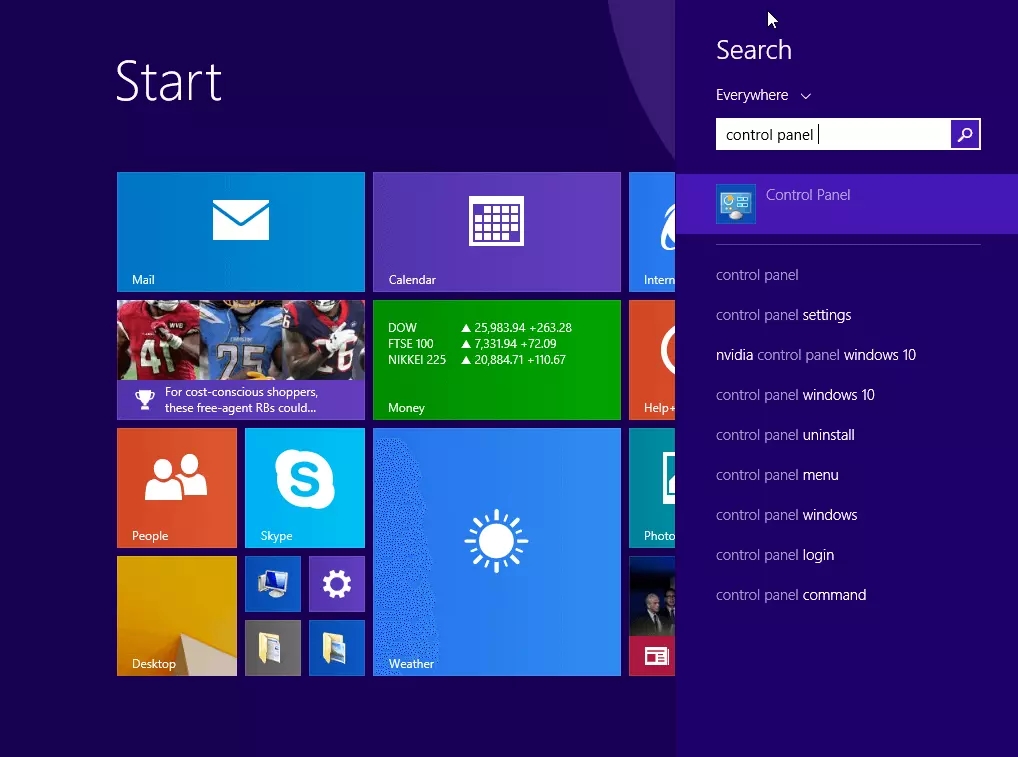
- Open the Control Panel by typing “control panel” in the Start menu search bar.
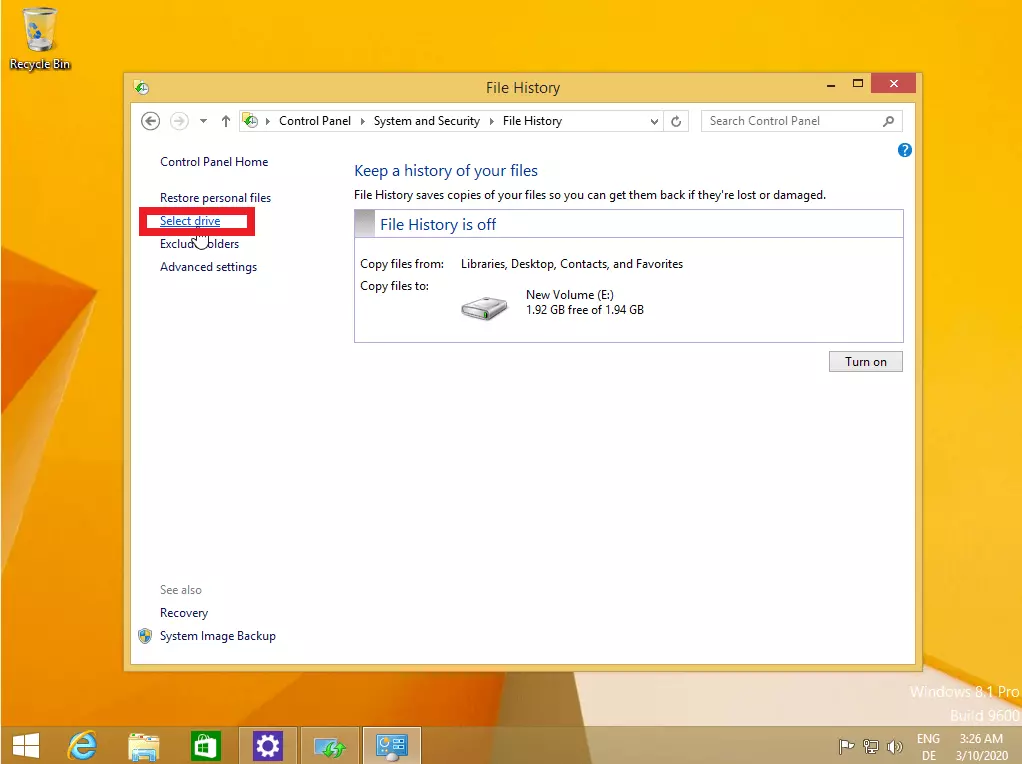
- Search and select a drive for your regular Windows 8 backups (“Select drive”). Make sure that the drive you intend to use is has enough storage capacity. Typically, it’s recommended to choose a drive with at least 32 gigabytes of available space.
- If you’d like to exclude certain folders from the backup, click on “Exclude folders” in the left menu bar. You’ll be given the option to remove individual folders, such as “Images” or “Music” from your Windows 8 backup.
- Click on “Turn on.” All the files in your personal folders will now be automatically saved on the selected drive in the background. If you wish to deactivate the file history process, click on “Turn off.”
- Automatic backup and easy recovery
- Intuitive scheduling and management
- AI-based threat protection
Windows 8: creating a backup of the entire system
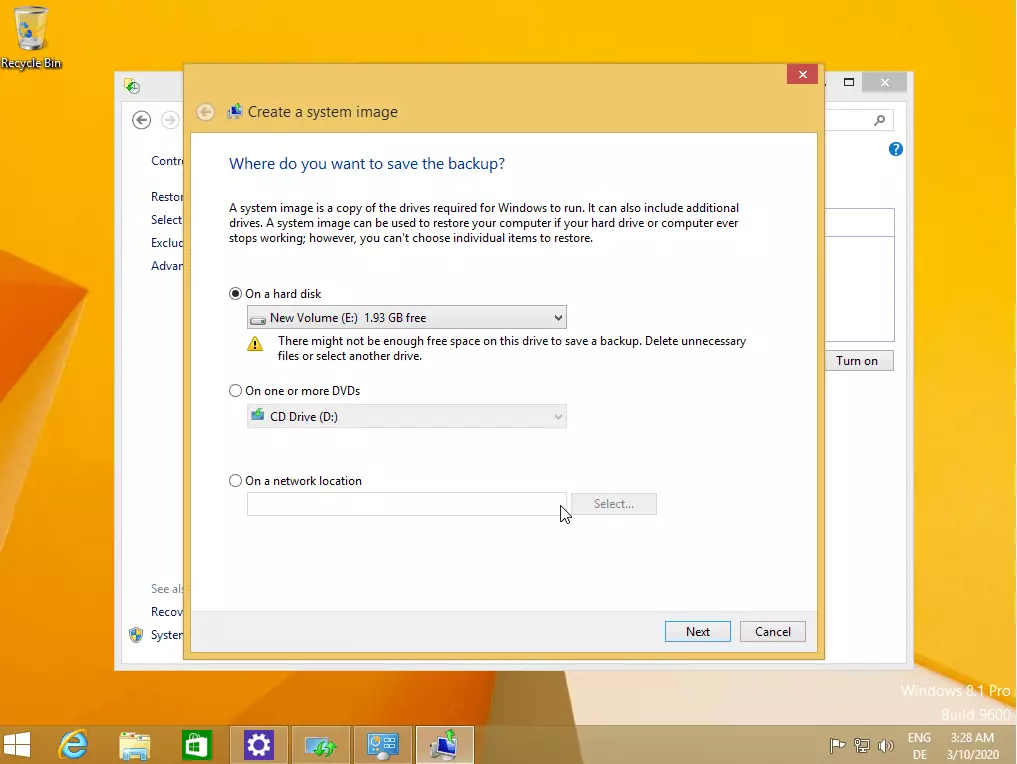
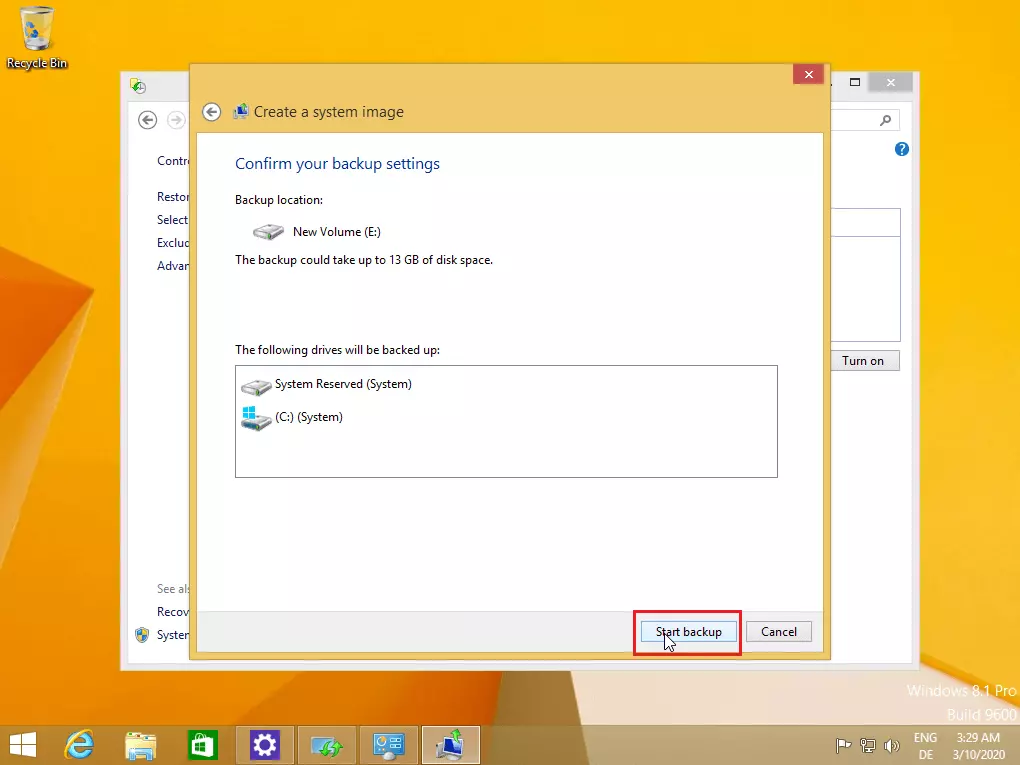
As an alternative to file history, you have the option to create a backup of the entire Windows 8 system. This has a number of advantages. On the one hand, it allows you to quickly restore the backup on a second device following a system crash and return to your work. On the other hand, all the data on a system partition and all your system settings will be saved. This type of backup represents an exact image of your system and all the data stored on it. However, a system image needs to be created manually in Windows 8. You can do this as follows:
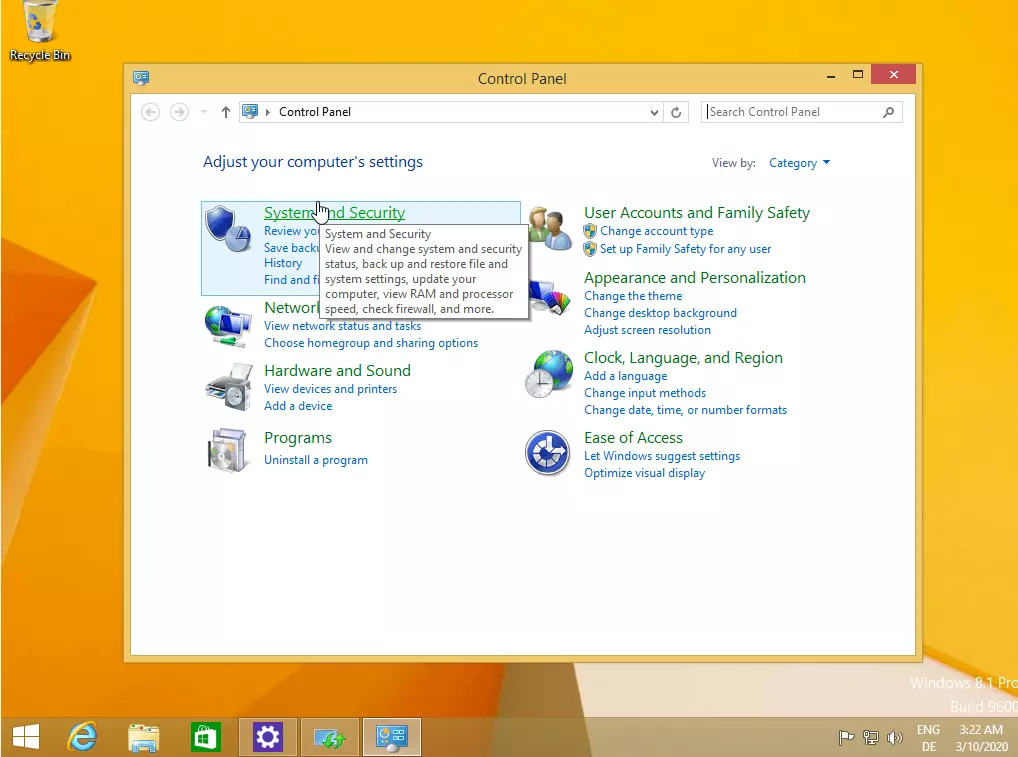
- Open the “Control Panel” and then the category “System and Security.”
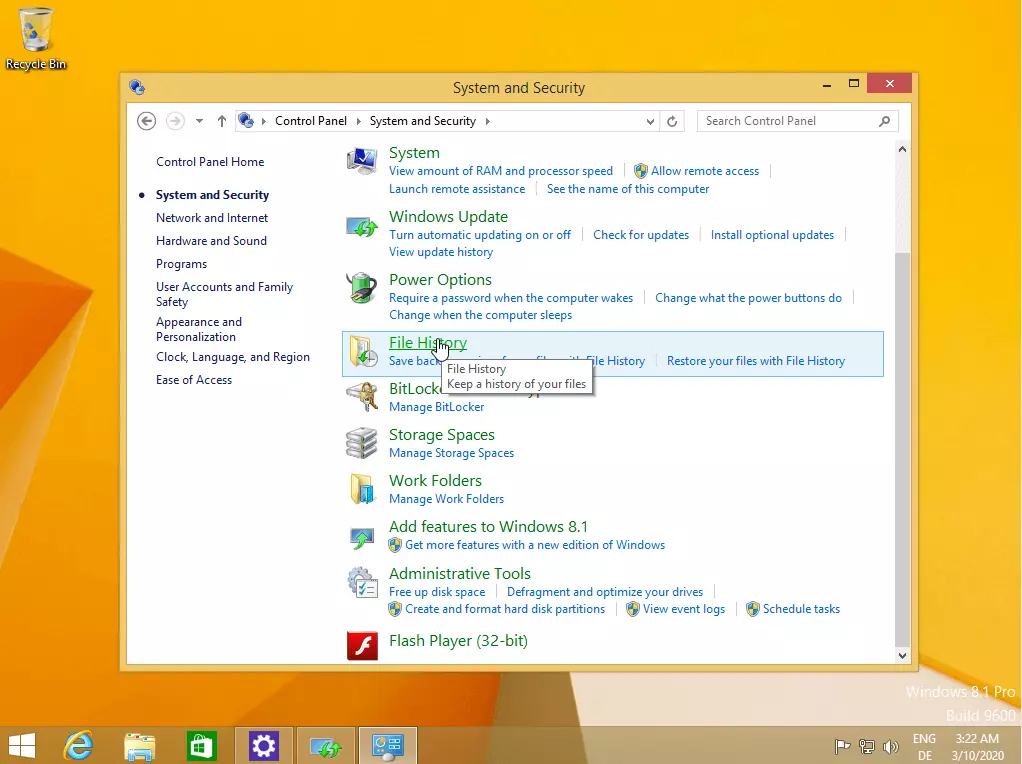
- Click on “File History.”
- In the bottom left, click on “System Image Backup” (this requires administrator rights).
Automatic and regular Windows 8 backups using a cloud solution
System integrated tools aren’t the only ways to perform regular backups. Nowadays, cloud backups such as the IONOS Cloud Backup provide a secure and extendable alternative. Cloud services allow you to create a Windows 8 backup at the touch of a button and can be accessed online at any time and whenever necessary. An even more convenient solution is the HiDrive Cloud Storage, which synchronizes your system via an app at regular intervals and stores your data online. You can then access this data at any time from any system.
After a crash: recovering your Windows 8 backup
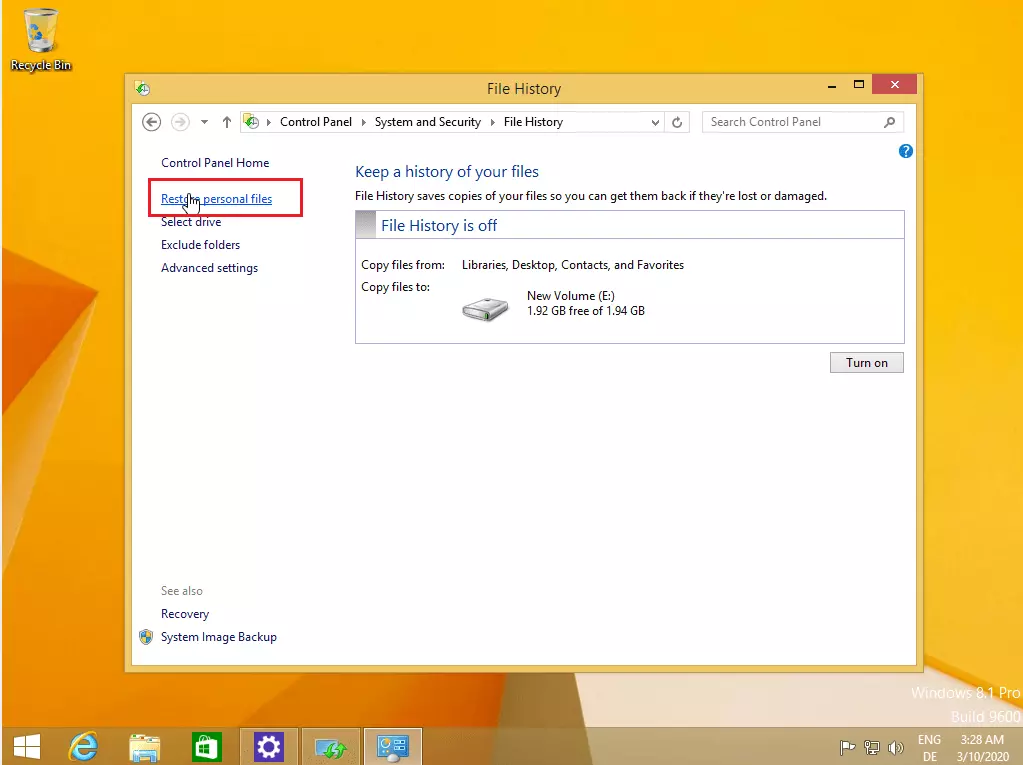
The big advantage of a regular Windows 8 backup is the ability to restore important files when you need to. In Windows 8, open the “File History” option (via “System and Security” in the Control Panel) and click on “Restore personal files”. Select the data you wish to recover:
If you have opted for the “System Image Backup,” you can simply connect the storage medium to your PC. After restarting the system, the assistant will be auto-booted to restore data based on the system image.
You can just as easily create backups in Windows 10 or on Apple devices, which offer native tools for generating partial or complete Mac backups.


