How to use the Windows 11 Clipboard
The Windows 11 Clipboard offers the option to temporarily save several items for later use. We’ll tell you exactly what this handy tool is all about and how to open the Clipboard in Windows 11.
- Up to 50 GB Exchange email account
- Outlook Web App and collaboration tools
- Expert support & setup service
Open and activate the Clipboard in Windows 11: Quick start guide
You can conveniently activate the Windows 11 Clipboard via Settings:
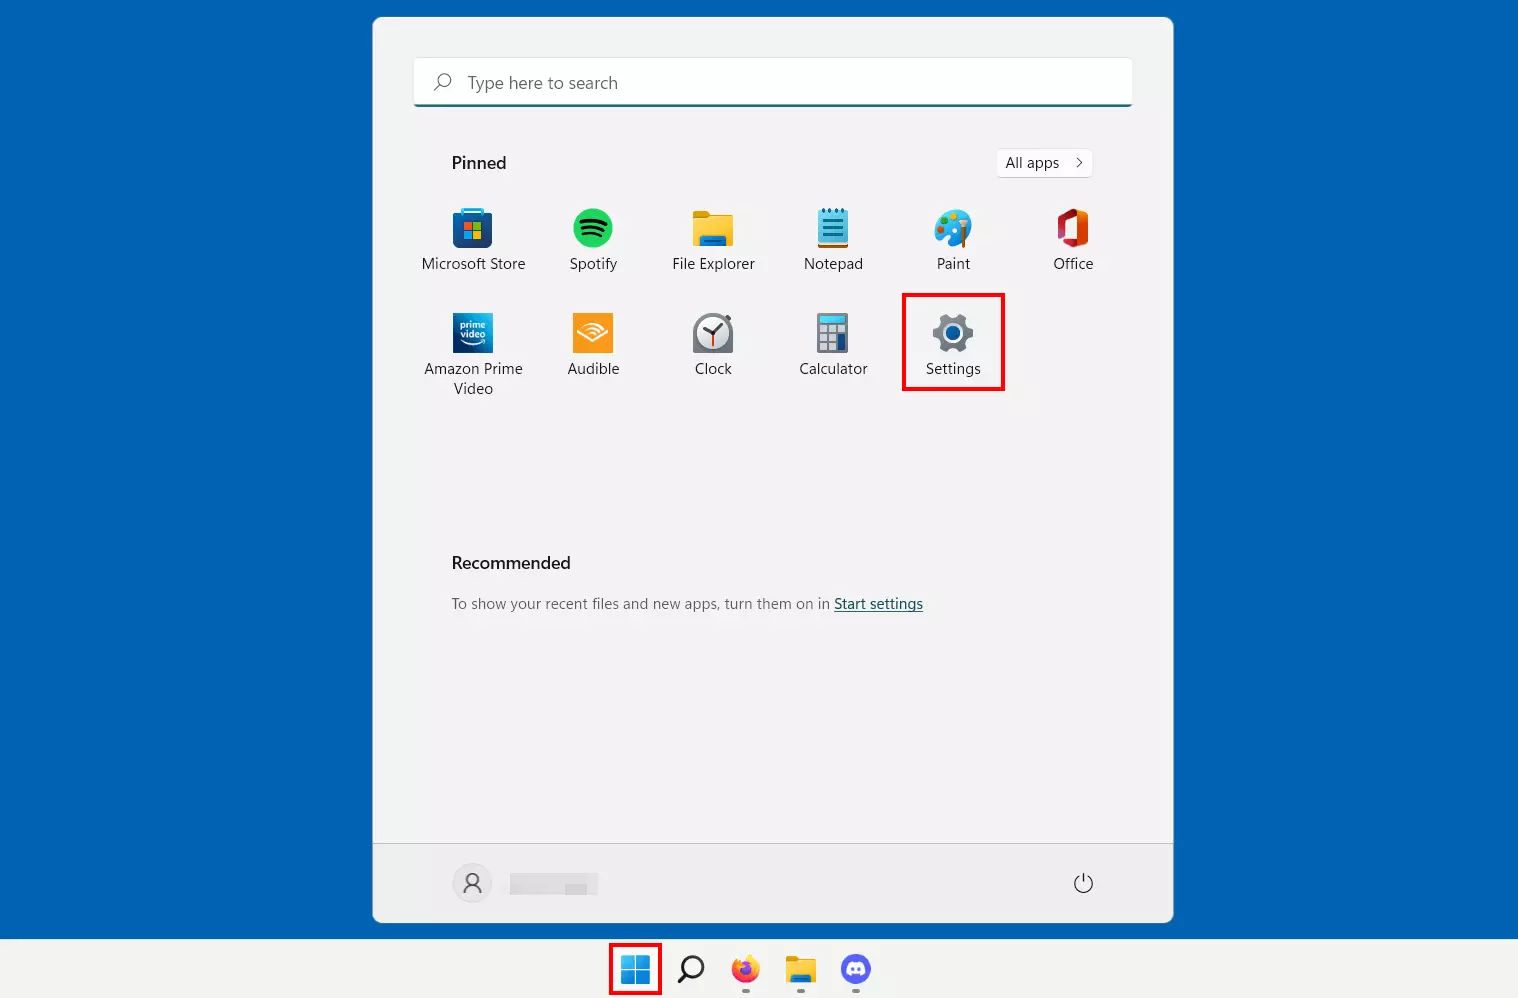
- Open Settings in the Start menu or use the key combination [Windows] + [i].
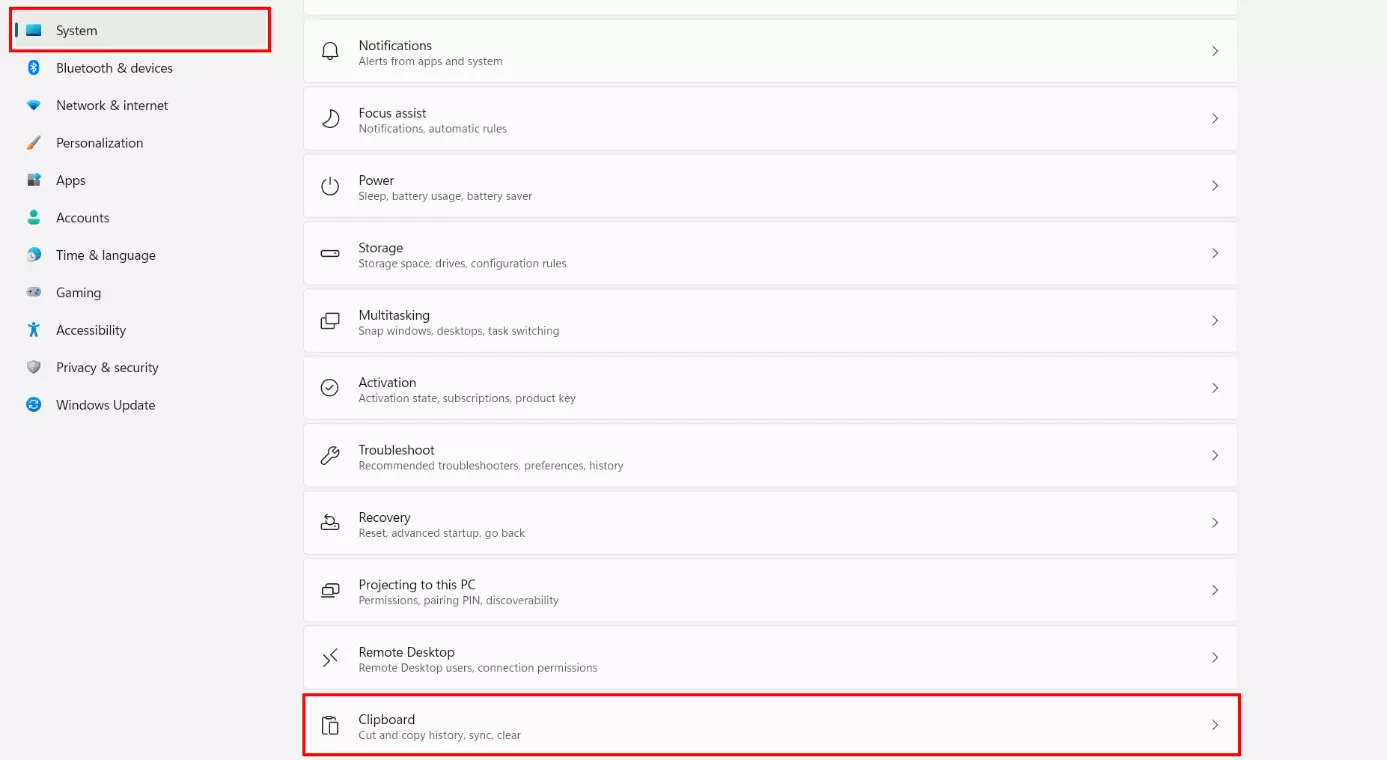
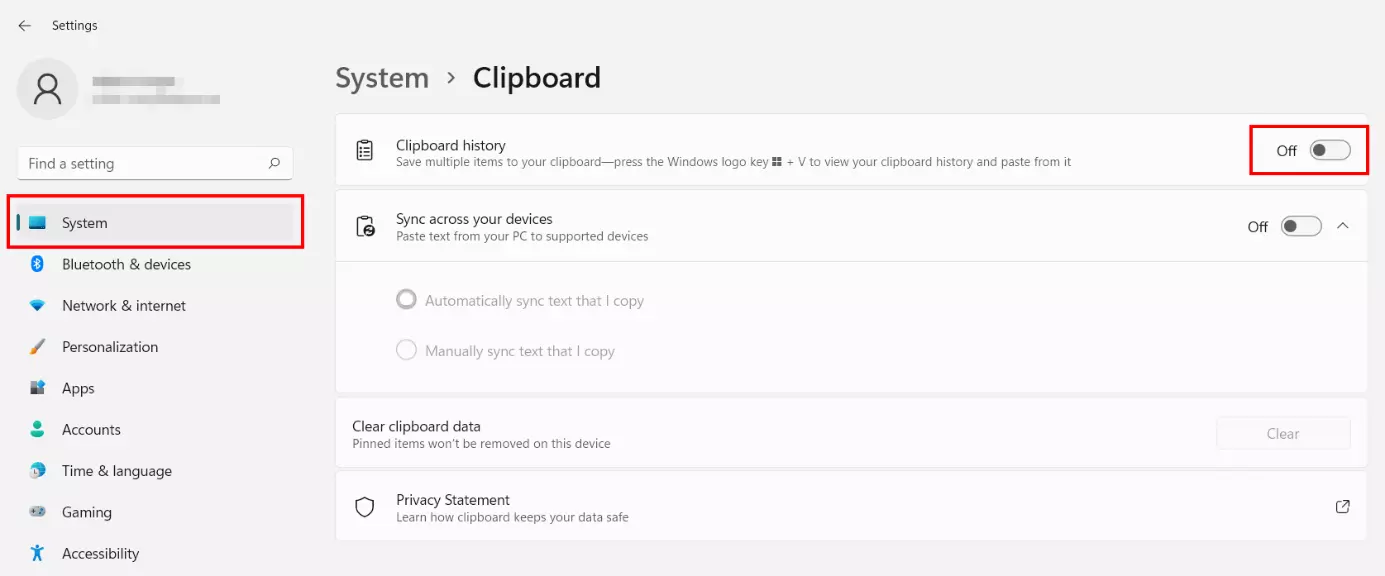
- Click on ‘System’ in the menu and select ‘Clipboard’.
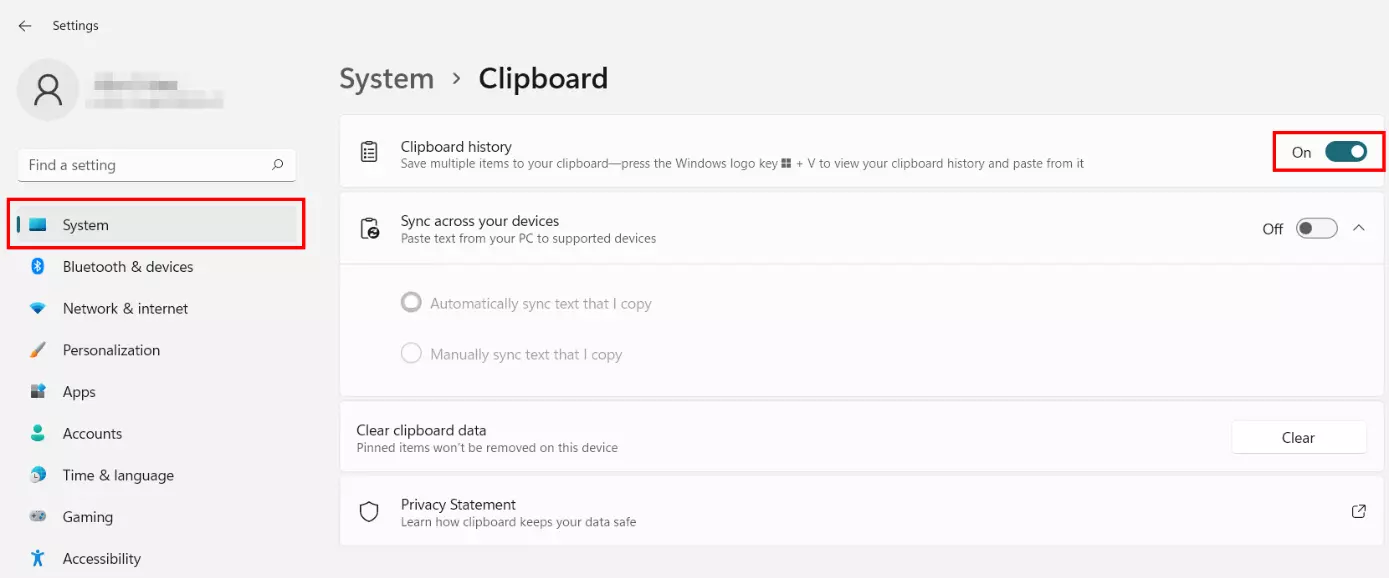
- Move the slider at ‘Clipboard history’ to ‘On’.
If you want to open the Windows 11 Clipboard, you have two options:
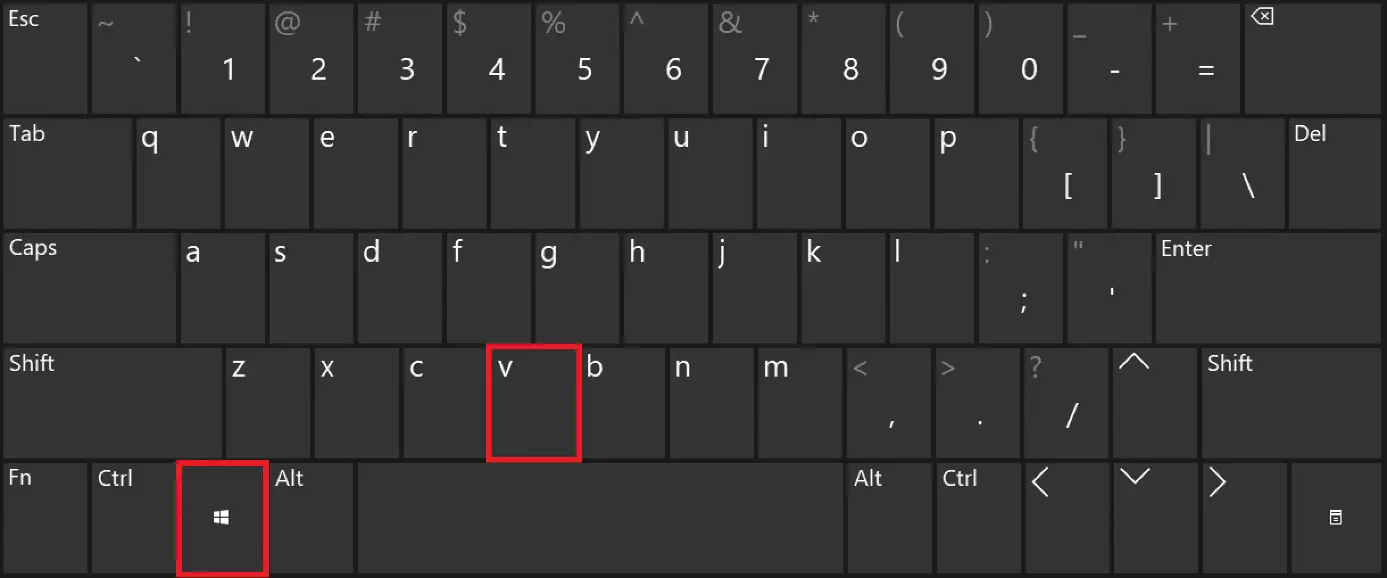
- Use the key combination [Windows] + [V].
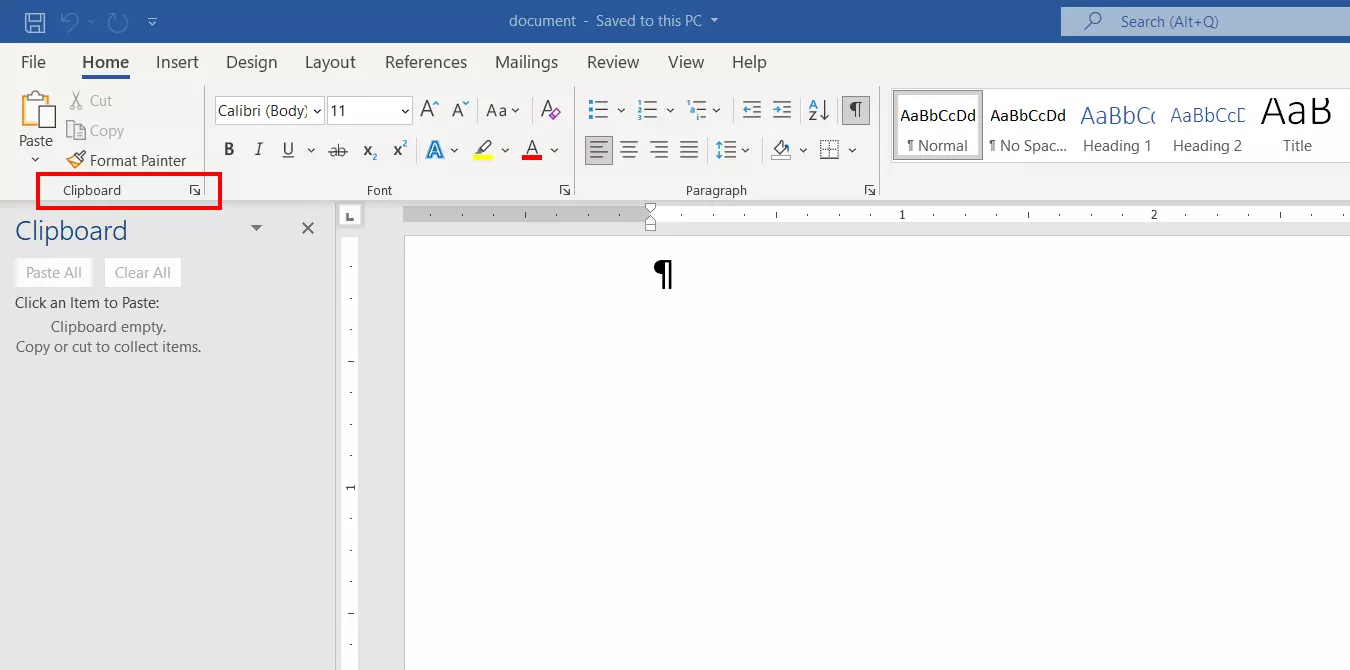
- Click on the individual button in the respective software. For example, in Office programs like Word or Excel, you will find the button in the menu ribbon under ‘Clipboard’.
What is the Windows 11 Clipboard?
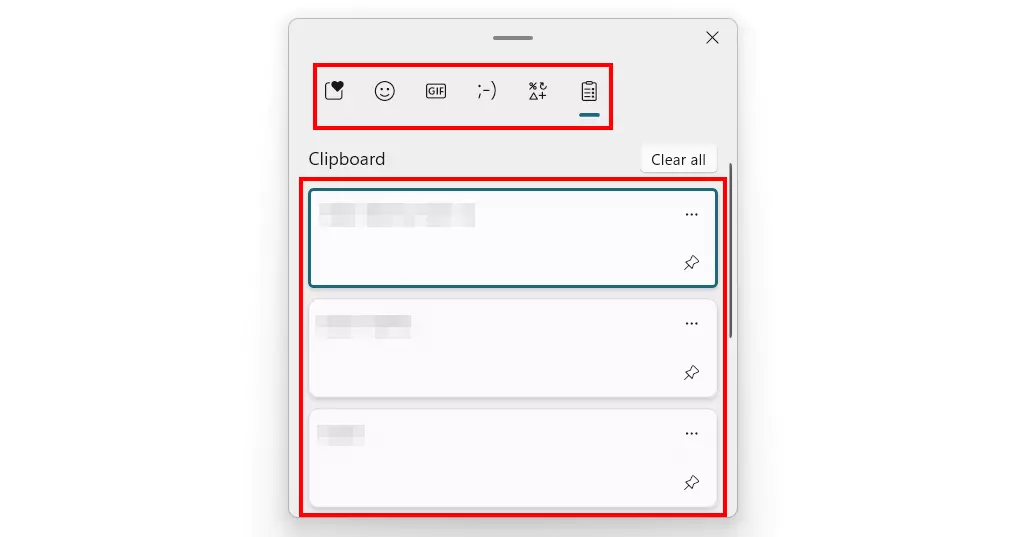
When you copy content on a Windows device, it will automatically go to the clipboard so that it can be pasted into the desired program at a later point. The tool saves up to 25 text, HTML, and Bitmap items, with a maximum file size of 4 MB per item. The Clipboard in Windows 11 also provides quick access to various emojis, kaomojis, GIFs, and icons – regardless of what the user copies.
If you use certain Clipboard items frequently, you can ‘pin’ these items. These favourites will not be replaced by other items once the Windows 11 Clipboard reaches its limit of 25 entries. Pinned items will also remain saved in the clipboard after the device has shut down and will be available for use once it is restarted, while all other saved content will be automatically deleted.
Windows 11 Clipboard: Step-by-step instructions
The most important instructions for working with the Clipboard in Windows 11 have been summarised in detail in the following sections.
Activate Clipboard history
View Clipboard
Add an item to the Clipboard
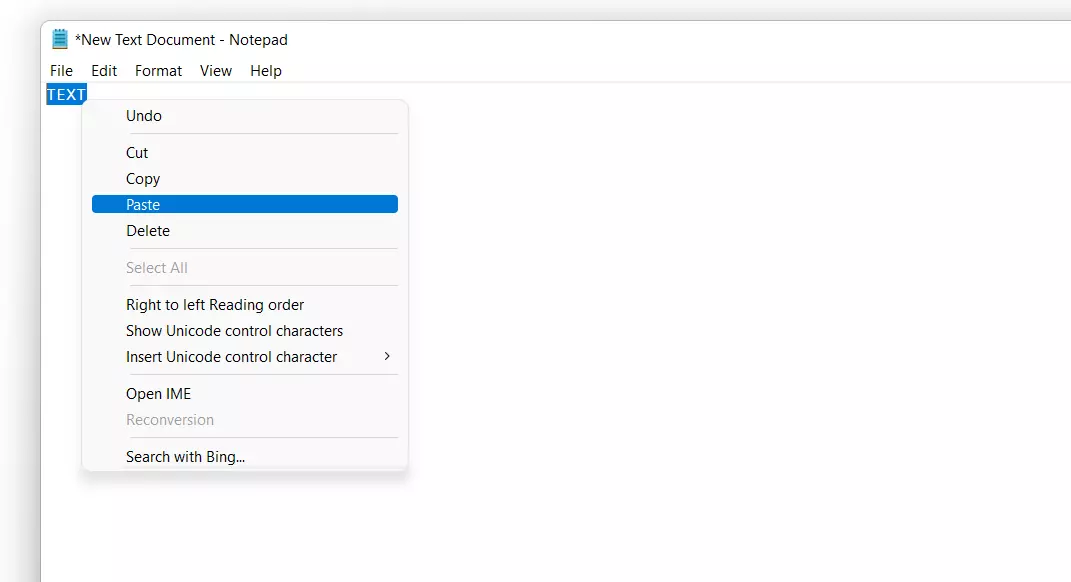
If you have an item that meets the criteria - text, HTML, or Bitmap, with a maximum size of 4 MB - select it and then add it to the Clipboard using the following key combination:
[Ctrl] + [C]Insert item from Clipboard
To insert a saved item or a GIF, icon, emoji, or kaomoji from the Windows 11 Clipboard into another program, first open the tool using the [Windows] key + [V] key combination.
After that, either left-click the thumbnail preview of the desired item, or switch from the Clipboard history to a category to search for a suitable GIF, icon, etc.
Pin item
As previously mentioned, to pin an item to the Clipboard in Windows 11, it must be marked it as a favourite. It will count as one of the 25 items in the Clipboard and will be automatically saved in the Clipboard after Windows has shut down.
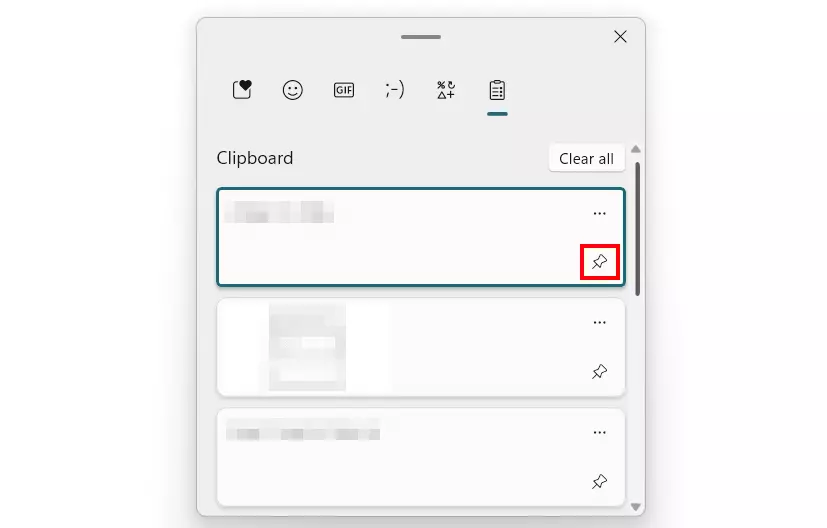
Pinning items works as follows:
- Copy the desired item.
- Open the Windows 11 Clipboard with the key combination [Windows] + [V].
- Click the pin icon beside the desired item in the Clipboard.
If you want to remove the favourite status of a Clipboard item, simply click the pin icon again beside the item to unpin it.
Delete Clipboard history and individual items
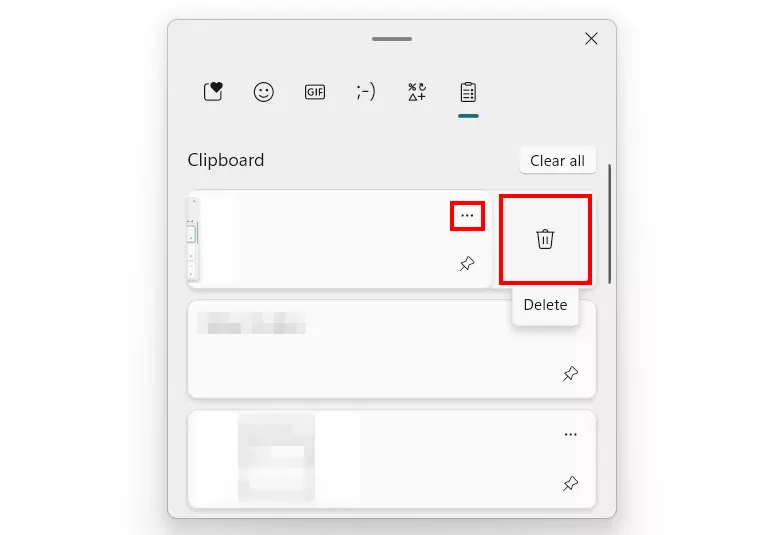
When you restart your device, all items on the Clipboard in Windows 11 that were not pinned are automatically deleted. However, you can also delete individual items or the entire history manually without restarting your device.
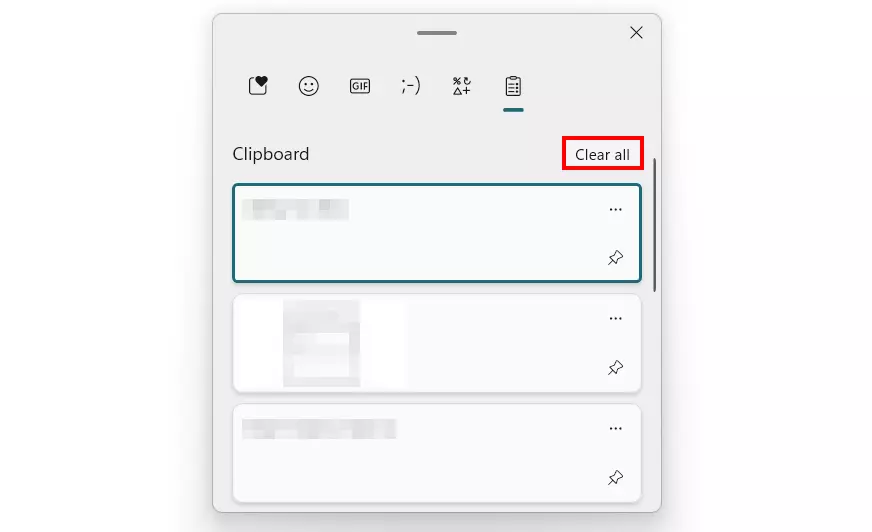
Firstly, open the clipboard with the usual key combination [Windows] + [V]. To delete the entire clipboard history, click ‘Clear all’:
Disable Clipboard
You can disable the Clipboard in Windows 11 at any time if you no longer want to save items when copying. Simply turn off the Clipboard history via the Settings:
- Open Settings via the Start menu or by using the key combination [Windows] + [i].
- Click on ‘Clipboard’ in the ‘System’ section.
- Move the slider at ‘Clipboard history’ to the left (‘Off’).


