How to enable or disable Windows 10 dark mode
While working on your Windows computer, the lighting conditions in your environment may change continuously. To ensure the screen display is readable at all times, you have the option to adjust the screen brightness in Windows. But the operating system offers another feature that ensures ideal legibility in dark working environments. Windows 10 dark mode displays windows and menu elements in dark colours. These display settings go easy on your eyes and save battery life, since energy consumption is reduced. What’s more, the black elements can look sleeker compared to the default white. We show you three ways to activate the Windows 10 dark theme.
- Free website protection with SSL Wildcard included
- Free private registration for greater privacy
- Free 2 GB email account
Option 1: manage Windows 10 dark mode via the settings
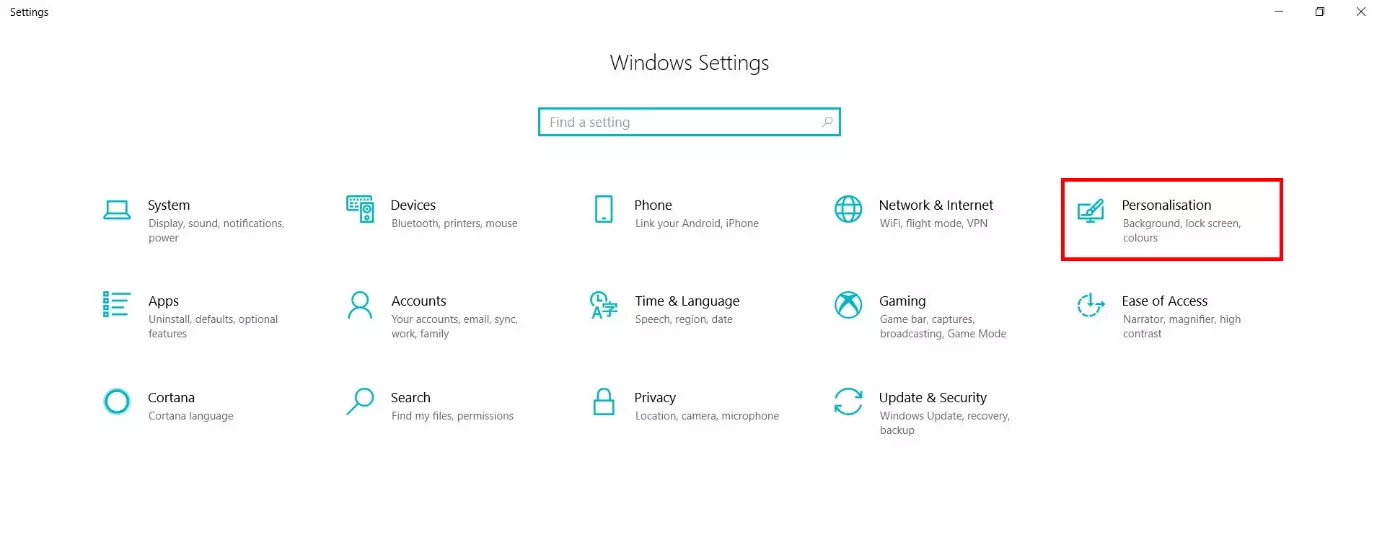
The settings application is the quickest and easiest option for enabling and disabling Windows 10 dark mode. Here, you can define the main settings of Windows 10 in just a few clicks, including the display language, lock screen or sound effects. Follow our step-by-step guide and learn how to enable the Windows 10 dark mode in the personalisation area.
This option is only available from Windows 10 Version 1607.
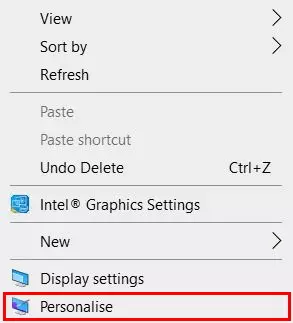
Step 1: open the settings app
Open the settings app directly using the shortcut [Windows] + [i].
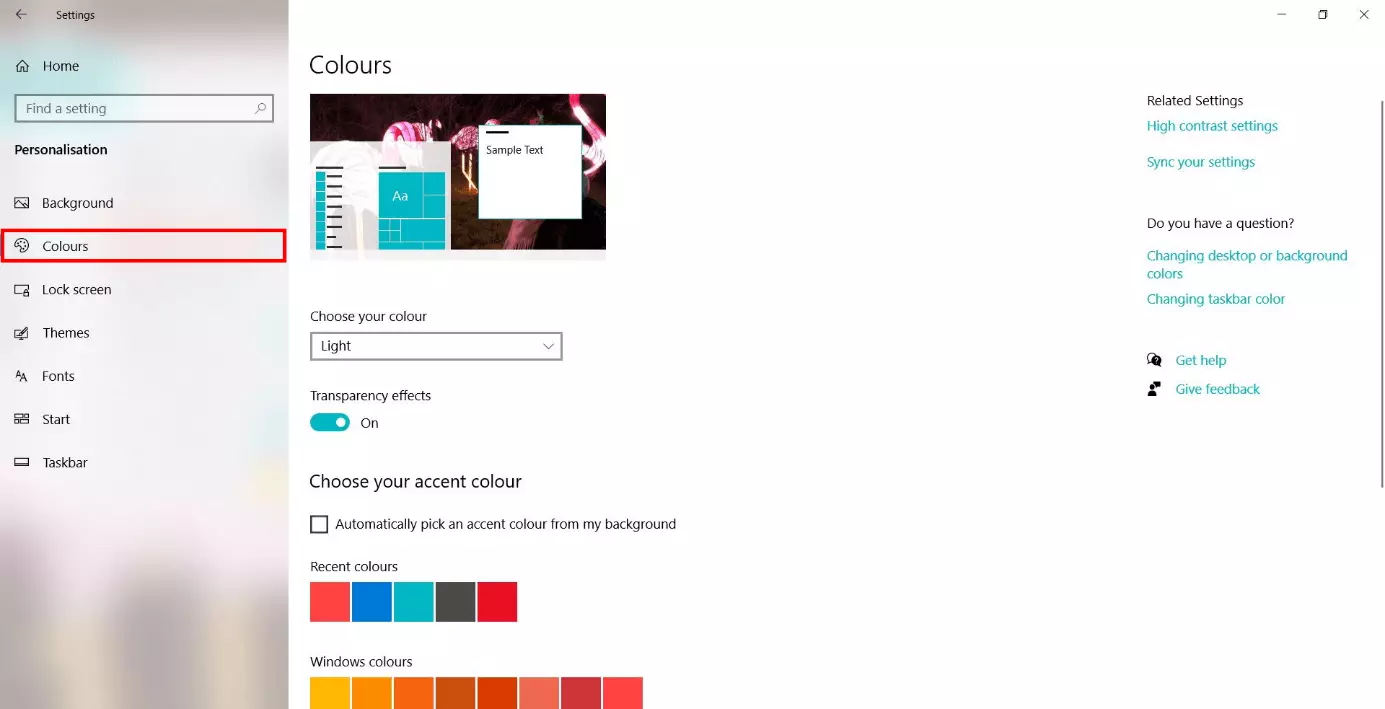
Step 2: access the ‘Colours’ tab in the ‘Personalisation’ menu
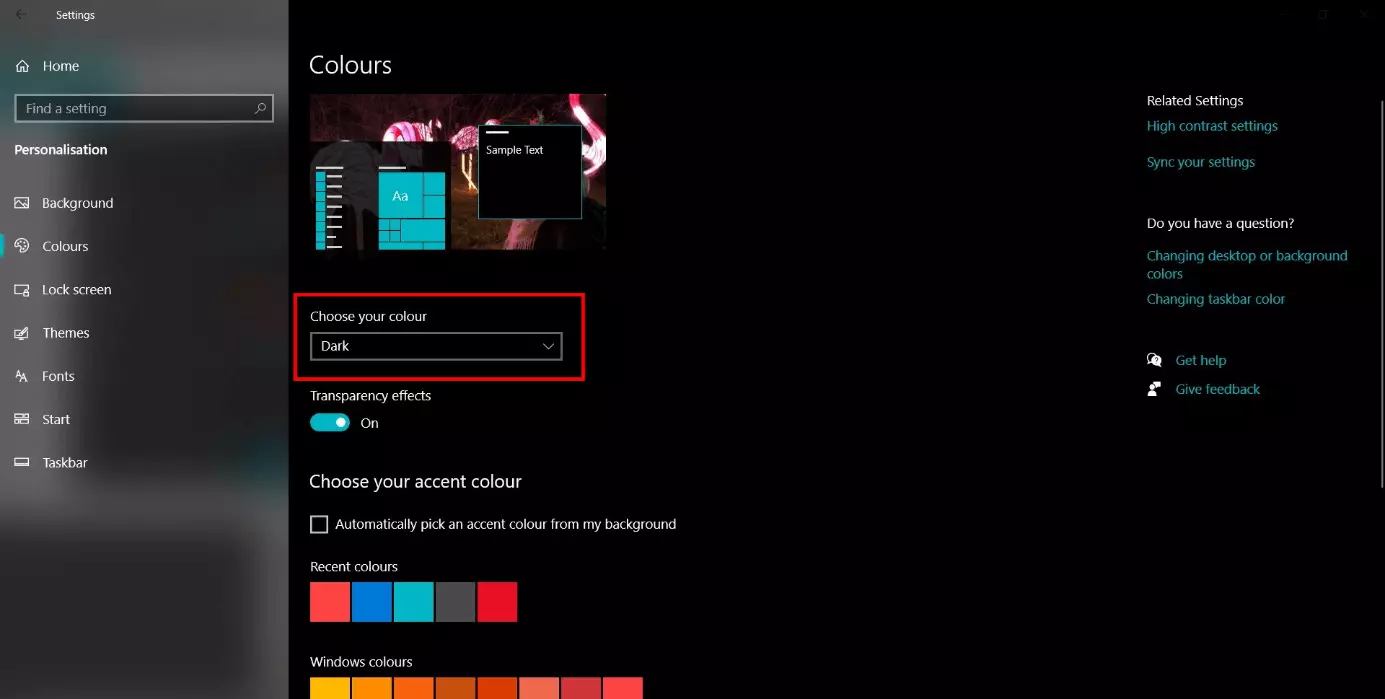
Step 3: activate Windows 10 dark mode
To activate the Windows 10 dark theme, click on the ‘Choose your colour’ drop-down menu and then select the option ‘Dark’. The operating system will immediately apply the setting and display the dark mode, with all elements in black or grey. If you want to deactivate the Windows 10 dark theme at a later time, select the option ‘Bright’ here instead.
Step 4: Define other settings
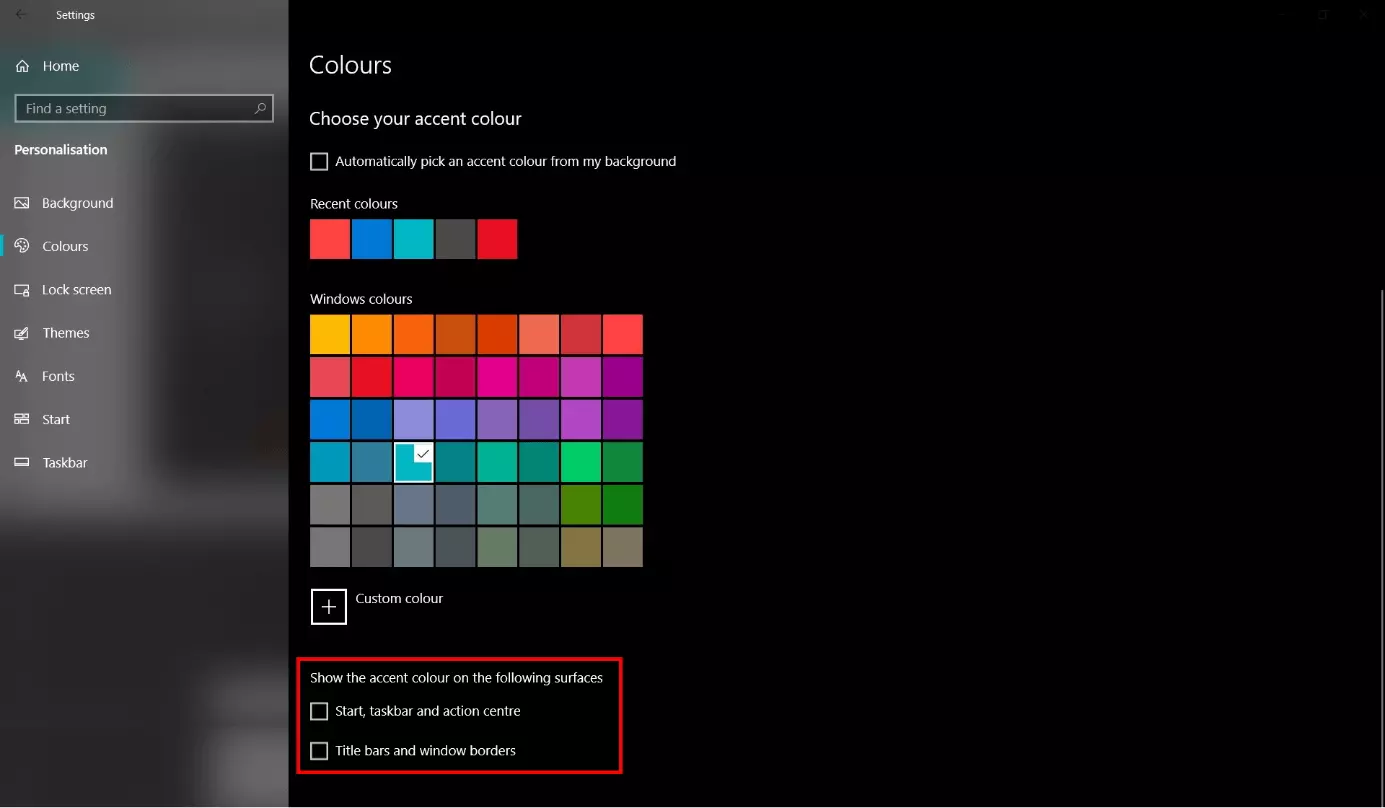
You also have the option to choose an accent colour. If you personalise this setting, Windows will display certain elements in the selected colour. Once you select an accent colour, it will be shown with a checkmark in the top-right corner. Scroll down to define the colour for other areas too, such as for the ‘Start’ section, task bar or info centre.
Option 2: enable/disable the Windows 10 dark theme via Windows Registry
If you’re working with an older Windows 10 version, the option to enable the Windows 10 dark theme is often not yet available in the settings app. In this case, you can activate and deactivate the dark mode in the registry. Simply use the default registry editor – also known as ‘Regedit’.
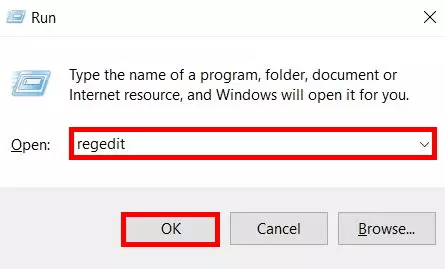
Step 1: open the ‘Run’ dialogue
If the program asks for permission to make changes, confirm by pressing ‘OK’. The registry editor will launch.
Step 2: open the file path for Windows 10 dark mode
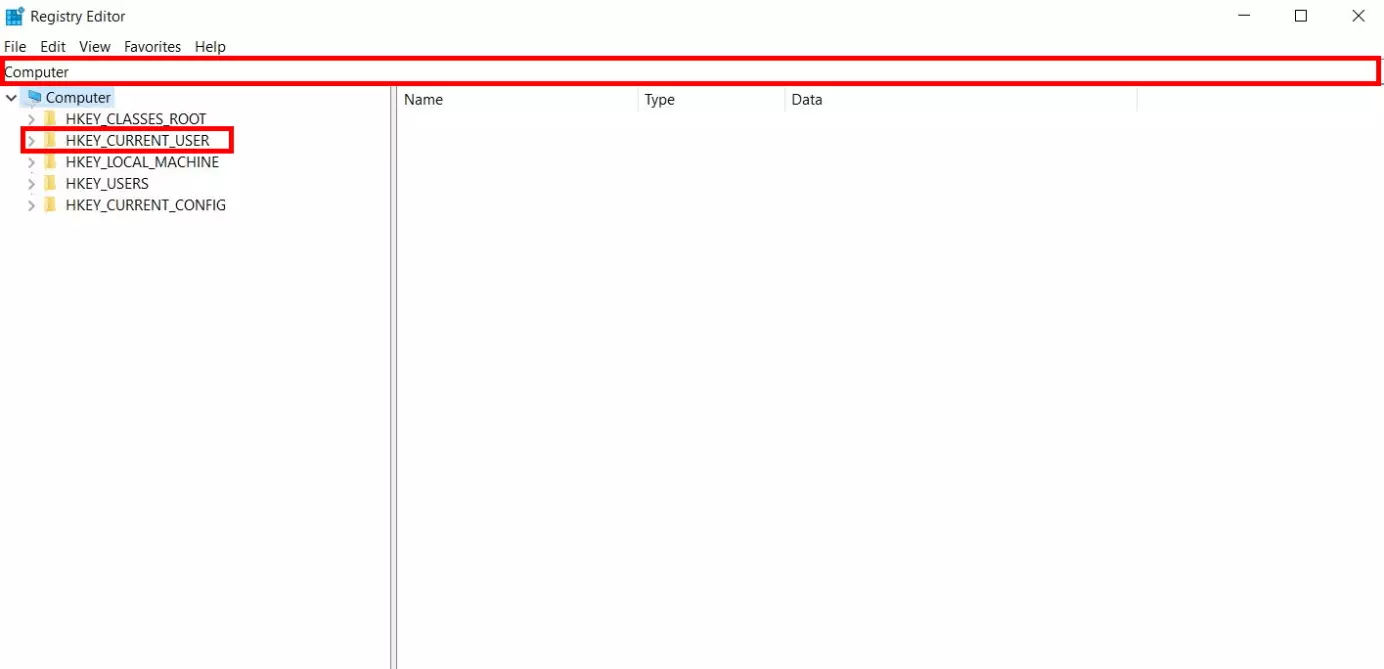
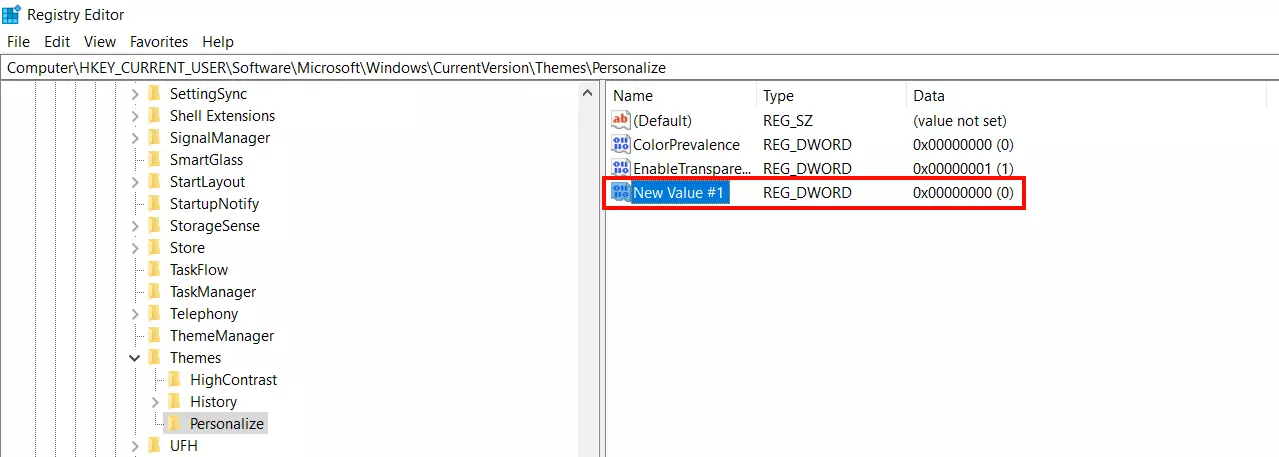
The Windows Registry is a configuration database. In the left area, Regedit gives you access to all content in this database – like how you may be used to with the Windows file manager. First select the drop-down menu ‘HKEY_Current_User’. Next, follow the file path below:
Copy the path ‘Computer\HKEY_CURRENT_USER\Software\Microsoft\Windows\CurrentVersion\Themes\Personalize’ using the key combination [Ctrl] + [C] and insert it into the address bar of the registry editor using [Ctrl] + [V] to gain direct access to the registry entry for the Windows 10 dark theme.
Step 3: activate the Windows 10 dark theme
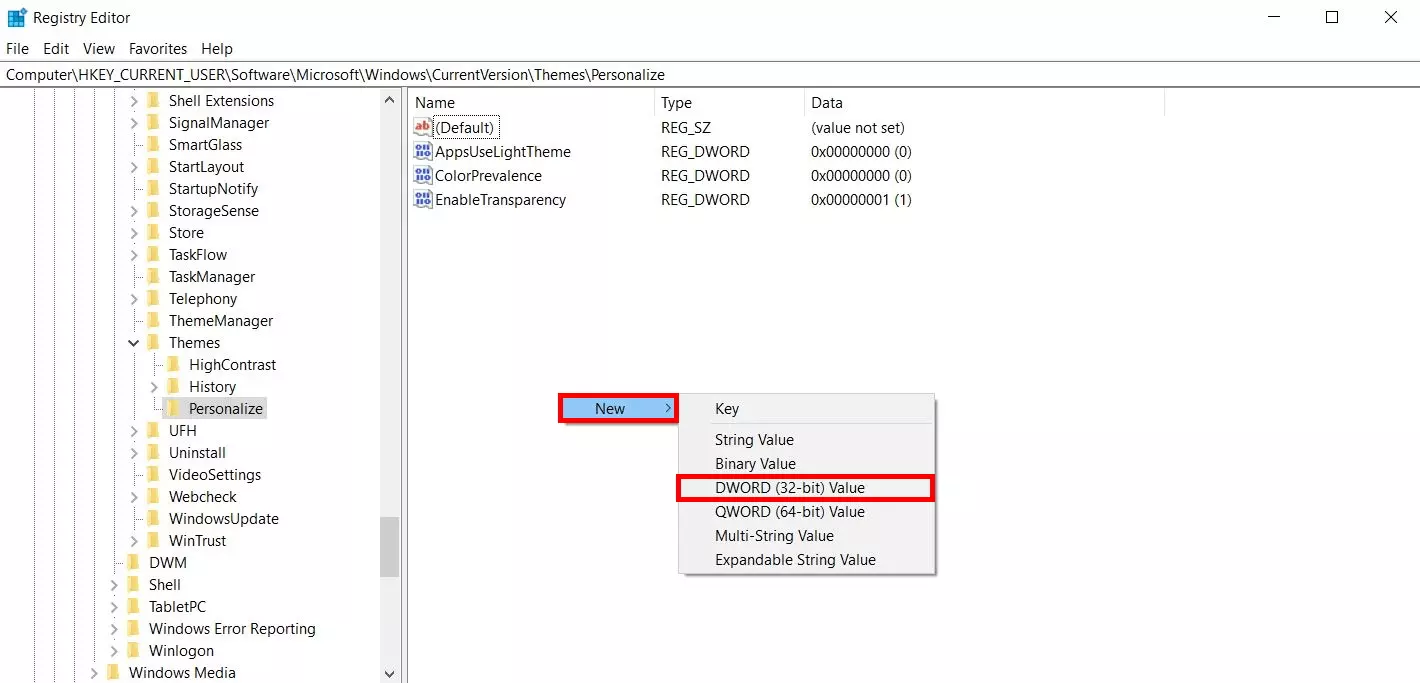
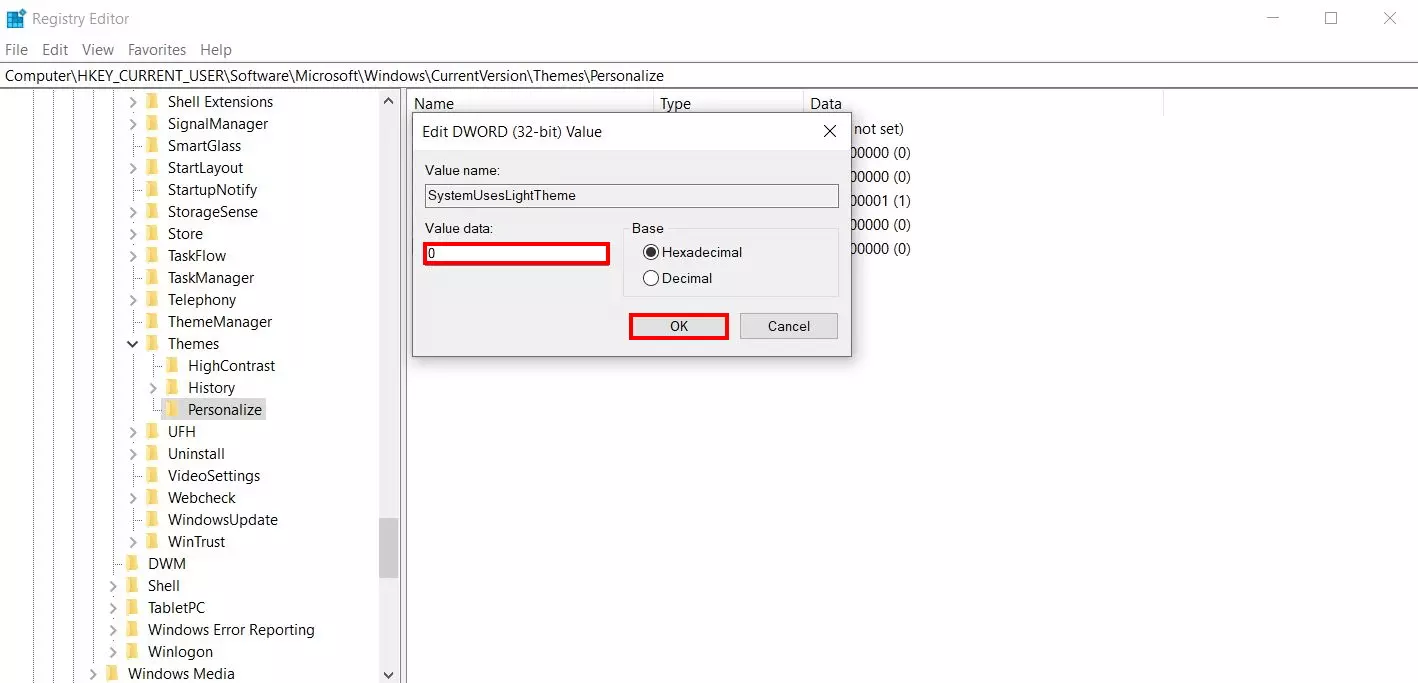
Next, rename the value to ‘AppsUseLightTheme’. Open it by double-clicking. Check whether the entered value equals ‘0’. This means ‘No’ and deactivates the bright mode. If this is not the case, adjust the value accordingly and confirm with OK. This activates Windows 10 dark mode.
To deactivate the dark theme, change the value for the registry entry ‘AppsUseLightTheme’ to ‘1’.
Option 3: use external software for dark mode management
If you often switch between Windows 10 dark mode and the standard bright settings, the process via the registry is rather cumbersome. When activating the dark mode via the system settings is not possible, it’s advisable to install suitable software. This way, you will also be able to switch between a bright and dark mode in older Windows versions. So you won’t need to go through the registry editor. Here are two free tools that are available.
Easy Dark Mode for Windows
The free tool Easy Dark Mode enables you to switch between both themes (‘Bright’ and ‘Dark’) with just a few clicks. The optional switch panel is size-adjustable and is shown before all other windows. Plus, you have the option to enable and disable the dark mode in Chrome (from Version 74) and in Firefox (from Version 63).
Windows 10 Dark Theme Activator
Another free option is the Windows 10 Dark Theme Activator. This tool also lets you conveniently activate and deactivate the Windows 10 dark theme. The disadvantage with this software is that you need to log in and out with your user account to switch between modes.


