What to do when Ubuntu won’t boot
Linux-based operating systems like Ubuntu traditionally require a higher level of technical knowledge than others. Although operating systems have become much more user-friendly in recent years, you might still have to correct serious errors yourself. Here are some solutions if Ubuntu won’t boot.
Is the problem hardware or software-based?
Like many other system-related processes, a faulty boot process can be due to missing or malicious software, as well as damaged hardware. To identify and fix the problem in your system, you first need to determine whether it’s due to the software or hardware. But unless you recently switched up your hardware, a boot problem is usually due to a software error. That’s why it usually makes sense to try out all software-based approaches before looking at the hardware.
In case you’ve tried the software solutions listed below and Ubuntu still won’t boot, it’s entirely possible that your hardware is damaged. Often, either the hard disk or the RAM is responsible. To check the RAM and the hard disk, you can use the tool MemTest86 and Ubuntu’s built-in disk management tool (GNOME Disks). For both, you need to create a bootable medium, either using MemTest86 or Ubuntu’s desktop tool. Find out more about hardware-related problems and possible solutions in our article on why your laptop isn’t starting.
Ubuntu isn’t the only operating system that can be affected by fatal errors. Here’s what you can do if Windows won’t boot.
Boot in recovery mode
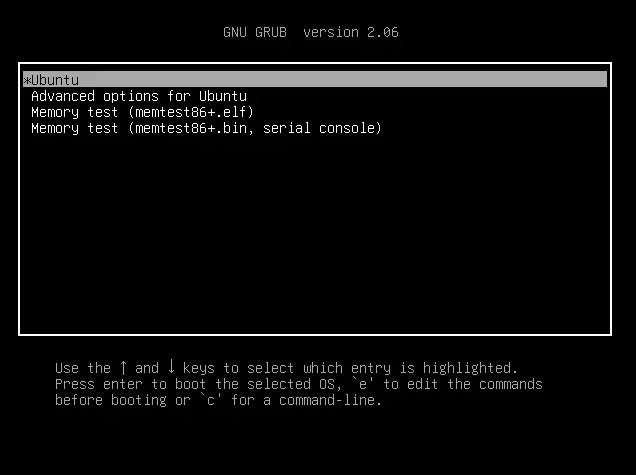
If you’ve already tried to turn your computer on and off, the next thing you should try is booting your system in recovery mode. In recovery mode, your system will only start with the processes that are absolutely necessary for operation. You can do this using GRUB bootloader. A bootloader is a small program that loads the operating system from the bootable medium into memory. To launch GRUB, restart your computer and press the [Shift] key during the boot process.
If your computer has an older motherboard, you may need to use a PS/2 keyboard for the above step, as USB keyboards aren’t recognised until after startup on some older models. But first, try using your usual keyboard.
You should get the following message:

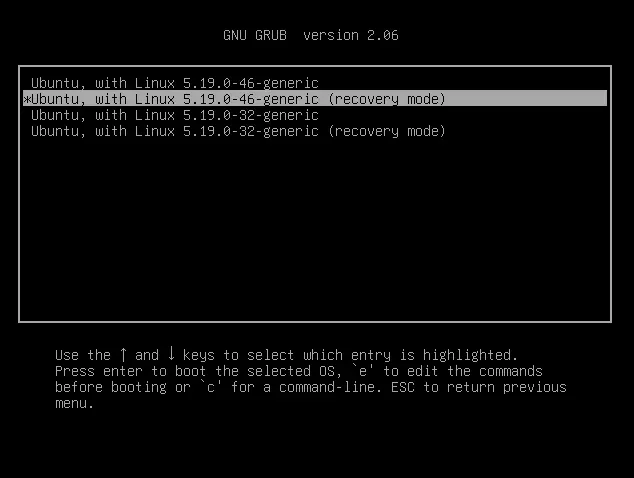
Use the arrow keys to navigate to the advanced options for Ubuntu, then select the recovery mode of the Linux core you want to boot. If you don’t know which core you want to use, you should choose the current one (with the largest version number) installed on your system. But if the problem lies with the Linux kernel, which you always start with, it would also be useful to try an older version, if one is installed.

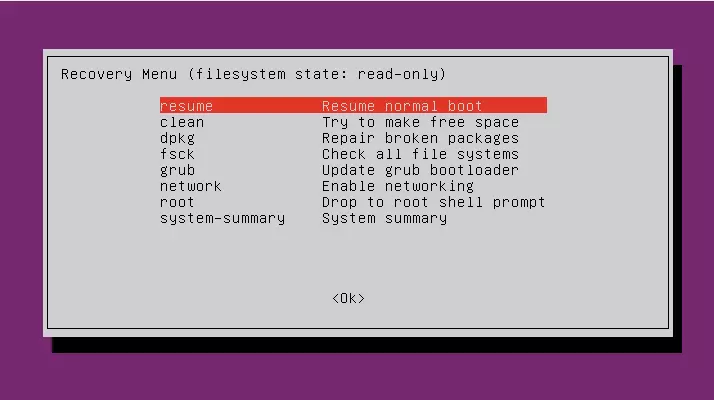
Now you should see a notice listing some recovery options and how they work. The below table shows you which scenario is suited to which option. Although the ‘resume’, ‘grub’ and ‘network’ options are probably not relevant to your problem.
| Option | Scenario |
|---|---|
| resume | You don’t want to boot into recovery mode after all |
| clean | If Ubuntu won’t boot because your hard drive is full, this option will try to free up some space |
| dpkg | If your system won’t boot because of a broken package or program |
| fsck | If your computer won’t start because of a corrupted or otherwise damaged file |
| grub | Update GRUB |
| network | Boot in recovery mode without turning off the network |
| root | If you want to fix the problem manually in a root shell; Attention: Only choose this option if you know exactly what you’re doing! |

If you manage to boot your system using any of the above options, you’ll know what the problem was. You can then take further steps to boot your system in normal mode.
What if GRUB isn’t working?
If the GRUB bootloader doesn’t work for you, it may have been corrupted, for example, by a dual-boot configuration with Windows. In this case, you need to repair GRUB. Luckily, this isn’t too complicated. Just follow these steps:
Step 1: Create installation medium and boot in Ubuntu
To repair GRUB, you’ll need to create an Ubuntu installation medium, as you probably did when you originally installed Ubuntu. The typical way to do this is with a USB drive. After creating a bootable medium, plug it into your computer and boot from it. For this, it may be necessary to change the boot order in your BIOS. Make sure that you don’t reinstall Ubuntu, but that you’re using the operating system on the USB drive. Most of the time, this can be done via the ‘Try Ubuntu’ button.
Step 2: Fix GRUB
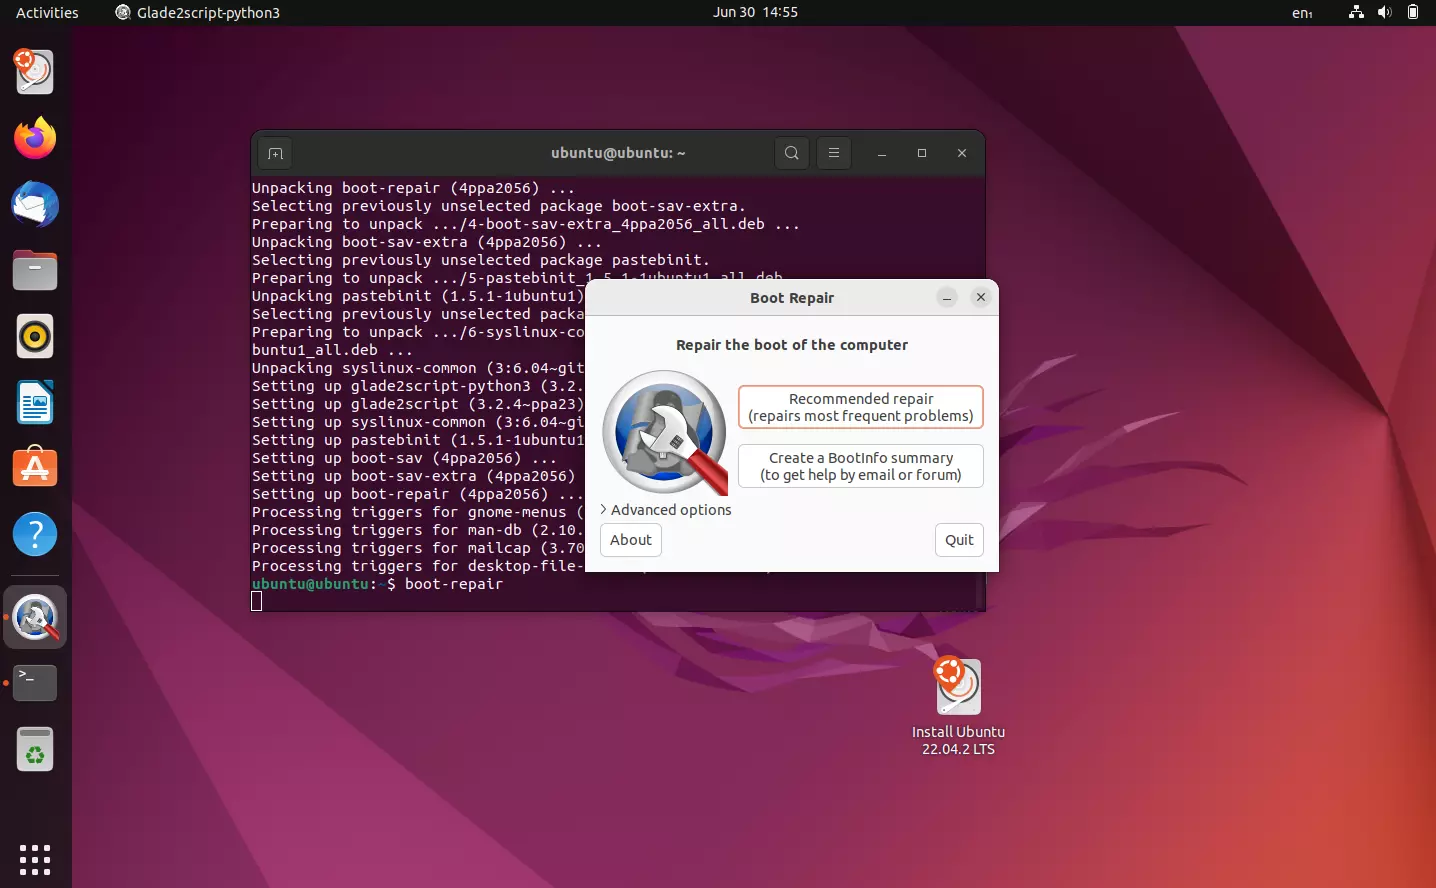
To repair GRUB, we use the Boot Repair tool from Canonical. Open the Ubuntu terminal and enter the following commands:
sudo apt-add-repository ppa:yannubuntu/boot-repair
sudo apt-get update
sudo apt-get install -y boot-repair
boot-repairSelect the Recommended repair option and follow the instructions. Boot Repair will reinstall GRUB for you. Then you can try to boot your system again.

Reinstall Ubuntu
If you’ve tried the recovery options and Ubuntu still won’t boot, reinstalling the operating system might be the solution. Reinstalling Ubuntu sounds very drastic, but you can do it without losing your programs and files. All you need is a bootable Ubuntu live medium. For this, it’s best to use a USB drive. To make a USB drive bootable, you need an Ubuntu ISO that you can download from the Ubuntu website and a program to write to your drive with the ISO such as balenaEtcher.
After creating the live medium, you should plug it into your computer and start booting from it. The installer should detect that an Ubuntu instance already exists on your drive and offer the option to transfer your files and programs.
Because Linux-based operating systems and Windows are very different, many bug fixes have very different operations. Here’s what to do if Windows 11 won’t start.

