How to split a screen in Windows 11
Usually, displaying a single program on a screen in full size suffices. But what if you need to switch back and forth between two or more applications? In that case, you can use the Windows 11 split-screen function to split the screen. We'll show you how to use the feature via mouse click, Snap Assist or using keyboard shortcuts.
- Free website protection with SSL Wildcard included
- Free private registration for greater privacy
- Free 2 GB email account
Windows 11: how to split the screen via mouse click
Displaying multiple windows at the same time can be useful. Suppose you want to view a Word document at the same time as a web browser. You could align the two applications on the screen side by side, but it’s much easier to split the screen into four equal sections. Splitting your Windows 11 screen is easily done using your mouse. Just follow the steps below.
Step 1: Align the window of the active application
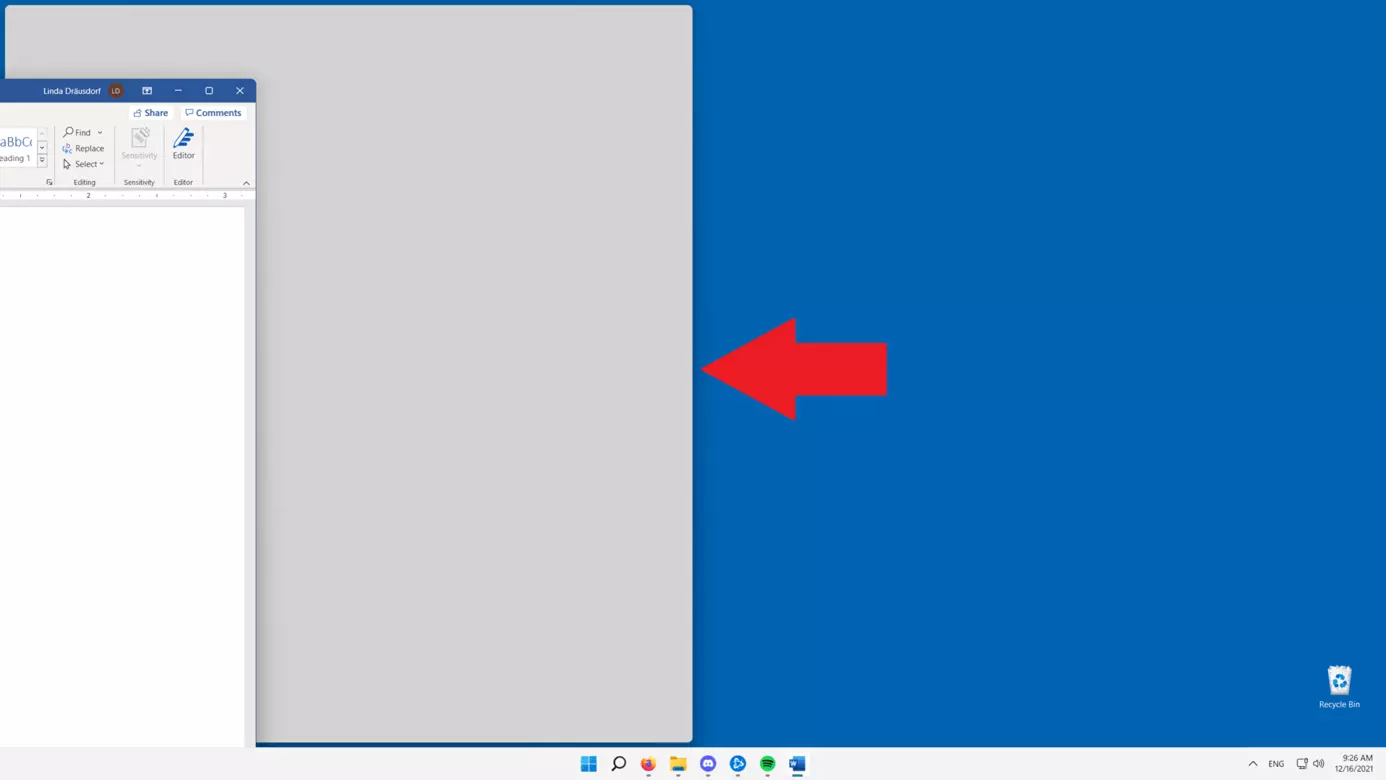
First, align the active window so that it forms the basis for either the two-split or the four-split screen view. For this purpose, click the left mouse button in the title bar of the active program and click the button.
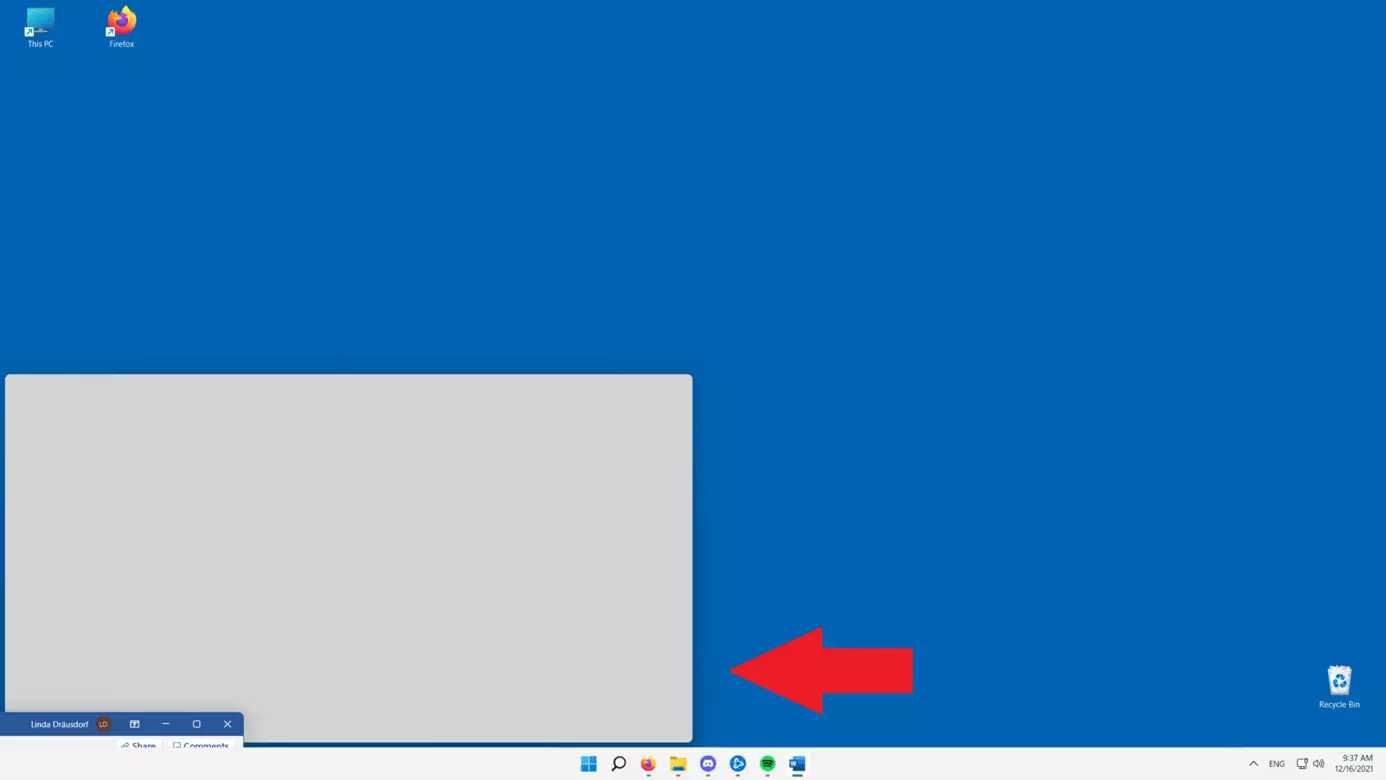
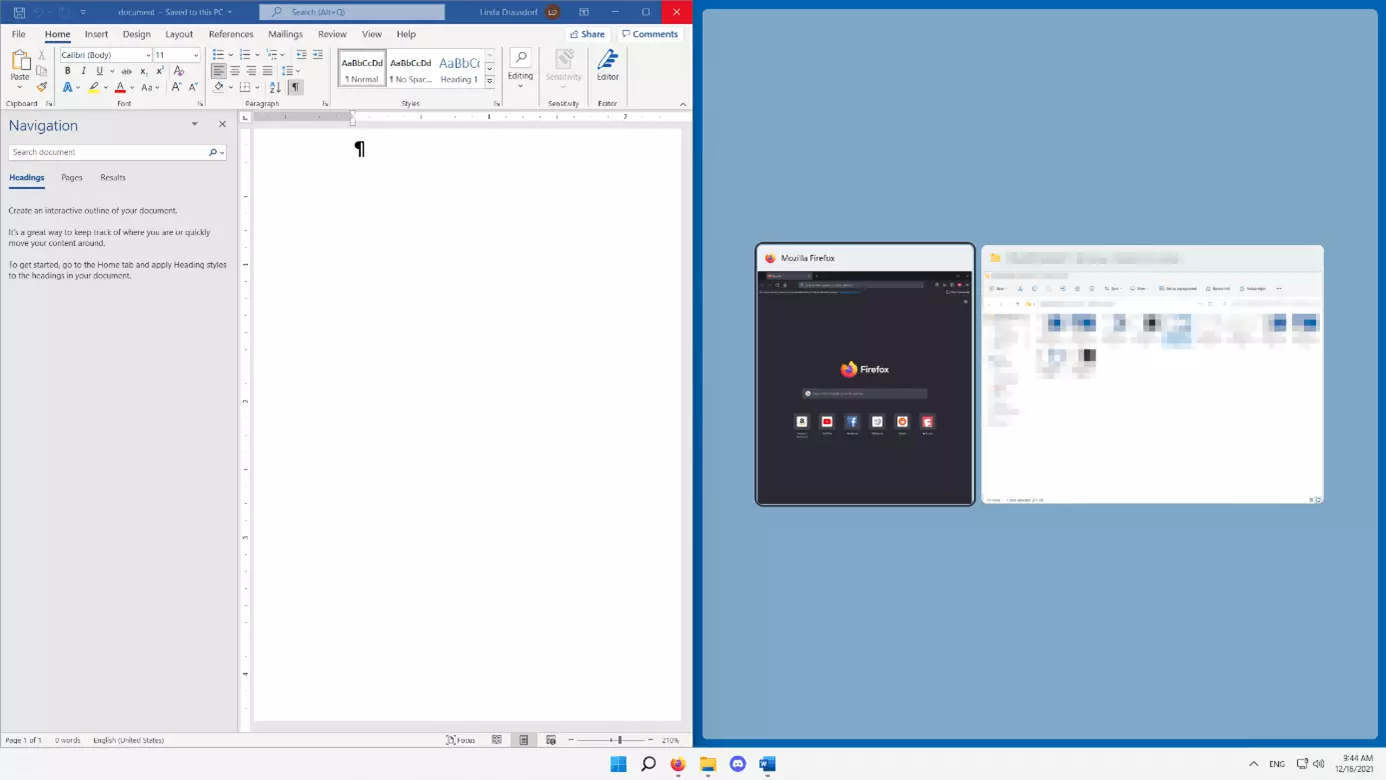
To split the screen into two sections, simply drag the window to the right or left edge of the screen until you get a corresponding preview for the split screen with a grey background. Release the left mouse button.
Want to create your own videos and pictures from Word, Firefox, etc.? Read our guide on how to create screen recordings in Windows 11 conveniently and without additional software.
Step 2: Add windows for splitting the screen in Windows 11
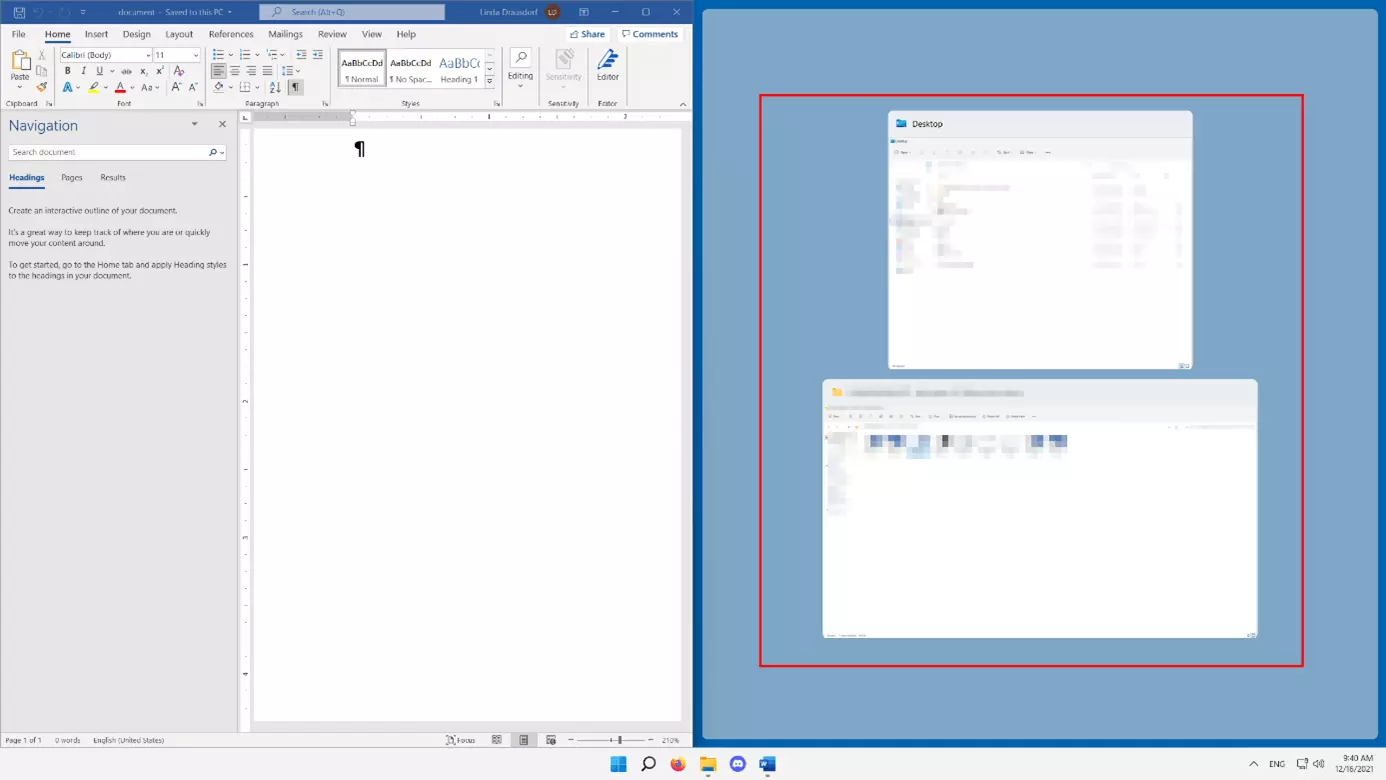
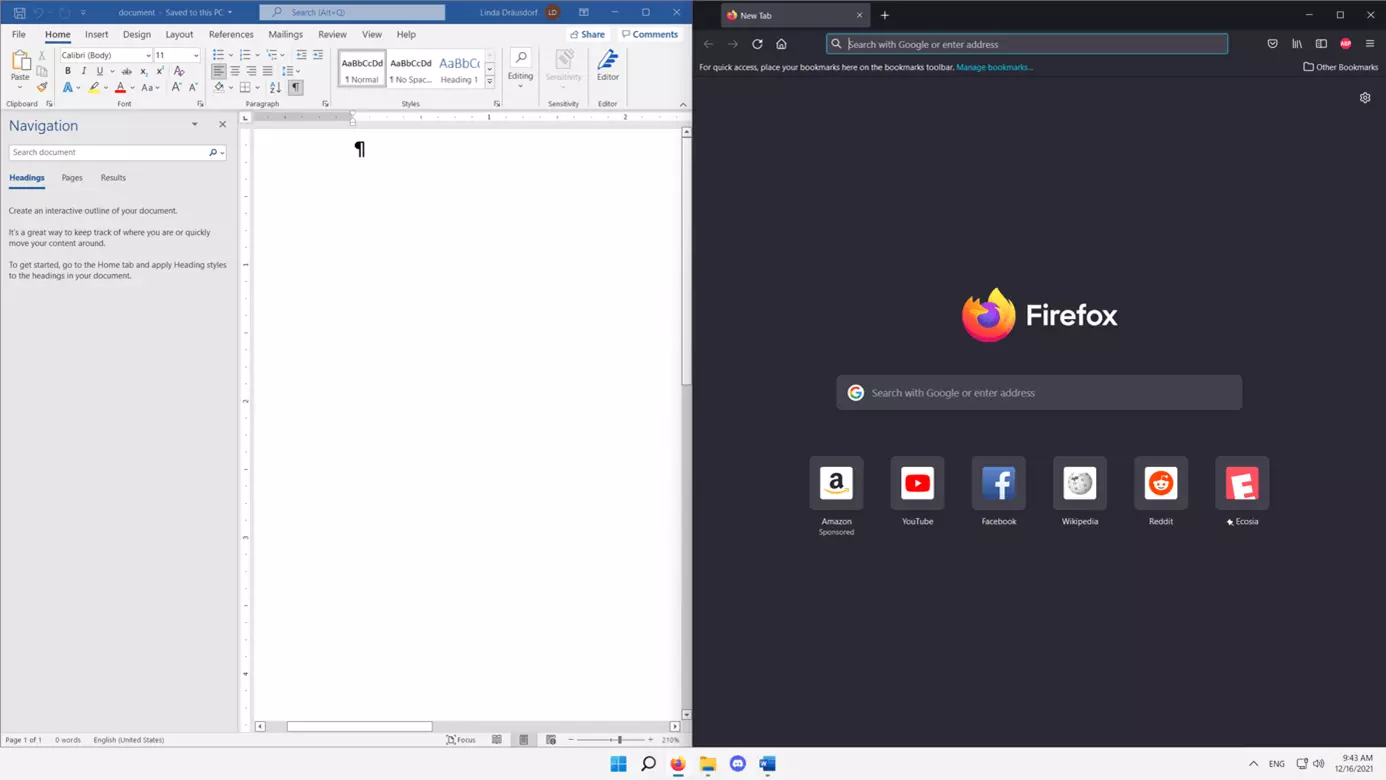
Once you assigned the active window to the left or right side of the screen, Windows 11 automatically presents a thumbnail preview of all other open applications or windows. By left-clicking on the preview of an image, you can rearrange them in second, third, or fourth position.
Using an Apple device instead of Windows? Splitting your screen on a Mac is just as simple.
Windows 11: split the screen using a key combination
When using a mouse to split a screen in Windows 11, dragging the active window to the desired location to trigger the split-screen function can be a bit tedious. For greater convenience use keyboard shortcuts instead.
Step 1: Align the window of the active application
First position the window of the active application in the desired position. The table summarises the relevant shortcuts, all of which are based on a combination of the Windows key and arrow keys:
| Position of active window | Key combination |
|---|---|
| left half of screen | Windows key + left arrow |
| right half of screen | Windows key + right arrow |
| upper left corner | Windows key + left arrow, then Windows key + up arrow |
| lower left corner | Windows key + left arrow, then Windows key + down arrow |
| upper right corner | Windows key + right arrow, then Windows key + up arrow |
| lower right corner | Windows key + right arrow, then Windows key + down arrow |
Step 2: Add windows
Once you’ve set the initial position of the window of your active application, the images of available programs for splitting are previewed. Make a selection using the keyboard arrow keys.
The selected window will be framed with a black border – press Enter to move it to second, third, or fourth position on the screen.
Split screen in Windows 11 with Snap Assist
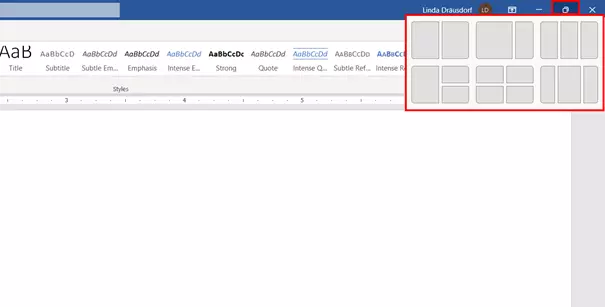
Snap Assist is a third option in Windows 11 to split the screen. The feature is not available for screen-splitting in Windows 10. Once activated, you can choose from six different split-screen variants activated in a single click.
To split the Windows 11 screen using Snap Assist, move the mouse pointer across the ‘Maximize/Minimize’ icon in the title bar of the active window. The system then automatically displays the available layouts for screen splitting. Simply left-click on your selection and choose the second, third, or fourth window in the usual manner.
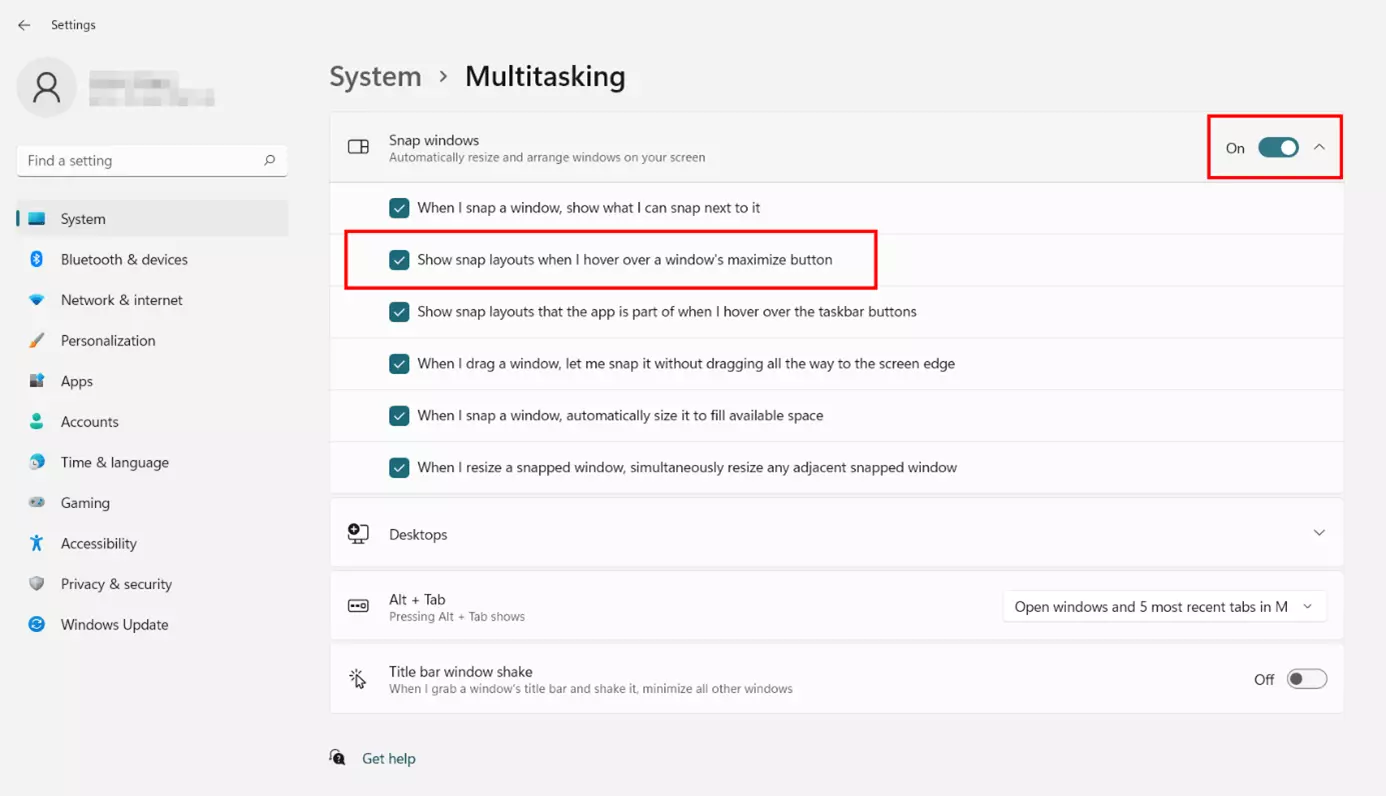
In case Windows 11 doesn’t display the Split Screen layout menu when you hover over the window’s maximisation/minimisation icon, Snap Assist is likely disabled. Simply enable the feature from the system settings:
- Launch the Settings from the Start menu or using the key combination [Windows] + [i].
- Select the ‘Multitasking’ menu item in the ‘System’ section.
- Expand the ‘Snap windows’ menu.
- Activate the option ‘Show snap layouts when I hover over a window’s maximize button’.
- You can enable the ‘Snap windows’ options by moving the slider to ‘On’.


