How to reset Windows 11
If the operating system crashes regularly, applications fail to open, or your PC runs slowly, repairing or even selling a device may seem like the only solution. But before you ship off your devices, it’s usually best to try resetting Windows 11 and restoring the Windows 11 factory settings. We will guide you through the reset process step by step.
- Up to 50 GB Exchange email account
- Outlook Web App and collaboration tools
- Expert support & setup service
What you should do before resetting Windows 11
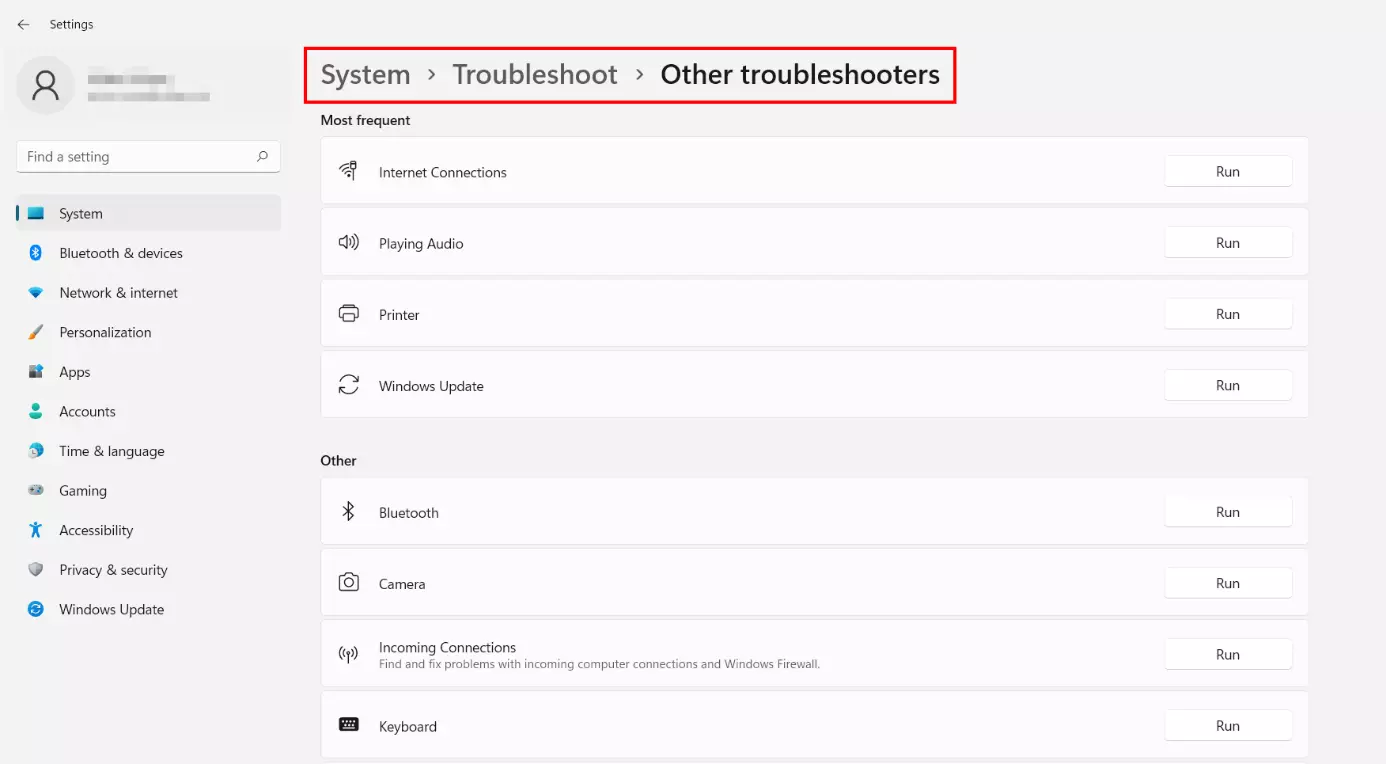
Restoring the Windows 11 factory settings is an interesting alternative to a new installation or a new device because you can keep your files during the reset. Nevertheless, a reset is only advised once you’ve exhausted all other options for fixing system problems. Before you reset the operating system, use the Windows 11 troubleshooting tools to check network adapters, Internet connection, power supply, or printers. You can access the corresponding menu as follows:
- Open the settings by clicking the button of the same name in the Start menu or by using the key combination [Windows] + [i].
- Press the ‘Troubleshoot’ entry.
- Select the ‘Other troubleshooters’ option.
- Run the various troubleshooting tools.
If your troubleshooting efforts are unsuccessful, you can reset Windows 11 as a last resort. Before doing so, however, you should always create a backup of Windows 11 or your personal files. This way you can minimise the risk of data loss and are prepared in case something goes wrong when resetting the system.
Windows 11 reset: step-by-step tutorial
Unlike resetting Windows 10, restoring the factory settings in Windows 11 requires reinstallation of the system software. During the process, you can choose to keep your personal files and whether you prefer a local reinstallation or downloading from the cloud.
Below we’ve summarised the most important steps for a Windows 11 reset.
Step 1: Access the ‘Recovery’ menu
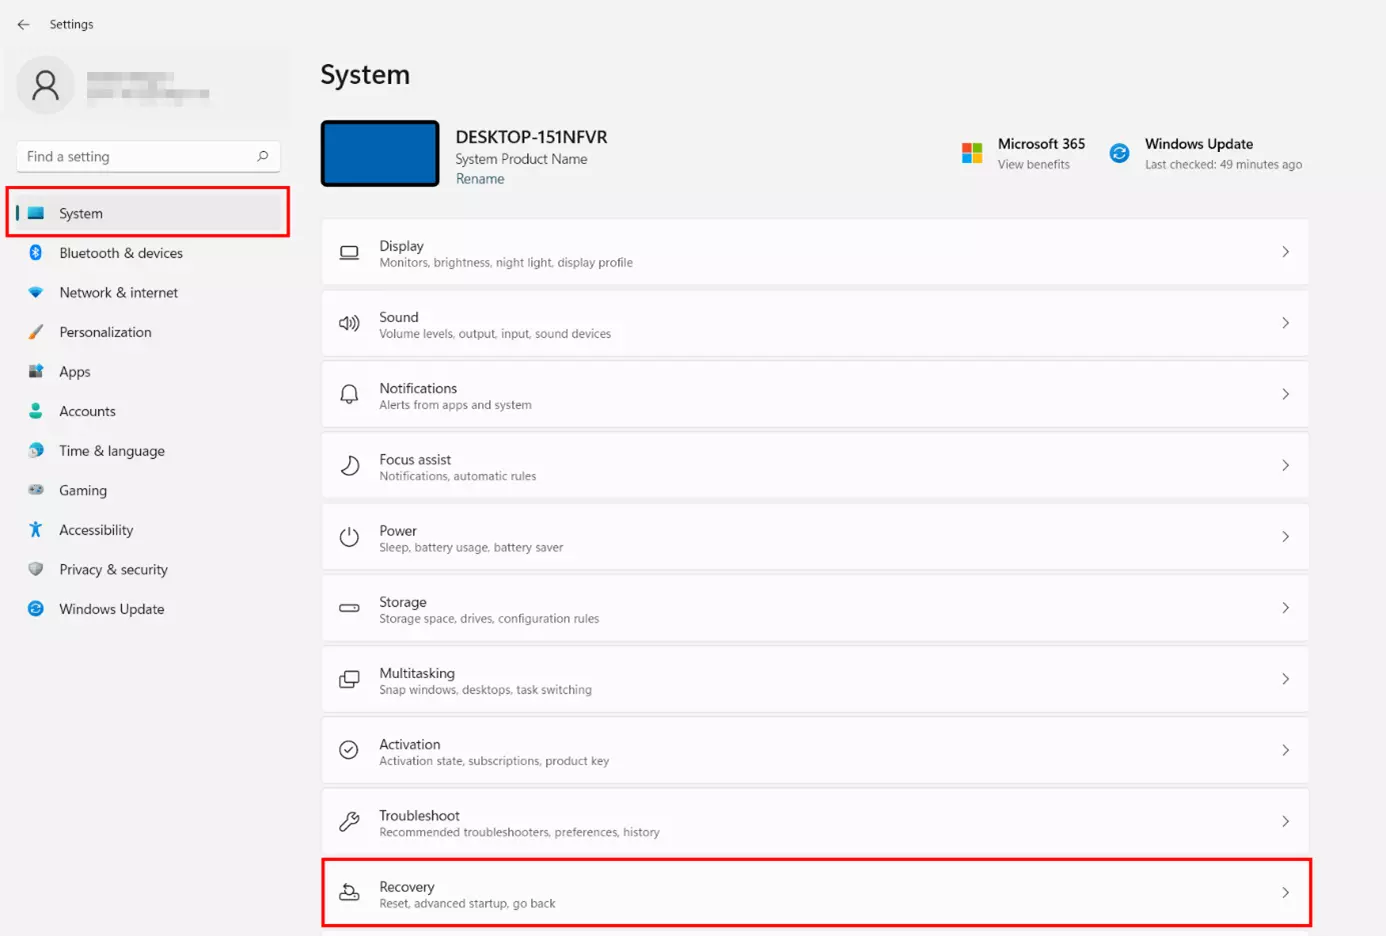
Similar to troubleshooting, you can access the Windows settings by selecting the button of the same name in the Start menu or using the key combination [Windows] + [i]. If you selected the ‘System’ entry from the left-hand menu, you will find the ‘Recovery’ menu item required for resetting Windows 11 in the list, among other things:
Step 2: Begin Windows reset
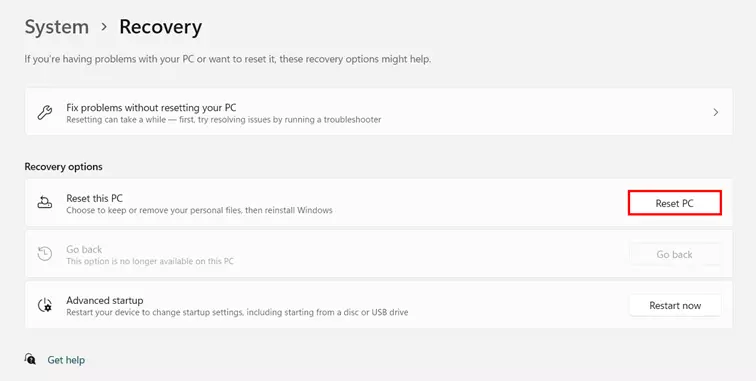
You can now reset Windows 11. You’ve also got the option to jump to the troubleshooter (in case you have not run it previously) or access advanced startup, which is useful for starting Windows 11 in safe mode.
To continue or initiate the reset, press the ‘Reset PC’ button.
Step 3: Define handling of own files
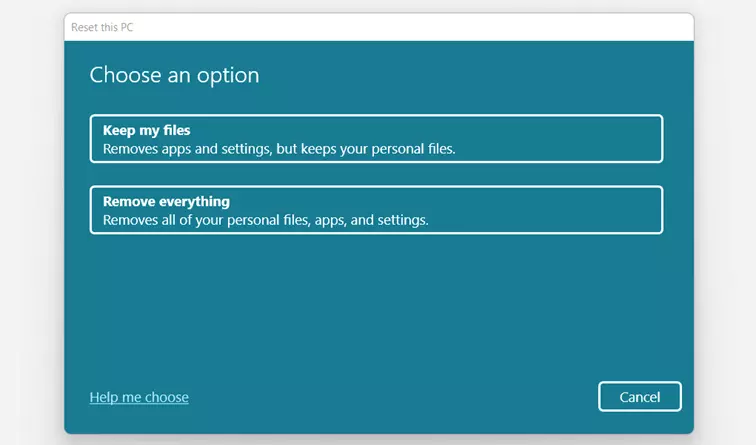
In the next step, you can select from two options to handle your files, apps, and system settings. If you want to retain personal data on your device after resetting Windows 11, select the ‘Keep my files’ button. If you no longer require your files, app settings, or other settings, select ‘Remove everything’ instead.
Step 4: Specify installation source
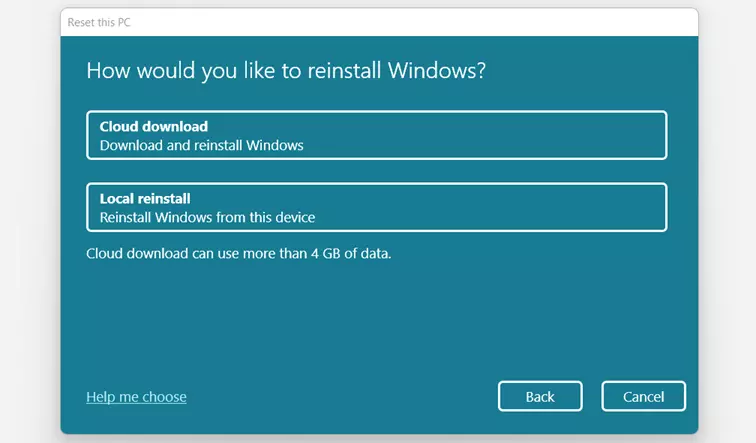
As mentioned, restoring the Windows 11 factory settings requires a new installation of the Microsoft operating system. The installation files required for this purpose are available from Windows 11 either locally from the system files or via cloud download (files can be larger than four gigabytes). Decide on a mode of installation – ‘Local reinstall’ or ‘Cloud download’.
Prefer to re-install the Microsoft operating system on one of your devices? Read more about how to install Windows 11 step by step.
Step 5: Reset Windows 11
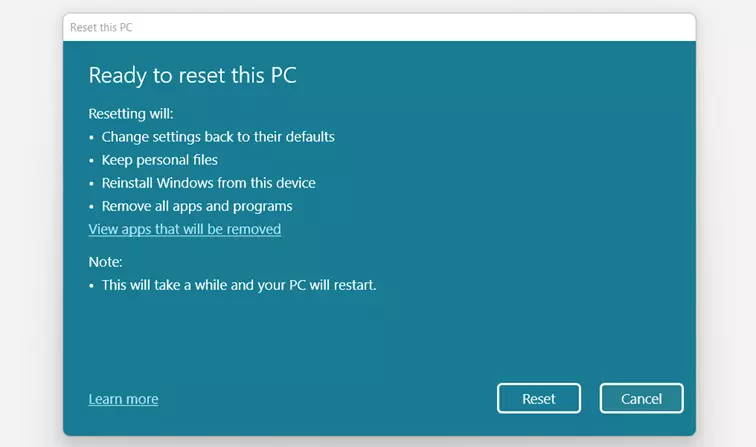
In the subsequent dialogue, click ‘Next’ to confirm the source of installation or press ‘Change settings’ to adjust your selection. The operating system then presents a summary of the actions that will happen during reset.
Press ‘Reset’ to begin the process and restore Windows 11 factory settings.


