How to install Composer on Windows 10
Composer is a PHP package manager that is used to install PHP libraries and frameworks. For installation on Windows 10, an installer can be used. We’ll guide you through the process step by step.
Step 1: download the latest version of Composer
Navigate to the official Composer download page. Installing Composer on Windows is easiest using the Windows installer. You can download it from the website using the Composer-Setup.exe file.

The installer assumes PHP is already installed on your system. Our PHP tutorial helps you to install PHP and provides useful tips on getting started with the scripting language.
Step 2: launch installer and perform installation

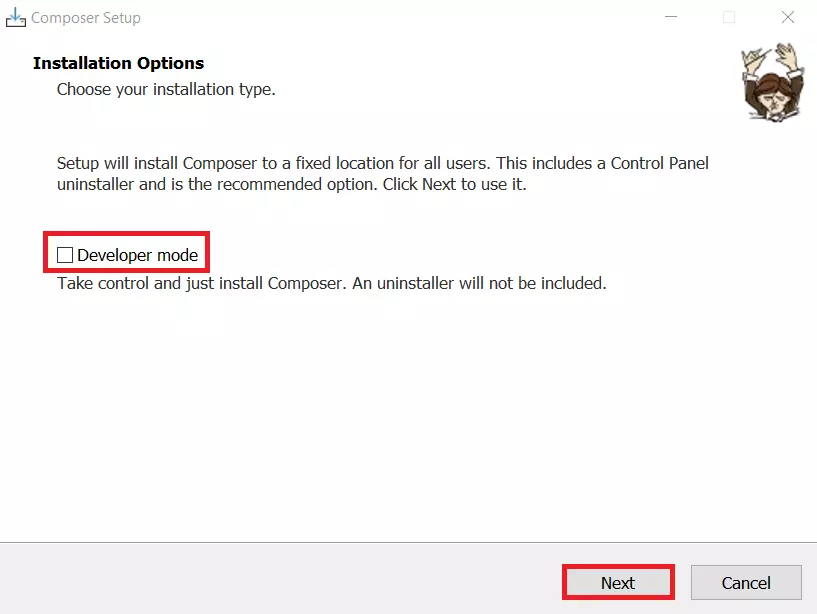
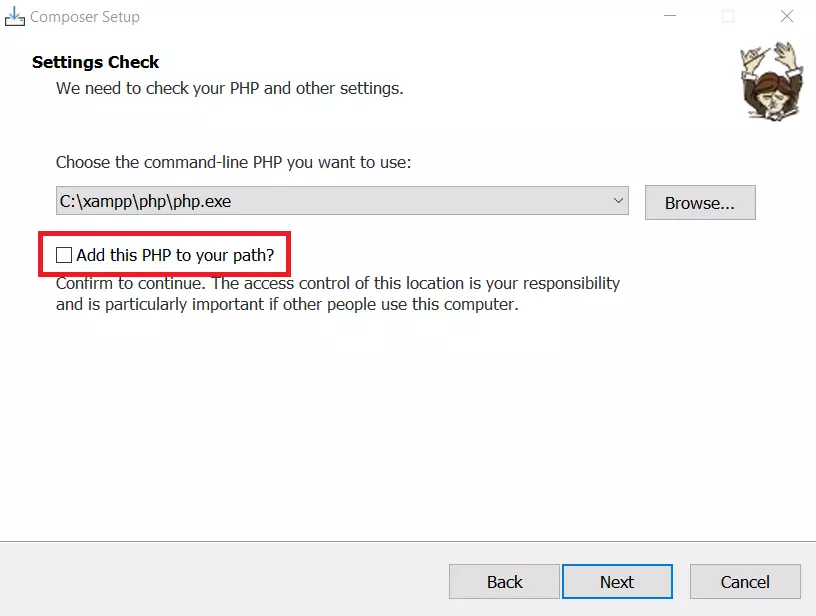
Click Next to continue with the installation. Keep the suggested default path and check the Add this PHP to your path? option. Otherwise, the installation won’t be able to continue.

You can skip the proxy URL settings. Hit Install to start the installation of Composer on Windows.
PHP Composer can be installed on many other operating systems. Find out how to install Composer on the operating system of your choice in one of the articles below:
Step 3: verify installation success
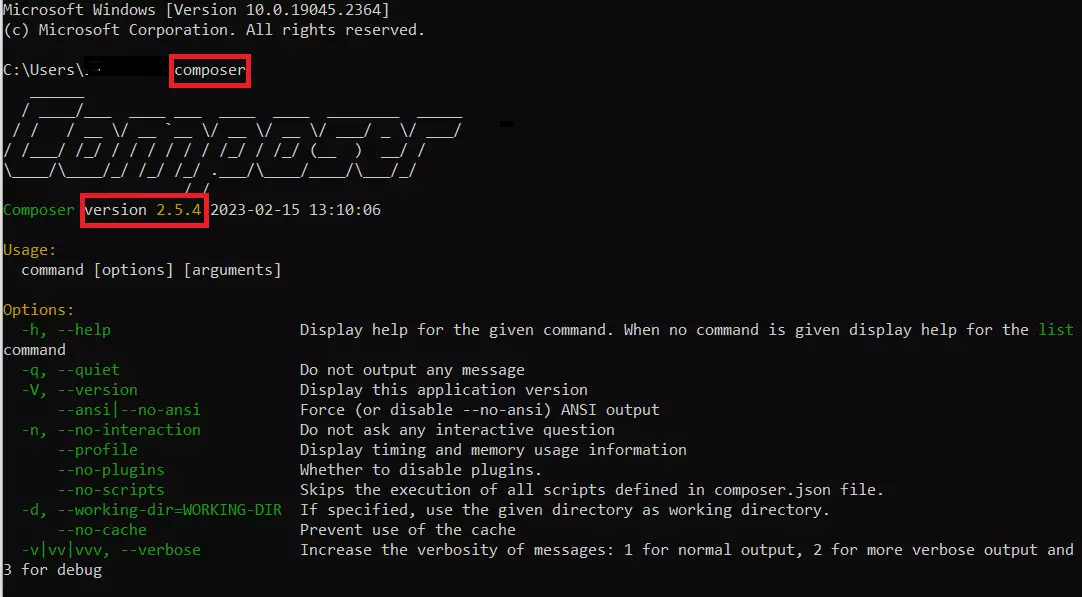
To ensure that the installation of PHP Composer on Windows 10 was successful, launch command prompt and type the following command:
ComposerIf installation was successful, you’ll see the currently installed Composer version and a list of Composer commands:

You can also use PHP Composer in IONOS web hosting packages. IONOS web hosting packages have many benefits such as an integrated DDoS protection and 24/7 support.
How to get started with Composer
You can use various Composer commands to add and update dependencies. The following are essential for getting started with Composer.
Step 1: create composer.json file
To use Composer in your project, all you need to do is install Composer and create a JSON file called composer.json, where you describe the dependencies of your project.
You can create such a file with the following Composer command:
composer initIf you do not manually create a composer.json file, it will be generated automatically when you create your first dependency.
Step 2: add dependencies
In our example, we’ll assume you need the logging library Monolog for your project. You can add this to your composer.json file with the following command:
composer require monolog/monologStep 3: update dependencies
Composer provides a built-in command to update your project dependencies. The command searches for current versions of the libraries in your project and installs them.
composer update
