How to install the Windows 11 upgrade
The final version of Windows 11 has been officially available since October 2021. As with previous versions of the operating system, Microsoft made the new edition available for users to download little by little. For the first time, the Windows 11 upgrade is also linked to a hardware check. Find out all you need to know about the new system software in this detailed installation guide.
- Free website protection with SSL Wildcard included
- Free private registration for greater privacy
- Free 2 GB email account
Windows 11 upgrade: The most important innovations at a glance
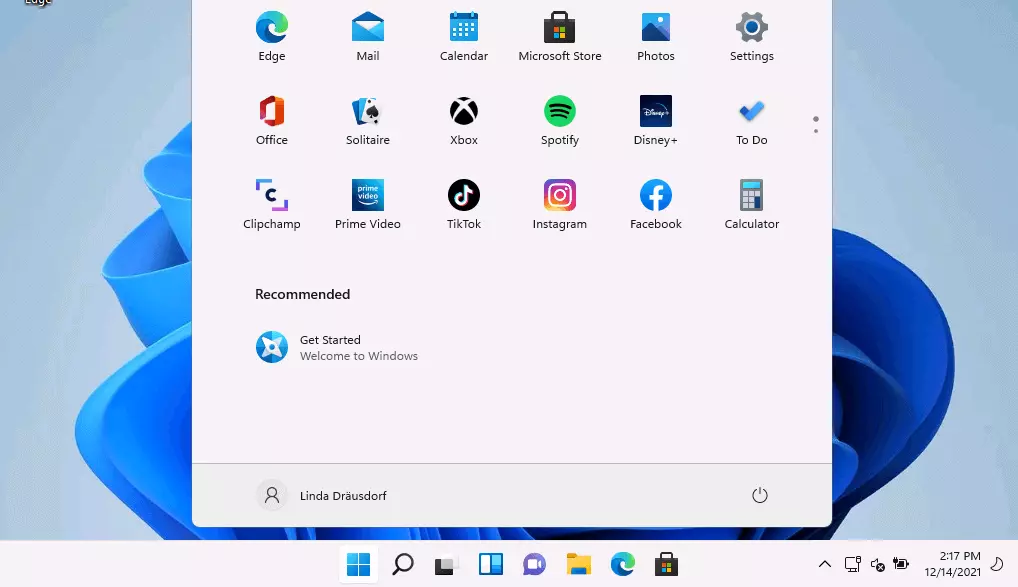
Windows 11 offers a range of interesting and useful improvements compared to its predecessor, Windows 10. The most noticeable change is probably the simplified taskbar, which places the Start menu button and all other icons at the centre of the dashboard by default. However, if you prefer the familiar arrangement with the Start menu to the far left, you can reactivate the classic option in the settings at any time. Other innovative features you can enjoy with the free Windows 11 update include:
- Rounded windows and scroll bars as well as numerous new icons for folders and the like.
- Widget menu on the left side of the screen (successor of the news and weather view of Windows 10)
- New system sounds
- Windows 11 is designed to be faster and more energy-efficient; future updates, for example, are supposed to be around 40 percent smaller than Windows 10 and load in the background
- Optimised gaming thanks to DirectStorage and AutoHDR feature (additional hardware required)
- Redesign of the Microsoft Store; among other things, Android apps now also available for PC users
- Enhanced or improved voice, touch, and pen controls
With the new edition, Microsoft deliberately focuses on usability, energy efficiency, and speed. Proper use and system maintenance are indispensable for an optimal performance in the long term. Read how to make Windows 11 faster!
Who would benefit from upgrading to Windows 11?
Installing Windows 11 is a must for anyone who does not want to miss out on the latest features. However, you don’t have to rush to upgrade. The Windows 10 predecessor is officially supported until October 2025, so it will still receive regular feature and security updates until then. In addition, many of the performance-enhancing features announced by Microsoft do not yet work as desired and designed by Microsoft.
However, if you wish to update Windows 11 regardless to test the new features and design adjustments of the user interface, ensure you have the appropriate hardware. Microsoft has updated the hardware system requirements required for the update:
| Processor | 1 gigahertz (GHz) or faster with 2 or more cores on a compatible 64-bit processor or SoC (system-on-a-chip). |
| Memory (RAM) | 4 gigabytes (GB) |
| Hard disk space | 64 GB or more |
| Graphics interface | Compatible with DirectX 12 or higher with WDDM 2.0 driver |
| Monitor | High-resolution screen (720p) with a diagonal of over 9 inches and 8 bits per color channel |
| Other | UEFI; Activated Trusted Platform Module (TPM) Version 2.0 |
If your system meets these requirements, there is nothing stopping you from upgrading to Windows 11. Within the first ten days, you can cancel the upgrade at any time with a single click. You can find out whether your device meets the requirements with the integrity check tool provided by Microsoft Health Check.
How to install a Microsoft Windows 11 upgrade
If you want to get started and install Windows 11 right away, you have several options. The easiest way for Windows 10 users to upgrade is via the Update Center, but the upgrade will only be activated for the different user groups bit by bit. If you are not yet offered an option to run the free Windows 11 update from the menu, you’ll just need to be patient. Alternatively, you can get proactive and install Windows 11 manually in one of the following three ways:
- Windows 11 installation assistant: If you have an active Windows 10 installation, you can upgrade to Windows 11 using the Installation Wizard. The tool checks the compatibility of your device and then initiates the installation with a reboot.
- Windows 11 Installation media: If you wish to install Windows 11 on a new device, you can create an installation medium. All you need are a valid license and a storage medium (USB stick, DVD, etc.) with at least 8 gigabytes of free memory. You can download the tool for creating a Windows 11 installation medium from the Microsoft website.
- Windows 11 disk image (ISO): A third option to upgrade Windows 11 manually is to download the Windows 11 ISO file, which you can mount to a virtual drive to initiate installation, or alternatively also use it to create an installation media. The image supports different Windows editions. Simply specify the variant with your product key during installation.
Already installed Windows 11, but wish to reinstall the system, e.g. by using an installation medium? Find out how to find your Windows 11 key to be prepared for a new installation.
Install Windows 11: step-by-step tutorial
Regardless of whether you created an installation medium, mounted an ISO, or upgraded to Windows 11 via the Windows 10 Update Center, always reboot your device after installation. Afterwards, simply follow the instructions below to install and set up Windows 11.
Do you want to install a Windows upgrade using a bootable medium? In our detailed article we’ll reveal how to render a USB stick bootable and select it for installation.
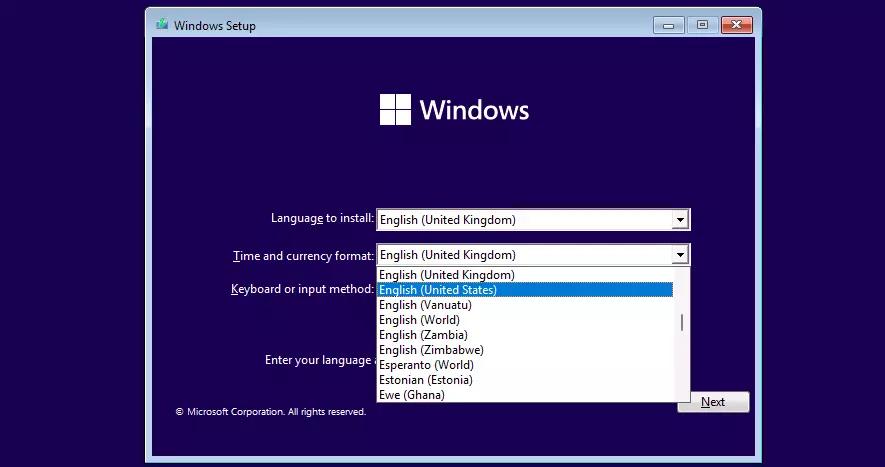
Step 1: Set language preferences
Start your Windows 11 installation by selecting the system language. By default, the current language of your system or the language you selected when downloading the ISO file is entered here. Simply select the desired time and currency format and your desired keyboard layout. Any settings you make at this stage can be modified later, for example, switching the Windows 11 keyboard for special characters.
In the following dialogue you start the installation by clicking on ‘Install now’.
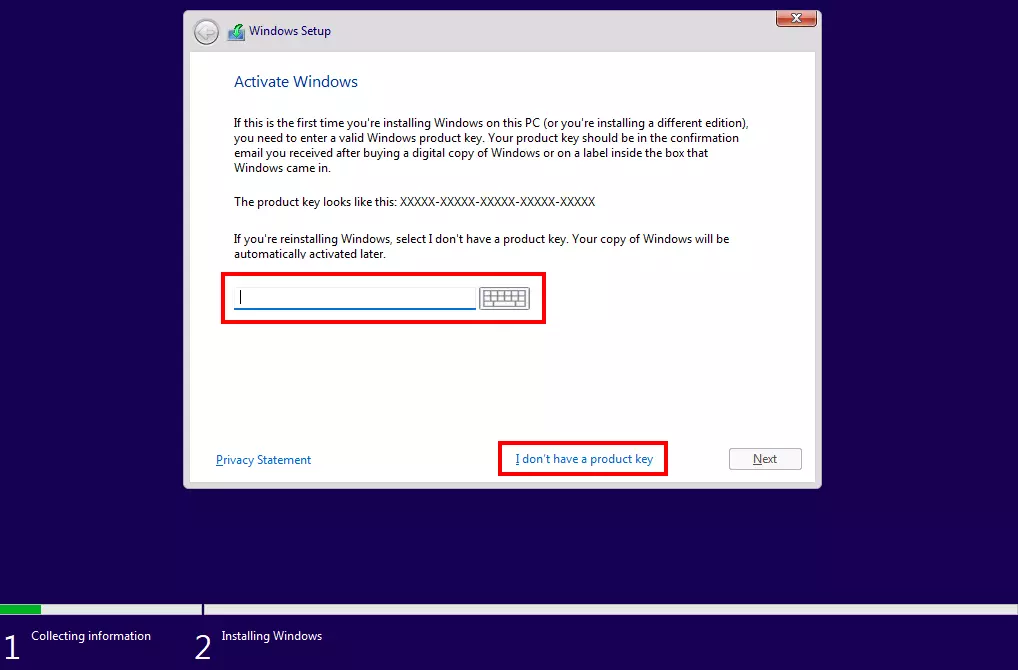
Step 2: Activate Windows or launch installation without a product key
When you install Windows 11 on a new device (or a new edition), you will be asked for the product key to activate the system. If you have the 25-digit product key to hand, enter it at this stage. Or you may continue installation without immediate activation by clicking on ‘I don’t have a product key’.
When upgrading to Windows 11, a product key is usually not required. Instead, activation is automated via the digital Windows license. You only require the product key for new purchases.
If you decide to proceed without activating the system, you just need to specify which edition of Windows 11 (Home, Pro, Education, etc.) you wish to install. Select the edition you have a license for and press ‘Next’.
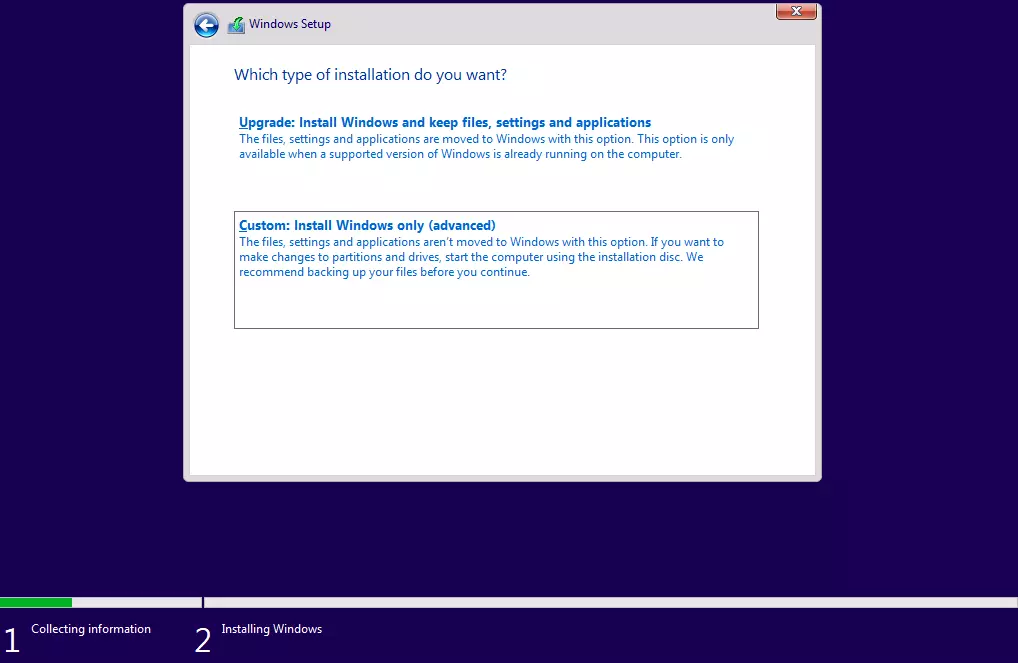
Now, the wizard checks whether the hardware requirements are being met. If that is the case, simply agree to the licensing conditions and click ‘Next’. Finally, to continue with the Windows 11 installation, select the type of installation. If you are upgrading from Windows 10 to Windows 11 or are changing editions, select the ‘Upgrade’ option; for a new installation, select ‘Custom: Install Windows only’.
Step 3: Data carrier management
In the next window, determine on which storage medium you want to install Windows 11. If your device only has one hard drive, the selection is easy. If there are several storage media to choose from, opt for the more powerful one. Clicking on ‘New’ allows you to add partitions to the listed disks, but this is not required.
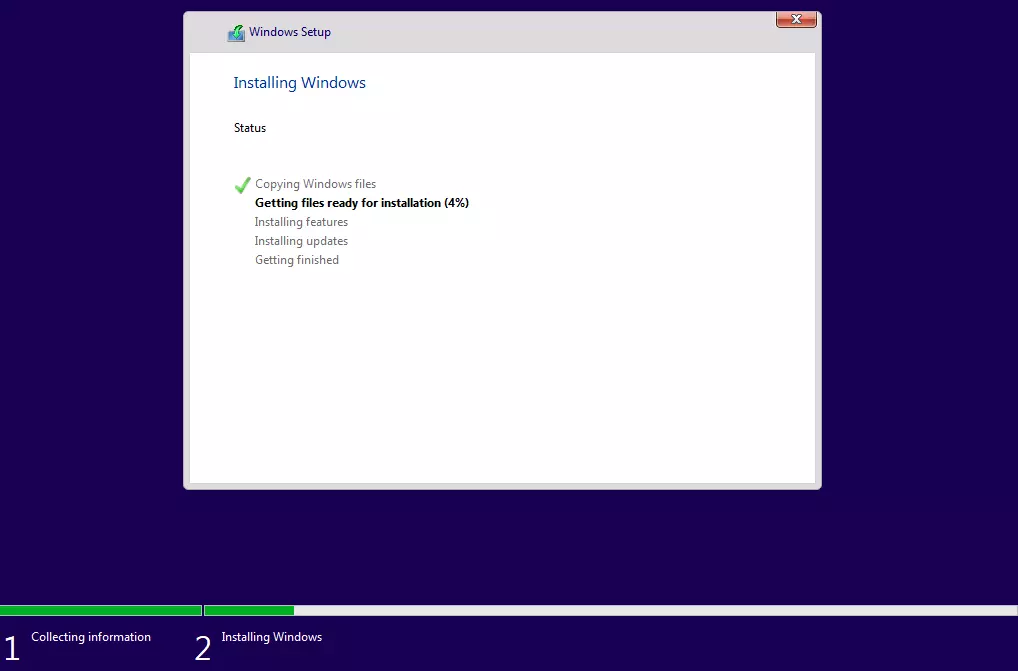
Once you have made the desired configuration, continue the process via ‘Next’. The installation then continues automatically – including a progress bar.
Step 4: Basic Windows 11 configuration
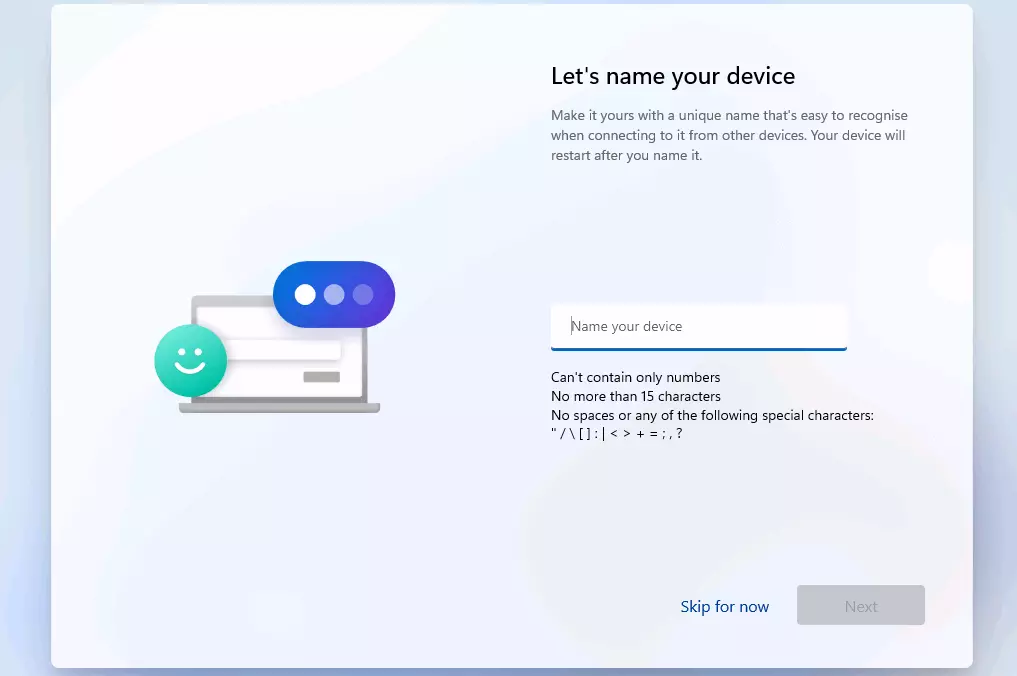
After your device restarts, the individual Windows 11 configuration follows. First, confirm your location (country or region) and the desired keyboard layout. Optionally, you can add another layout for your keyboard in the next step or skip this step via the button of the same name.
Provided your device is connected to the Internet, the Windows 11 Upgrade Wizard automatically checks for updates once the keyboard layouts are set up.
Step 5: Link to Microsoft account
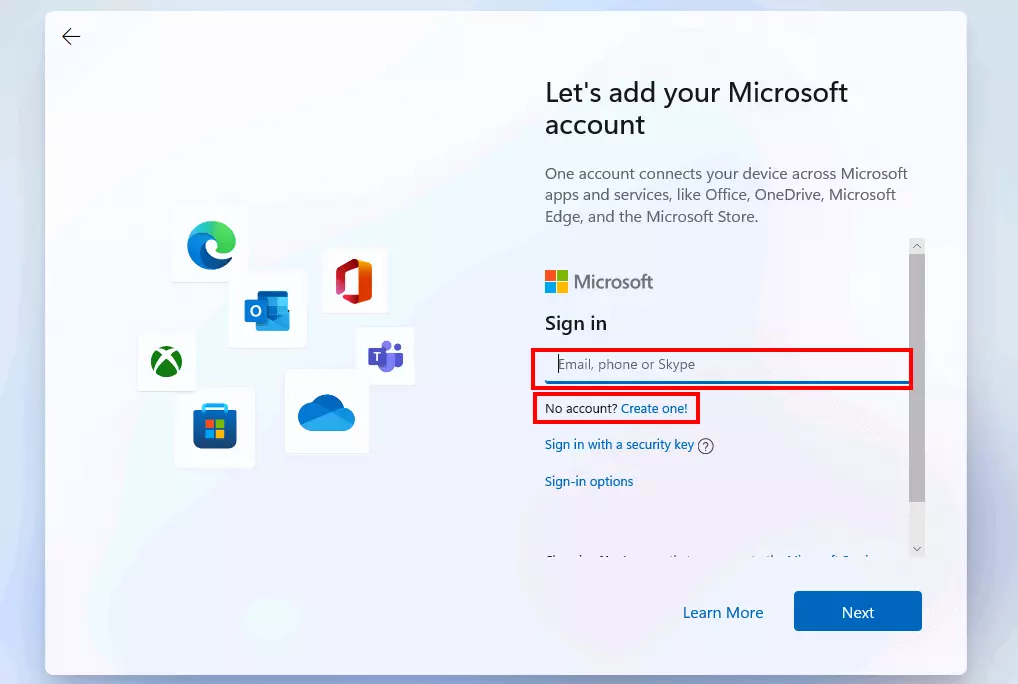
Next, link the device or the Windows installation to a Microsoft account. This step is mandatory for the Home Edition; users of the Pro Edition can alternatively create an offline account.
The Microsoft account connects all important Microsoft services such as the Office applications Word, Excel, Teams, OneDrive, or PowerPoint with one another. In addition, it enables the cross-device synchronisation of Windows settings.
Don’t worry about the design of your user account. You can always change the Windows 11 username later!
Step 6: Privacy and security settings
You can adjust the privacy and security setting from the options menu. To do so, assign a PIN, which can be composed of four numbers or alternatively of numbers and letters.
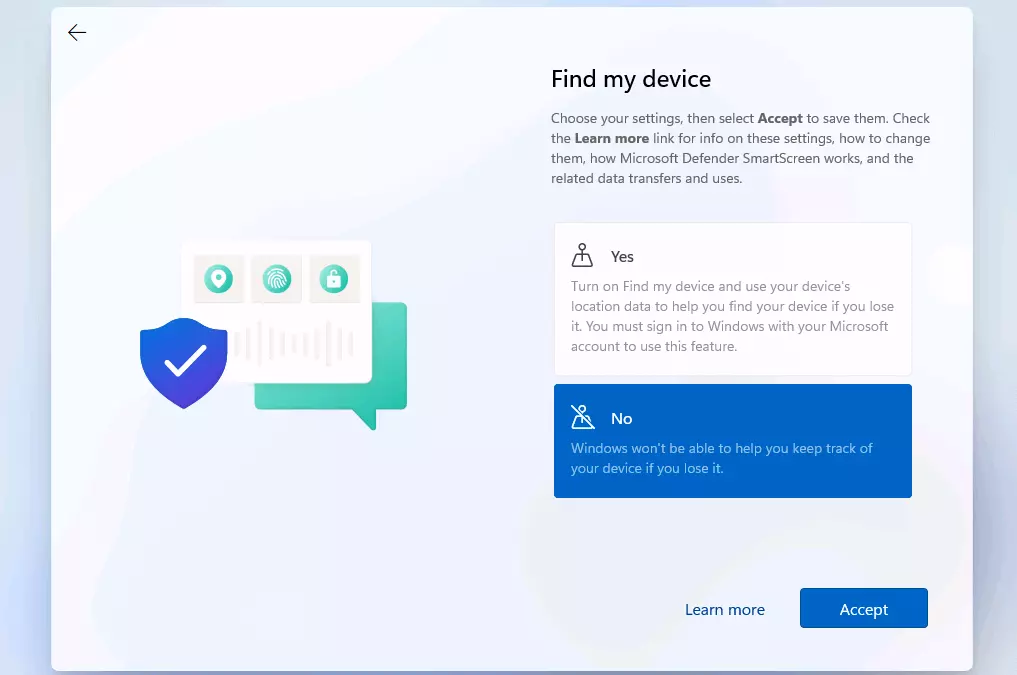
Answer the following questions with ‘Yes’ (more user comfort) or ‘No’ (more privacy):
- Enable Microsoft and apps to use your location: If you want to use location-based features like directions or the weather report, enable this option to forward your location data.
- Find my device: Microsoft also accesses your location data for the ‘Find My Device’ feature. In this case, the data is used to locate your device if you have lost it.
- Share diagnostic data with Microsoft: To keep Windows secure and up to date, you must share diagnostic data with Microsoft (option: ‘Required only’). If you select the ‘Optionally include’ option, you send various other data.
- Improve freehand and input: To improve speech recognition and suggestion capabilities of Microsoft apps and services, select ‘Yes’ in this menu.
- Get customised experiences using diagnostic data: The key question to weigh is whether you are willing to give up data in order to receive personalised tips, advertising and recommendations, or can you do without this kind of content tailored to you?
- Allow apps use advertising ID: Agree to allow apps to use advertising IDs to serve you personalised ads.
Step 7: Personalisation of user interface
Optionally, you can skip the personalisation step of the Windows 11 installation. It is the selection option of your user profile. You can select whether you prefer to use the device as a work, school, entertainment, or gaming PC.
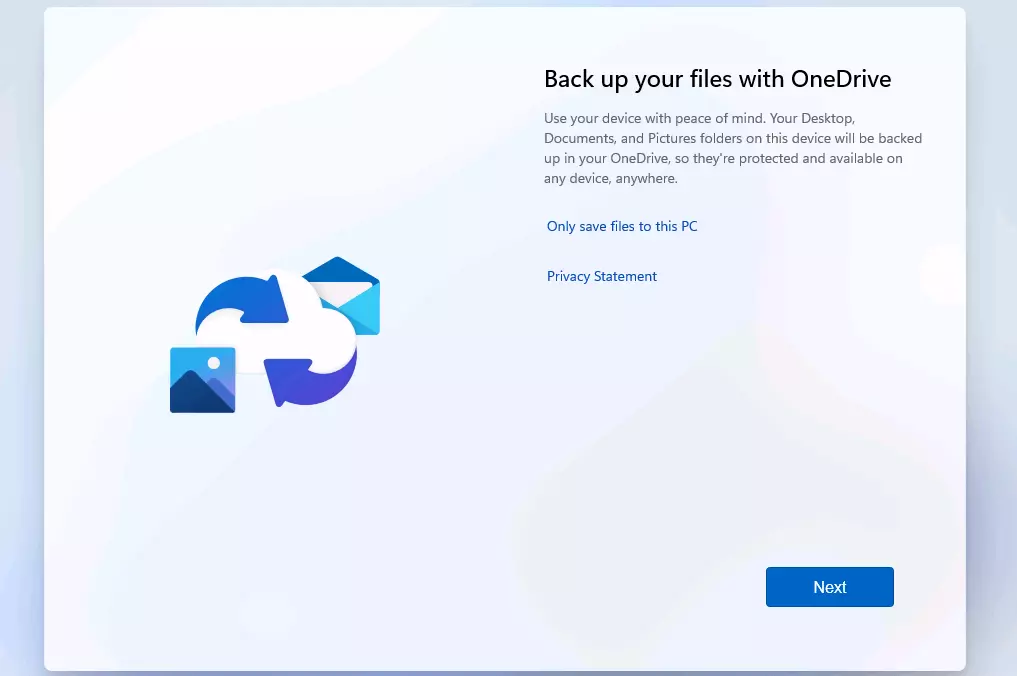
Finally, set up file backup with OneDrive to ensure your files are available from anywhere and at any time. If you don’t want to use the cloud service, click ‘Only save files to this PC’.
Regardless of whether you back up your files with OneDrive or not, you should definitely secure your account and regularly create a Windows 11 backup.
The installation and basic setup of Windows 11 is now complete. Following setup, your device restarts and then presents you with the user interface of the new Microsoft system for the first time. In the opened start menu, you can select the menu item ‘Get Started’ for a simple start-up.
Windows 11 installs apps and services by default which you may not need later. If you don’t want to delete the apps directly from your system, you can stop them from running automatically as part of the system startup by managing the Windows 11 autostart.


