How can you set up Kubernetes? Beginner-friendly Kubernetes tutorial
Kubernetes (also known as K8s) enables efficient management of large numbers of containers and automates many processes in software development. With just a few steps, you can install a powerful Kubernetes cluster and start using it productively right away.
The ideal platform for demanding, highly scalable container applications. Managed Kubernetes works with many cloud-native solutions and includes 24/7 expert support.
Step 1: Prepare the system
In this tutorial, we’ll demonstrate installing Kubernetes on Ubuntu.
First, prepare the system by updating it to the latest version and installing all necessary dependencies. Open the terminal and run a system update to ensure all packages are current:
sudo apt update && sudo apt upgrade -yNext, install the key utilities required for installing Kubernetes and Minikube. You can use the following command:
sudo apt install -y curl wget apt-transport-https ca-certificates gnupg lsb-releaseThese tools ensure you can securely use external sources and easily download and install additional software packages.
Step 2: Install kubectl
Kubernetes works with different servers: the master and various nodes. These do not necessarily have to be on different physical servers. Virtual machines make it possible to run multiple Kubernetes nodes on a single computer. For testing purposes, the free program Minikube has proven especially useful. It lets you work with Kubernetes locally. Since Minikube requires either a virtual machine or Docker, it depends on a hypervisor or container software. You’ll also need the tool kubectl.
In this Kubernetes tutorial, we’ll use Docker. You can, however, use virtualisation software such as VirtualBox instead.
First, install kubectl (Kube Control) on your system. This program is required to manage clusters.
curl -LO "https://dl.k8s.io/release/$(curl -Ls https://dl.k8s.io/release/stable.txt)/bin/linux/arm64/kubectl"
chmod +x kubectl
sudo mv kubectl /usr/local/bin/Installation commands depend on your system architecture.
Step 3: Install Docker
Before using Minikube, make sure Docker is installed on your system. Docker acts as the container runtime and allows Minikube to run Kubernetes clusters without virtualisation software. Install Docker with the following command:
sudo apt install -y docker.ioTo use Docker without root privileges, add your user account to the Docker group:
sudo usermod -aG docker $USER
newgrp dockerYou may need to log out and back in for the group change to take effect. Test the installation with:
docker run hello-worldIf you see a short success message, Docker is installed and ready for Minikube.
Step 4: Install and start Minikube
Next, install Minikube in a compatible version and use Docker as the driver. First, download the appropriate version of Minikube, make the file executable, and move it to a system directory so the command is globally available:
curl -LO https://storage.googleapis.com/minikube/releases/latest/minikube-linux-arm64
chmod +x minikube-linux-arm64
sudo mv minikube-linux-arm64 /usr/local/bin/minikubeAfter installation, check if Minikube is set up correctly:
minikube versionThen, start Minikube with:
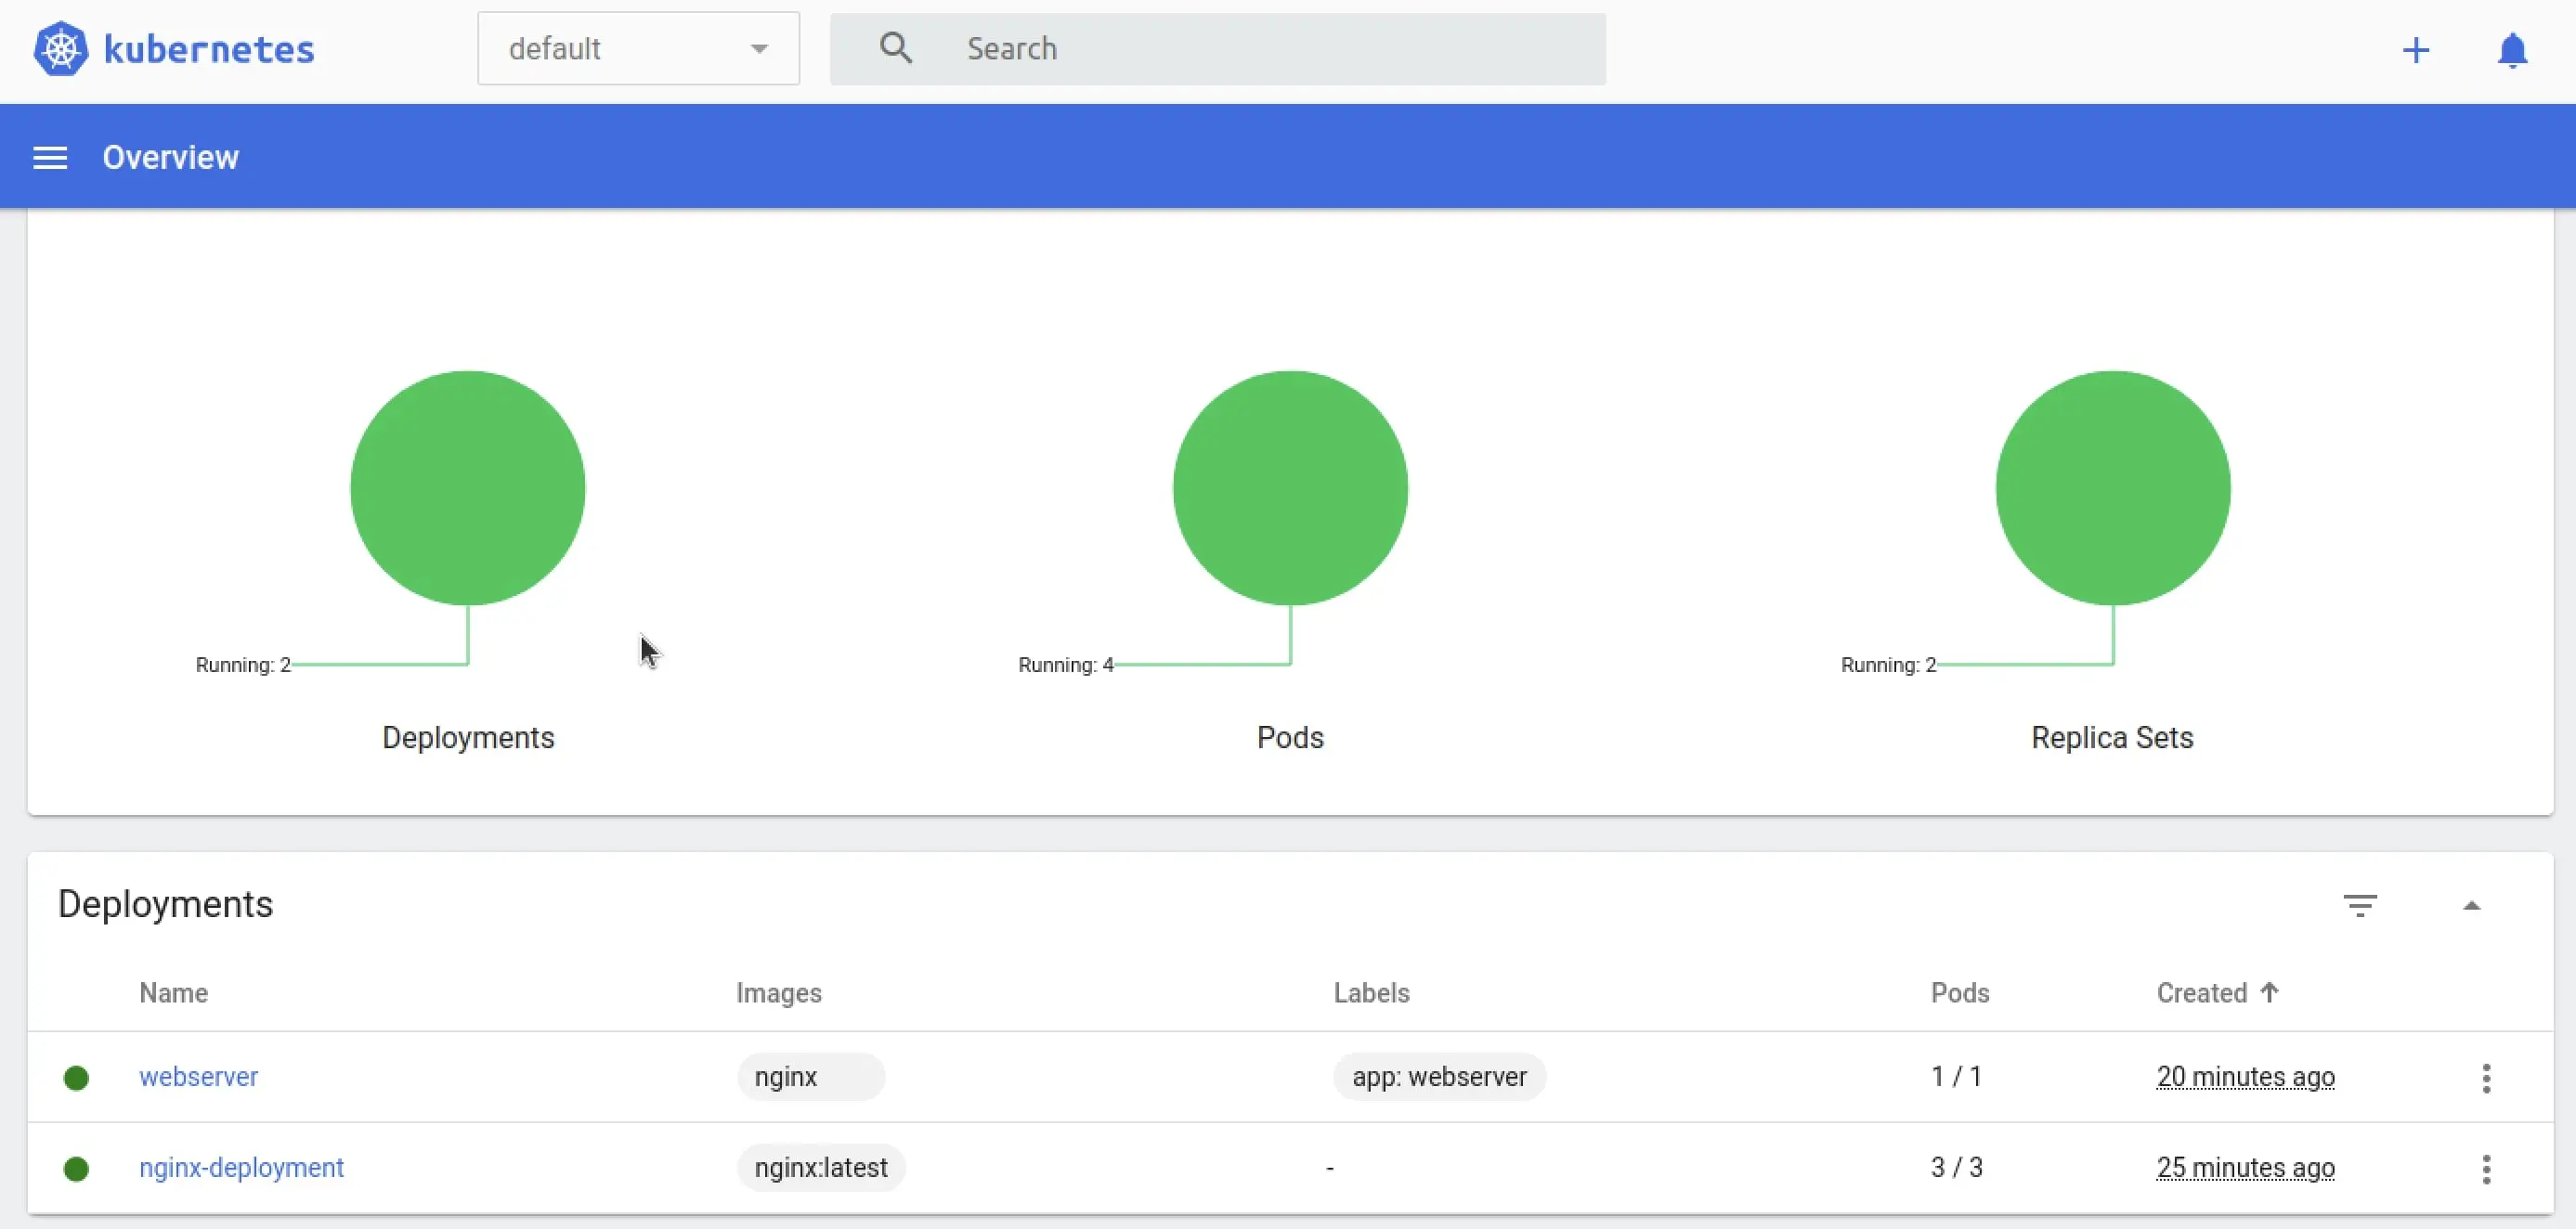
minikube start --driver=dockerMinikube uses Docker as the container runtime in this scenario and creates the Kubernetes cluster directly within the Docker environment. When Minikube starts, kubectl should be automatically configured. To switch from the command line to a GUI, enter another command. This will open the dashboard in your default browser.
minikube dashboard
- Cost-effective vCPUs and powerful dedicated cores
- Flexibility with no minimum contract
- 24/7 expert support included
Step 5: Try Kubernetes out
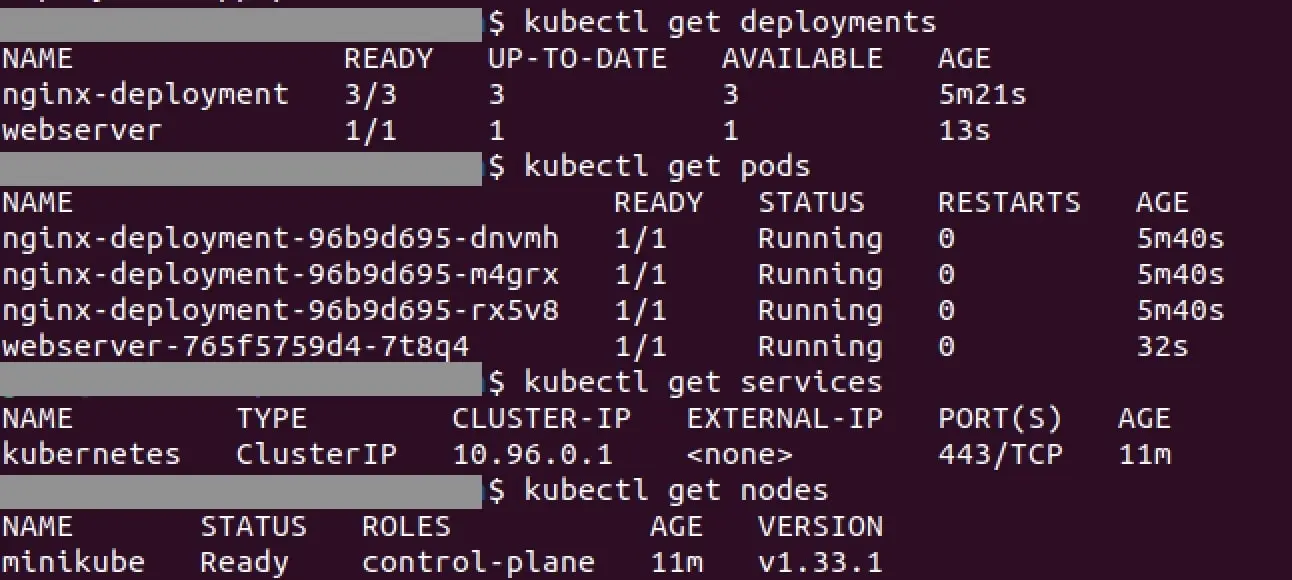
When you start Minikube, it automatically creates a cluster with a single node. You can check this with kubectl:
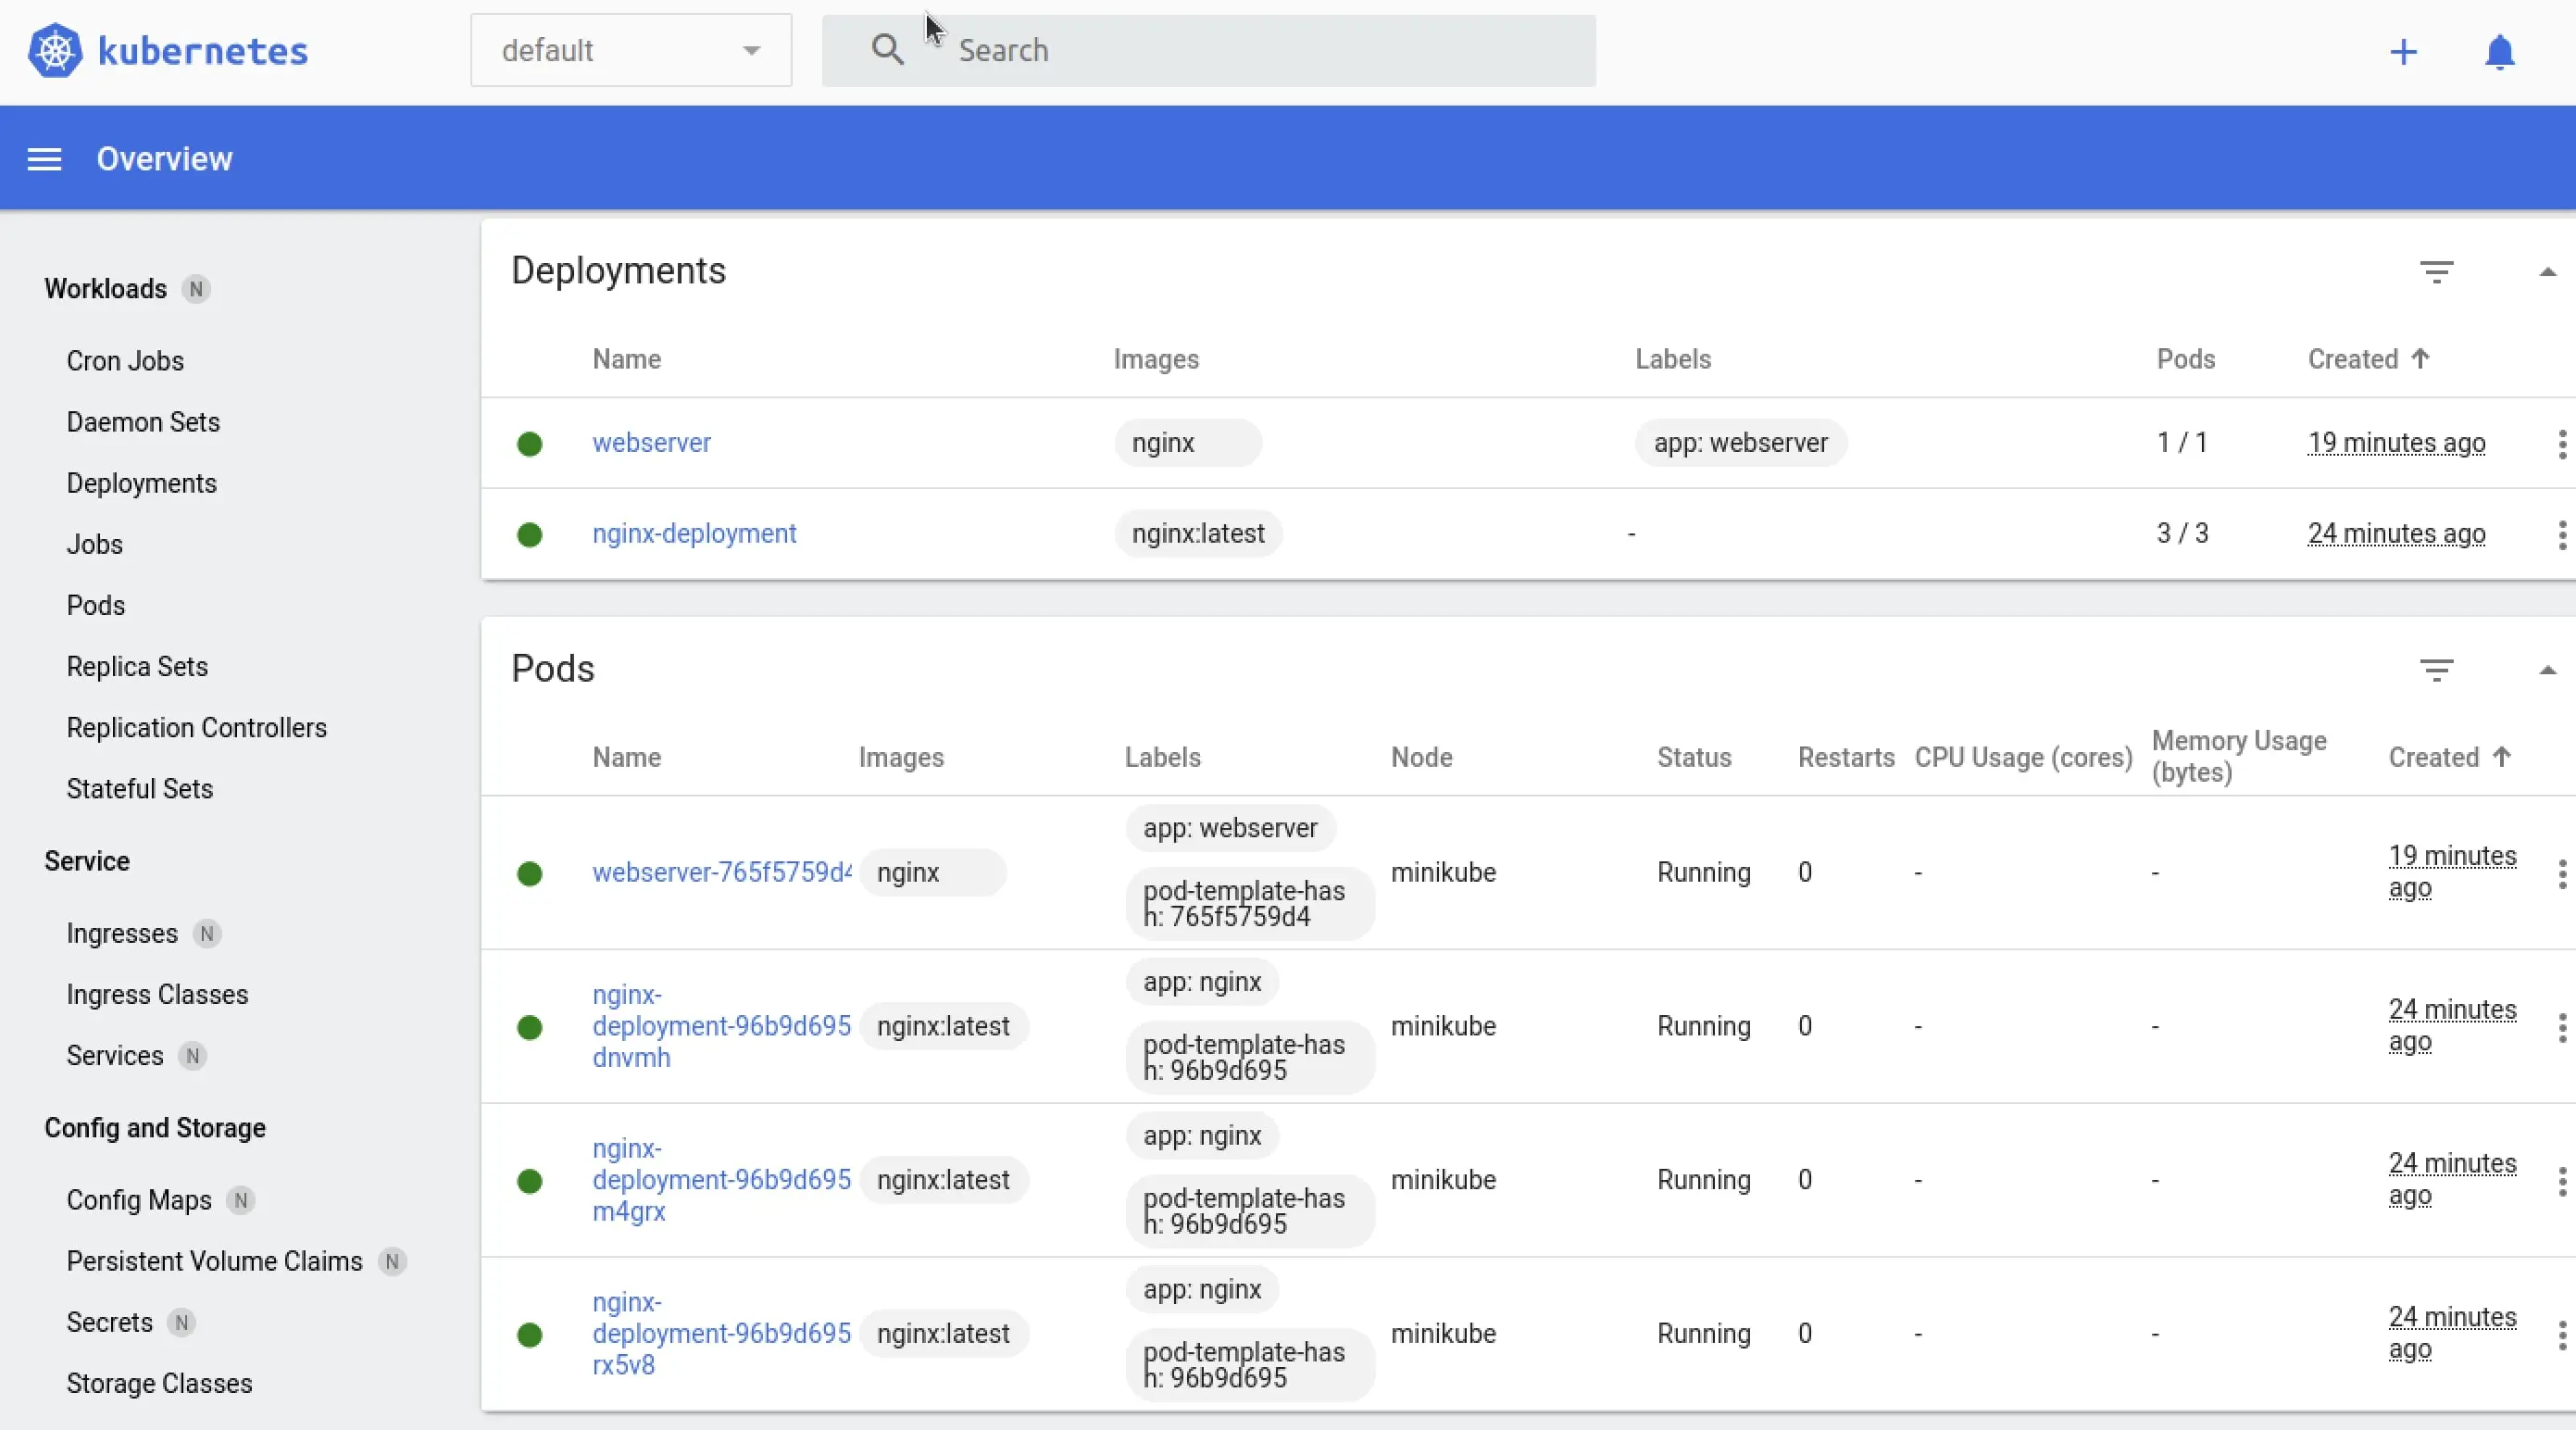
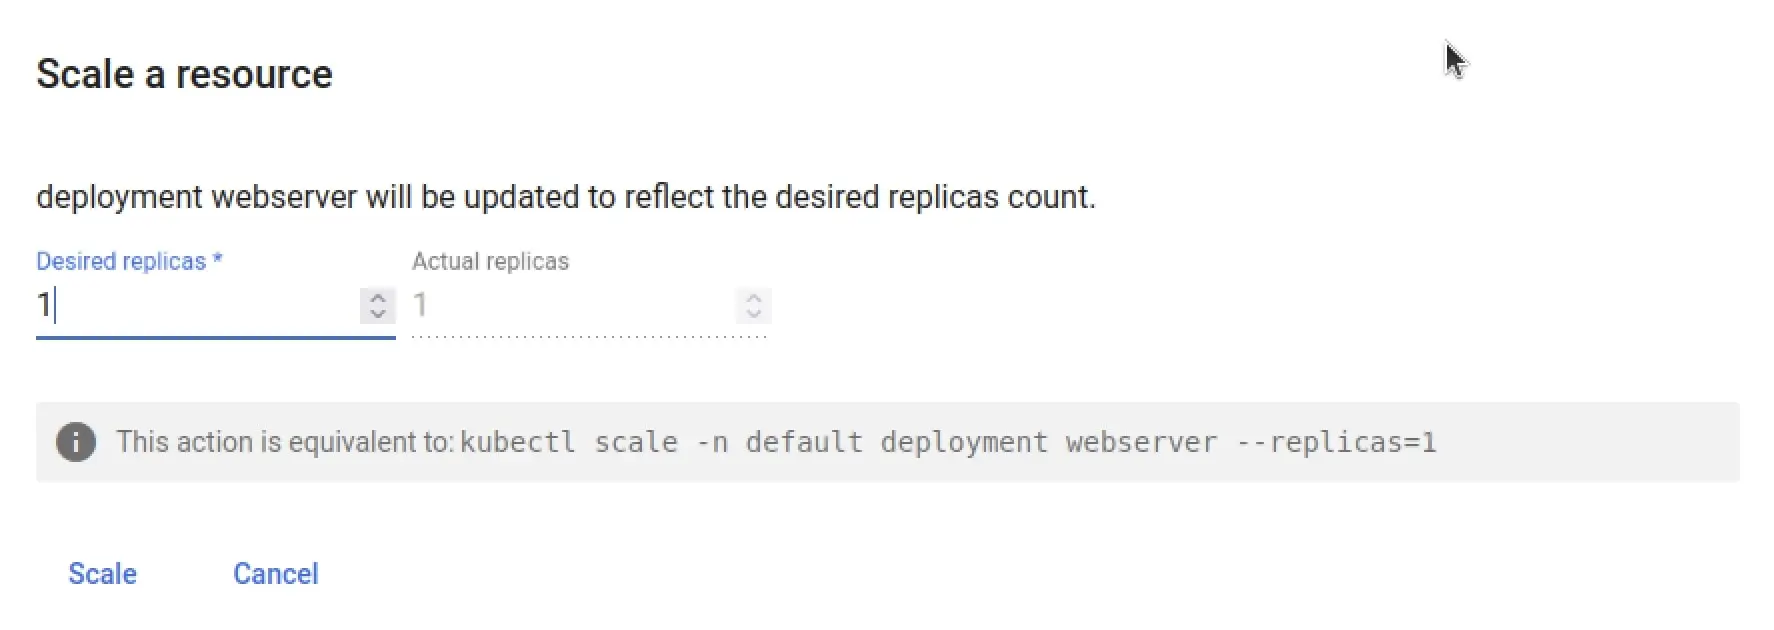
kubectl get nodesThrough the dashboard, you can now create deployments. Click the Create button (the plus sign in the upper right) to open a web-based editor. In JSON or YAML format, you can create a deployment there. Once you’ve done this, Kubernetes automatically generates multiple pods. You can adjust the desired number by scaling the deployment. You’ll find this function by clicking the three-dot button next to the deployment.


Alternatively, you can create deployments via the terminal, as long as the content is already packaged in a Docker image stored in a repository:
kubectl create deployment --image=[path to the image]You can retrieve a variety of information using command-line commands.
Which deployments are available?
kubectl get deploymentsHow many pods are there?
kubectl get podsWhich services are available?
kubectl get servicesWhich nodes are active?
kubectl get nodes
Step 6: Publish a deployment
So far, you have started your deployment but have not yet published it. To publish it, create a service:
kubectl expose deploy test-deploymentThis way, the service is published only within the cluster. To access the deployment from outside the cluster, add additional flags:
kubectl expose deploy test-deployment --type=LoadBalancer --port=8080With Minikube, you can then start the service:
minikube service test-deploymentIf you want to delete the service, there’s also a command for that:
kubectl delete service test-deploymentThe deployment can also be deleted:
kubectl delete deployment test-deploymentTo finally shut down Minikube, stop the process:
minikube stopIf you no longer want to work with the VM or the container runtime, you can delete it as well.
minikube deleteAfterward, all configurations, created deployments, and pods are removed. When you start Minikube again, you will be working with an empty cluster.

