ISO mount in Windows 11, 10, and 8
As of Windows 8, image files can be quickly mounted using Windows on-board resources, i.e. without any third-party software. To do this, simply double-click on the ISO files or alternatively use the ‘Deploy’ command by right-clicking on the file. Windows then mounts the ISO files via a virtual CD drive in Windows Explorer.
What is a Windows ISO mount?
With Windows 8, Microsoft made it easier to mount image files on the Windows operating system. No additional third-party software is needed to access or use an image file. ISO files, by the way, are memory images of file systems, applications, or files used without an optical disk via virtual machines. Before you can access an ISO file, you must first download it or create a bootable USB stick. You can use the image tools in our image tool comparison to do so. Read on to find out how an ISO mount with downloaded files works on Windows 11, 10, and 8.
ISO mount in Windows 11
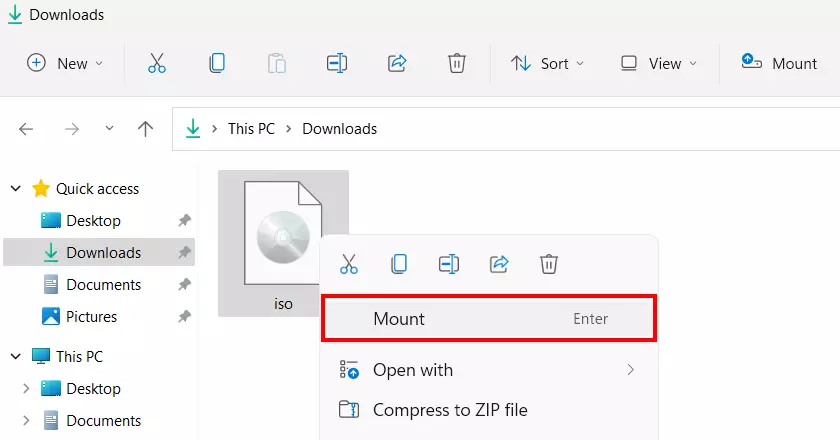
Adding downloaded image files in Windows 11 takes just a few clicks. The individual steps are as follows:
Step 1: Launch the folder containing the downloaded ISO file.
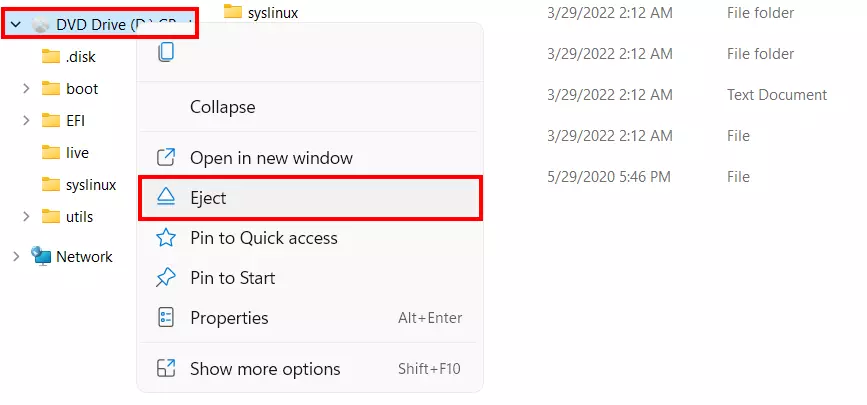
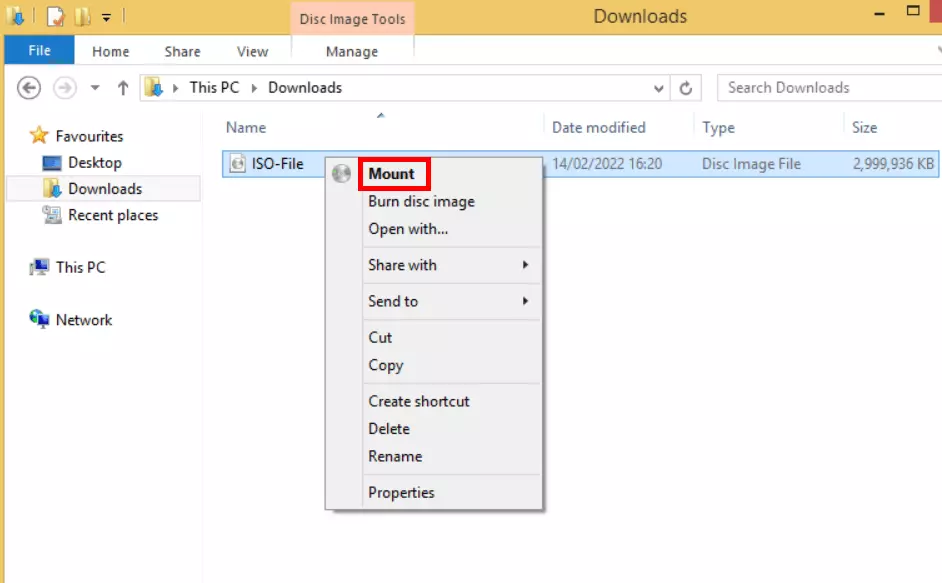
Step 2: Double-click the file to mount it in a virtual drive, which you can see a short moment later in the left-side menu of the Explorer. Alternatively, right-click the ISO and press ‘Mount’ from the pop-up menu.
ISO mount in Windows 10
Accessing ISO files via the system’s on-board tools is simple for Windows 10 users. To do this, proceed as follows:
If the ISO mount does not work because you linked the ISO files to a program such as 7-Zip or WinZip, remove or disable the program first.
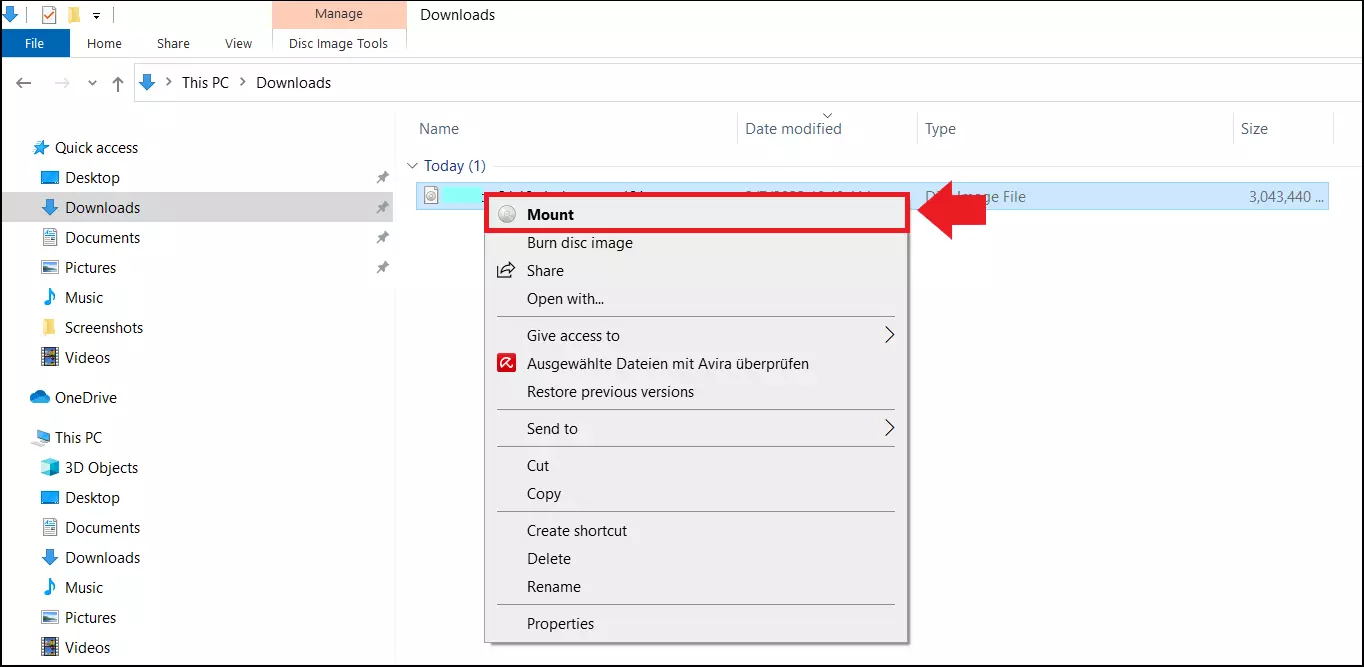
Step 1: Navigate to the folder where you saved the downloaded ISO file.
Step 2: Double-click on the ISO file. Windows should immediately mount the contents as a virtual drive in your Windows Explorer and mount the files faster than via optical drive.
ISO mount in Windows 8
The procedure for Windows 8 is almost identical to Windows 10. Follow the steps below:
- Go into the associated folder with the ISO file and double-click on the file. Windows 8 now mounts the memory image via a virtual drive in the Explorer.
- Alternatively, a double-click on the ISO file and ‘Mount’ should work too.
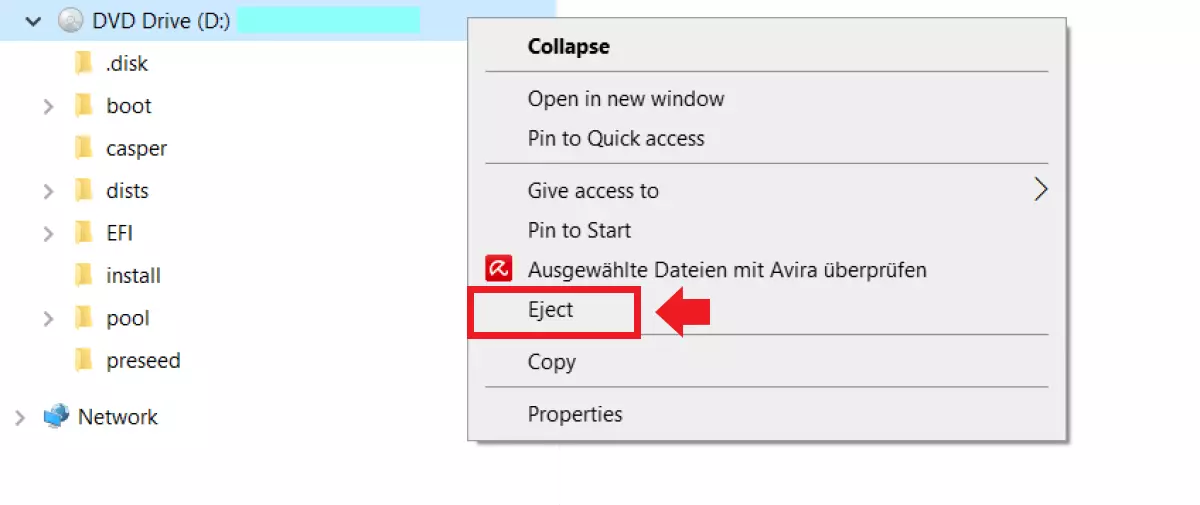
Exiting works just the same as with other Windows 10 drives: right-click on the drive and select ‘Eject’.
ISO mount with older Windows versions
The integrated mount function is only available to users as of Windows 8 or higher versions. In older versions, you will still need to use third-party software to access ISO files. Below are a number of ISO readers that you can use for free.
- Virtual CloneDrive: The free, multilingual tool creates 15 virtual drives to access ISO files (e.g. ISOs of games, films, or applications) by double-clicking (no CD or DVD required). In addition, one of its functions lets you automatically mount ISOs. ISO, BIN, CCD, IMG, DVD, and UDF are supported ISO formats.
- DVDFab Virtual Drive: The free tool provides over twenty languages, supports ISO formats such as ISO, DVD, CCD, UDF, BIN, IMG, and NRG, mounts the last executed ISO if desired and emulates up to 18 virtual drives. It is used via a taskbar icon (without a standard interface).
- PowerISO: The tool’s functions include opening, burning, editing, compressing, encrypting, reading, and converting image files. For this purpose, the tool also emulates virtual drives. In the free version, however, it can only edit or create ISO files up to 300 MB. Included is a ripper for copying CDs and images. CD, DVD, BD, and BIN formats are supported.
- MagicISO: A helpful, simple tool to launch a virtual drive through which ISO files are mounted to the operating system. In addition, the tool can be used to create images of selected files. In the free version, a maximum of 300 MB is available for creating and editing ISOs.


