How to install Red Hat 9 step by step
Red Hat Enterprise Linux 9 can be installed in just a few simple steps. Once the system requirements are met, you can configure the necessary settings using the convenient installation summary.
The new RHEL
Red Hat Enterprise Linux (or RHEL for short) has been regarded as one of the best Linux distributions for companies since its initial release in 2002. Over time, the proprietary platform has become the market leader in this segment. In addition to security, stability and flexibility, RHEL is particularly impressive due to its compatibility with numerous software packages.
RHEL 9 debuted on May 17, 2022, and will be fully supported through 2027. This version incorporates OpenSSL 3, boasts enhanced loading speeds, includes Wireguard VPN, and by default, enables Link Time Optimization (LTO) in userspace. The version was created on CentOS Stream for the first time. Other new features include automated updates for Container and rollbacks, improved security features such as Integrity Measurement Architecture (IMA) and new options for analysing your own data streams and workloads.
In the following sections, we will explain step by step how to install RHEL 9 and which requirements must be met.
If you would like to use the previous version of RHEL, you will also find the appropriate instructions for installing Red Hat 8 in our Digital Guide.
What are the requirements for installing RHEL 9?
To install Red Hat Enterprise Linux 9, you’ll need a minimum of one CPU with a speed of 1 gigahertz. However, it is recommended to use two CPUs. Your system should have at least 2 gigabytes of RAM, and you should allocate a minimum of 20 gigabytes of hard drive space. The simplest installation method is via a USB stick with at least 11 gigabytes of capacity, though other storage media are also possible.
Start by downloading the RHEL 9 ISO file from the official Red Hat website and save it to a USB drive. Alternatively, you can mount the ISO to a virtual drive. After this, you can proceed with the RHEL 9 installation.
How to install Red Hat Enterprise Linux 9
-
Attach the installation media you created or mount the downloaded ISO file, then restart the machine where you want to install Red Hat Enterprise Linux 9.
-
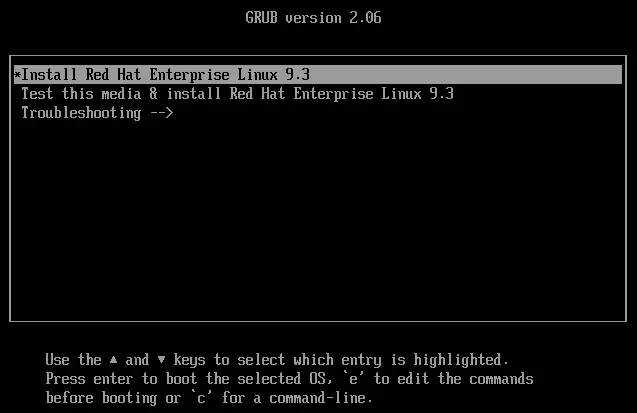
In the starting installation dialog, select the Install Red Hat Enterprise Linux 9.x option and confirm with [Enter].

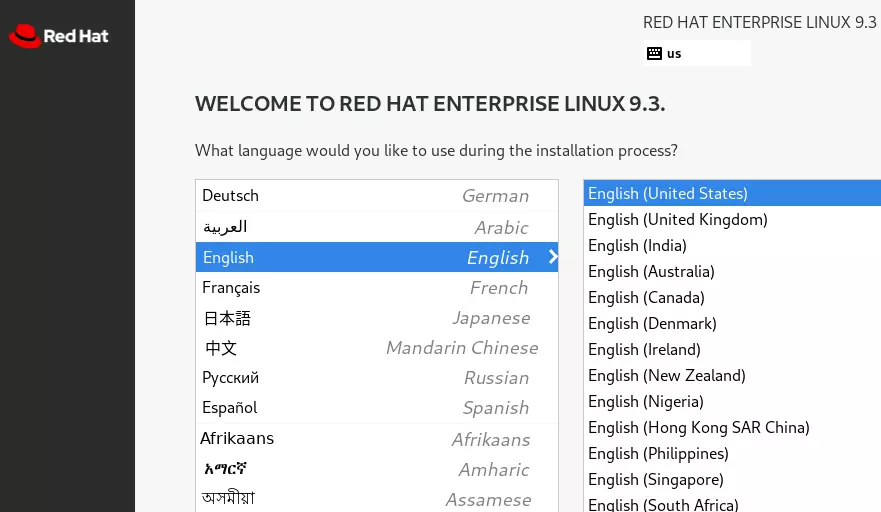
- The distribution menu will now appear and you will be asked to select the language for the installation. Click on the desired option and then Continue.

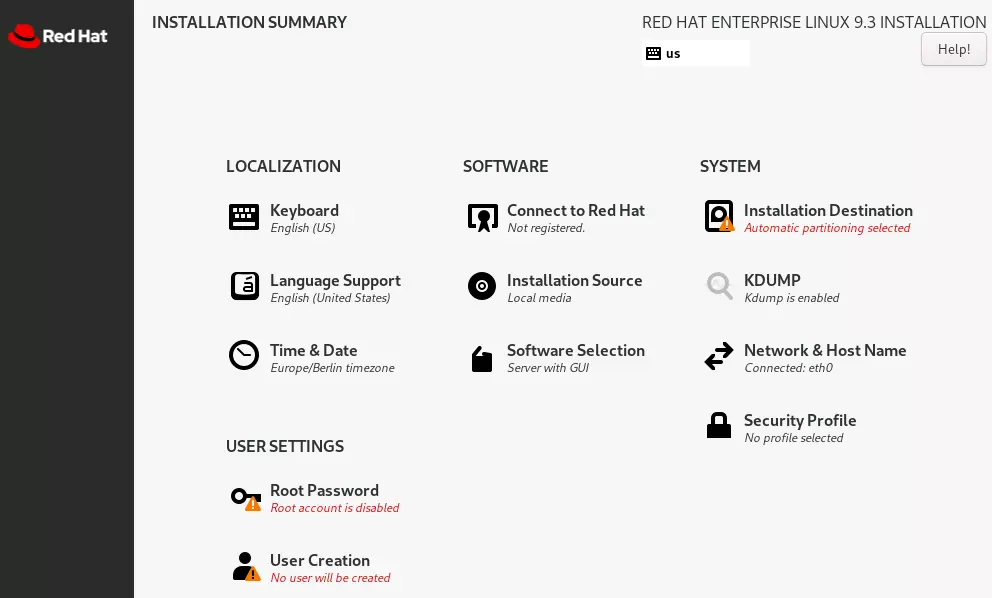
- You will now be taken to the Installation Summary menu. You can make various settings here. Under Time & Date, for example, you can specify your preferred time zone. All mandatory fields are marked with a small exclamation mark.

-
To determine which version and additional tools of RHEL 9 you want to install, select Software Selection. Server with GUI is preselected by default. Confirm your selection by clicking the Done button.
-
Under System you will find the item Installation Target. Here you configure the partitions and specify where the system should be stored. Alternatively, you can let the Red Hat Install Manager do the partitioning automatically. Confirm your selection again with Done.
-
What’s almost important is that under User settings you will find the option Root Password. Here you define your administrator password, which must be at least six digits long and consist of numbers and letters in upper and lower case. Special characters are also possible. Enter your desired password in both lines and then click on Done.

In another of our helpful articles, you can find out how to later change the RHEL root password you created!
-
Now select Create User and create a new user account. Among other things, you can specify whether this user should have admin rights and be logged in with a password. Complete this step by clicking Done.
-
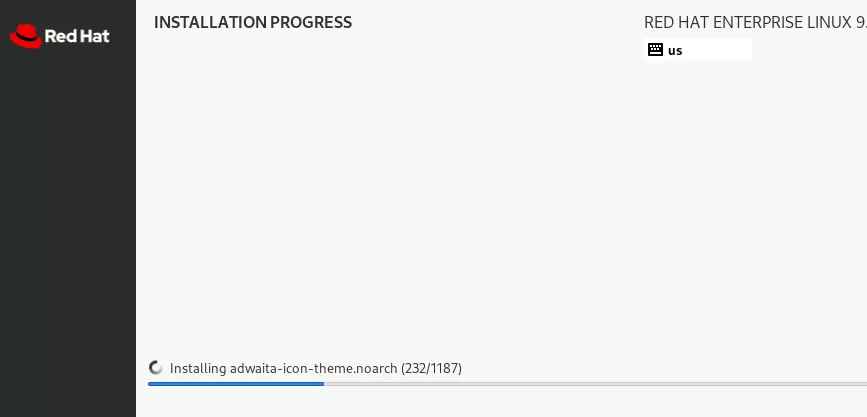
If all settings are to your satisfaction, click on Start Installation, which you will find at the bottom right. You can now follow the progress of the RHEL 9 installation.

- After completing the installation, reboot the system and change the boot medium setting from the USB stick to the hard drive. You can then start using the distribution.

