How to install Git on Ubuntu 20.04 in 3 simple steps
Git is probably the most popular version control software out there. Installing it on Ubuntu 20.04 using your package management tool takes just a few steps.
What are the installation requirements?
Git is a lightweight tool that can easily be installed on popular operating systems and different Linux distributions. The system requirements for installing the version control software aren’t particularly high, but should still be met:
- x86-based processor or a processor with similar architecture (most modern processors have this)
- 64 MB RAM
- 20 MB disk space
What server options are there for installing Git on Ubuntu 20.04?
In addition to the easy installation on a local computer, Git also runs smoothly on a server. If the server is being used for programming projects, version control software like Git is extremely useful.
To get started, you have a few server types to choose from:
- Cloud server: A cloud server works with virtualized, highly scalable resources. Billing is done on a per-minute basis.
- Virtual private server: A VPS or vServer also provides scalable resources but at a fixed monthly price.
- Dedicated server: A dedicated server will give you dedicated hardware resources (exclusively for you) and is billed by the minute.
Which IONOS package is right for you?
Finding the right server can be a confusing process. With the broad range of servers and packages out there, the table below can help you determine which Linux server you should use to install Git on Ubuntu 20.04:
| Scenario | Recommended IONOS server |
|---|---|
| Development or testing of simple applications like databases or websites. | VPS Linux M |
| Use of continuous integration and continuous deployment (CI/CD) or deployment of larger websites. | Cloud Server M |
| Use of enterprise applications or high-traffic websites. | AR6-32 HDD |
With each server option, you have the freedom to choose the operating system, allowing you to select the right software for your specific needs. In addition, every package offers high availability and a bandwidth of up to 400 Mbps.
Prefer the newer Ubuntu version 22.04? Installing Git on Ubuntu 22.04 is also super simple and can be done in a few steps.
How to install Git on Ubuntu 20.04: step-by-step instructions
Installing Git on a Linux distribution like Ubuntu 20.04 is executed directly via the command line.
Step 1: update system
For the installation of Git to run smoothly on Ubuntu 20.04, you should first update your operating system. Use the following terminal command to do this:
sudo apt updateStep 2: install Git
Now you’re ready to install Git. The command-line command is simple and intuitive:
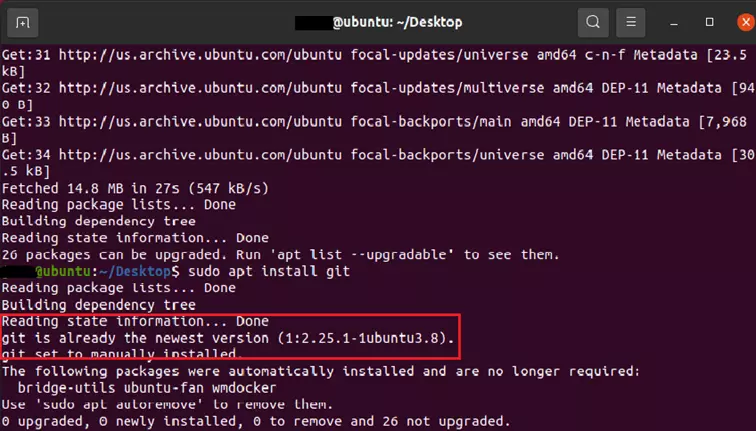
sudo apt install gitThe terminal will tell you if the installation was successful. If Git has already been preinstalled, the command line will display this message:

Step 3: review installation
Use this command to display the version of Git that is currently installed:
git --versionTips for working with Git
All of the commands you need to work with the version control system in the command line start with the keyword ‘git’. You can also download and clone repositories with ‘git clone’ or create your own repositories with ‘git init’.
For a detailed look at how Git works, check out our Git tutorial. If you just need a quick refresher on essential Git commands or want to look up a specific command, check out our handy Git cheat sheet.
If you prefer working with graphical user interfaces, we recommend using the Git-based version control platforms GitHub or GitLab. In addition to Git’s core functionality, the platforms also support other features as well.

