How to change DNS servers on Windows 10, 8 and 7
Windows makes it easy to manually adjust the DNS server. This can be done either directly in the Microsoft operating system or from your router’s settings. You may find alternative servers for the Domain Name System (DNS) more suitable.
How to change the DNS server on Windows 10
As a Windows 10 user, you can change the DNS server in the ‘Network Connections’ menu.
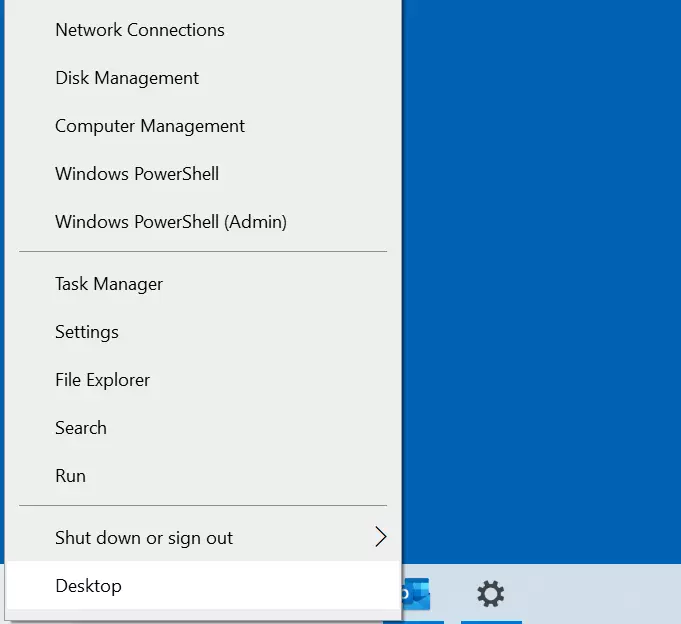
Step 1: Right-click on the Windows logo to launch the network connection settings and click on the menu item of the same name.
Step 2: You’ll see the status of the setup connection. Select ‘Change Adapter Options’ in ‘Advanced Network Options’.
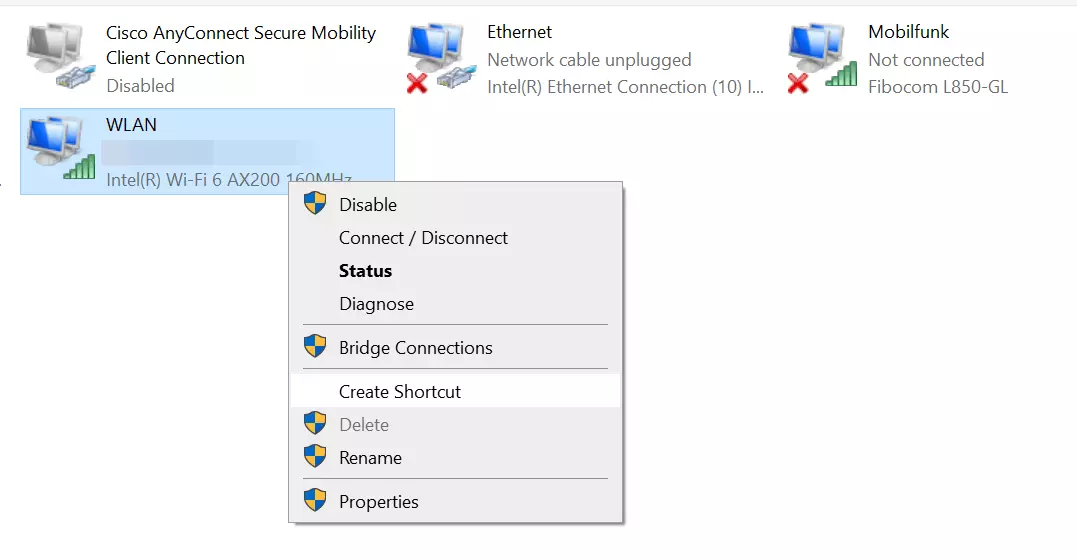
Then right-click the connection for the DNS server change to select it. If you’re using a desktop PC, you’ll probably have a connection that’s set up via network cable. In this case, choose ‘Ethernet’. If the device is connected to the internet by Wi-Fi, select ‘Wi-Fi,’ then click on ‘Properties’ in the menu that appears.
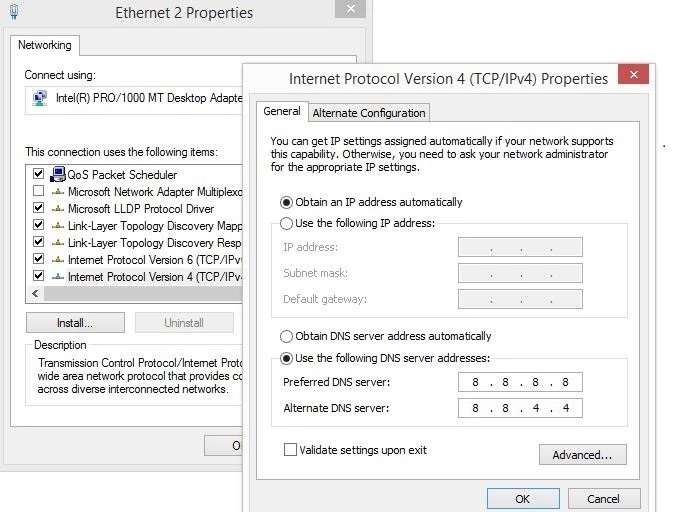
Step 3: Double click on the menu item ‘Internet Protocol, Version 4 (TCP/IPv4)’ and activate the option ‘Use the following DNS server addresses.’ Now enter the addresses for both Google servers (8.8.8.8 and 8.8.4.4).
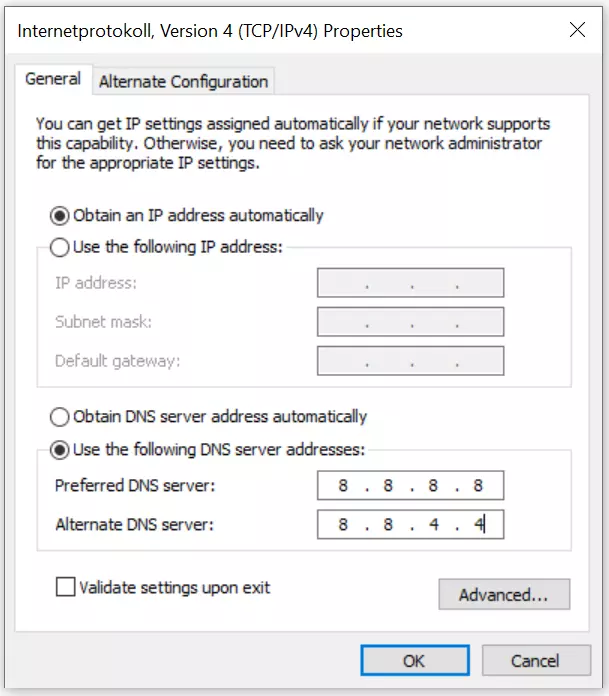
Step 4: To confirm the DNS server changes on Windows 10, click on the ‘OK’ button.
Alternatively, you can change the DNS server settings on Windows 10 using the command line. Simply enter the following commands:
netsh interface ip add dns name=‘connection name’ addr=8.8.8.8 index=1
netsh interface ip add dns name=‘connection name’ addr=8.8.4.4 index=2
Instead of the placeholder ‘connection name,’ use the corresponding name of the LAN or WLAN connection.
How to change the DNS server on Windows 8
Windows 8 users can just as easily change their DNS server in the network settings.
Step 1: Navigate to the Network and Sharing Center. This can be opened either via the control panel (‘Start Menu’ -> ‘Control Panel’) or via the network connection symbol in the task bar’s notifications panel. Once you’ve found the icon, click on it with the right mouse button and select the option ‘Open Network and Sharing Center.’

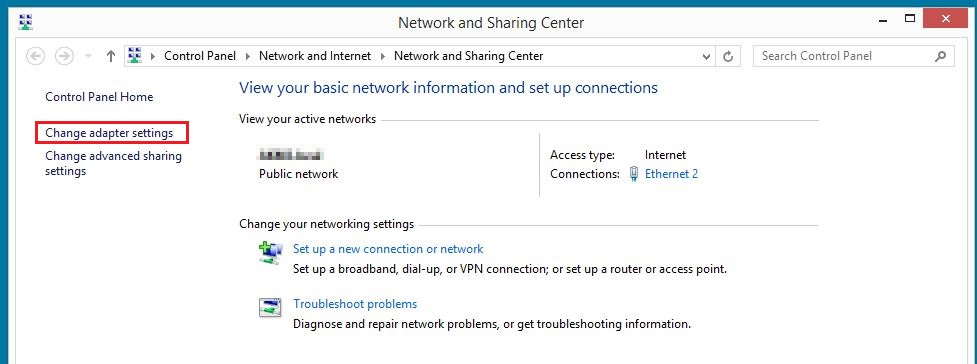
Step 2: Launch the adapter settings by clicking on the appropriate button.
Step 3: Now right-click on the connection you want to configure and select ‘Properties’ in the menu that appears.
Step 4: Double-click on ‘Internet Protocol Version 4 (TCP/IPv4)’ to open the menu for changing the DNS server on Windows 8, where you can enter the above addresses for the public Google DNS servers (8.8.8.8 and 8.8.4.4).
How to change the DNS server on Windows 7
You can change the DNS server in Windows 7 via the network connection settings.
Step 1: Launch the Network and Sharing Center. You can do this via the control panel, where you’ll find a corresponding menu item, or by right-clicking on the network connection symbol in the notifications panel on the task bar (also known as the system tray) and then clicking ‘Open Network and Sharing Center.’

Step 2: In the next menu, select the option ‘Change adapter settings’ and then choose the connection with the DNS settings you wish to change.
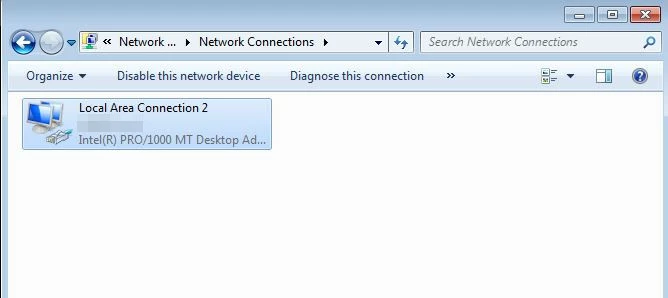
Step 3: You can open the protocol and service overview for the selected connection by right-clicking and going to ‘Properties’. Look for the entry ‘Internet Protocol Version 4 (TCP/IPv4)’ and double-click to bring up the menu for changing the DNS server on Windows 7.
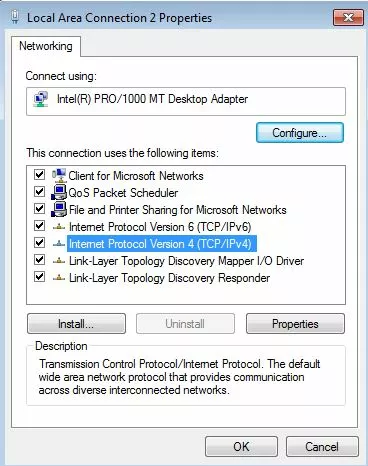
Step 4: In the final step, activate the option ‘Use the following DNS server addresses’ and enter both addresses for the public DNS servers:
Preferred DNS server: 8.8.8.8
Alternate DNS server: 8.8.4.4
How to change the DNS server in the router settings
Instead of switching the DNS server from the operating system, you can amend it in your router. The advantage of this is that all devices that are logged into your network (e.g., the WLAN) will automatically use the desired DNS server. This saves time because they won’t need to be configured individually.
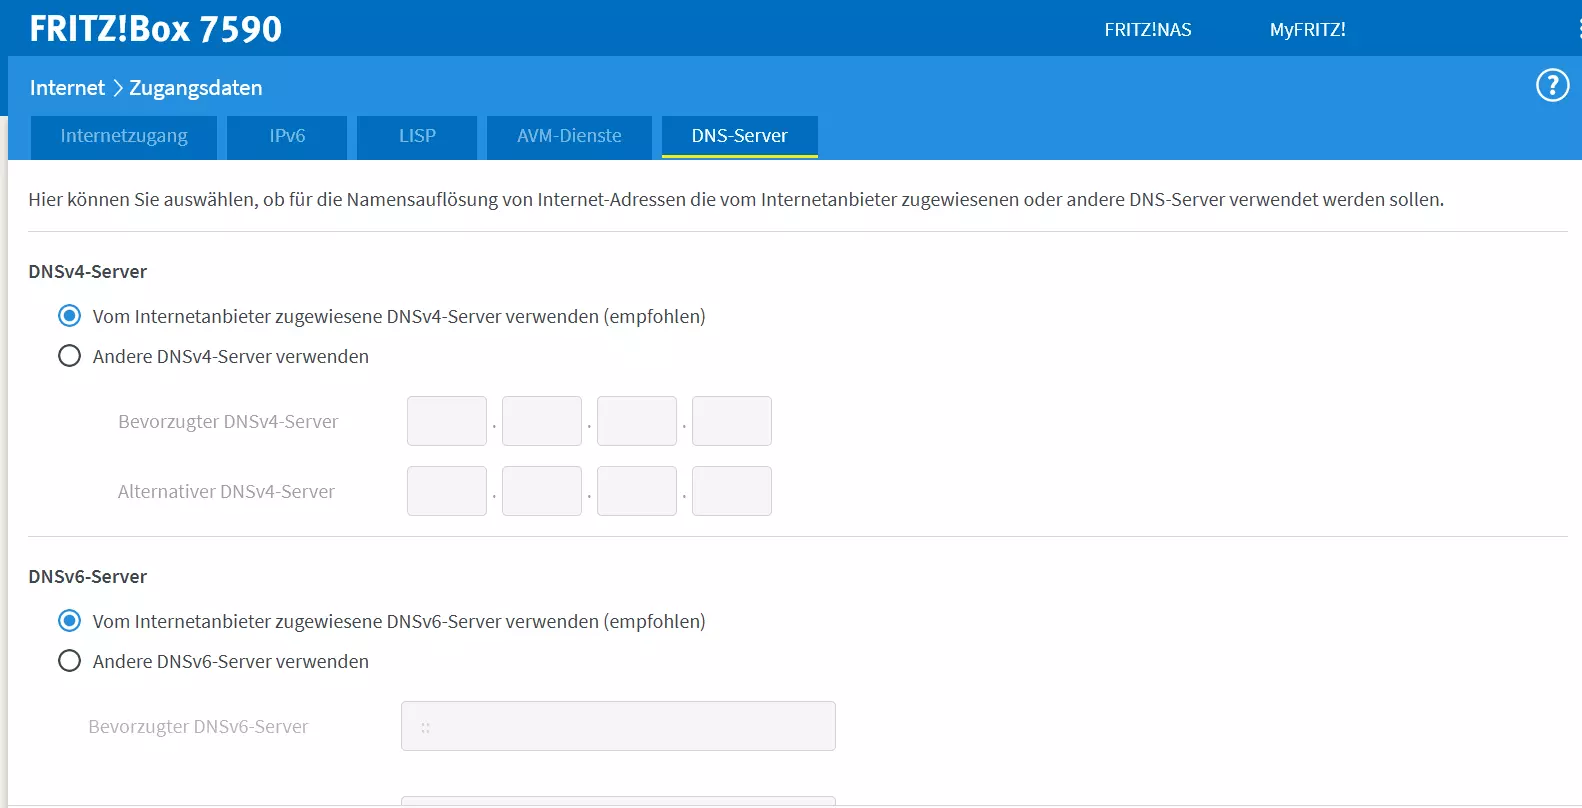
The steps to adjust the DNS server depend on your router. Most devices are managed via a browser interface. You can find the URL or IP address in the user manual or printed on the router. Open the browser and enter your login details. You’ll find these in your router documents. Then navigate to the settings for the Domain Name System.
Let’s look at an example. With a Fritz!Box, for example, you would enter ‘http://fritz.box’ to launch the account information of the router. You’ll find the DNS settings under ‘Internet’ and ‘Account Information’.
Changing DNS servers is just as easy in other operating systems:
What are the advantages of changing DNS servers?
When you connect to the internet via your router, the DNS server settings are automatically loaded. As a general rule, your internet provider manages the name resolution so that you don’t have to deal with the configuration. The only thing you need to do is connect the router to the desired devices. Protocols such as DHCP assign the required information to establish a connection.
While this is good in principle, DNS alternatives may be more suitable. The following are the top three reasons for why it may be useful to change your default DNS server:
- Speed: A different DNS server may speed up loading times. OpenDNS and Google Public DNS servers are popular to this end. They are particularly fast.
- Availability: When you encounter the error message ‘DNS server not responding’, it usually means the default server for the name resolution is down. Most of the time that’s a temporary glitch, but you can fix it immediately by changing the DNS server.
- DNS blocking: The DNS can be used for DNS blocking. Internet providers block the name resolution of certain domains. By choosing a different DNS server, you can bypass DNS blocking.

