Data backups on Windows 7
Imagine your computer breaks and all your data is gone – what a disaster! Although losing a device is a big inconvenience for lots of people, particularly in a professional environment, it’s especially bad if you can no longer access your data. In some cases, years of work may have gone into the data and it may not be possible to reproduce everything. But this loss of data can be prevented. Those who regularly create backups will not need to worry about data loss. Not only can you duplicate individual datasets or specific folders, but you can also create a backup of an entire system. This protects almost all of your data against loss.
Most people understand the importance of backup copies. But many also simply find constant backups to be tedious. However, they can also be made fully automatically. Once you know how to set up Windows 7 backups to run regularly and without further effort on the part of the user, backing up data becomes a walk in the park.
Microsoft discontinued the official support for Windows 7 on January 14, 2020. Technical support and security updates are no longer available for the product. An exception is the paid professional support for companies, which runs until 2023. If you don’t wish to use this service, switching to a newer Windows edition is definitely recommended. Find out more in our extensive article on the end of Windows 7 support.
Correctly configuring Windows 7 backups
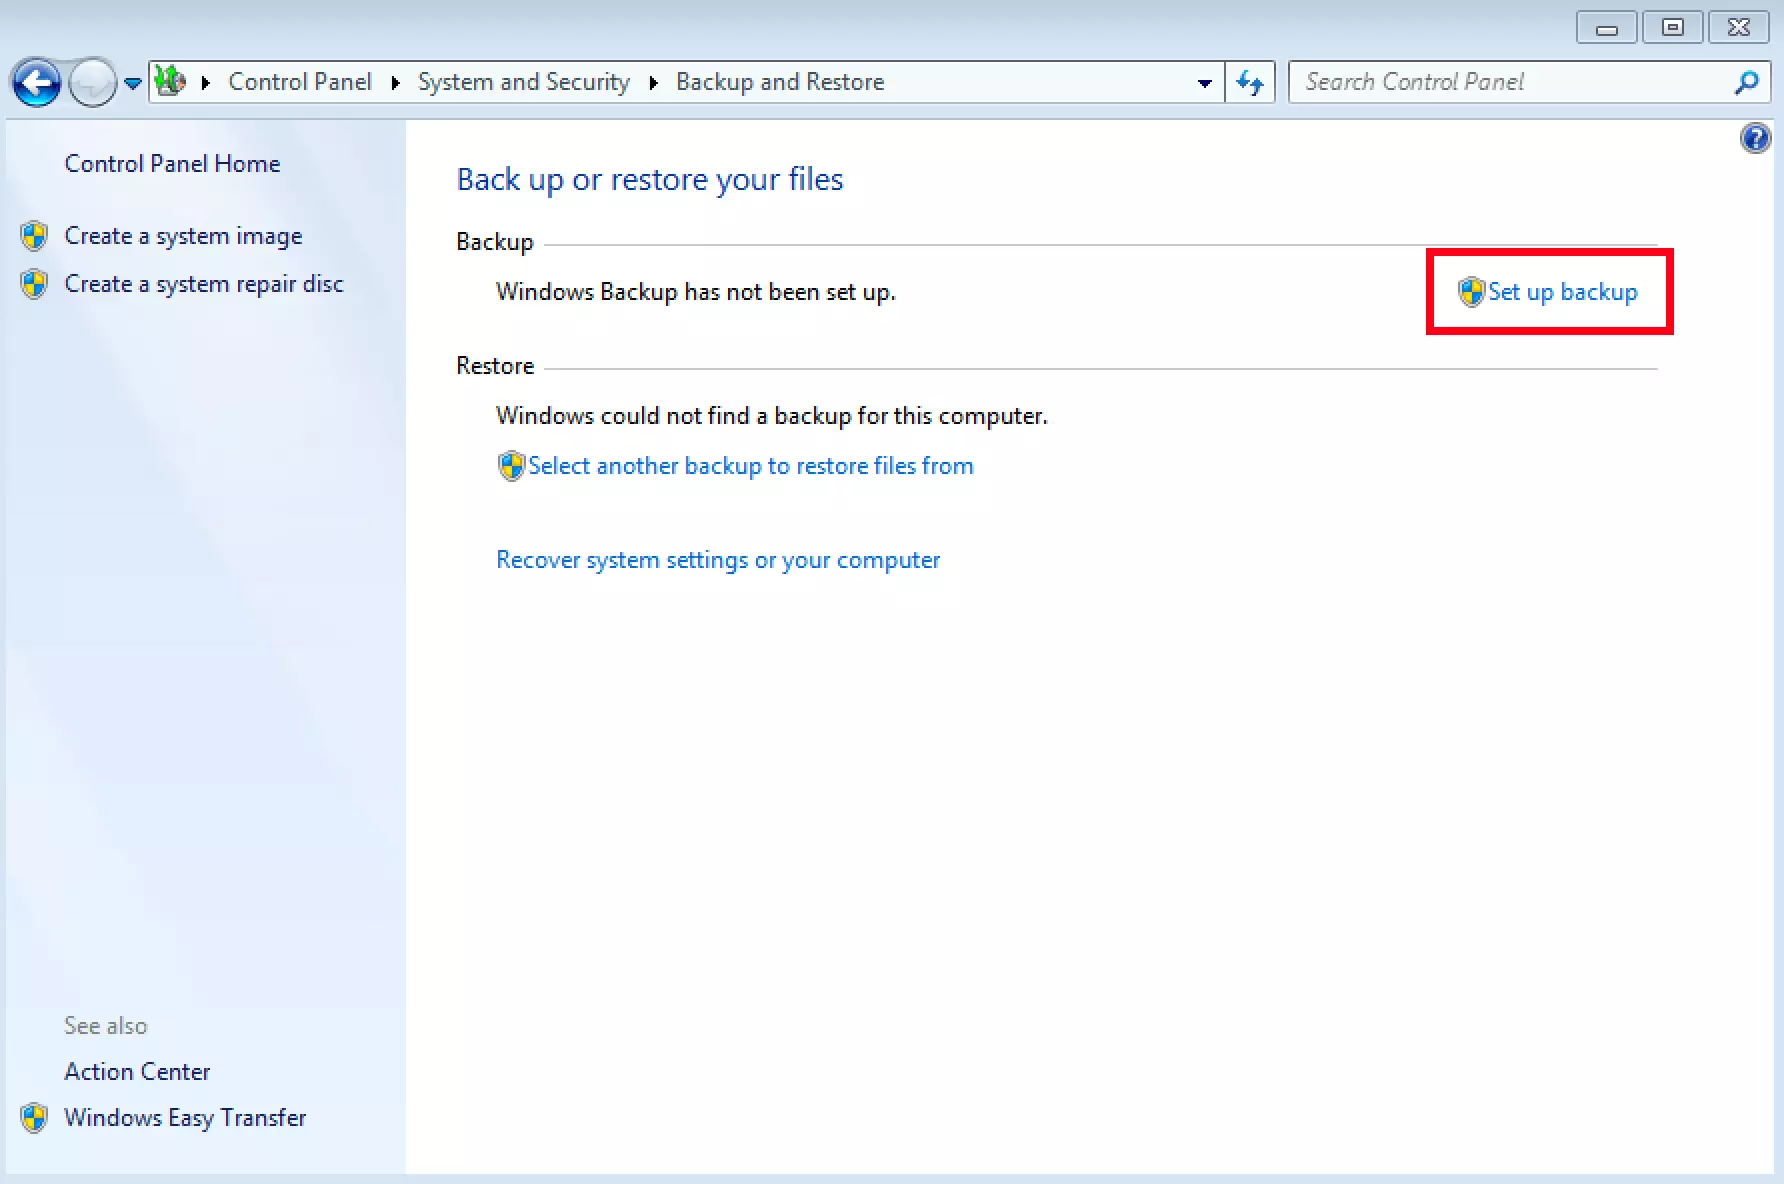
You don’t need any additional software to perform a Windows 7 backup. The necessary functions are also included in the operating system. Simply navigate to the system settings and select “Backup or restore your files.” You should find this menu item under the “System and Security” section. If you haven’t used the automatic backup feature before, Windows will inform you that no Windows backup has been set up yet. Click on “Set up backup” to configure the settings accordingly.
You can also use an external service to regularly back up your system. Using Cloud Backup or HiDrive Cloud Storage from IONOS, you can save all important data online and have access to your files wherever you are.
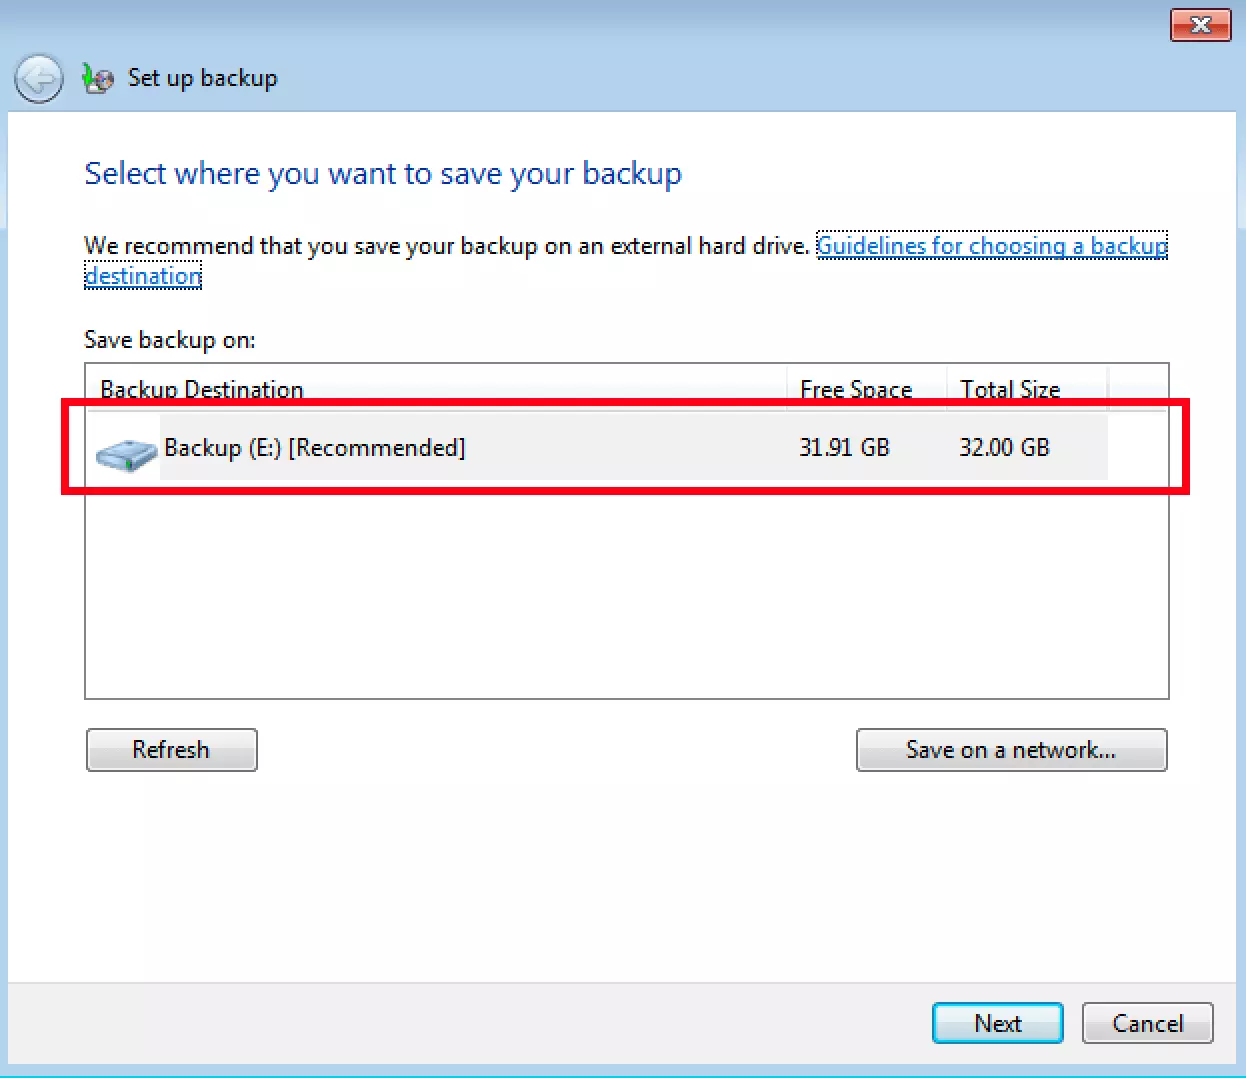
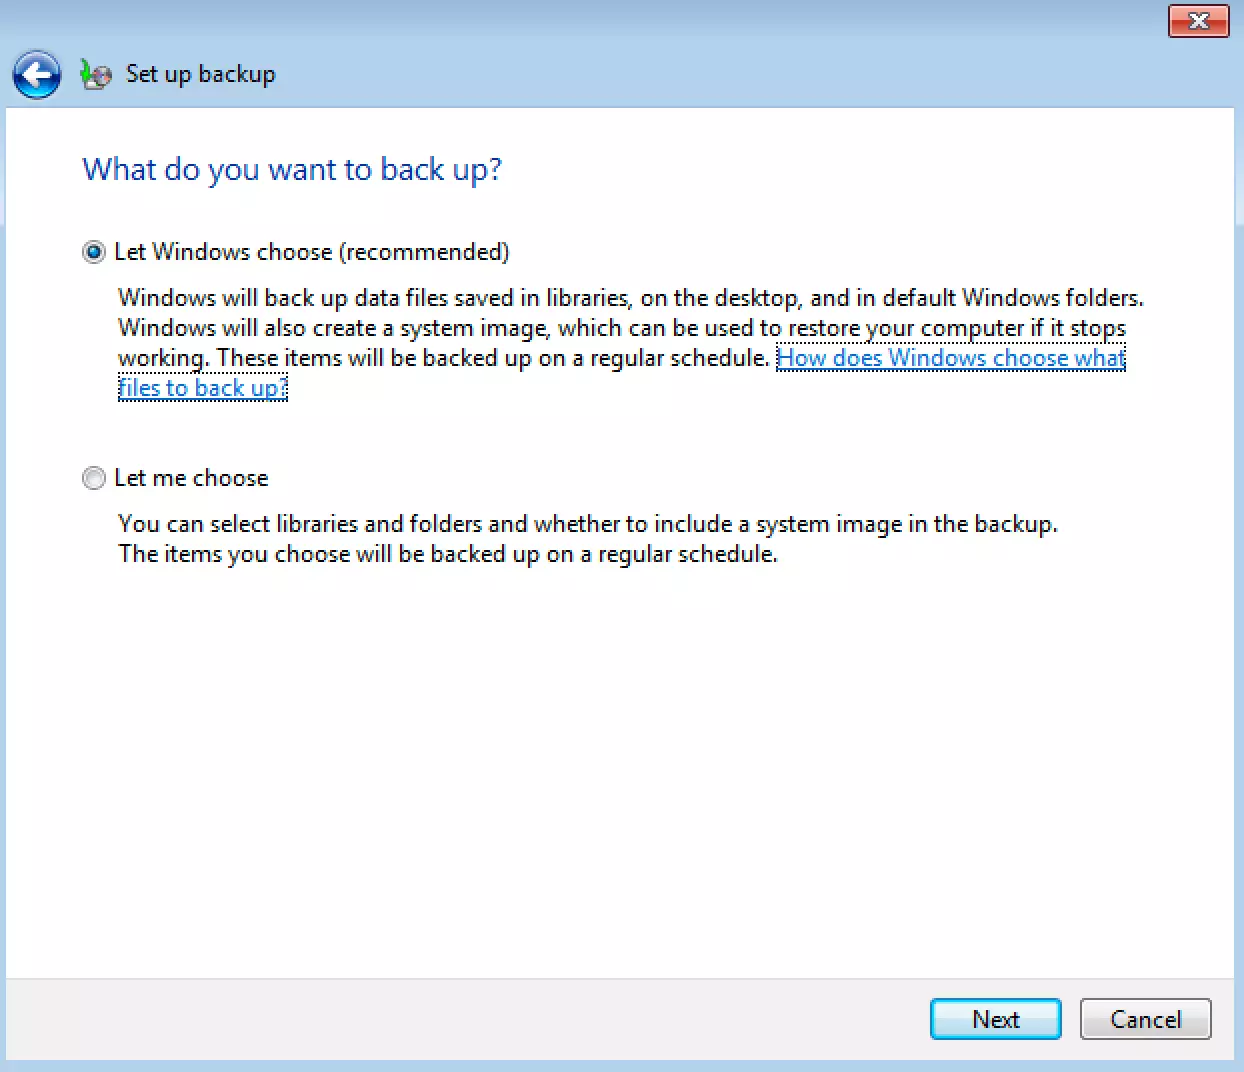
After you’ve chosen a suitable drive, Windows will give you two options: Either you decide which files are to be included in the backup or you can let the operating system decide for you. Most users can can’t go far wrong with the automatic selection. Only if you have a better understanding of your PC or laptop is the manual selection advisable. This allows you to select entire drives or just certain folders.
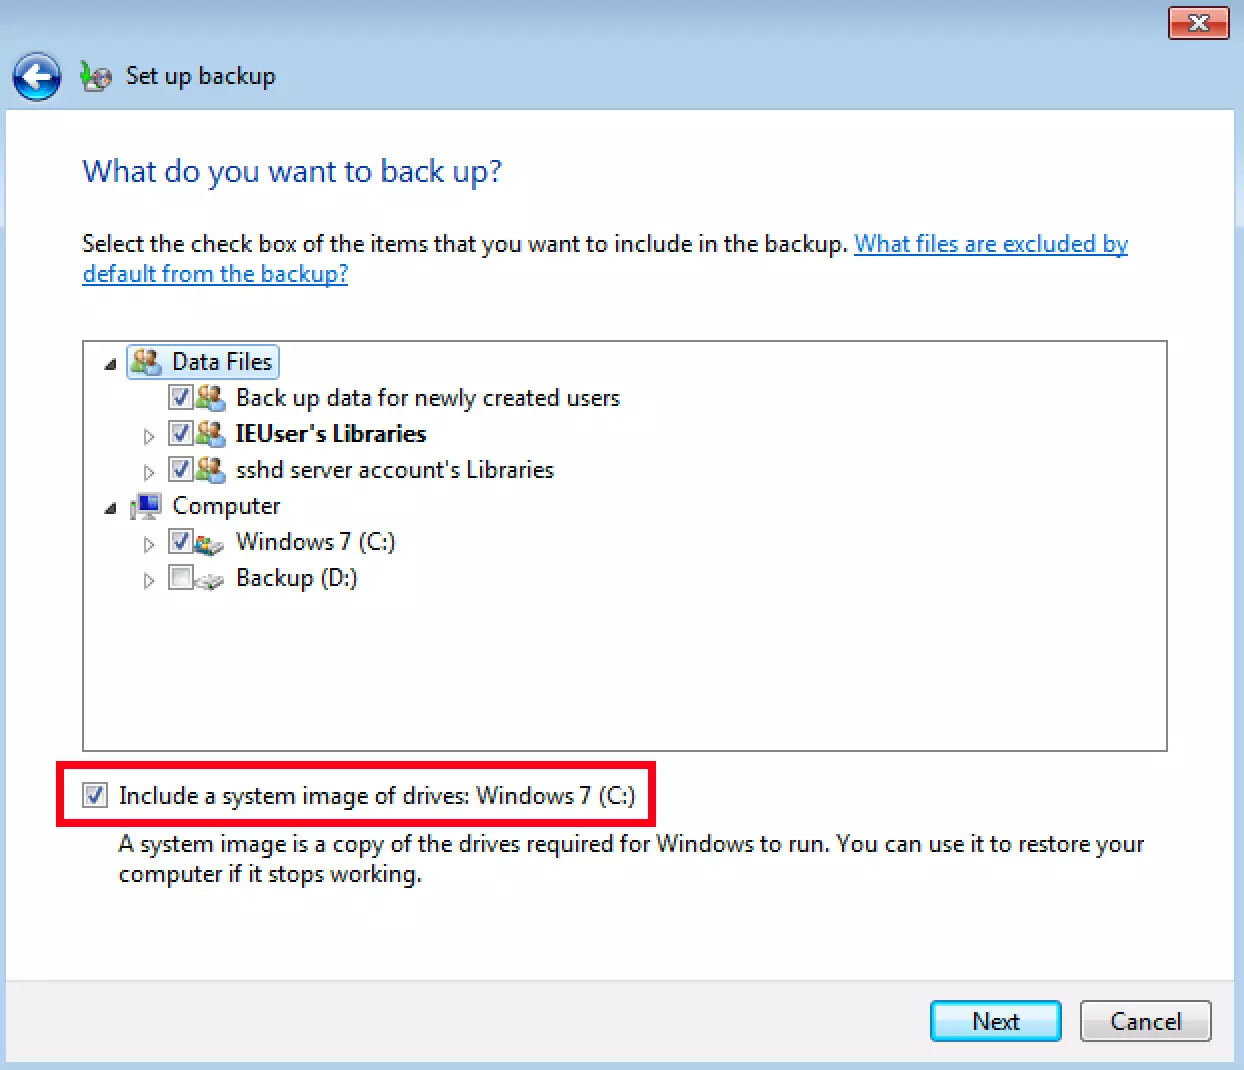
What’s more, it’s also possible to include a system image in the manual selection. In this case, not only are the folders and files duplicated, a copy of the complete system settings is also created. So, if you want to restore your system after a computer problem, this Windows 7 backup allows you to pick up where you left off. Windows will not have to be completely reconfigured.
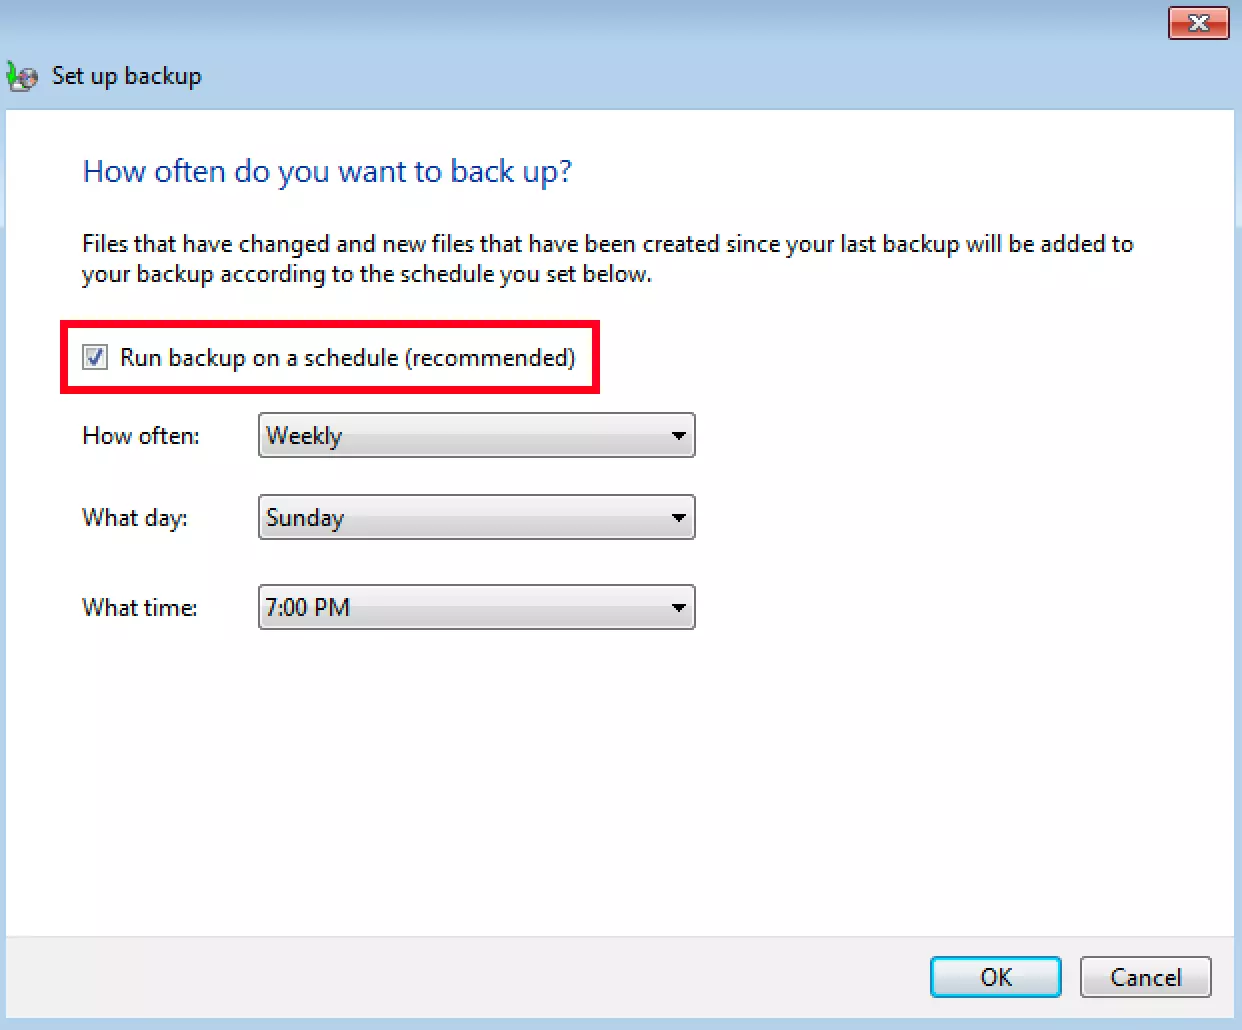
After you have chosen a selection option (either automatic or manual), you will see a summary of key information. Moreover, Windows will show you the option to adjust the schedule of regular backups. Remember to have your computer running and connected to the external drive at this time. You can also choose how often Windows 7 should perform the backup: daily, weekly, or monthly. The decision should depend on how many critical changes you make. If you opt for daily backups, you’ll naturally have the best protection.
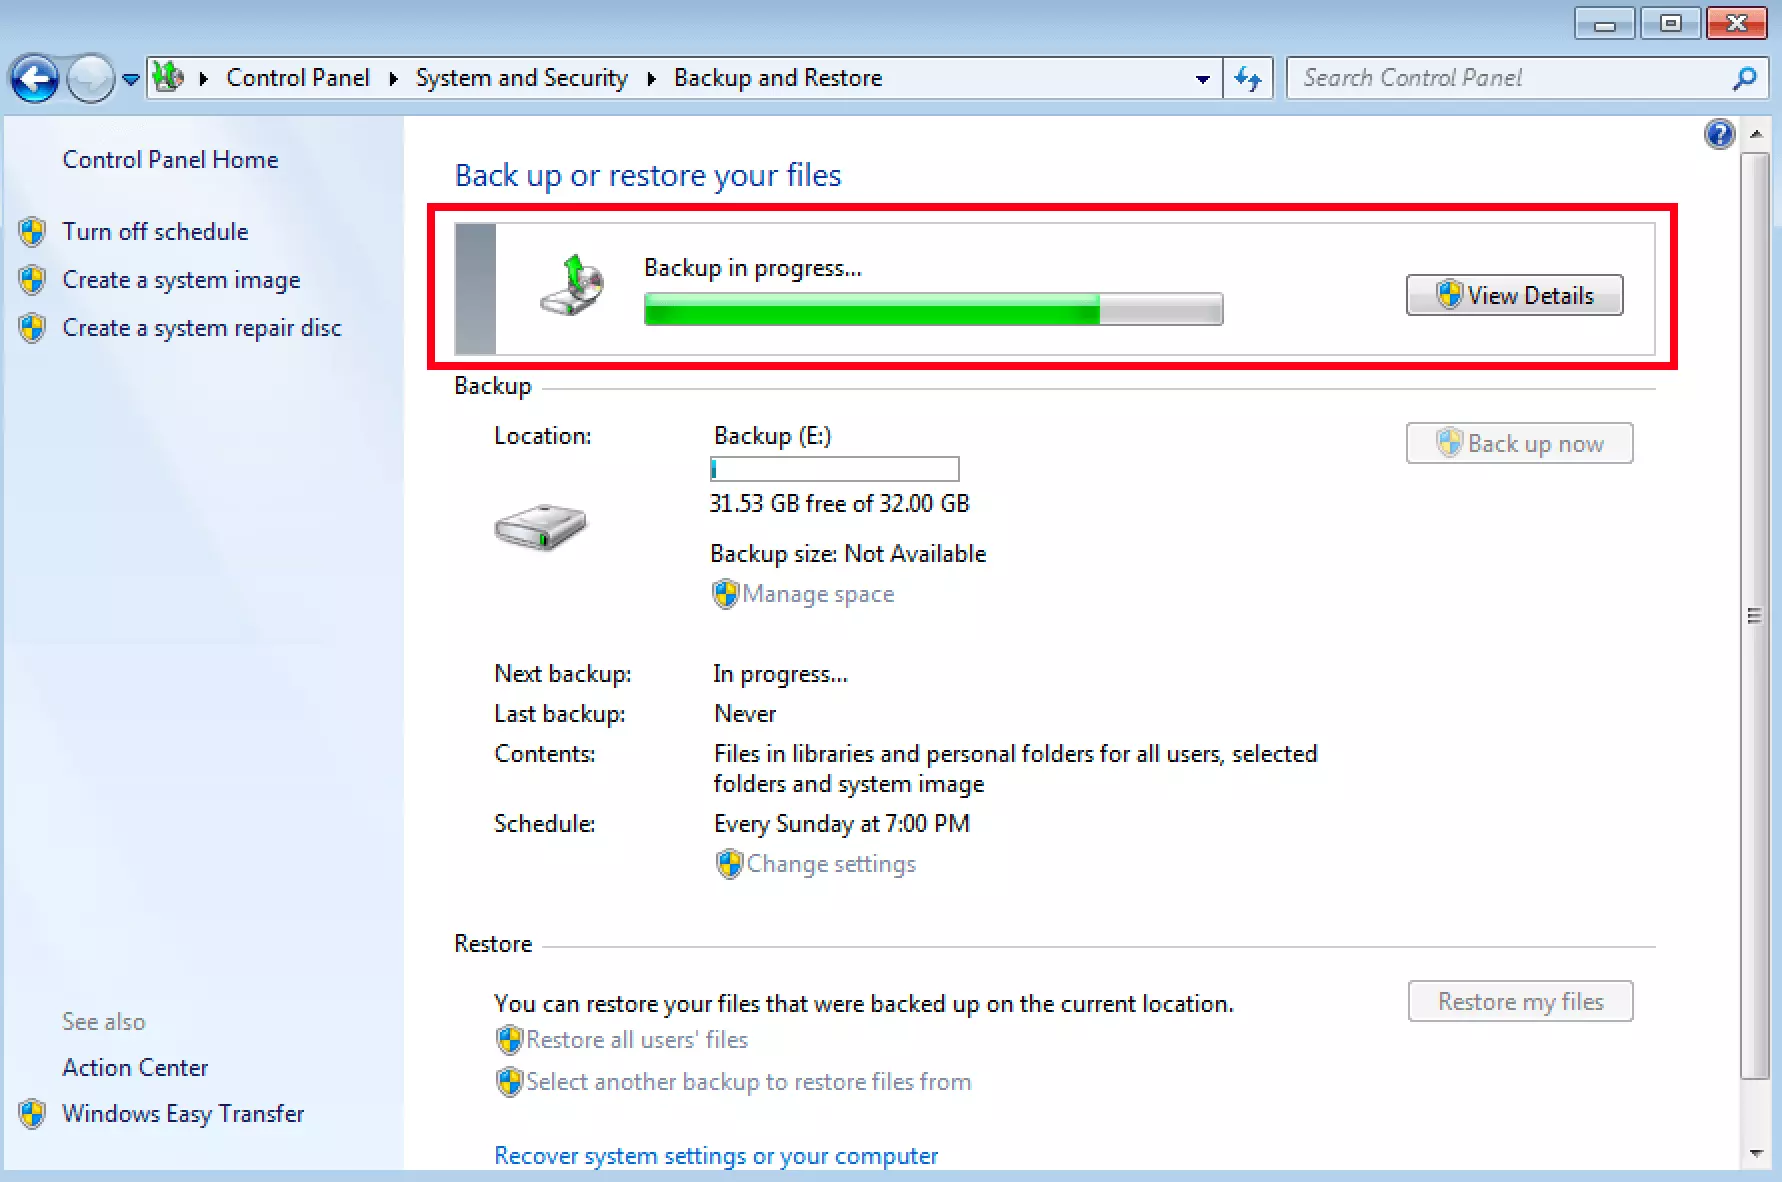
Once you’ve configured all the settings, confirm everything and start the first backup. From now on, Windows 7 will make backups at regular intervals – without any further action required on your part. The operating system makes sure only to copy the data that has changed since the last backup, rather than always copying every file.
Restoring Windows 7 from a backup
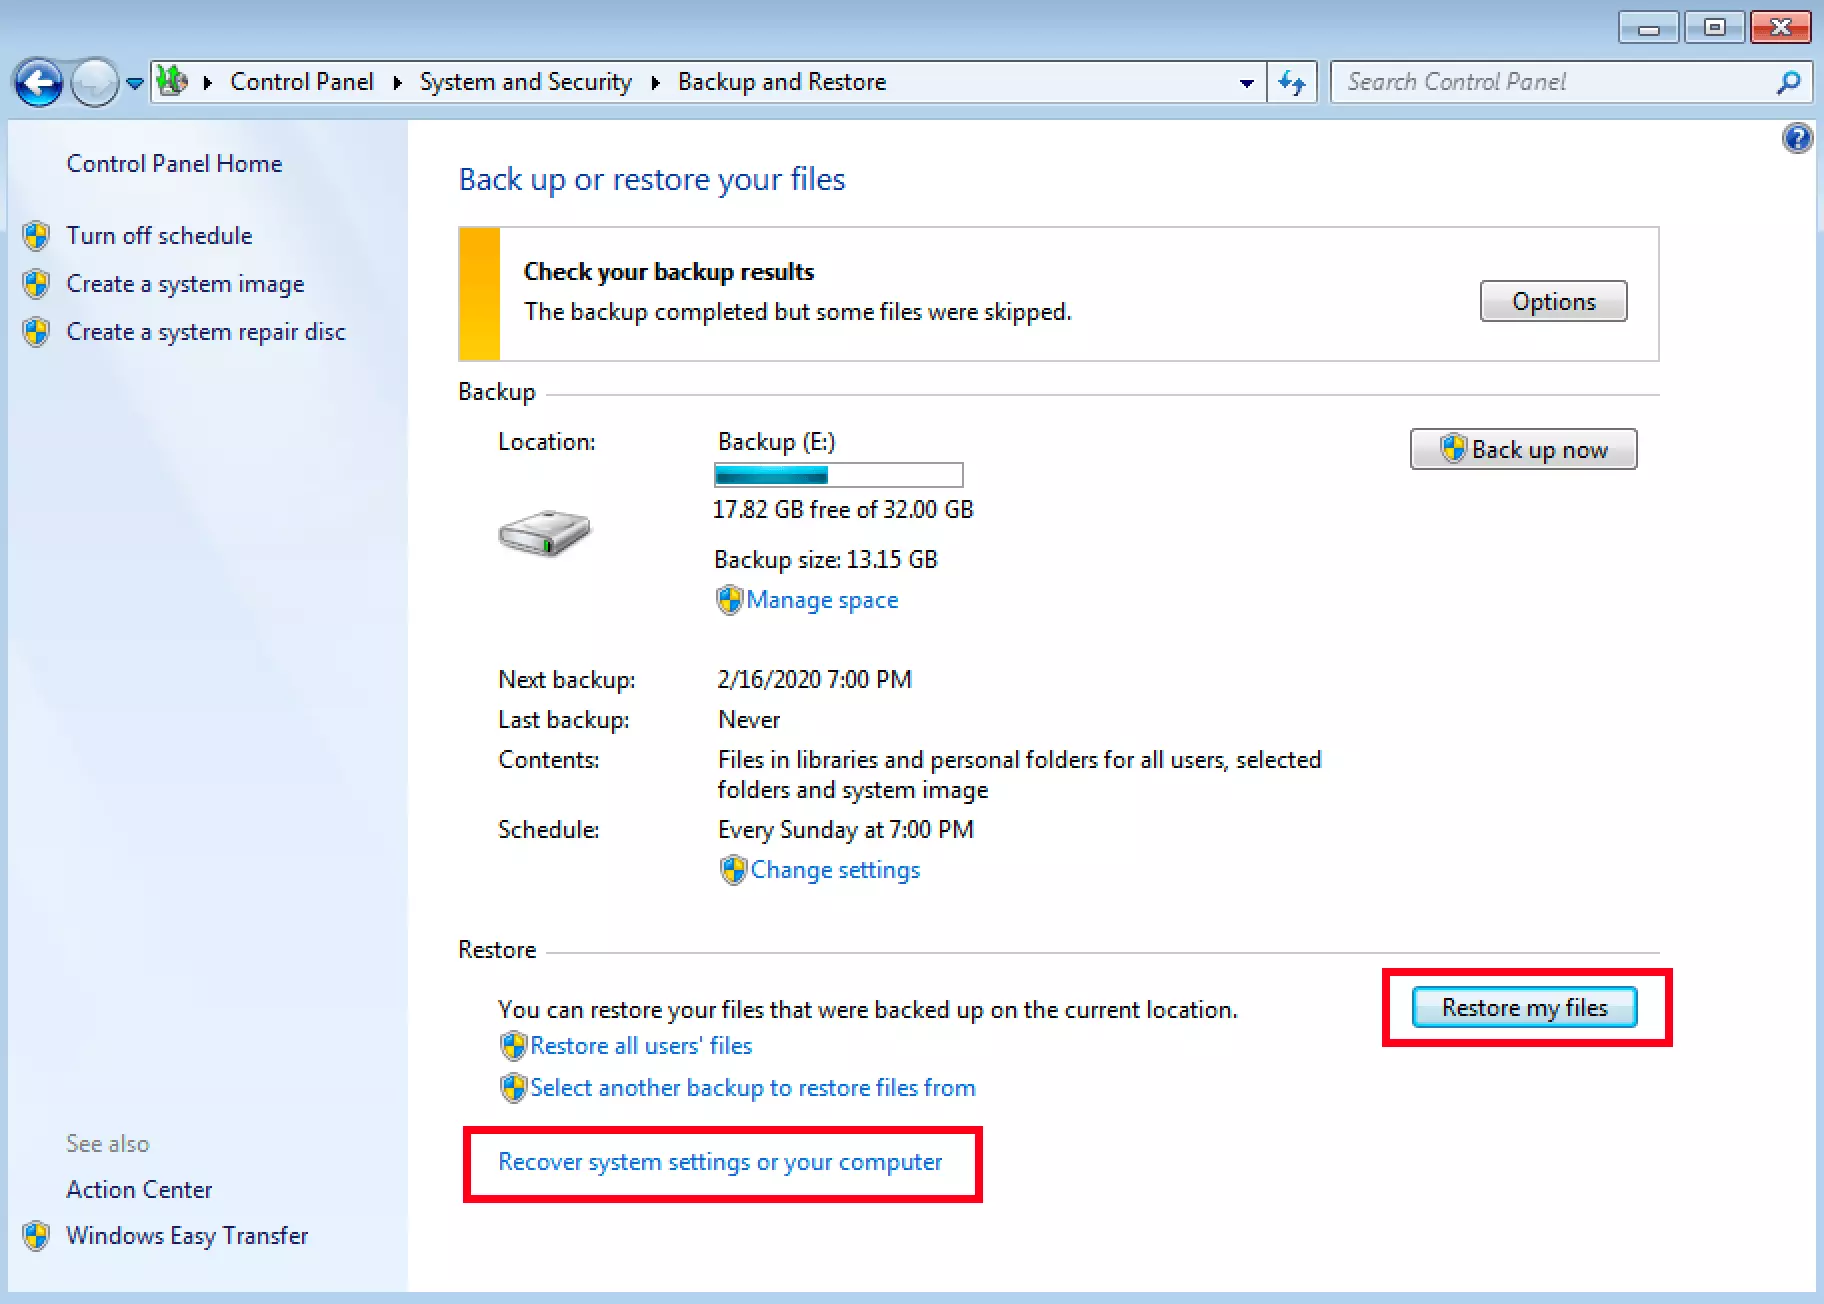
Having created a backup, you can easily use it should it become necessary. To do so, go back to the backup menu and select the option “Restore my files.” You should then select the backup folder that you made on the external hard drive. Next, consider whether you wish to use the original directory or a new folder. The recovery process will begin as soon as you confirm.
If Windows has problems as a whole, you should not just restore the files but run a complete system recovery. You’ll find the option for this at the bottom of the backup menu: “Recover system settings on your computer.” An assistant will guide you through the recovery process. You’ll also be asked which recovery point you wish to use. Sometimes it makes sense not to use the most recent backup, since errors may have already crept in.
Repair disc for Windows 7
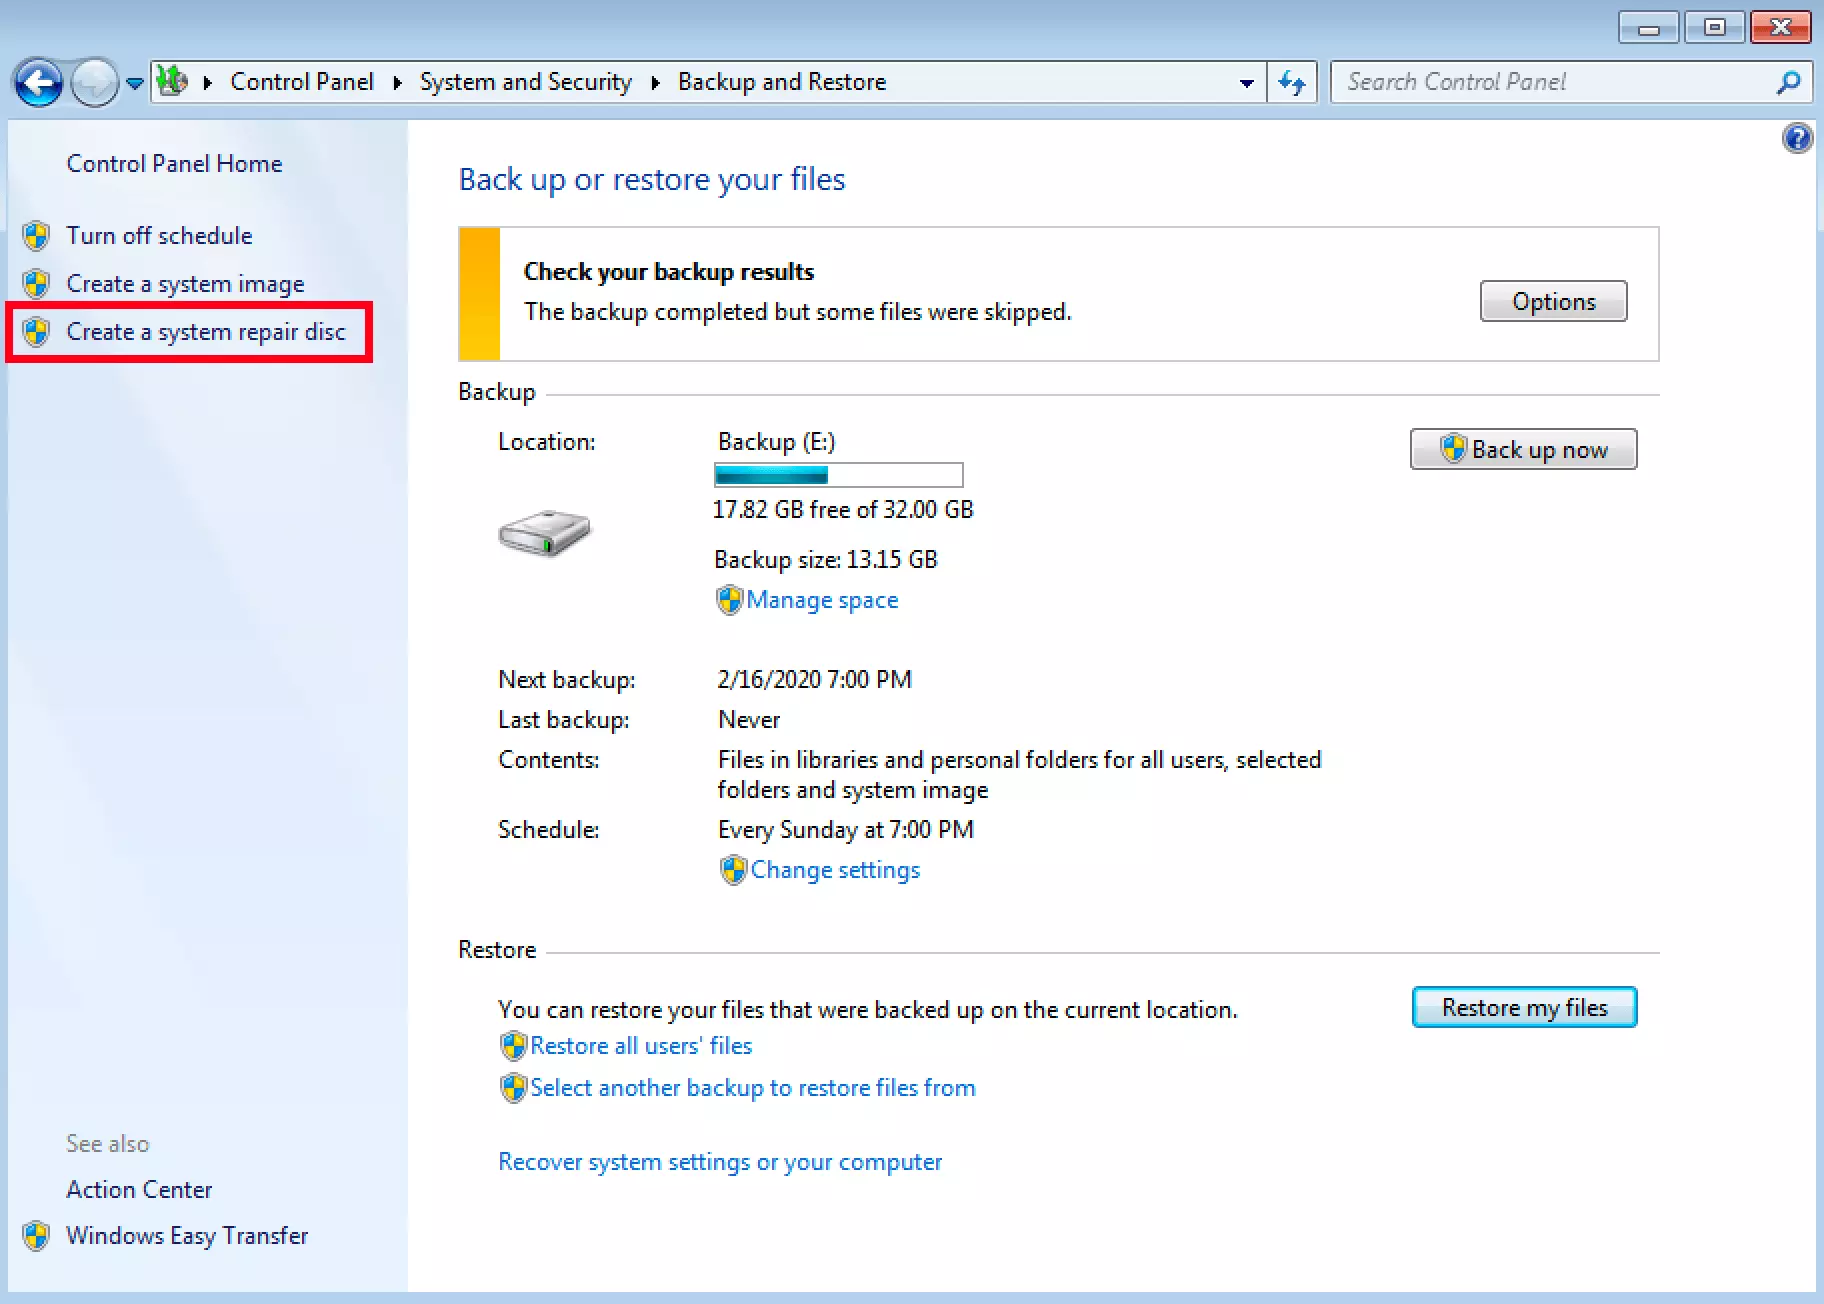
A repair disc can be worthwhile for backing up the system. If nothing else works, you can use this CD or DVD to boot Windows 7. To create a repair disc, return once again to the backup menu. There you’ll see the option “Create a system repair disc” in the left panel. Select your drive and write an empty data medium.


