Hard drive not detected – here’s what you can do
The Windows 10 operating system is known to flag minor errors from time to time, such as with the management of disk drives. But issues can also arise when using hard drives. For example, a hard drive that has already been used for a long time or one that has recently been purchased might not be detected. We explain some of the possible reasons for these errors and how you can fix them using examples.
Any kind of troubleshooting with disk drives will be simplified the more familiar you are with the topics of “disk drive recovery” and “backups”. Some external hard drives will also reappear if they are simply reconnected to the computer through another USB port.
- Free website protection with SSL Wildcard included
- Free private registration for greater privacy
- Free 2 GB email account
Mechanical causes
If a hard drive is not recognised, first check the connection between the hard drive and the USB or SATA port on the computer. Is the fit tight, and are the connectors plugged in deep enough – both on the hard drive and on the computer? Since USB was introduced, there have been many types of connectors. The most common external connectors right now are the standard USB-A and the newer USB-C. Internally, disk drives are mostly connected through SATA connectors.
For external hard drives, the variety of connectors is larger but due to high data transfer rates the trend is pointing towards USB-C connectors. Users no longer have to pay attention to the orientation of the connector when plugging it into a device. Manufacturers offer a guaranteed number of plug cycles for USB connectors. With mini-USB and USB-C, that number is around 10,000, for example. Faulty USB connectors may thus be an option, but this is rarely the cause. This also applies to USB sticks with a large storage capacity that are used as hard drives.
With 10,000 plug cycles and two uses on an average workday, a USB-C connector has an expected duration of around 22 years.
As such, a hard drive will not be recognised if a defective USB or SATA cable is being used to connect the drive to the computer. Transportable hard drives are often carried around with the cable wrapped around it, which could lead to breakages in the cable. You can just try out another suitable USB cable if you suspect faulty wiring to be the cause. Furthermore, there are USB cables that are only used for charging devices, and these cannot be used for data transfer.
Keep USB cables with their appropriate devices, in order to avoid the need to frequently try out different ones. You could also use a colour code or labels, for example, by creating little flags out of transparent tape and tiny pieces of paper.
An unrecognised hard drive could also be defective. With older models, this is noticeable through clicking or buzzing sounds coming from the device. Defects in SSD models can become evident if the device heats up or if its working speed slows down a lot. But sometimes it’s not at all apparent what the issue may be. Even SSDs have a limited number of read and write cycles. However, if you format such a hard drive generously, there will be enough internal space to fall back on functioning memory cells.
A drive letter has not been assigned
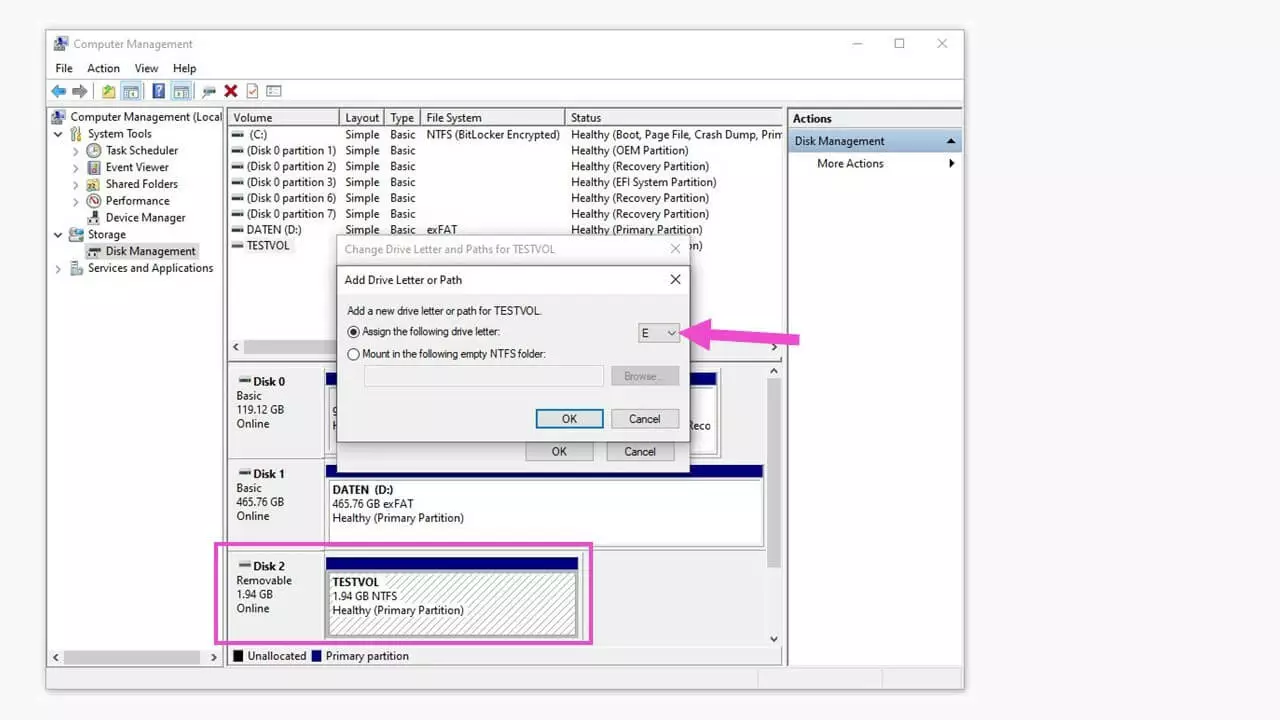
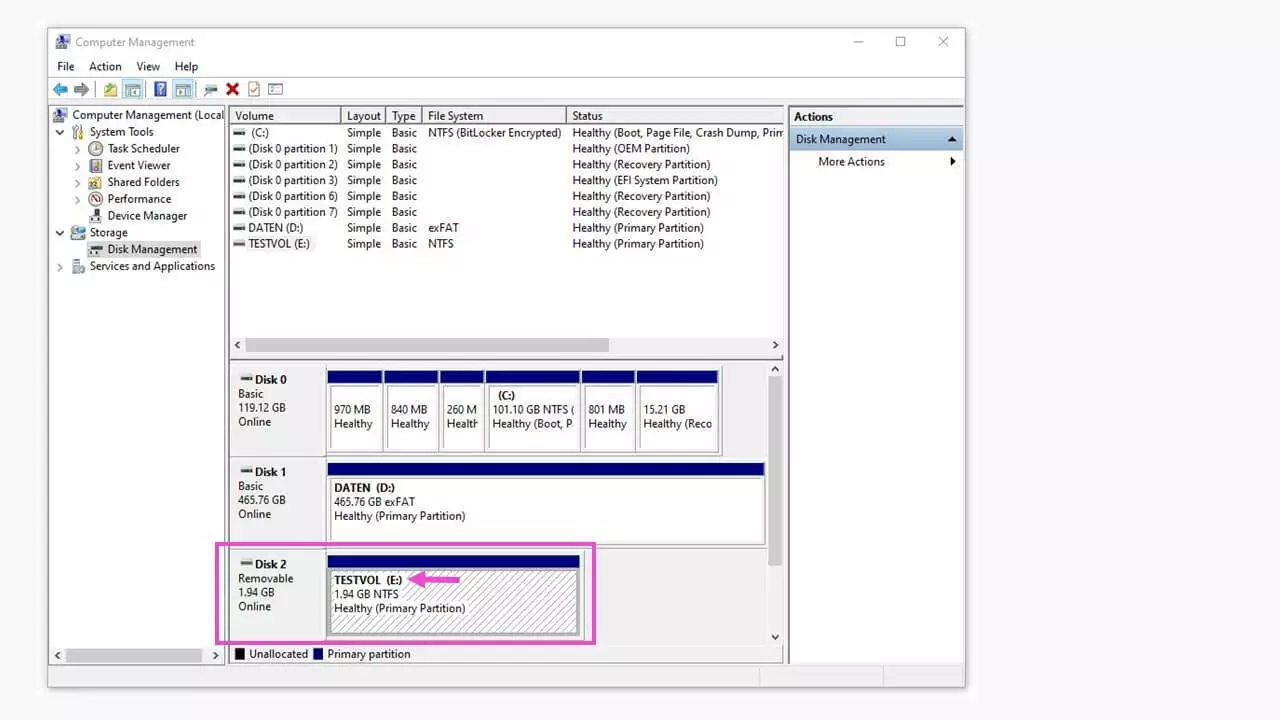
In order for Windows to manage a storage device, it has to be registered in the system. This happens through the assignment of a drive letter, such as “E:\”. It is possible for Windows to not automatically assign this letter on its own, because it presumes that all letters have already been assigned or that the desired letter is already being used. This could also cause a hard drive to not be detected and points to an internal Windows problem. A format that is not Windows-compatible, such as a Mac OS format, could prevent a drive letter from being assigned.
Before you begin making changes to an unrecognised hard drive, it is important that you back up your data, possibly using another computer with the appropriate operating system.
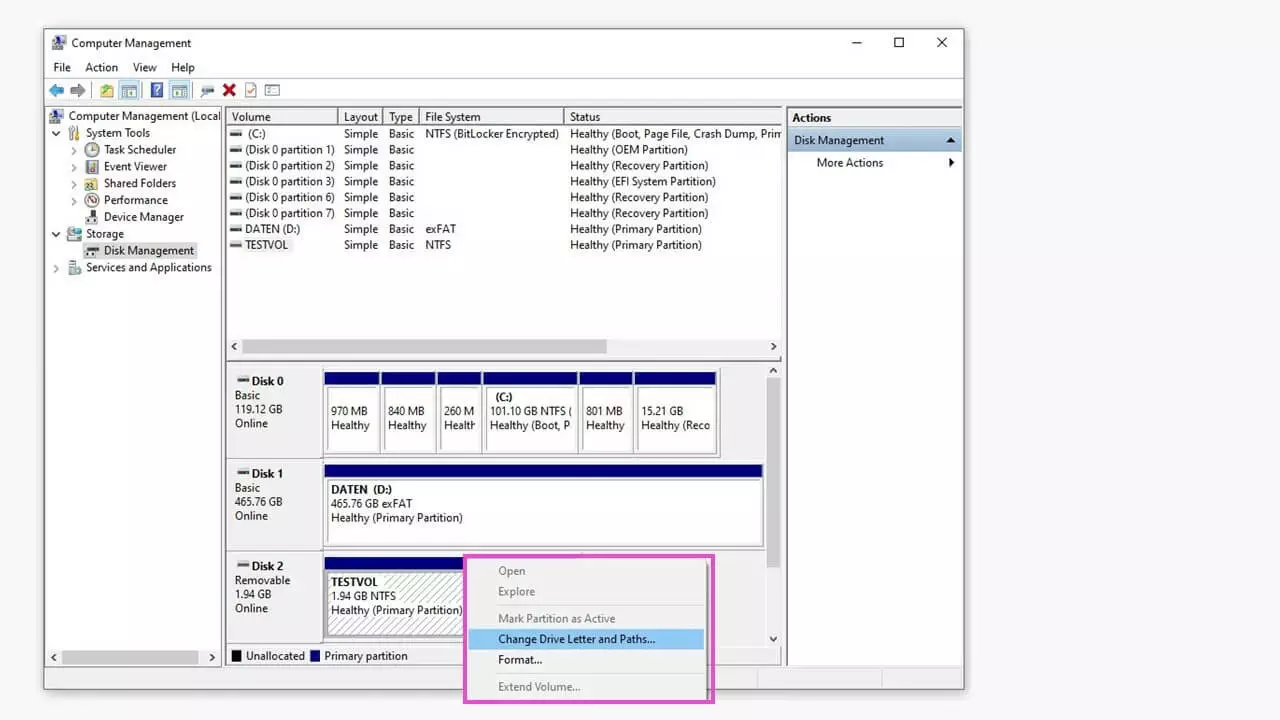
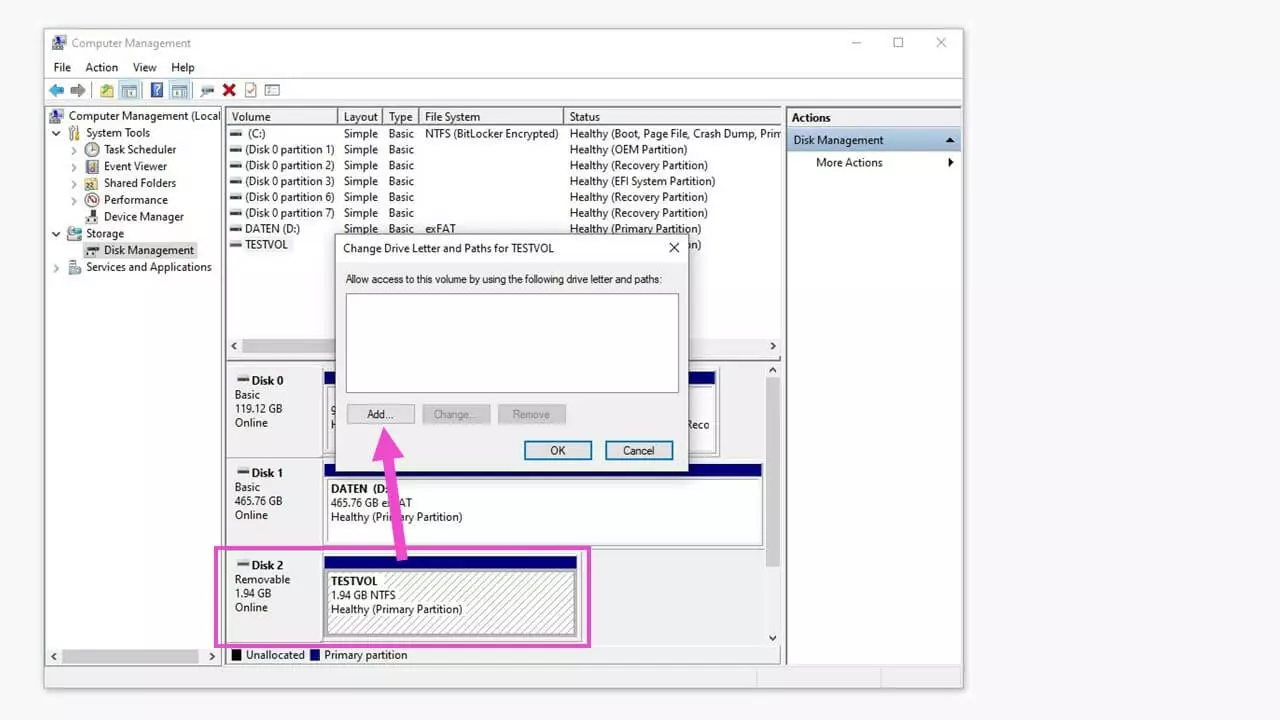
Here is how you can assign a drive letter:
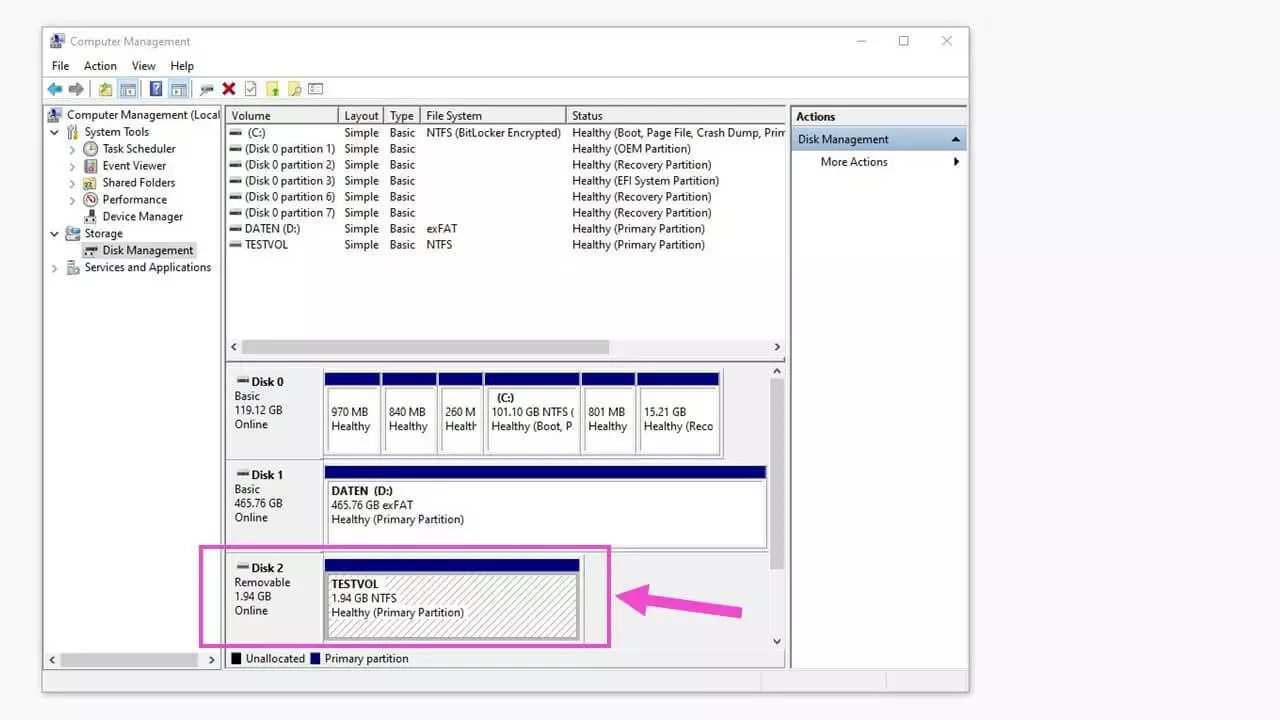
Open Windows “Disk Management”:
- Right-click on “This PC” in File Explorer > click on “Manage” in the menu bar.
- Search Windows using the term “Disk Management,” and then select “Create and format hard disk partitions.”
This will open the “Computer Management” window. In the left-hand menu, click on “Disk Management” under “Data storage.”
The system will suggest a letter, but you can choose any other available letter and then confirm by clicking on “OK”.
If you would like to keep using certain disk drives, such as an SSD drive or a USB stick, with the same drive letter, then avoid choosing it when assigning a letter to another drive.
The drive has now been assigned a letter and can be used just like any other internal or external drive, without any constraints.
A file system is missing from the disk drive
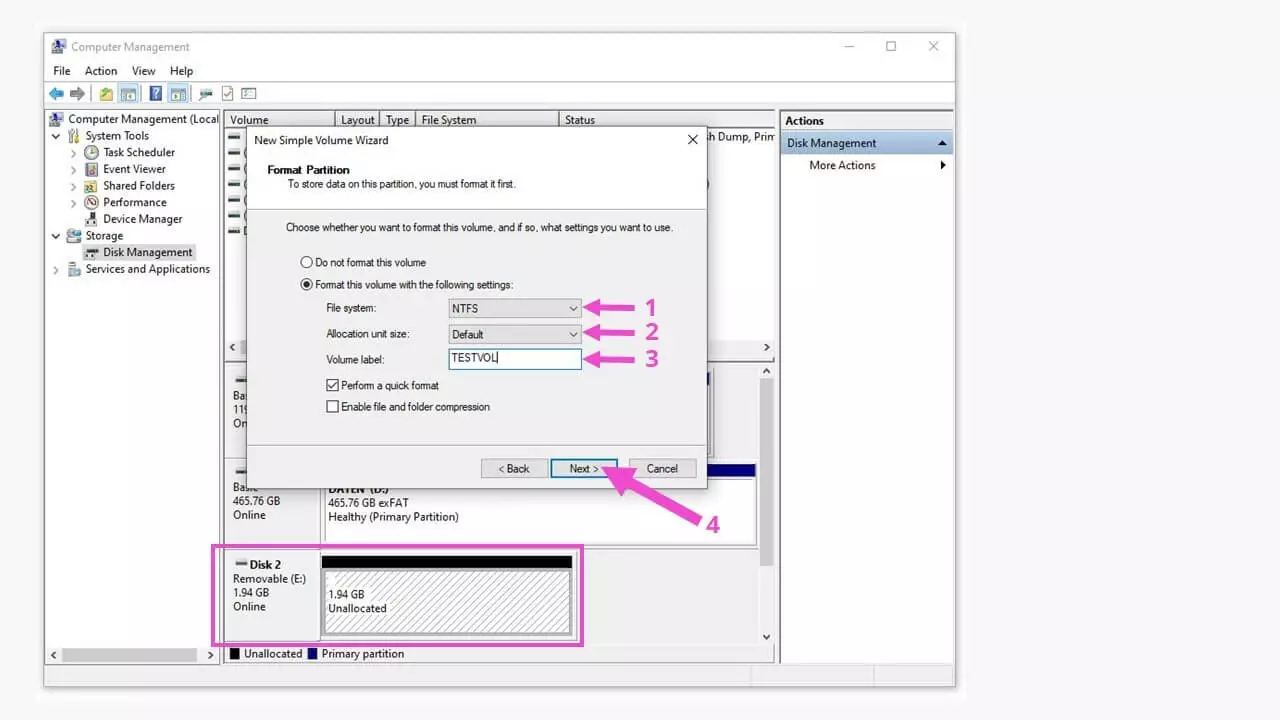
Another cause for the error of a hard drive not being recognized could be a missing file system. For Windows, this should be a NTFS (“New Technology File System”) or a FAT (“File Allocation Table”). In Disk Management, you can open the context menu by right-clicking on the blue bar above the unrecognised drive and then clicking on “Format...”.
Either leave the suggested volume label or choose a new one (1), choose the file system to be used (2), check the box to perform a quick format (3), and then click on “OK.” After Windows has completed the process, the formatted Disk 2 with its drive letter will be ready to be used.
The disk drive has no partitions
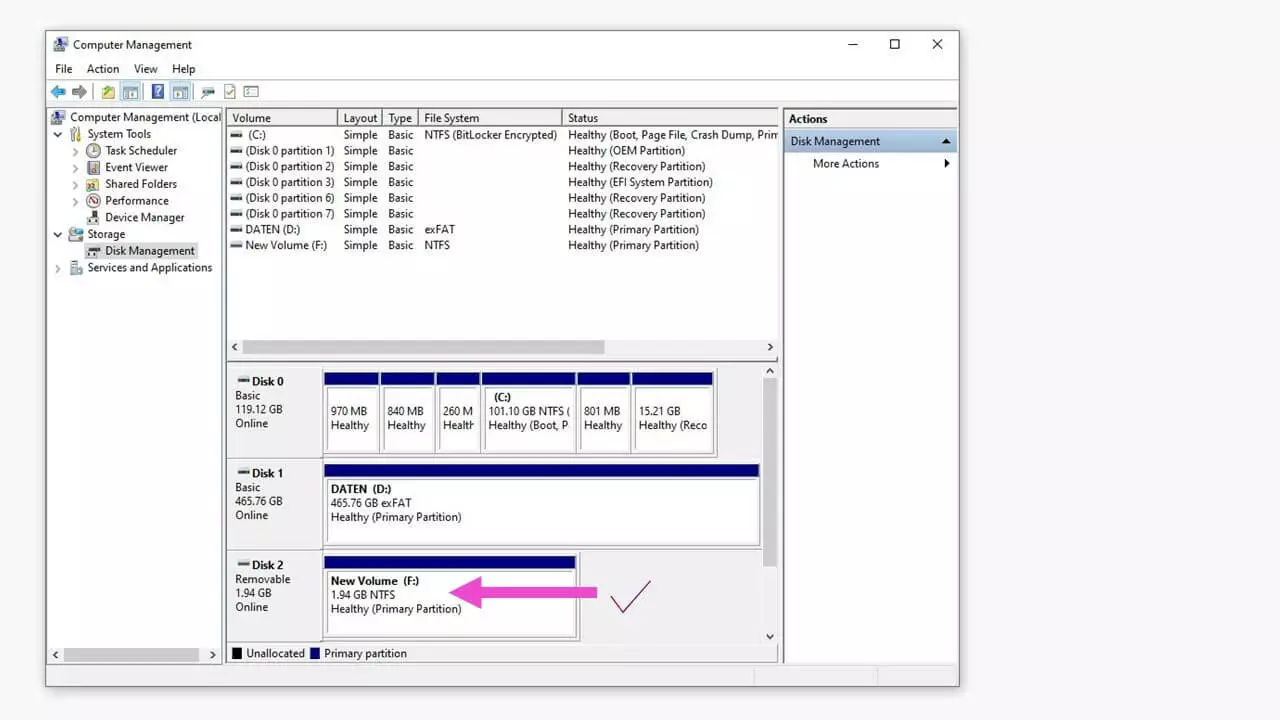
Though rare, the required partition could be missing from a new hard drive after it has been connected. This can be resolved once again through the context menu in Disk Management.
Once Windows has terminated the process, the partitioned drive with its letter will be available to you for use as Disk 2. When partitioning a large drive, it is also possible to set up several partitions, for example, “Data (F:),” “Backup (G:),” “Archive (H:),” and so on. You can also determine the size of each partition for yourself.
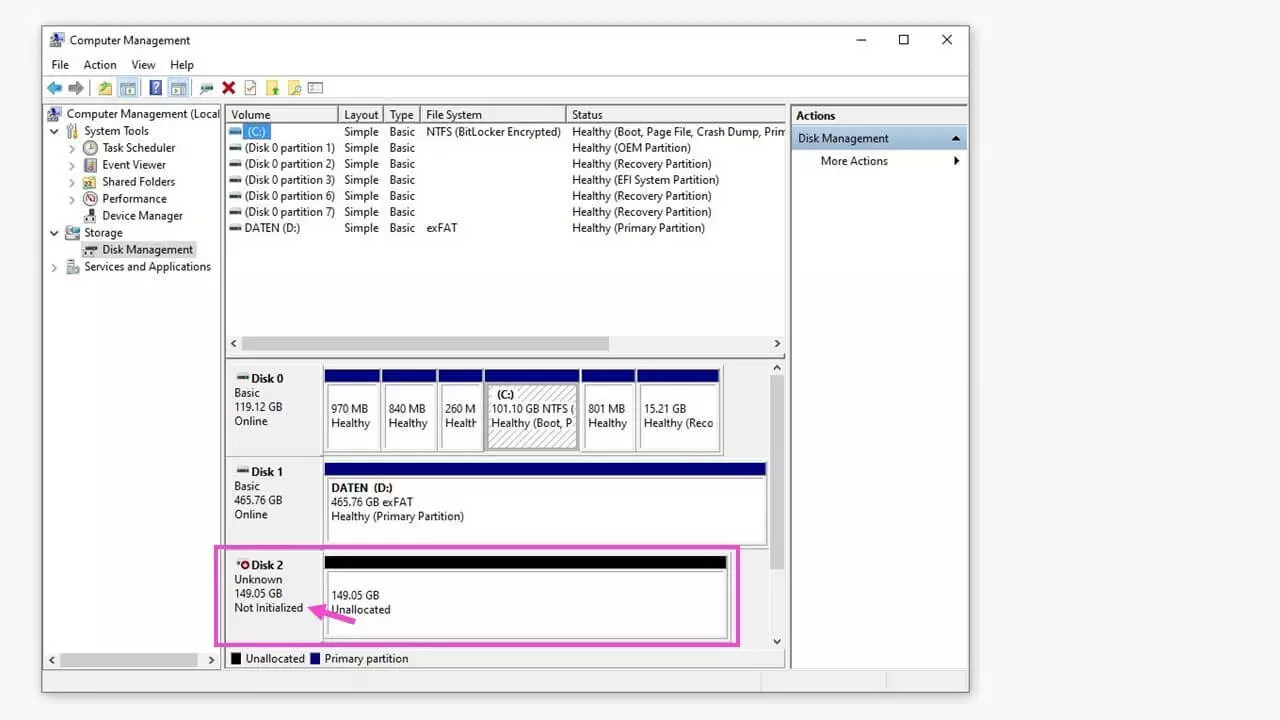
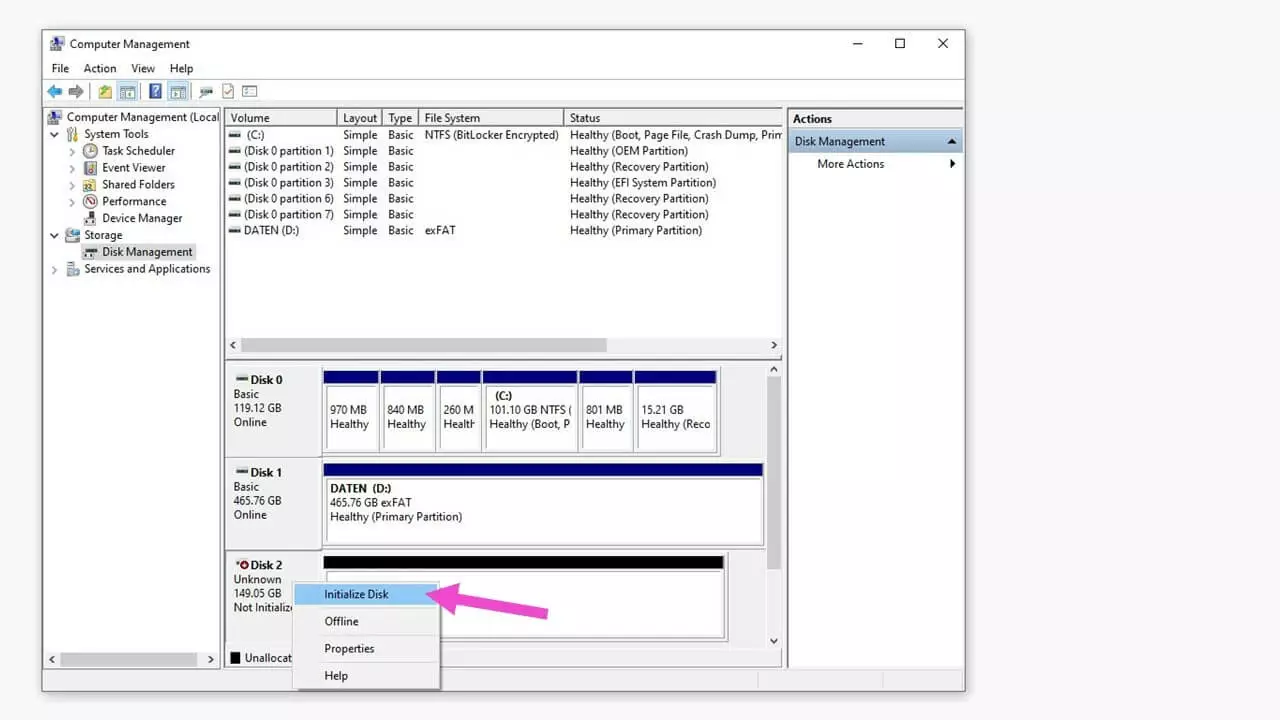
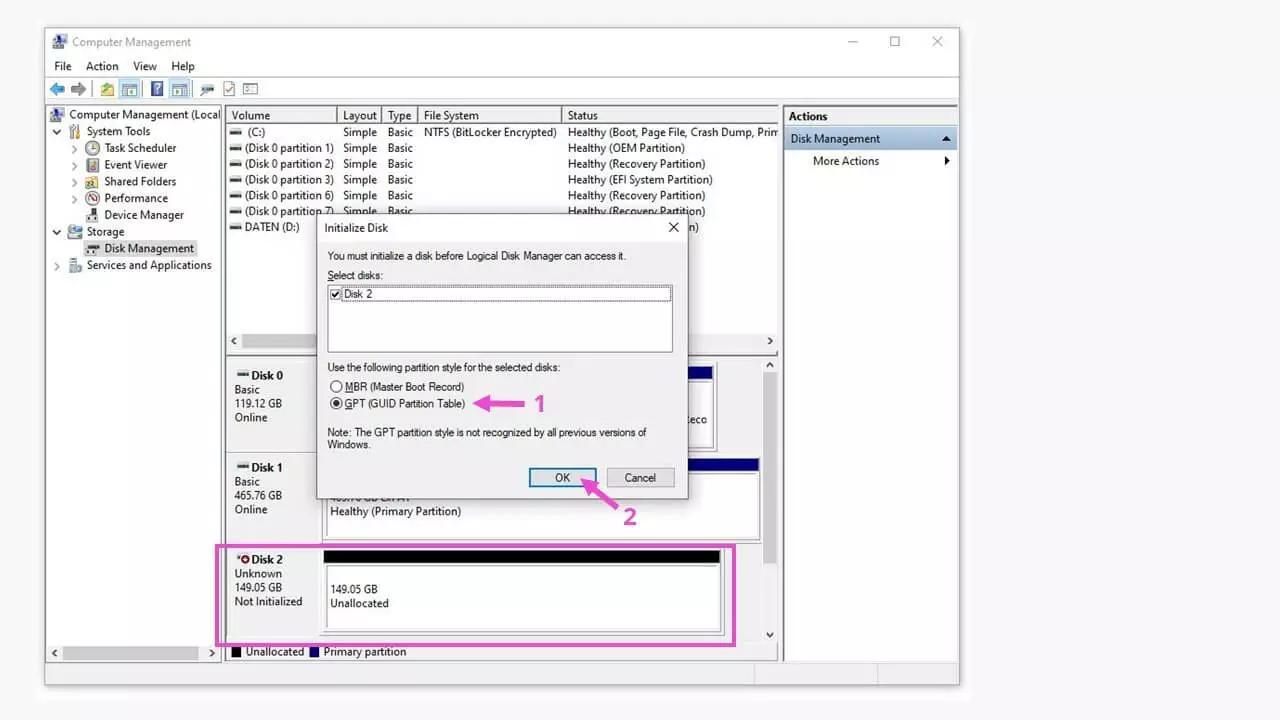
The hard drive has not been installed
After you have done this, the initialised Disk 2 can then be partitioned as a disk drive and be assigned a drive letter. It will then be visible and online in Disk Management and File Explorer.
For more information, consult our guide on hard drives that are not showing up, which includes more tips and tricks for Windows hard drives.


