How to delete a recovery partition in Windows
With the help of the recovery partition, you can restore the operating system of your computer to the factory settings. You delete the recovery partition using the DiskPart utility with the “delete partition override” command.
What is the recovery partition and what is it used for?
The recovery partition refers to a component of your computer hard drive that can be used to restore the system to factory settings in the event of a system failure or other problems.
There are two variants of this partition:
- Windows recovery partition: This contains the operating system alone and allows rebooting in the WinRE (Windows Recovery Environment).
- Manufacturer’s recovery partition: This requires more storage space and allows restoring in the factory settings by pressing a specific key (depending on the manufacturer).
Looking for effective data protection? MyDefender from IONOS performs regular virus scans and backups to keep your computer and its contents protected at all times. It is also suitable as a supplement to your existing virus protection.
Delete recovery partition on Windows: Step by Step
Step 1: Press the [Windows] and [R] keys simultaneously to make the Run command window open.
Step 2: Type `diskmgmt.msc´ in the search box and go to `OK´. The `Disk Management´ window will open.
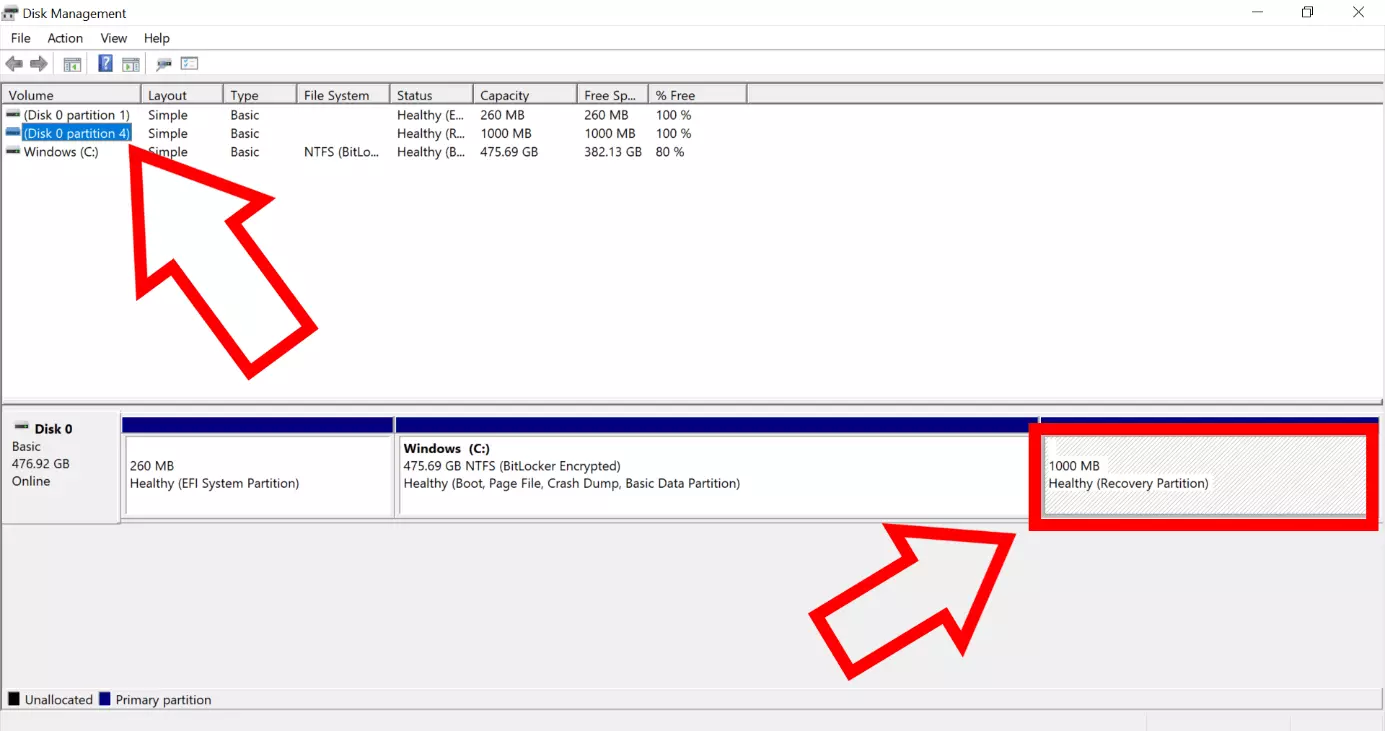
Step 3: Look for the recovery partition there. This is usually located on disk 0. If it’s there more than once, it’s because the disk partition has been partitioned. You will recognize the correct partition by the fact that the box with the word `Recovery partition´ is grayed out after your selection.
Step 4: Bring up the `Run´ window again, and this time type `diskpart´ in the search box. Then click `OK´ again.
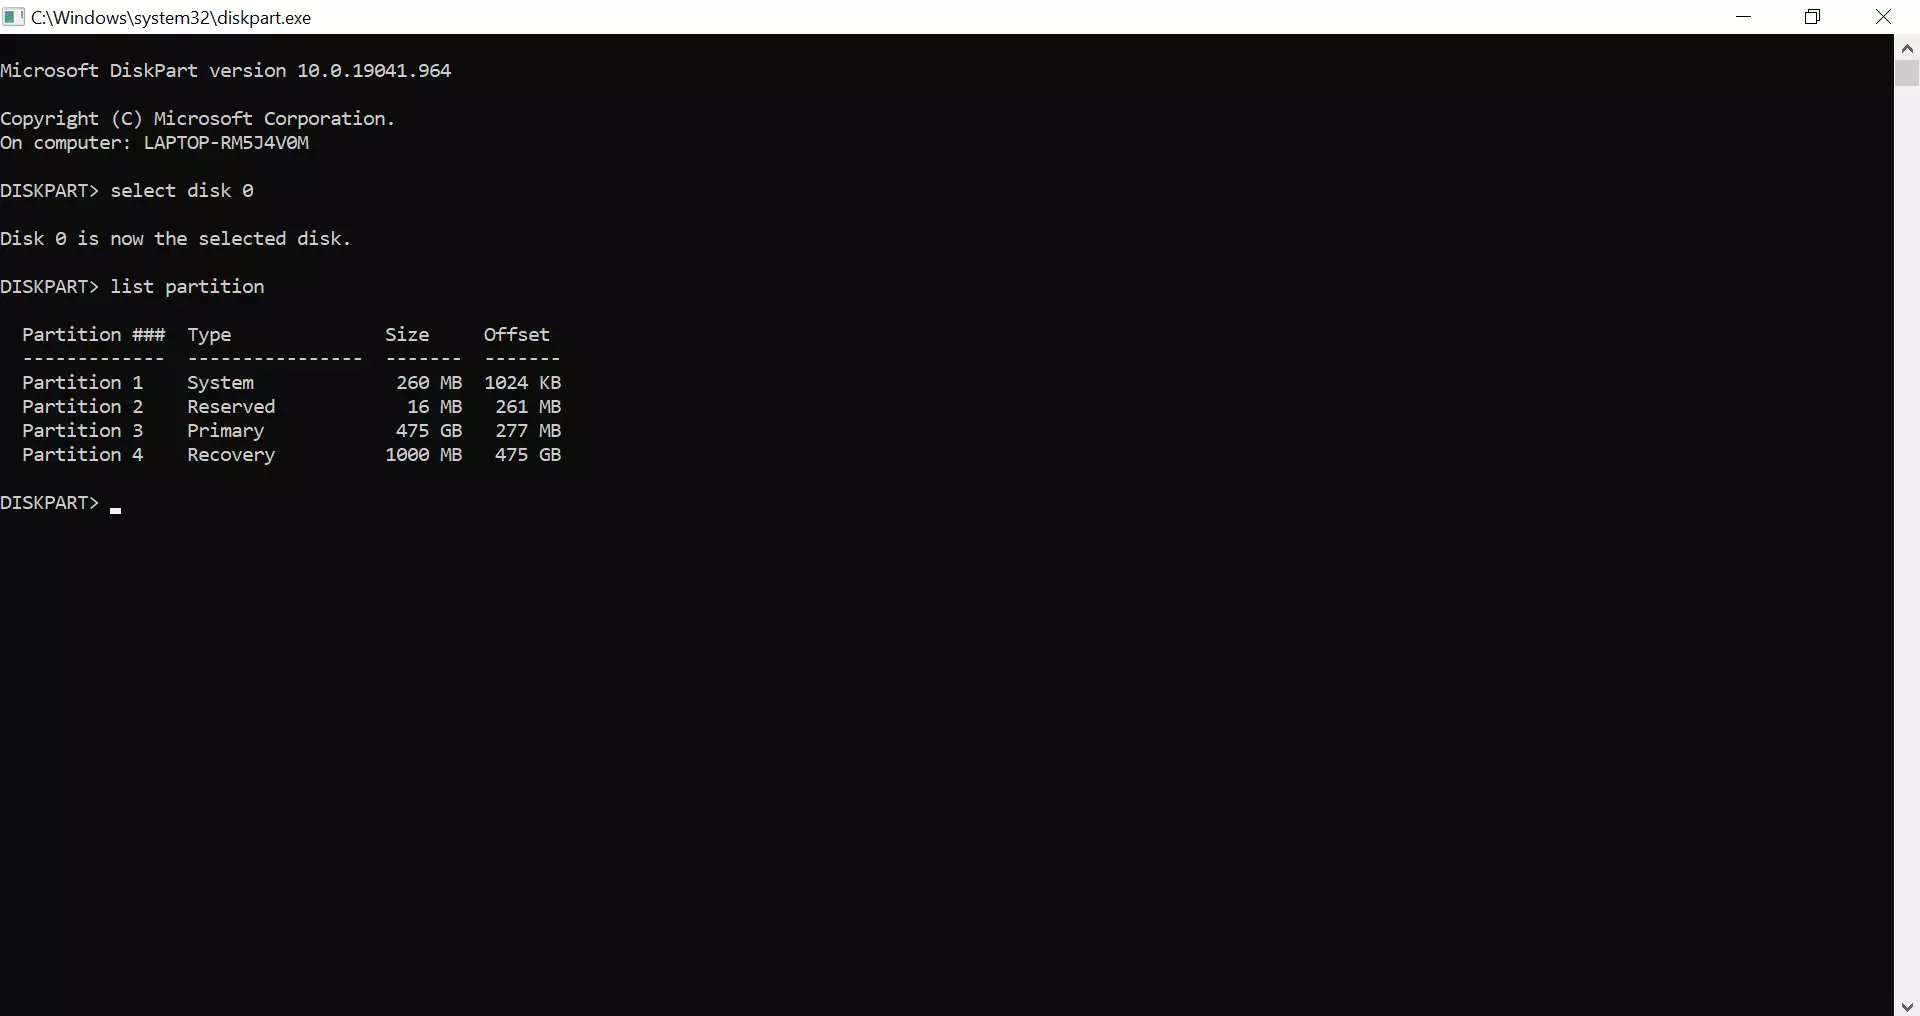
Step 5: If you are now confronted with the question whether DiskPart is allowed to make changes to your computer, confirm this. A black window with the name C:\Windows\System32\diskpart.exe will open. In it, first type `select disk 0´ (if disk 0) and then `list partition´, and then press [Enter] each time.
Step 6: Now all partitions of your selected disk are displayed. Check on which of them the recovery partition is located. In our example it is partition 4.
Step 7: Next, type `select partition 4´ to select the disk part with the recovery partition. Replace the number with your matching partition number if necessary.
Step 8: Finally, type the command `delete partition override´. This will delete the recovery partition. You can allocate the resulting space to another partition in Disk Management.
You want to partition your disks in Windows 11? This is possible at any time. However, to be on the safe side, you should perform a Windows 11 backup beforehand to be safe from possible data loss.
What are the effects of deleting the recovery partition?
Deleting the recovery partition will not have any negative impact on your running operating system. But before you go down this path, you must be aware that this process cannot be stopped or undone. All data that is on the partition will be irrevocably deleted. To be on the safe side, you should therefore create a recovery medium such as a CD or a USB stick beforehand. Many companies also resort to a cloud disaster recovery. This way, you always have a backup available.
Is there a useful alternative to the recovery partition?
The recovery partition is not the only tool that can be used to restore your computer to a previous state. For instance, you can reset Windows 11 by selecting `Reset this PC´ from the `Recovery´ menu. Another method would be to create a recovery drive and bring one of the already mentioned recovery tools to bear. In addition, there are numerous recovery programs to choose from on the Internet. This includes, for example, RS Partition Recovery and Hetman Partition Recovery.


