How to clean up the WinSxS folder in Windows 10
In Windows 10, you can save disk space by cleaning up or reducing the WinSxS folder. You can clean up the folder using DISM and Disk Cleanup.
Do not delete the WinSxS folder under any circumstances! The folder contains important system files and shortcuts to Windows updates. If you get rid of it, you may no longer be able to start or update Windows 10 properly.
How to clean up WinSxS in Windows 10 with DISM
It’s important to be careful when cleaning up the folder. This should not be done manually. Instead, you can use the Windows 10 tool DISM (Deployment Image Servicing and Management). The instructions below describe how to use the tool to clean the WinSxS folder in Windows 10.
Step 1: Open the command prompt as administrator
To use DISM, you need to open Command Prompt. When opening Command Prompt, you need to open it as an administrator. If you do not have admin rights, you won’t be able to clean up the WinSxS folder.
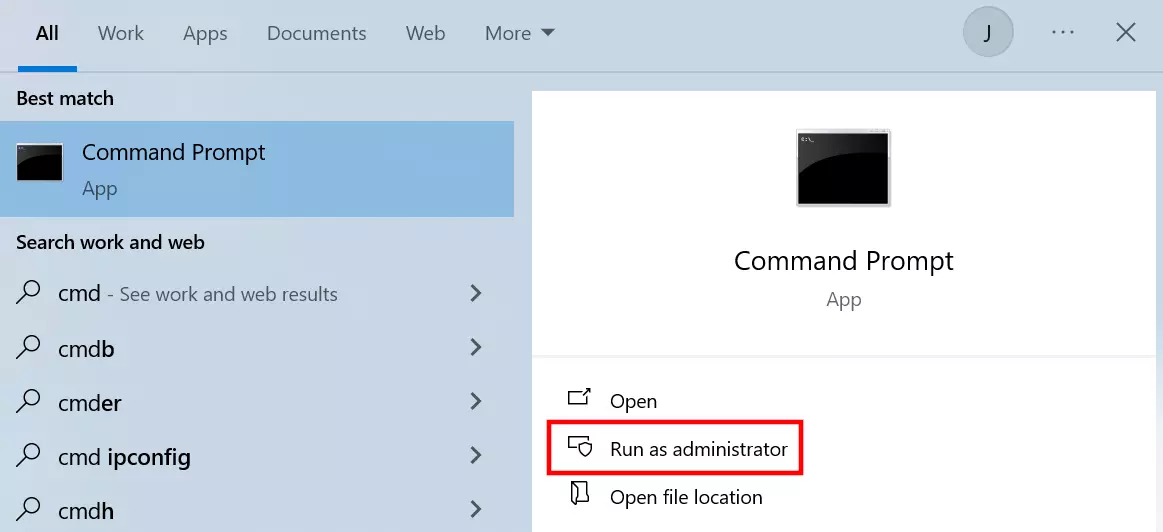
You can use the Windows 10 search function to open Command Prompt. Enter ‘CMD’ into the search bar and then click on Run as administrator.

Step 2: Start WinSxS analysis
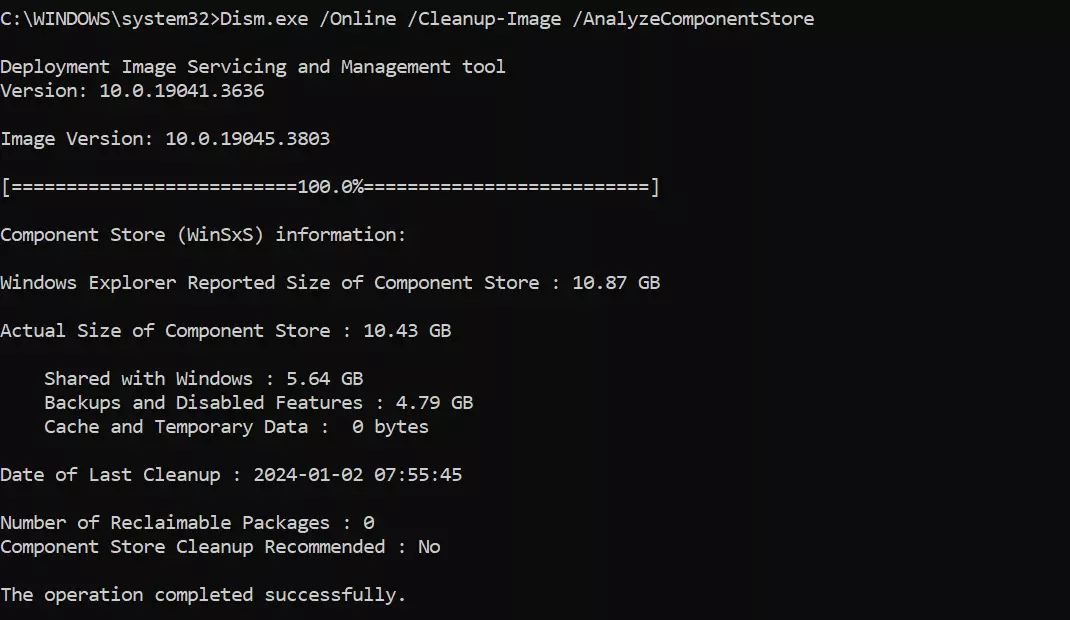
Once you have started the Windows 10 command prompt with admin rights, perform a check of the WinSxS folder. This not only tells you how large the component memory currently is, but also when WinSxS was last cleaned up and whether a cleanup is recommended.
Execute the following commands so that DISM can analyse the system folder:
Dism.exe /Online /Cleanup-Image /AnalyzeComponentStore
Step 3: Clean up WinSxS
To clean up the WinSxS folder in Windows 10, execute the following CMD command:
Dism.exe /Online /Cleanup-Image /spsupersededFiles in the component memory that are outdated or no longer needed will be deleted from WinSxS. Provided your system is running stably and you are certain you no longer need any older system versions, you can also clean up all the Windows updates that are stored in WinSxS:
Dism.exe /online /Cleanup-Image /StartComponentCleanup- Automatic backup and easy recovery
- Intuitive scheduling and management
- AI-based threat protection
How to reduce the size of WinSxS with Windows 10 Disk Cleanup
If you find cleaning up the WinSxS component memory via command prompt too tedious or risky, Disk Cleanup is a great alternative. This Windows tool can be used within the familiar user interface to reduce the size of the WinSxS folder in Windows 10.
Step 1: Open Disk Cleanup
The easiest way to start Windows 10 Disk Cleanup is to use the Run dialog. You can use the key combination [Windows] + [R] to open it. Then enter ‘cleanmgr’ in the input field and click OK.

If you save your files in different locations, you will be asked which drive you want to clean before the disk cleanup begins.
Step 2: Run the system scan
Disk Cleanup will display temporary and unnecessary files that can be removed from your system. However, in order to reduce the size of the WinSxS folder in Windows 10, you need to be able to access the system files. Click on Clean up system files to start scanning these sensitive files (requires admin rights).
The size of your WinSxS folder will affect how long it takes to perform the system scan and the deletion process.
Step 3: Reduce the size of WinSxS
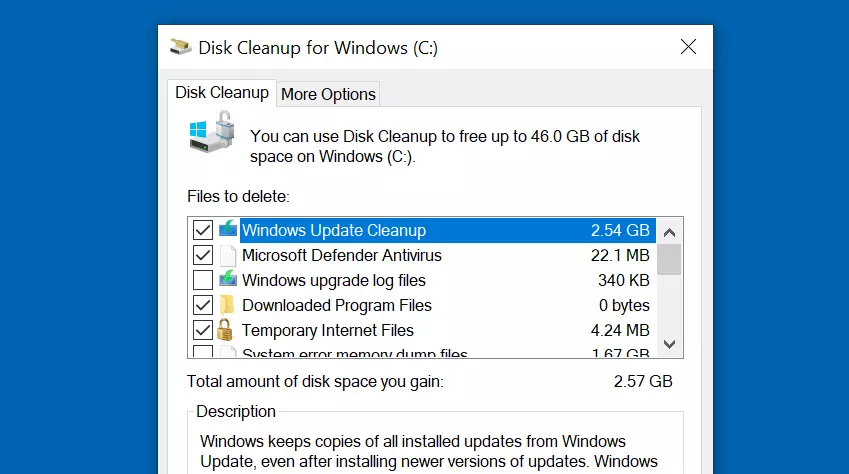
After Windows 10 has been scanned by Disk Cleanup, the program will show you which files can be deleted. You can select various categories such as Downloaded Program Files, Windows upgrade log files or Windows Update Cleanup. The data in the categories you select will be deleted, reducing the size of WinSxS. Click on OK to remove the selected files from the system.

You can find more information about using and cleaning up WinSxS in various Windows editions - including Windows Server - in our article ‘WinSxS Cleanup’.

