Creating a table of contents in PowerPoint in just a few clicks
Using Microsoft PowerPoint, you can design and create professional presentations with numerous features, such as animations, transitions, and design templates. It is recommended that you create a table of contents to give your audience an overview of your presentation at the very beginning. However, as of PowerPoint 2007, Microsoft removed the feature that automatically generated a table of contents in PowerPoint. We will show you how to create a table of contents in PowerPoint in just a few steps and how to link to individual slides.
- Free website protection with SSL Wildcard included
- Free private registration for greater privacy
- Free 2 GB email account
Creating a table of contents in PowerPoint: step-by-step instructions
The more slides you have, the more useful it is to create a table of contents for your PowerPoint presentation. This will provide your audience with an overview of your presentation at the start. You should wait to create the table of contents until after you have finished your presentation. This will help you avoid having to modify your table of contents repeatedly. In the following, we will provide you with step-by-step instructions on how to manually create a table of contents in PowerPoint.
Step 1: Creating the slide for the table of contents
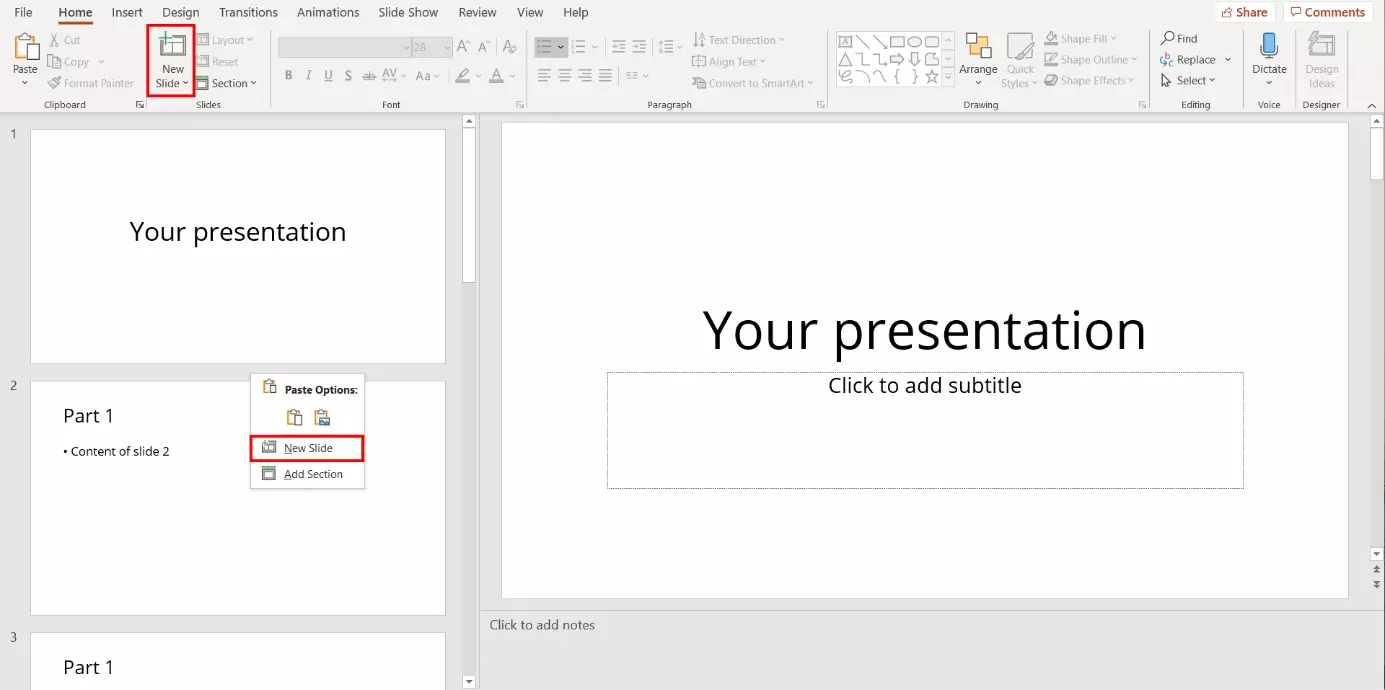
First, you need to create a new slide where you will add the PowerPoint table of contents in the following steps. There are two ways to create a new slide:
- Via the menu: Select the “Home” tab in the menu and click on “New Slide”. PowerPoint will then insert a new slide which you can drag to the desired position in the slide pane.
- Via the slide pane: Right-click in the slide pane and select “New Slide” from the pop-up menu. PowerPoint will then insert a slide at the corresponding position.
Usually, the PowerPoint table of contents will come right after the title page. However, you can choose to insert it anywhere in your presentation.
Step 2: Copying the outline for the table of contents
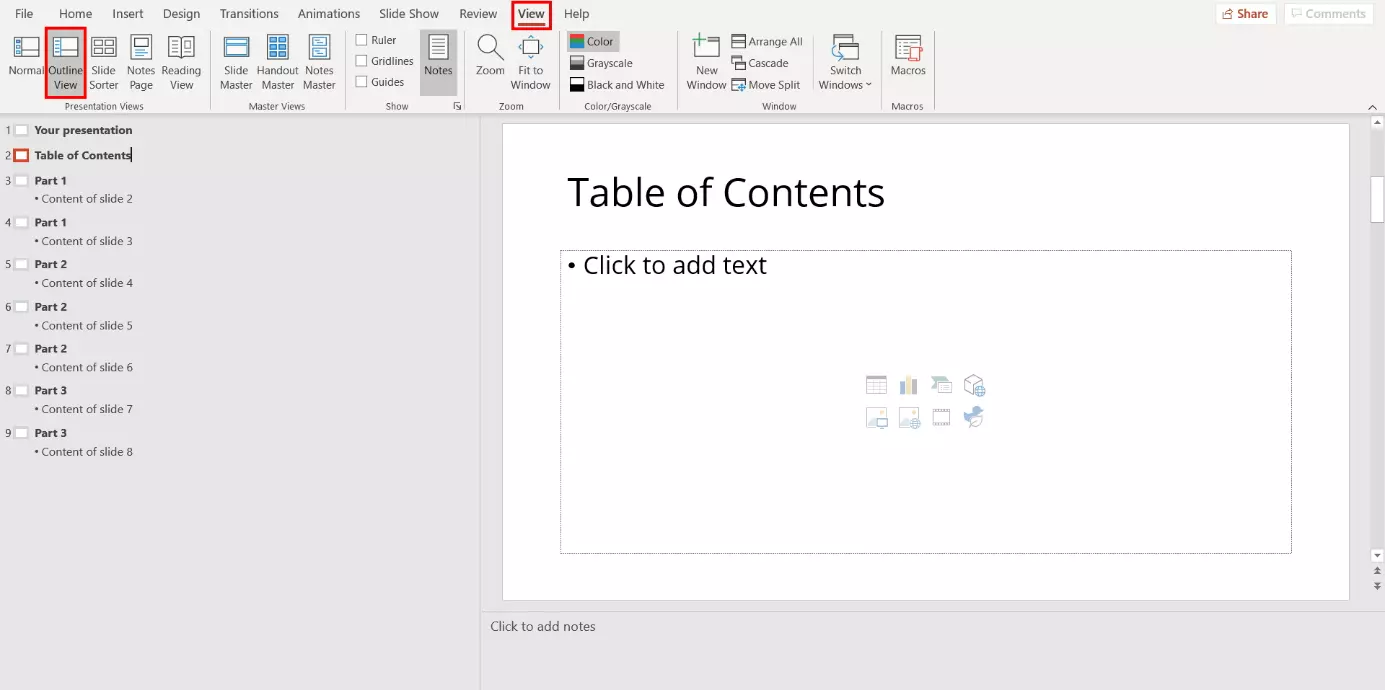
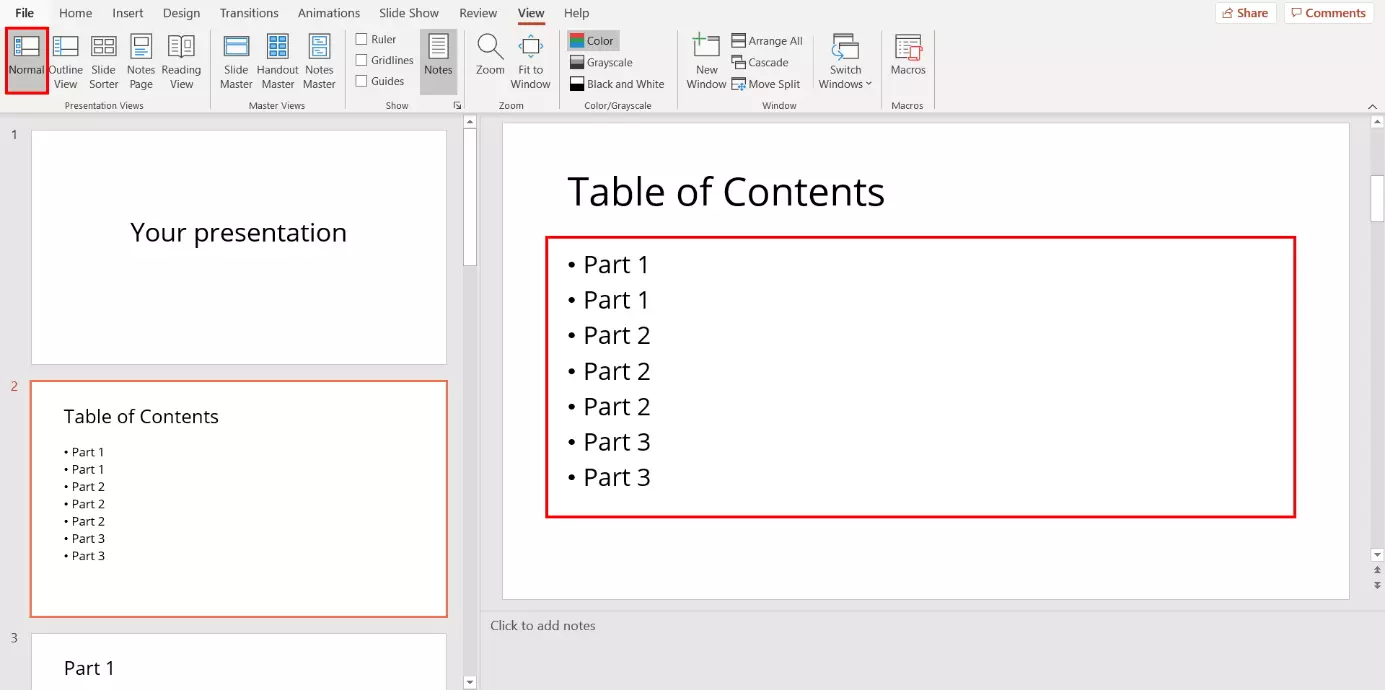
Select the “View” tab located in the menu. Then, left-click on “Outline View”. As the name suggests, this provides you with an overview of the presentation which is particularly useful for structuring the content. PowerPoint will then display an overview of the slide contents in the slide pane.
In addition to the Presentation Views, you will also find the Master Views in this menu bar. Using these, you can set up a uniform design for your presentation.
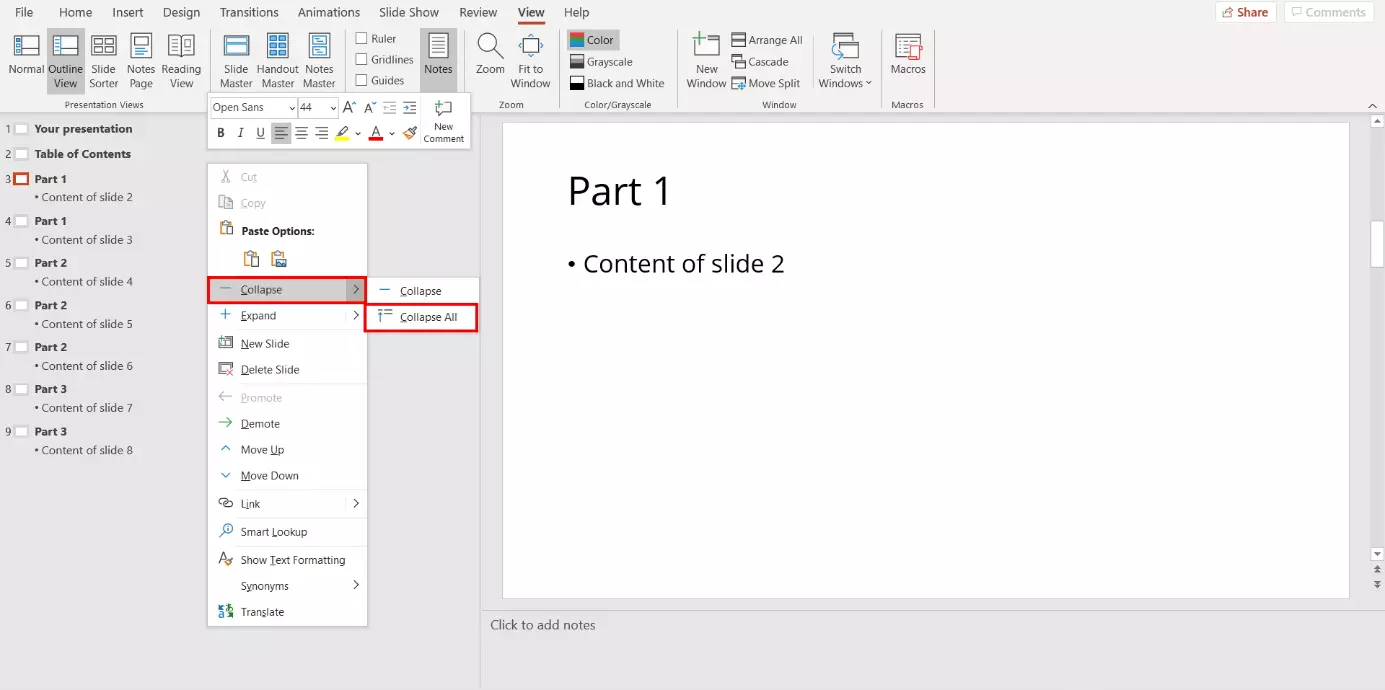
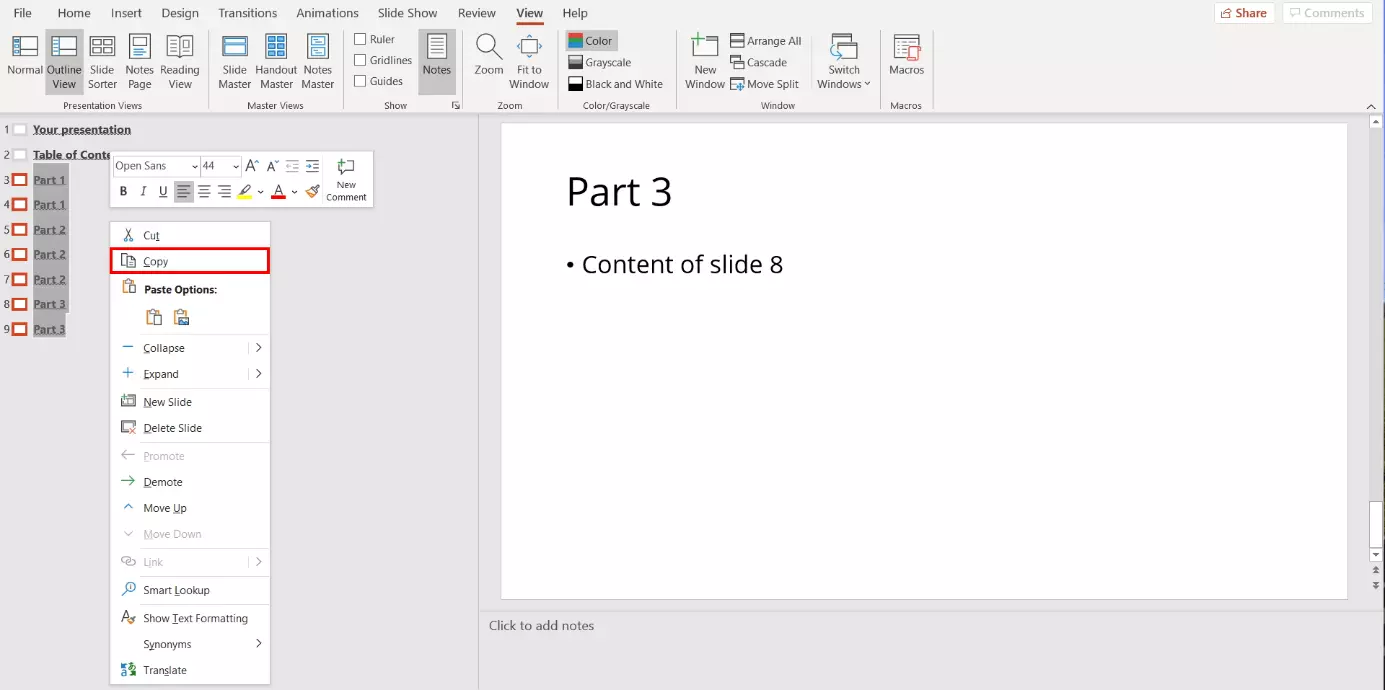
PowerPoint will then only display the slide headings in the slide pane. The outline structure will show the bullet points which you will copy to your table of contents in the next step. To do so, first copy the content. Select all the slide titles and right-click to open the pop-up menu. Then, select “Copy”. This will copy all the selected headings to the clipboard.
You can copy content even faster by using a keyboard shortcut. To do so, press the keys [Ctrl] + [C] on your keyboard at the same time. To paste the content elsewhere later, press the keys [Ctrl] + [V] at the same time.
Step 3: Inserting entries into the PowerPoint table of contents
In this step, you will paste the copied outline structure from the clipboard into your table of contents. To do this, switch back to the “Normal” presentation view which can be found in the menu under the “View” tab. Then, select the slide that you created for the table of contents in step 1 by left-clicking on it in the slide pane. Open the pop-up menu by right-clicking on the text box and select “Paste”. PowerPoint will then paste the outline structure from the clipboard into your table of contents.
If you wish, you can modify the content. For example, you can do so if you do not want to display all the slide headings for your presentation in the table of contents. You can also change the text font and colour as usual.
Step 4: Numbering the outline structure
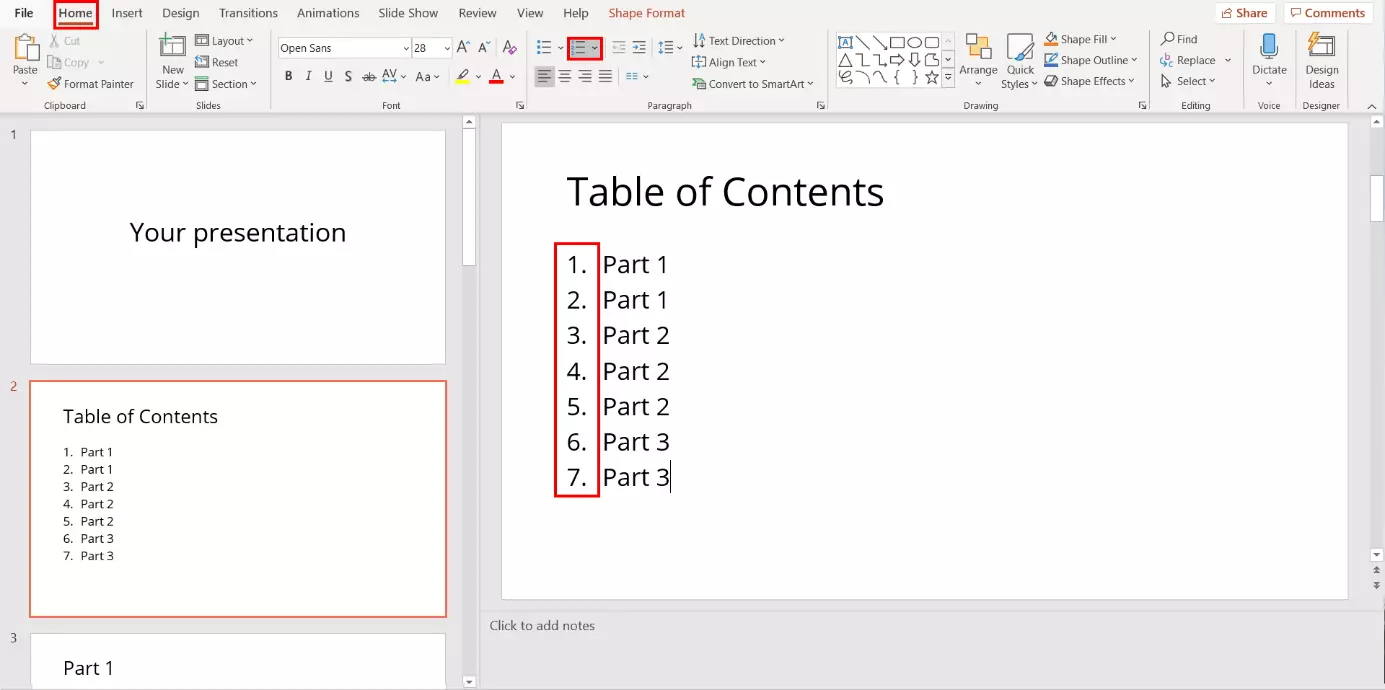
If you wish, you can design your PowerPoint table of contents to be clearer by numbering the outline structure. To create a numbered list, first select the contents of the slide. Then, select the “Home” tab from the menu and click on the icon for numbered lists. PowerPoint will then replace the bullet points with the corresponding numbering.
PowerPoint is included, along with other popular programs such as Excel, Word, and Outlook, in the Microsoft 365 Business package which you can rent from IONOS at a low cost!
Linking the table of contents to slides
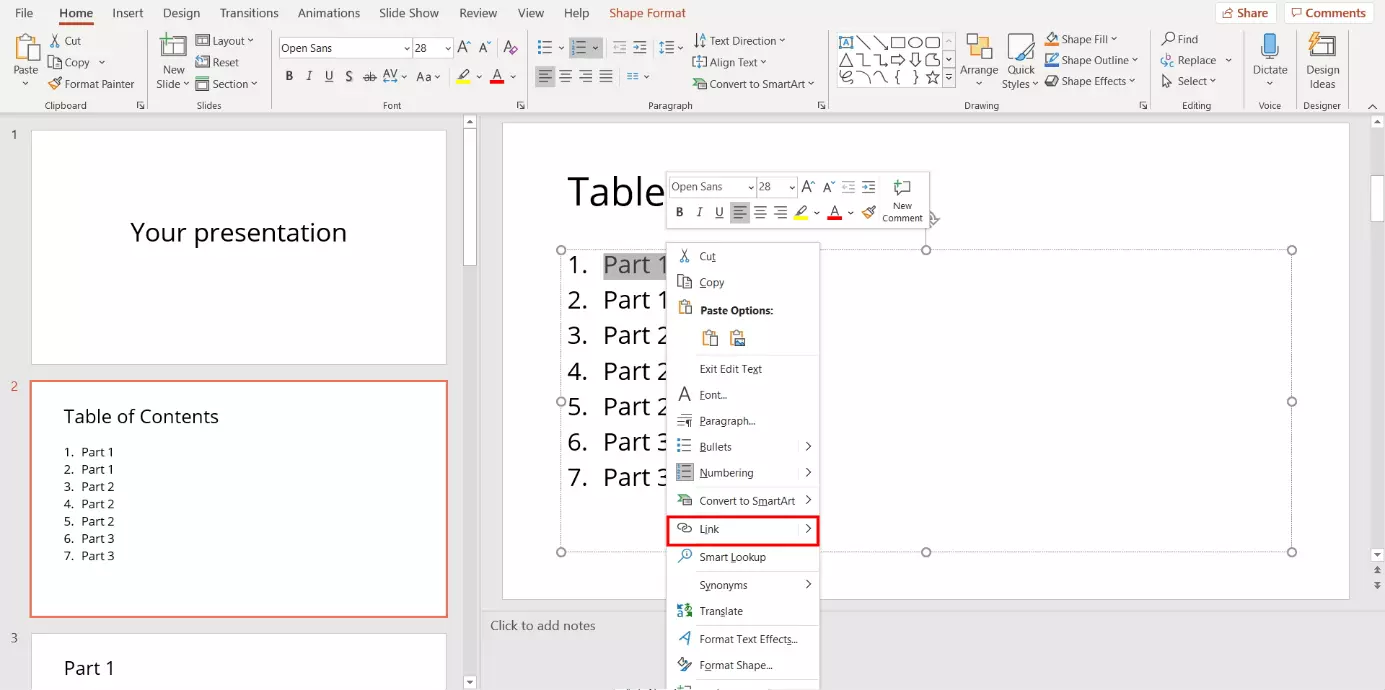
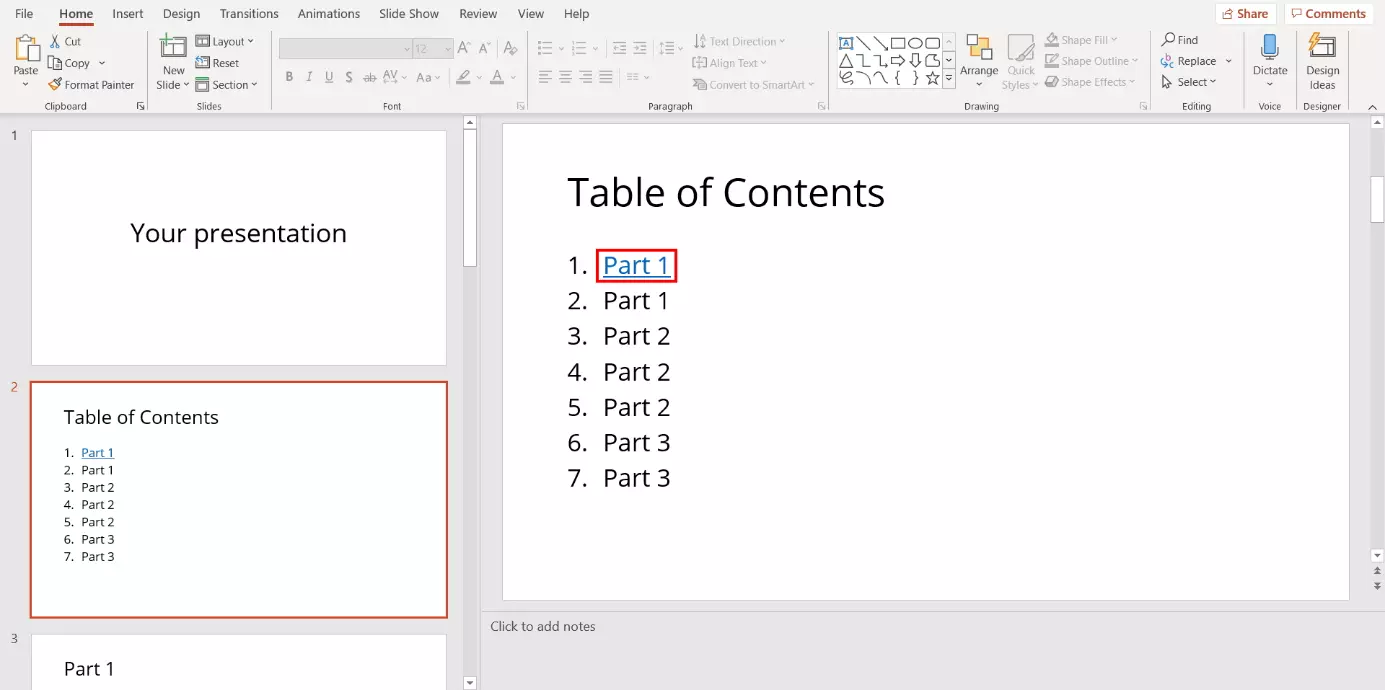
PowerPoint lets you link the outline of your table of contents directly to the corresponding slides. This allows you to jump directly to a specific section of your presentation with a single click. To create links in your PowerPoint table of contents, follow the steps below for each bullet point.
Step 1: Selecting the content
Step 2: Linking the content to the slides
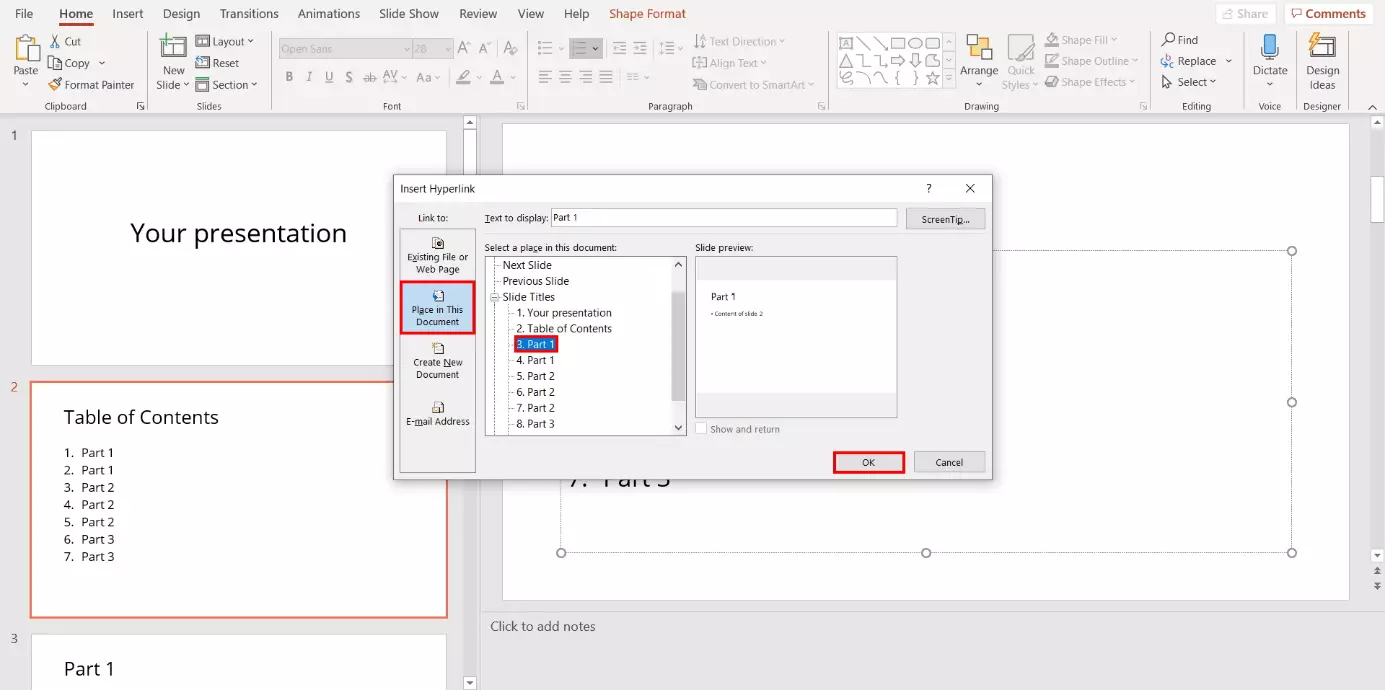
The “Insert Hyperlink” dialogue box will open. On the left-hand side, click on “Place in This Document”. Then, choose the slide that you want the selected bullet point in your PowerPoint table of contents to link to. Confirm your selection by clicking “OK”.
Step 3: Modifying the text colour
- Up to 50 GB Exchange email account
- Outlook Web App and collaboration tools
- Expert support & setup service


