Excel: Move columns and rows - A step-by-step-guide
To organise a worksheet, you often need to move columns and rows in Excel. You can do this by using drag and drop or by cutting and pasting the respective cells.
The following instructions apply to the Outlook version of Microsoft 365 as well as Outlook 2021, Outlook 2019 and Outlook 2016.
How to move a column in Excel quick guide
- Select the column you want to move by left clicking on the column header.
- Move the mouse pointer to the edge of the column until a four-sided arrow or hand appears as the cursor.
- Hold down [Shift] and the left mouse pointer and drag the column to wherever you want to move it to.
- Release the buttons and the column will jump to the desired position.
- Up to 50 GB Exchange email account
- Outlook Web App and collaboration tools
- Expert support & setup service
How to move a column in Excel with drag and drop
In order to move a column in Excel, you don’t necessarily have to copy and paste it. While this functionality is practical, there’s always a risk that the formatting of the formulas in the columns could change. In addition, this method can be very time-consuming.
An effective and simple alternative is to use drag and drop. The only restriction is that there cannot be any connected cells located outside of the selected range.
Step 1: Select column
First, select the column or columns you want to move. To do this, left click the column heading to select the entire column. Alternatively, click any cell in the desired column and then press [Ctrl] + [Space] to select the column.

Step 2: Move the cursor to the edge of the column
Next, move your mouse to the left or right side of the selected column until the pointer turns into a four-sided arrow or hand. This may vary depending on the Excel version you’re using.
Step 3: Move the column using drag and drop
Next, hold down the [Shift] key and the left mouse button and move the selected column(s) to the desired location using drag and drop. The new column location is indicated by a coloured or dashed line.

Step 4: Drop the column
Once you’ve found the right location, release the mouse button and the [Shift] key. You’ve now moved the Excel column to the intended location. If there is another column with contents in this location, it will automatically move to the left or right.

How to cut and paste an Excel column to a different location
As an alternative to Copy and Paste, you can use the Cut and Paste function. The standard keyboard shortcut for Cut is [Ctrl] + [X]. First, select the desired column by clicking the column heading or pressing [Ctrl] + [Space]. Then select the location where you want to paste the column and insert it there by pressing [Ctrl + [+].
You can also use the standard keyboard shortcut [Ctrl] + [V] to insert cut columns. However, if you use this shortcut, the formatting of the column or row may be affected. That’s why the Plus key is the better option here.
How to move a row in Excel quick guide
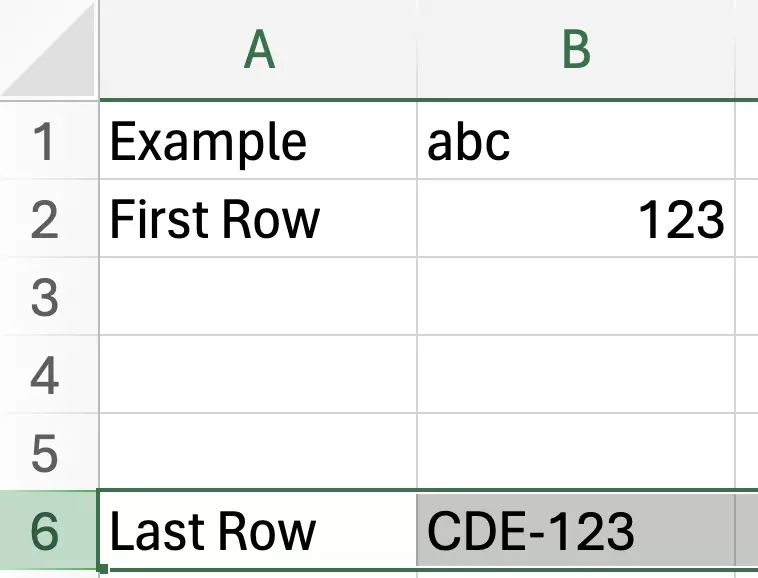
- Click on the row header with the left mouse button to select the row you want to move.
- Hover the mouse pointer over the top or bottom edge of the row until the cursor changes to a four-sided arrow or a hand.
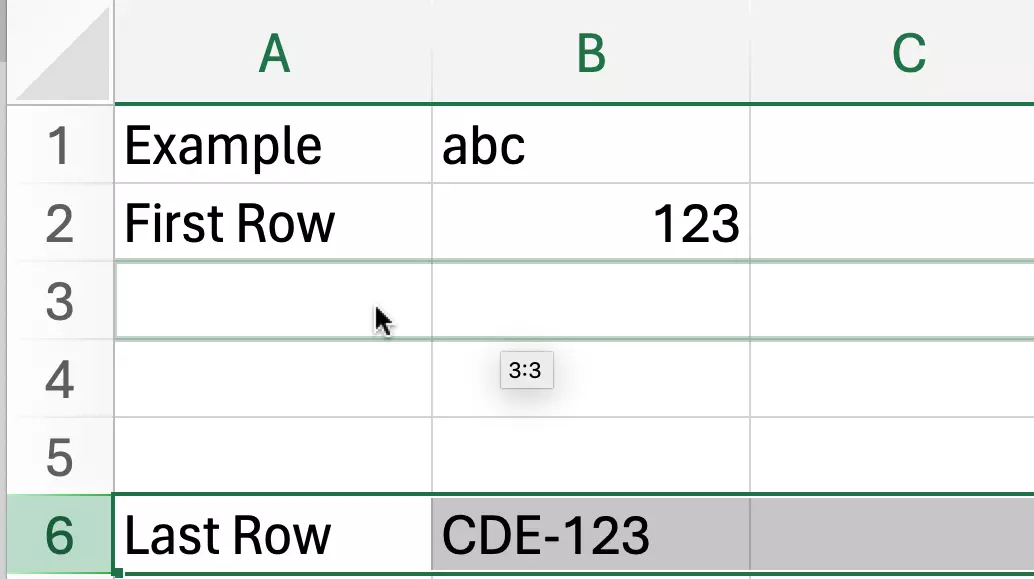
- While holding down the [Shift] key and the left mouse button, drag the row to the desired position.
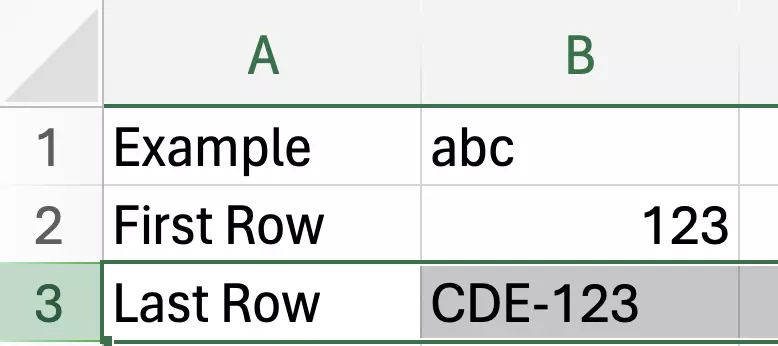
- Release the [Shift] key and the mouse button to place the row in the new position.
How to move a row in Excel with drag and drop
The procedure for moving rows in Excel is similar to the method used for moving columns.
Step 1: Select the row
Select the row or range of rows you want to move. To do this, left click the row number (row heading) in the border area to select the entire row. Alternatively, click any cell in the desired row and then press Shift + Space to select the entire row.

Step 2: Move the pointer to the edge of the row
Then move the mouse pointer to the top or bottom edge of the selected row until the pointer becomes a four-sided arrow or a hand symbol.
Step 3: Move the row in Excel using drag and drop
Hold down the [Shift] key and the left mouse button and move the selected row(s) to the desired location using drag and drop.

Step 4: Drop the row
Release the mouse button and the [Shift] key to drop the row in the selected location.

How to cut and paste an Excel row to a different location
You can also use Cut and Paste commands for rows. Once you’ve selected the desired row by clicking the row header or pressing [Ctrl] + [Shift], press [Ctrl] + [X]. Then select the desired location and press [Ctrl] + [+] to insert the row.
- Store, share and edit data easily
- ISO-certified European data centres
- Highly secure and GDPR compliant

