How to insert a watermark in Word
You can use a watermark to mark a document with your logo or other label. Traditionally, watermarks were added to paper during manufacturing. The thickness of the paper was changed in specific places while the paper was still wet and watery. This made the paper more transparent in those places and let light through more easily. The embossed image or text was then visible when you hold the paper to the light.
A watermark is used to guarantee the authenticity of printed products (such as banknotes) or to negate authenticity, for example by displaying “Sample” behind the text in a document. Other people might use a watermark to display their company logo elegantly but not too intrusively on a page.
You can create a similar effect in Word. Although you can’t make changes to the printer paper itself, you can insert faint text or graphics behind the actual text. In this article, you’ll learn how to insert your own watermark into letters and other documents.
Watermarks in Word—How to insert symbols and text
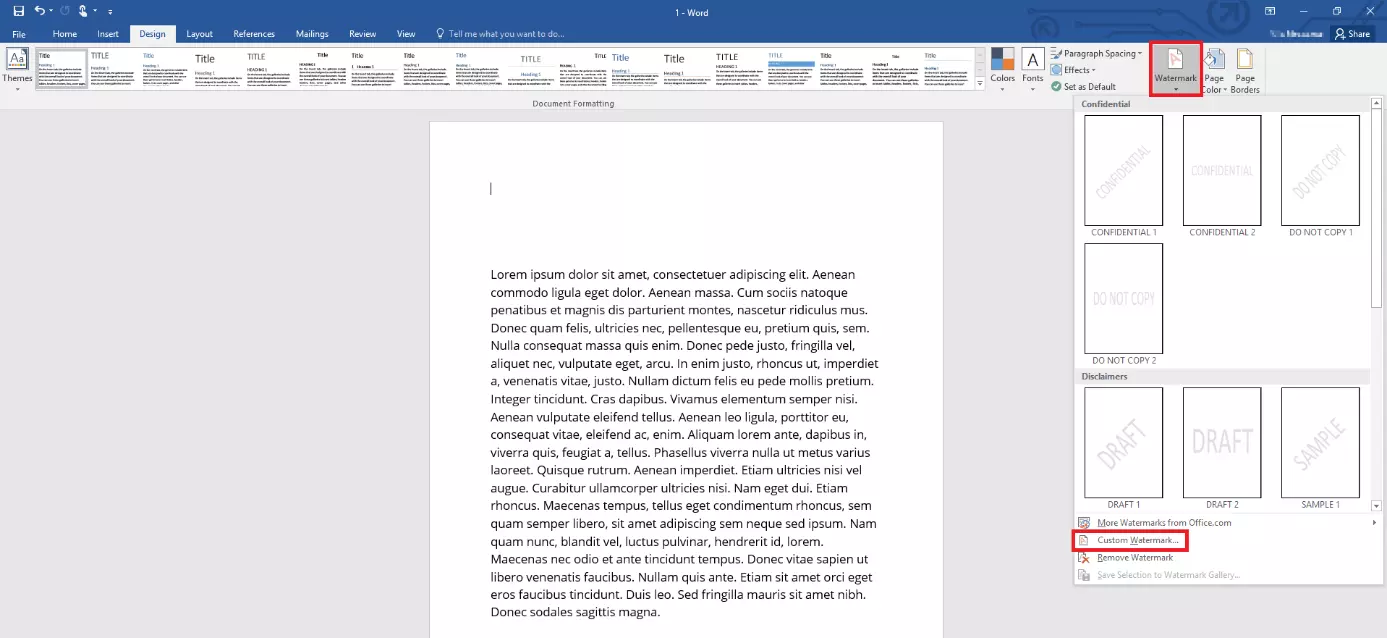
You can use a watermark to embed a graphic element in a Word document page. To do this, switch to the Design tab in the upper part of the ribbon. Choose the Watermark feature. When you click this button, Word suggests several pre-configured watermarks for you. You can apply different pale-grey words (such as draft or confidential) to the document in different orientations. The words appear in the middle of the page (or on all pages of your document), but are faint enough so that you can still read the text in front of them.
In Word 2007 or 2010, this option is located on the Page Layout tab.
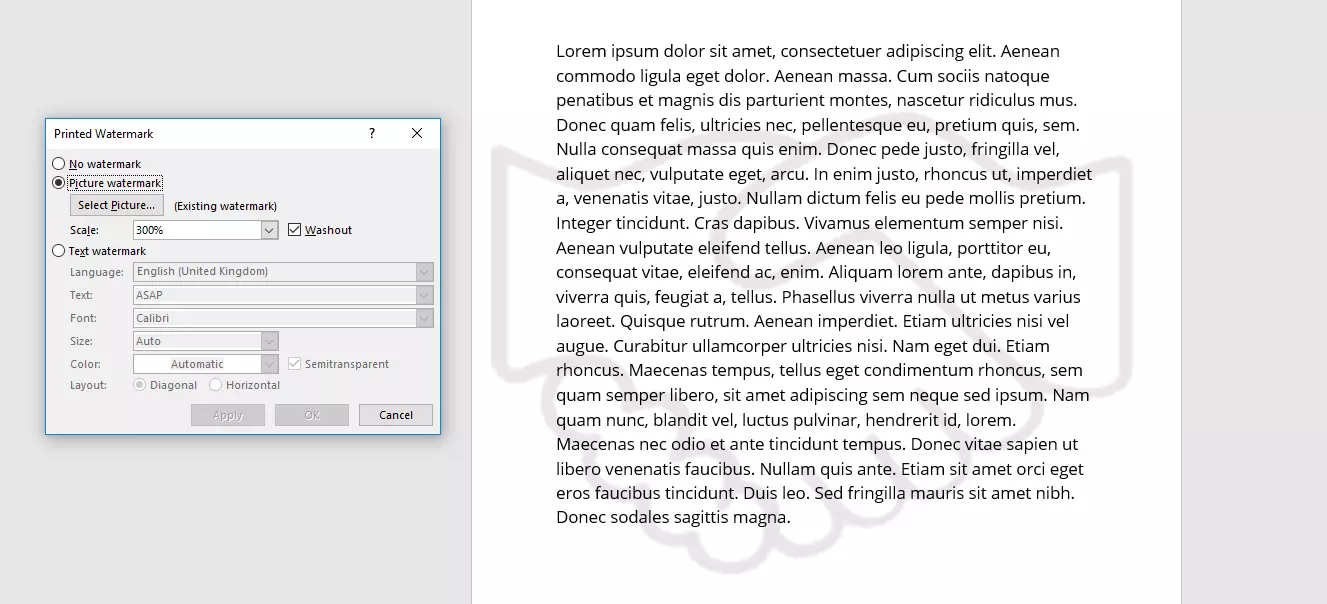
In addition to pre-configured watermarks, you can also use custom watermarks in Word. To do this, choose the Watermark button again and click Custom watermark.... You then have two options: Insert an image or text for your watermark.
If you want to insert an image, you can choose it from your hard drive without adjusting it to look like a watermark first. If you select the Washout option, Word will display the graphic in the same pale-grey tone as the pre-configured watermarks. However, that might not be desirable for all image files: If you don't select this option, Word will wash out the image only slightly. You can also resize the graphic so that it fits perfectly on the page.
In theory, you can insert an image into the background of your document without using the watermark feature. But then you would have to adjust the colours yourself. Whereas Word automatically inserts a watermark into every page of the document, you would have to manually insert your image into each page.
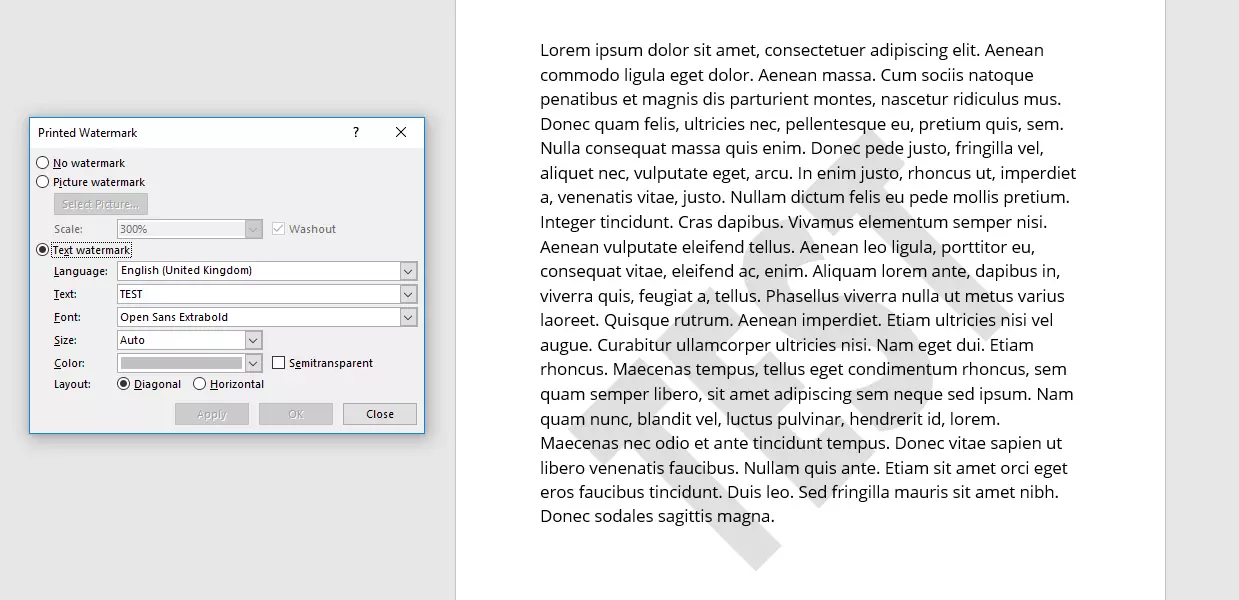
Along with picture watermarks, you can also insert your own text watermark into the document. Here too, Word proposes various pre-configured watermarks. Alternatively, you can type in your own text. You can then customise its appearance: You can change the font, size and colour of the text. The default colour is the usual grey. However, you can choose a different colour. You can also choose the Semitransparent option. The text will then be displayed very faintly on the pages of the document. Lastly, you have to decide whether you want the text to be diagonal or horizontal.
Click Apply to insert your watermark into the document. You can now preview the watermark and decide whether you want to make further changes. Even if you've already closed the Printed Watermark menu window, you can reopen it (as described) and adjust the text or image.
Not satisfied with your custom watermark in Word? We also explain how to remove watermarks.
Customising watermarks
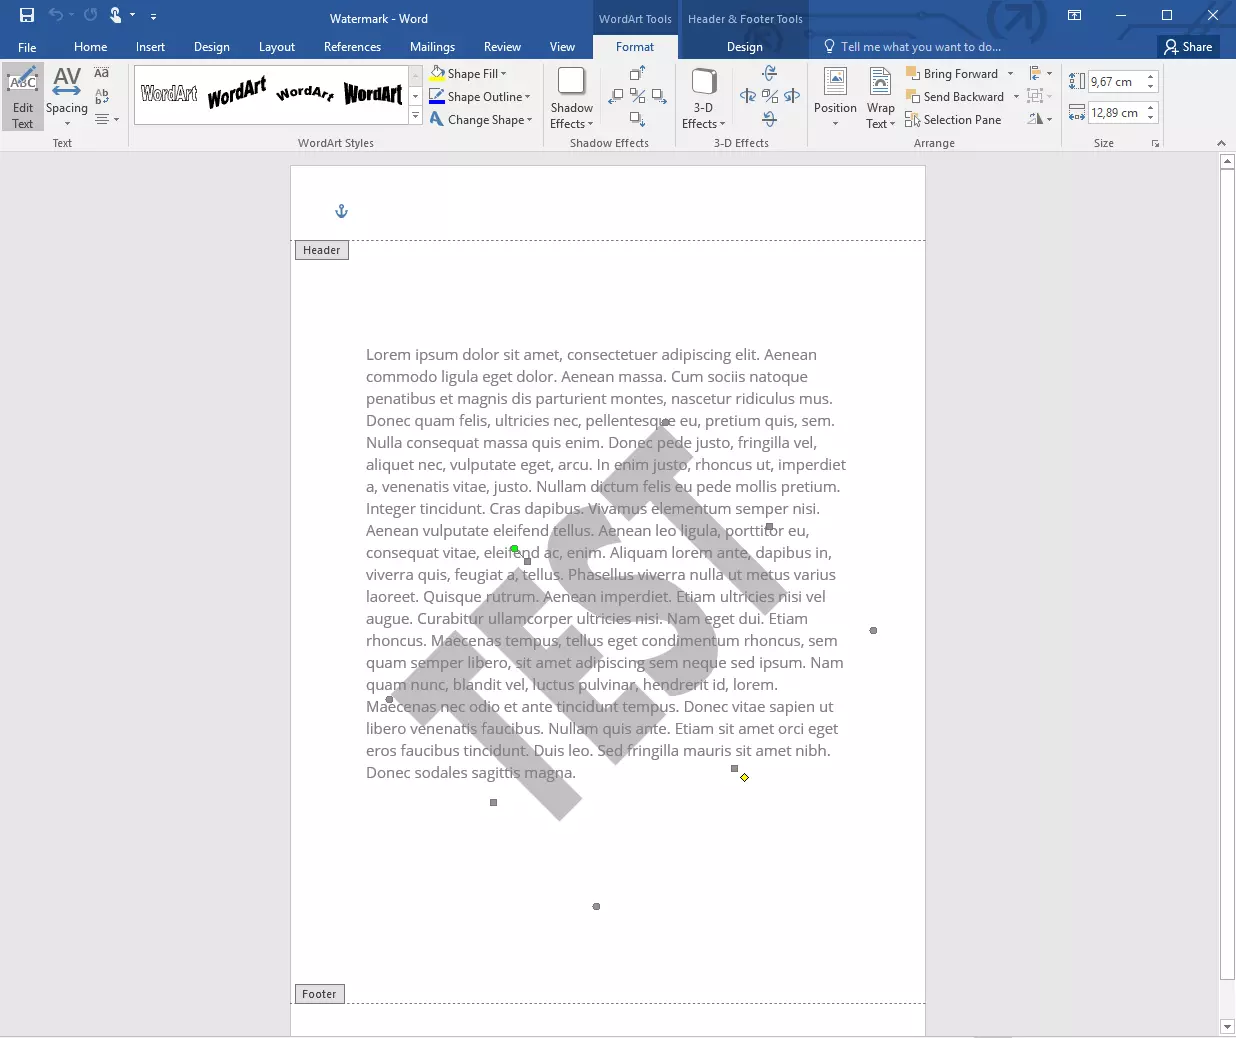
Word offers other functions beyond the default options for configuring watermarks, but these features are a little more hidden. You can open the header of a page (double-click at the top of the page) to select and customise background objects. These include the header and footer as well as watermarks. By clicking on the graphic or text, you can select the item and then rotate, move, or resize it.
If you’re working with a text watermark, you can now use WordArt Tools (in the menu ribbon). These tools allow you to further customise the design of the text. For example you can change the spacing or add a 3D effect. If you're working on a picture watermark, you can now use Picture Tools. These tools offer further options for customising your watermark.


