Excel macros: How to optimise your work process with the popular spreadsheet programmes
If you regularly work with word processing programmes, database systems, or spreadsheet applications, then you know how tedious it can be to enter the same directives over and over again. More than anything, complex, multi-stage programme sequences can be a real test of patience. Macros record a sequence of commands so that they can be executed automatically by the software user at any given time. Even though macros are written in a programming language, programming knowledge generally isn’t needed, as many programmes — including Excel – can record simple macros and provide assistance in development. For the Microsoft spreadsheet software Excel, macros are one of the most important features.
What is an Excel macro?
Microsoft Excel is the most sought-after solution for processing, analysing, and presenting data. Using Excel spreadsheets, which forms a key component of the Microsoft Office Suite, Windows subscribers have been working with this programme for years to create budgets, individual calendars, and a whole host of other projects. Excel is also used in business: With the software, project plans, hours lists, or budget plans are realised just as easily as graphical representations of sales figures, profits, or losses. Anyone familiar with the programme learns to appreciate the various functions but at the same time, most people quickly develop a reluctance to constantly repeat routine tasks or repetitive actions that can’t easily be performed using the standard user interface.
So it comes as no surprise that the possibility to create macros in Excel is one of the core features of the spreadsheet programme. There’s an integrated macro-recording tool for this purpose that uses the Visual Basic for Application (VBA) script language, which is also used in the Microsoft Office Word, PowerPoint, Access, and Outlook programmes. Thanks to the language, you can easily create your own Excel macros that automatically execute defined routine commands, or add new functions to the spreadsheet calculation (i.e., algorithms for data analysis).
How macros work in Excel
Excel provides various elements of the user interface in the form of hierarchically organised programme objects. Each one features specific properties and methods. All available objects are related to each other in the hierarchical object model and are reflected approximately in the visual user interface, which provides buttons and input boxes for interaction with the application. By setting the properties and invoking their methods, you can edit the different objects. For example, a “Close” method exists for the “Workbook” object that can be used to close the selected workbook as well as the “ActiveSheet” property that represents the sheet currently active in the workbook.
With the help of collections, macros can also perform actions on a whole group of objects. For example, the “Worksheets” collection object causes the statements in the macro to apply to all worksheets. For the execution of a macro, you have the following three options:
- Selection in the macro menu
- Click on an individually created button
- Individual key combinations
Benefit of Excel macros
If you previously, either consciously or unconsciously, refrained from creating macros in Excel, this doesn’t necessarily have a negative effect on your Excel files. But you have chosen a rather tedious way to work. Macro technology offers a vast number of decisive advantages that make it a must for anyone who wants to get the most out of their calculation software:
- Macros reduce the error rate: With every directive that you manually enter into Excel, you increase the probability of an incorrect entry. Especially in complex command sequences and frequently repeated tasks, mistakes are quickly made that derail the entire functionality of the sheets you are working on. In a macro, only the creation process has error potential. If no errors manage to sneak in there, then the Excel macro will operate error-free every time.
- Macros reduce the work effort: You only create macros one time. You can then start using the practical command combination as often as you want by pressing the assigned key combination. It saves you a lot of time that you can now invest in other areas of work.
- Macros expand Excel: With VBA, it’s not just a case of programming macros that group commands together, you can also develop new functions. This extends the integrated function collection of your customised user-defined workbook and significantly simplifies your formulas. Excel also presents your customised functions as if they were native functions. In addition, you have the option of linking all of the macros that have been created with a button in the toolbar, which can then be used to trigger their functions.
How to create your own macros in Excel
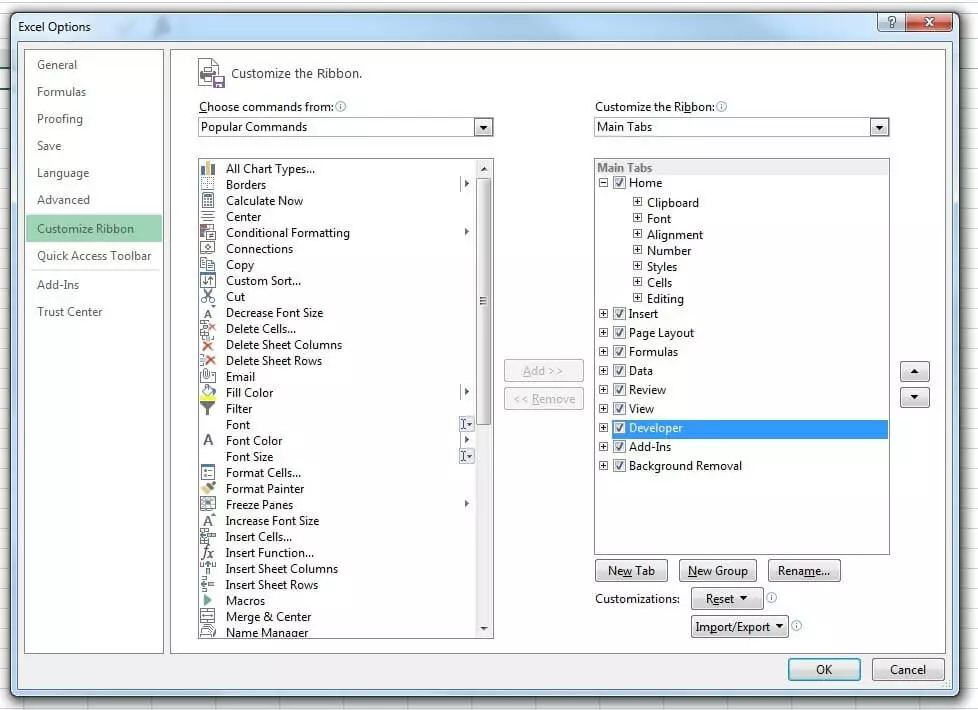
To create your own command collection, you first have to activate the VBA editor, which is a part of the developer tools. These are not accessible on the menu list by default (also called the “ribbon” in Microsoft Office applications), so you need to add the corresponding tab in the first step.
Step 1: Add the “Developer” tab
Step 2: Create a new workbook for macros
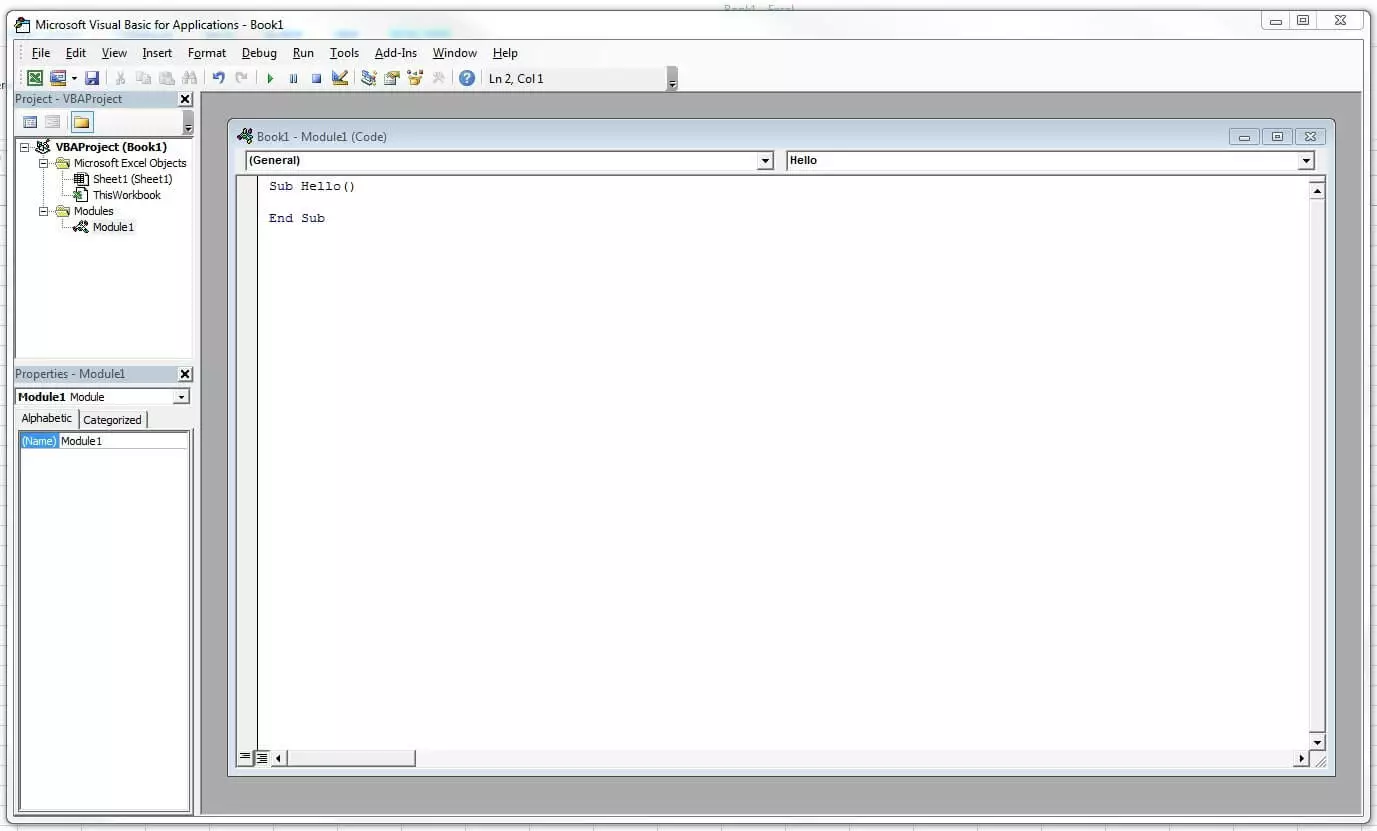
The second step is to create a new Excel folder to serve as the basis for the macros that you are about to record. To do this, click on the “Macros” button in the “Developer” tab, enter the name of the folder (in this example, “Hello”) under “Macro name” and confirm by clicking on “Create," at which point the VBA editor will open, including the following code:
Sub here stands for subroutine and also for a macro, which is in itself a kind of subroutine for Excel. For the respective macro, the entire code between Sub and End Sub is executed. If you would like to conduct a small test, you can extend the code of the sample “Hello” macro as follows:
Sub Hallo()
    MsgBox ("Hello world!")
End Sub
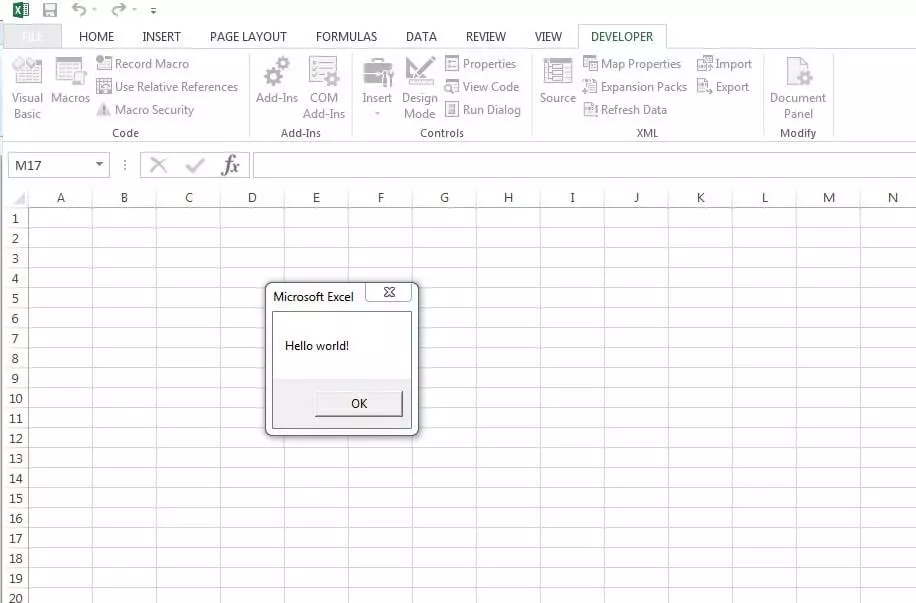
Save the result in the .xslm format, switch back to the Excel programme interface, reactivate the “Macros” button, and select the “Hello” macro in the displayed list. Now, if you click on “Run," a small information window appears with the text content you just defined.
Click on the “OK” button to close the window and stop running the macro. Then save the macro workbook in the VBA editor.
Step 3: Create a quick-access button for macros
In both the “Developer” tab and the “View” tab, you can display and run the available Excel macros. But if you need the command summary more frequently, it would make sense to create a button for quick access to the toolbar. This is done as follows:
- Go to the “File” tab.
- Open the options, and click on the menu item “Quick-access Toolbar”.
- In the “Select command” list, click on the “Macros” entry and search for the previously created “Hello” macro.
- Select this and click “Add," then transfer it to the list of quick-access buttons.
- Before you confirm the new button via “OK," you can first select the symbol that will be shown later. Simply select the macro and click on “Change”.
Now, next to the standard “Save," “Undo," and “Redo” buttons on the toolbar. There’s also the quick-access button for the “Hello” macro:
Note: You can also set a key combination for running a macro instead (“Developer” -> “Macros” -> “Options”).
Step 4: Use the macro recording
The VBA editor integrated by Microsoft into its Office applications has the benefit of you not being required to master the programming language in order to create simple Excel macros. For this, the integrated function for recording macros is perfectly adequate. For example, we’ll now create a macro that automatically renames a worksheet.
- In the developer tools, select the “Record macro” button this time.
- In the following dialogue window, name the macro “RenameWorksheets” and start the recording with “OK”.
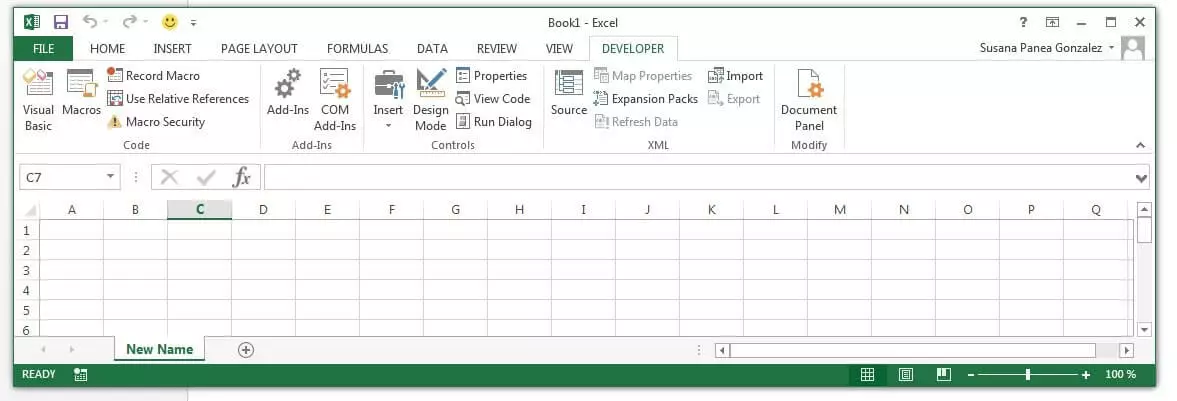
- Now rename “Table1” to “New Name” and end the macro recording by clicking on “End recording”.
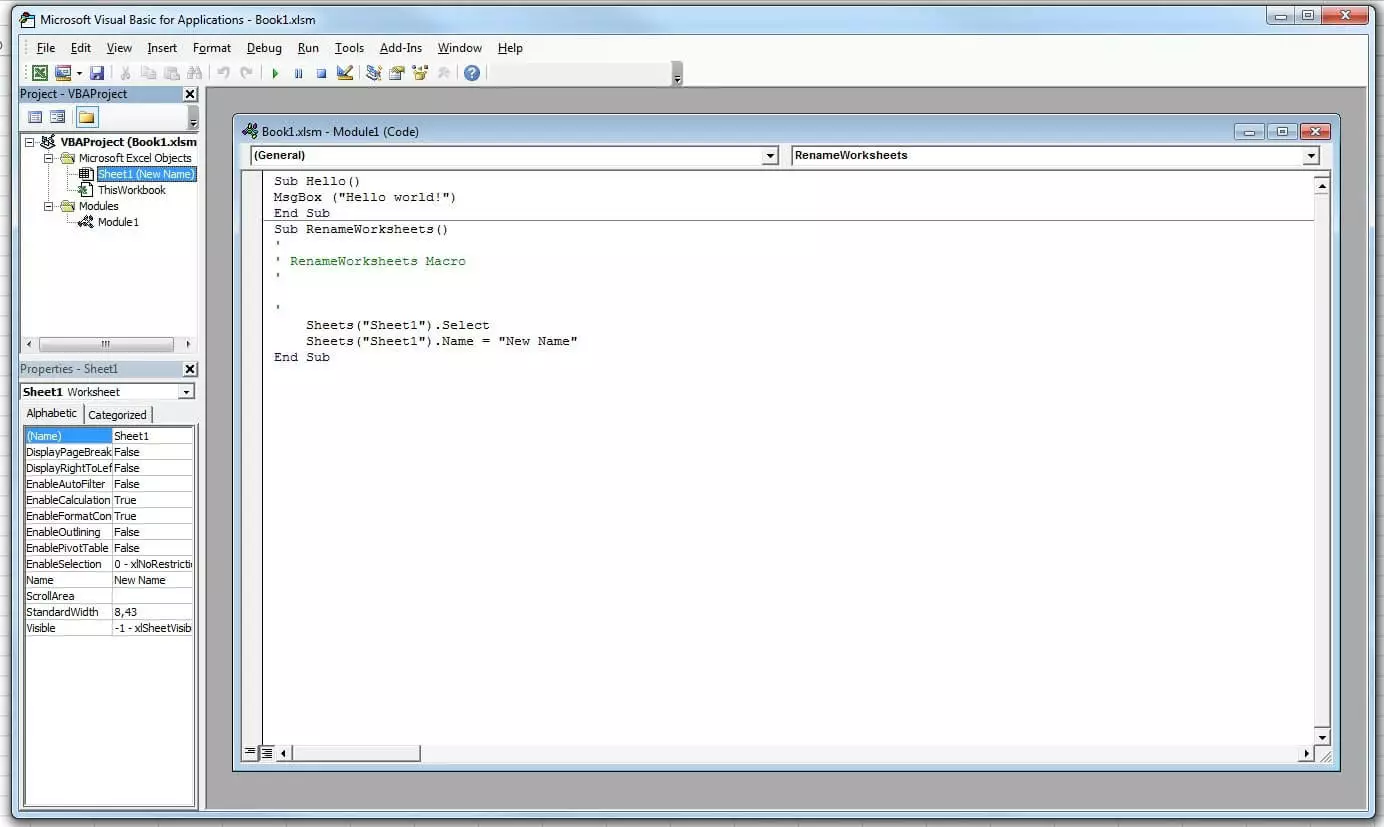
If you switch back to the VBA editor now (“Developer” -> “Macros” -> “Edit”), the following code should appear:
In the first four code lines under the Sub line, each beginning with an apostrophe, are the commentary lines. These have no influence on the overall functionality of the macros and primarily simply offer a better understanding of the code. You can also temporarily deactivate code lines with the help of commentary. For this example macro, you don’t need the four automatically created lines, so you can safely delete them.
The next line contains the selection method, selecting “Table1," which was necessary for the manual rename execution before you could give it a new name. VBA scripts don’t need objects to be selected in order to be edited, so these code lines aren’t necessary for macros in Excel. Completely revised, the code looks like this:
Sub RenameWorksheets ()
    Sheets("Table1").Name = "New Name"
End Sub
Switch back to Excel and rename the worksheet back to “Table1”. Now run the RenameWorksheets macro as a test to see if the name changes automatically. Note that the macro will have to be adapted to the new name if you want to run it again.
Excel macros in practice: Diagrams and input forms
VBA scripts enable the automation of various Excel tasks. With the help of the recording option, you will simplify your own work process and also acquire knowledge about the high-performance programming language. Don’t hesitate to use the VBA tool if you suspect that an Excel macro will make a particular task easier.
Having already presented the general approach to macro-building in the previous paragraphs, the following two examples will now help by giving you a concise overview of how versatile the command automation is.
Excel Evergreen: Create a diagram based on a cell range
A common function of Excel tables is the visualisation of input data in the form of a diagram. With this quite often tedious task, a macro can provide valuable assistance. For this, you’ll first create a macro with the name “AssortedTasks” and declare the variable for your diagram object:
Dim mydiagram As ChartobjectIn the next line, create a diagram object for the mydiagram variable to refer to:
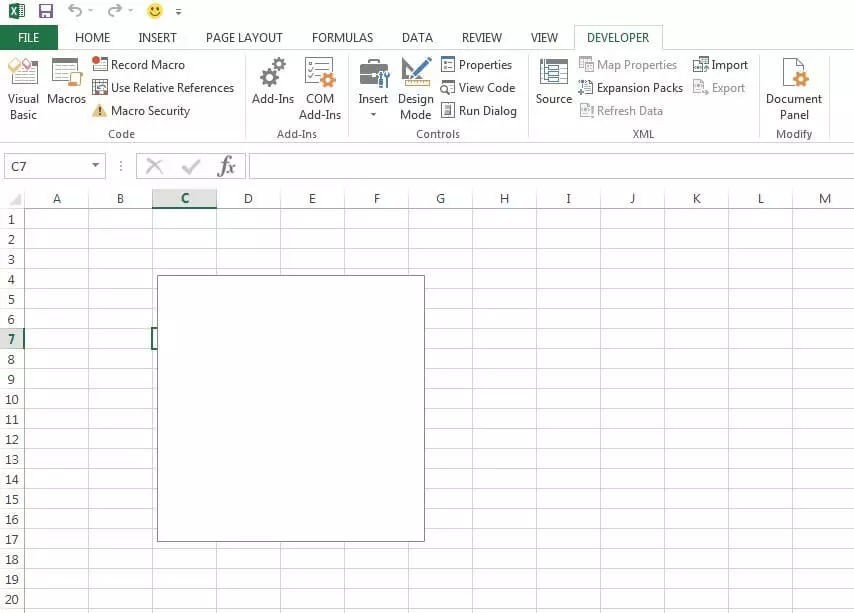
Set mydiagram = ActiveSheet.ChartObjects.Add(100, 50, 200, 200)The values that are contained in the brackets define the position as well as the size of the diagram. The first two sets of data are the coordinates of the upper left corner, followed by the values for the width and the height. If you run the macro now, Excel automatically creates the object at the defined position and in the defined size — but it’s obviously still blank since at this point the input data is missing.
The last step is to fill the diagram object with data, which can then be visualised accordingly. Inputting the values is required for this, as well as a further adjustment of the Excel macro since it still lacks information regarding where the information should be displayed. Within the With … End With construction, now use the SetSourceData method and specify the Selection value, which will cause the values of all cells that are marked when the macro is run to be taken into account. The code of the complete macro looks as follows:
Sub AssortedTasks()
Dim mydiagram As ChartObject
Set mydiagram = ActiveSheet.ChartObjects.Add(100, 50, 200, 200)
With mydiagram
.Chart.SetSourceData Source := Selection
End With
End Sub
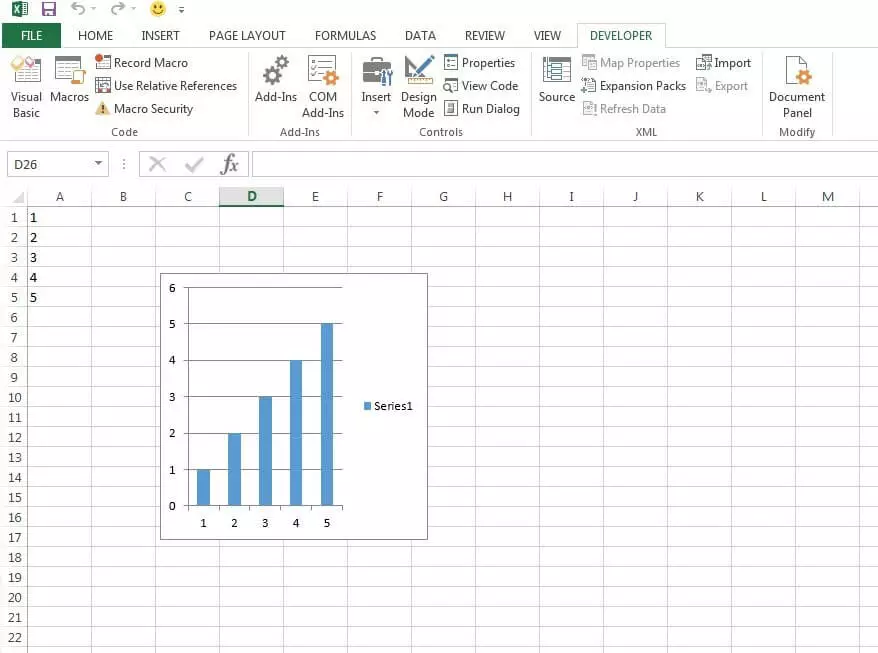
For test purposes, give cells A1 through A5 the values 1 through 5 and run the macro to see the data presented to you as a bar graph. This type of diagram is created by default in Excel, as long as you don’t supply additional ChartType details.
How to create a dialogue box for user input
With the help of the macro tool, you can also create an input form through which the user can interact with Excel. For example, to create an interaction window whose input value is automatically written into a defined cell, start by creating and naming the macro as usual. In our example, we give the command collection the name “InputForm”. Then you name the subroutine destination of the value entered later by the user:
Sub InputForm()
    ActiveSheet.Range("A1").Value =
End Sub
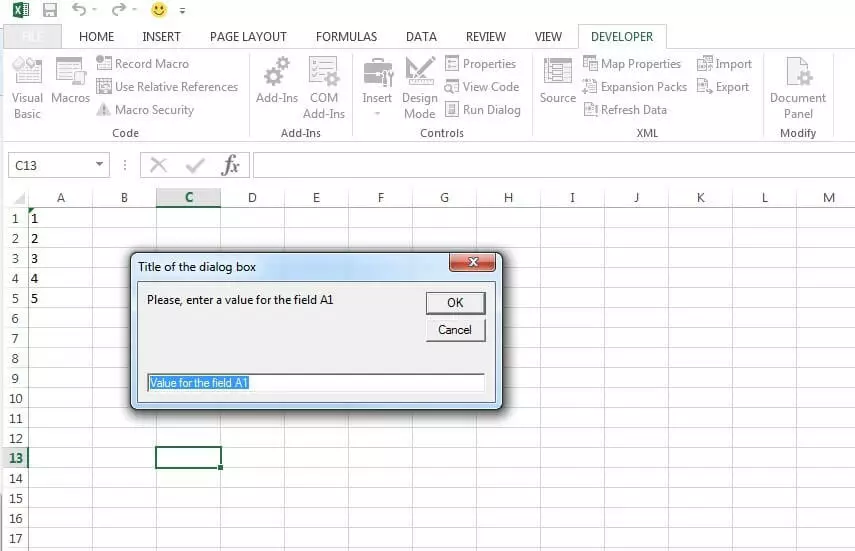
The macro ensures that the input of the user is transferred to the A1 cell of Table 1. The value of the field (Value) now needs to be assigned in the second part of the statement. We decided on the InputBox command as an example, which is very similar to the MsgBox command used in the “Hello” macro. Combined with the following three arguments, which are enclosed in quotation marks in the VBA code, a suitable input window is created.
- Prompt: With the help of the first argument, define the text of the dialogue window that supports the user during input.
- Title: The “Title” argument displays the title of the input form.
- Default: Finally, you can also specify a standard input with “Default”.
A possible example code of the complete “InputForm” macro including the box and text looks as follows:
Sub InputForm()
    Table1.Range("A1").Value = InputBox("Please enter a value for the field A1.", "Title of the input form", "Value for field A1")
End SubTransferring Excel macros
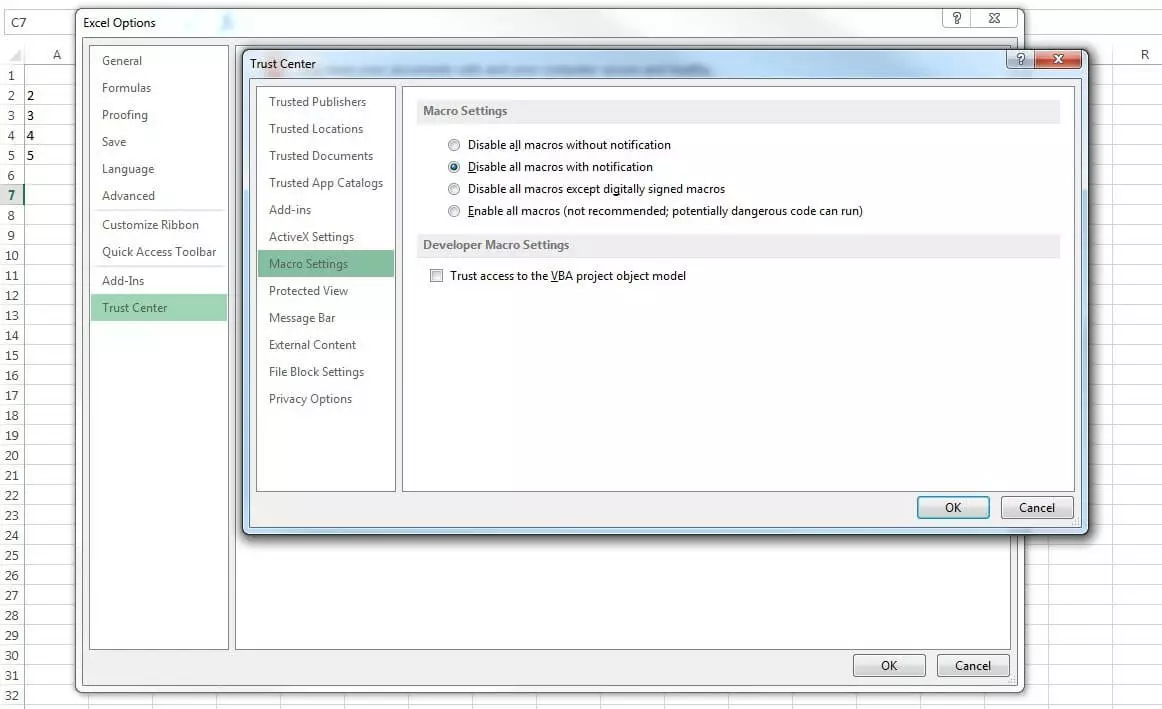
If you’ve created macros in your Excel workbook, you can easily use them in another document or transfer them to another user. The VBA editor has an import/export function for this purpose, with which you can save your command collection in the .bas format or integrate macros already saved in the .bas format into your current Excel document. The only requirement is that macros are activated in the target document. Since the handy scripts can contain potentially unsafe code, Excel has restrictions in place to protect users, so that all macros without a digital signature are blocked, for example, with or without a notification. The simple solution is to automatically allow all macros and make sure that all codes are trustworthy before importing.
Find the options for activating and deactivating macros is in the “Trust Center” (“Security Center” in older versions): Simply go to the “File” tab, choose “Options," “Trust Center," and click on the “Trust Center Settings” button. There you’ll find the “Macro Settings” menu item, which contains the settings mentioned here.
To export a macro, open the Visual Basic Editor, click on the “File” tab and then on “Export file”. Give your macro collection a meaningful name, choose the desired index, and complete the process by clicking “Save”. The exported file is only a few bytes big and can easily be sent via e-mail or transported via a portable storage device to the desired target computer. To import a macro file, proceed the same way initially but then choose “Import file” and specify the save location of the file.
- Store, share and edit data easily
- ISO-certified European data centres
- Highly secure and GDPR compliant


