How to delete and hide empty rows in Google Sheets
If you want to remove empty rows in Google Sheets, the easiest way to do this is to use the filter feature. This feature also lets you hide rows.
How to delete empty rows in Google Sheets for a clearer spreadsheet
One of the many advantages of spreadsheet programs such as Excel or Google Sheets is the ability to continuously add to and edit tables. However, this also means you may be left with empty rows that are no longer needed, which can affect the structure of your entire spreadsheet.
Luckily, you can delete blank rows individually in Google Sheets, making your documents clearer and more organised. You can also hide rows if you don’t want to permanently delete them.
How to delete an empty row in Google Sheets
Deleting a single blank row in Google Sheets is simple. To do this, click the row you want to remove and then right-click it. A menu will open where you’ll find the option Delete row with a trash can icon in front of it. If you select this option, the row will be removed.
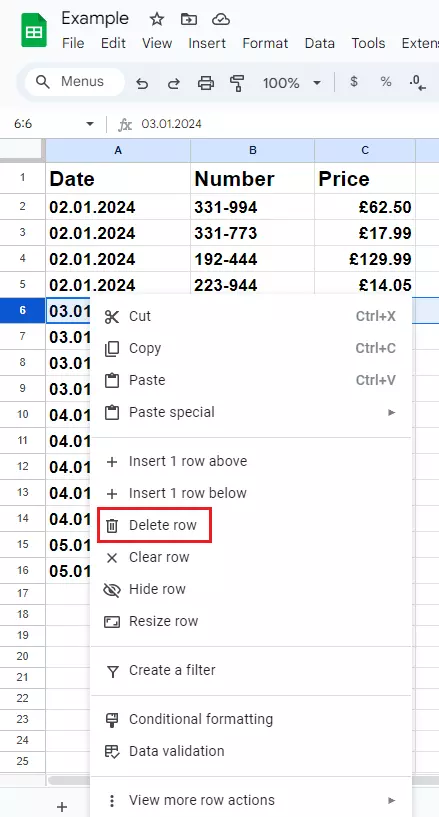
Although this can be done quickly, if you are working with a large table and want to delete multiple empty rows , it can be somewhat time-consuming since you have to remove each row individually. Luckily, there’s a much simpler way, which we’ll go over later on in this article. But first, let’s take a look at how to hide rows.
You can find the most important shortcuts for Google Sheets in our Digital Guide.
- Up to 50 GB Exchange email account
- Outlook Web App and collaboration tools
- Expert support & setup service
How to hide empty rows in Google Sheets
If you want to temporarily hide empty rows to make your table clearer, the process for doing so is similar to deleting empty rows in an Excel table:
- Select all the cells in your table. There are two ways you can do this. If there are only a few entries, click on the first cell, then hold down the cursor and drag it to the last entry. As this can be tedious with a large table, you can also select the first entry, scroll to the last entry, press the Shift key and then click on the last entry. This method works for both Windows and Mac.
- Once you have selected all entries, set a filter. To do this, click on the corresponding symbol in the menu bar. By default, it is in the third position from the right and looks a bit like a cocktail glass without a base.

- If the filter is set, a small symbol in the shape of a funnel will appear in all the cells located in the top row of the table. Click on this symbol.
- The filter menu will now open. Below the search bar, you’ll find a list of all the rows in your table. All empty rows that are summarised as (Blanks) will be listed first.
- Remove the tick in front of (Blanks) and then click on OK. All empty lines should now be hidden.
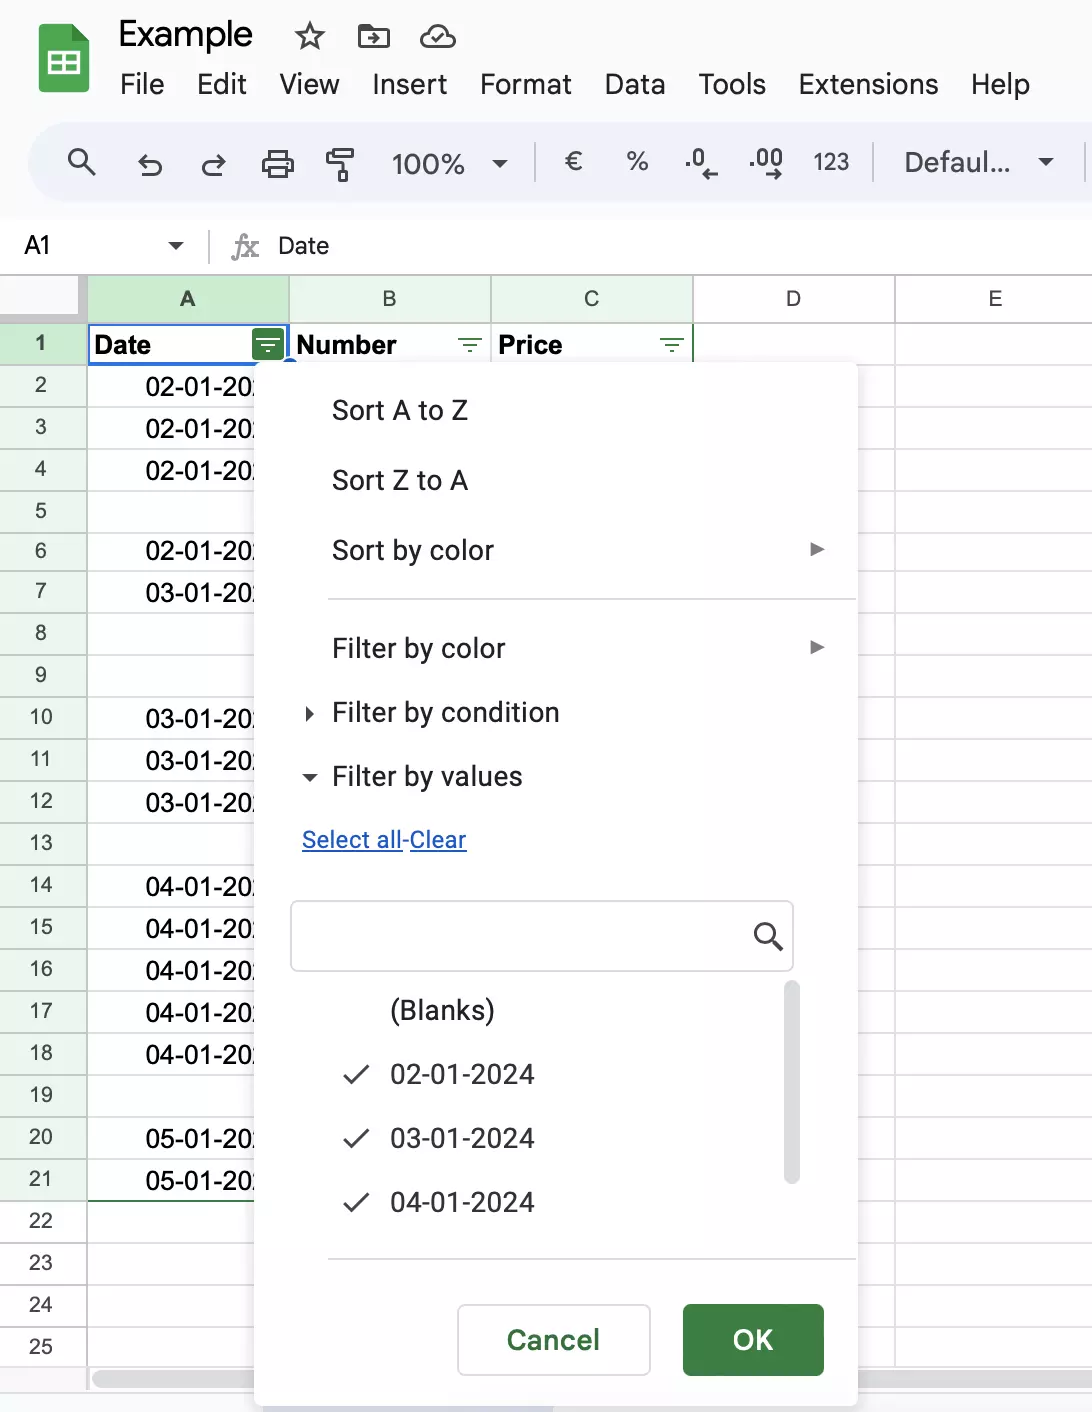
If you want to display the rows again, simply remove the filter by clicking on the icon at the top right again.
How to delete multiple empty rows in Google Sheets
In Google Sheets, you can also remove multiple empty rows. If you’re sure you no longer need the rows, follow the steps below to permanently remove them:
- Select all the cells in your spreadsheet.
- Set the filter just as you did in the last section.
- Click on the funnel symbol to open the filter menu.
- First remove all ticks by clicking on Clear next to Select all.
- Place a tick in front of (Blanks) and click OK.
- Now, only the empty lines of your document will be displayed. These are highlighted in green.
- Select all empty rows.
- Right-click on the lines and then click on Delete selected rows, the option with the rubbish bin symbol.
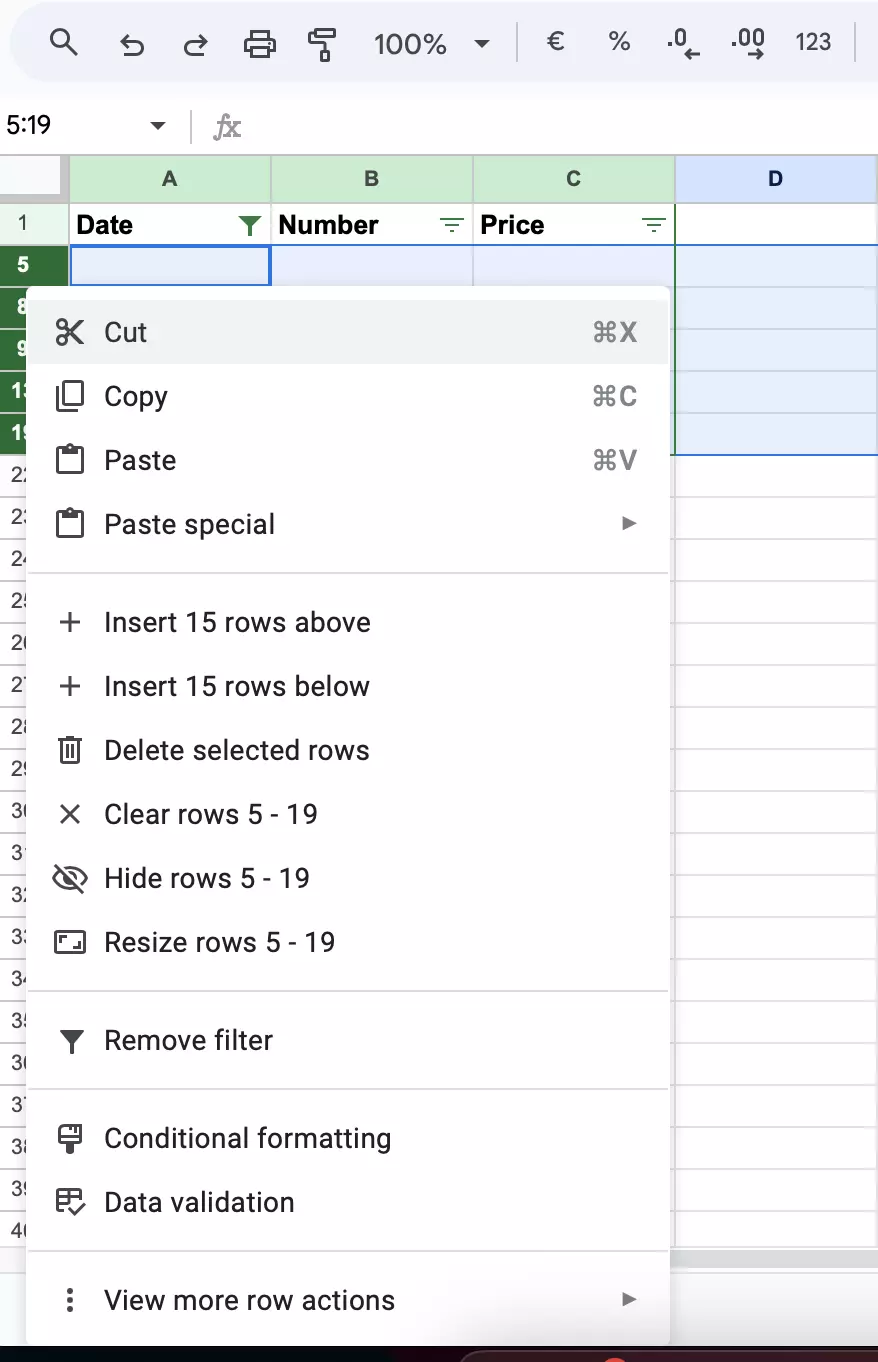
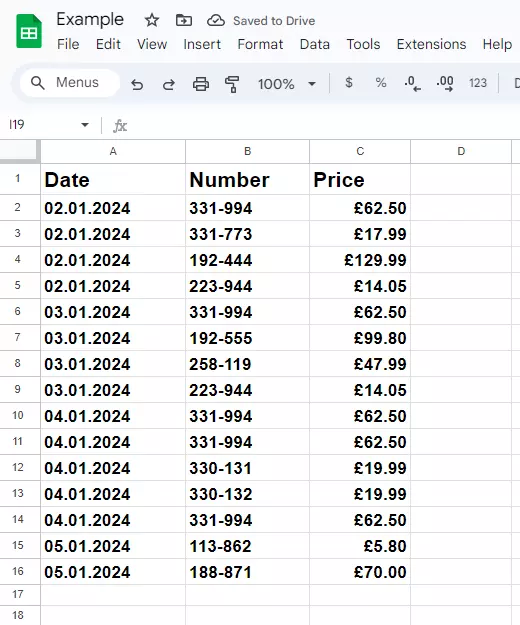
- Remove the filter by clicking on the icon again. The empty rows have been removed and now only the rows containing data will be displayed.
- Keep your data safe with industry-leading security
- Save time on updates and maintenance
- Easily add apps and online office tools
How to remove the contents of a row in Google Sheets
If you want to keep rows but delete their contents, follow these steps:
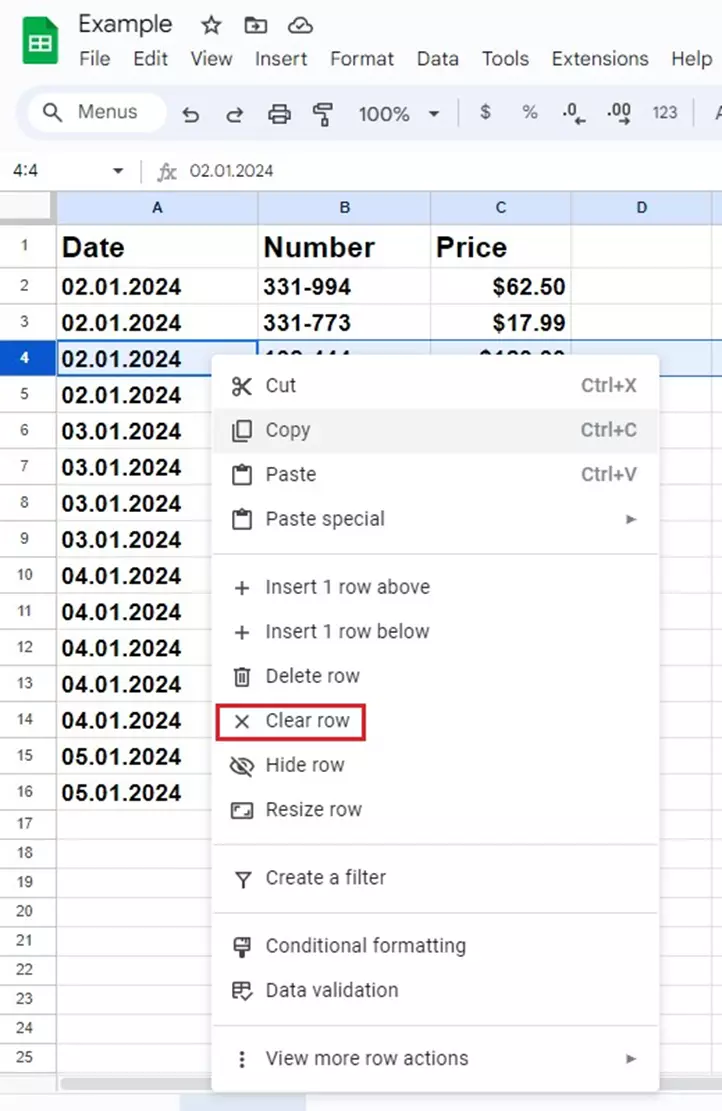
- Select the row or rows where you want to remove the content.
- Right-click on the row number(s) of the row(s) where you want to remove the content. The row numbers are located in the far-left column of the spreadsheet.
- In the middle of the drop-down list, you’ll find the option Clear row, which has a small x in front of it. When you click on this option, Google Sheets will remove the contents, leaving you with an empty row.
Wondering how to use Google apps and their features even more effectively? With Google Workspace from IONOS, you not only get better Google support, but also benefit from seamlessly integrating all features with your domain through IONOS.

