Incognito mode: activate private surfing
All well-known Internet browsers include incognito mode – also referred to as private mode. Activating incognito mode is simple enough. But understanding which activities are hidden from third-parties is a little less obvious.
Why surf in incognito mode?
Generally, incognito mode deletes a user’s browsing history and cookies when the session is closed down. But in most cases, it won’t delete any bookmarks or downloaded data. Deleting the browsing history can be useful when, for example, multiple people are using the same computer. When a person browses in private, subsequent users won’t be able to check which websites were previously opened.
Internet providers and network administrators – and employers checking PCs – can usually monitor which websites a user browsed, even when incognito mode is active. Private mode does not traditionally secure one’s browsing history against trackers or analysis tool that websites use to understand surfing behaviors. Neither does it protect against malware, such as key loggers or spyware. Some browsers like Mozilla Firefox have extended their features for enhanced security measures. These settings are separate from incognito mode.
Browsing in private mode usually means that users sharing the same PC cannot check a previous user’s browsing history. Most browsers will also delete cookies when surfing incognito. But beware: incognito mode does not guarantee anonymous surfing. If you’re looking to anonymise your browsing activities, you’ll need to choose alternative options.
Are you still looking for the perfect browser? Our comparison of the top browsers helps you to make a decision.
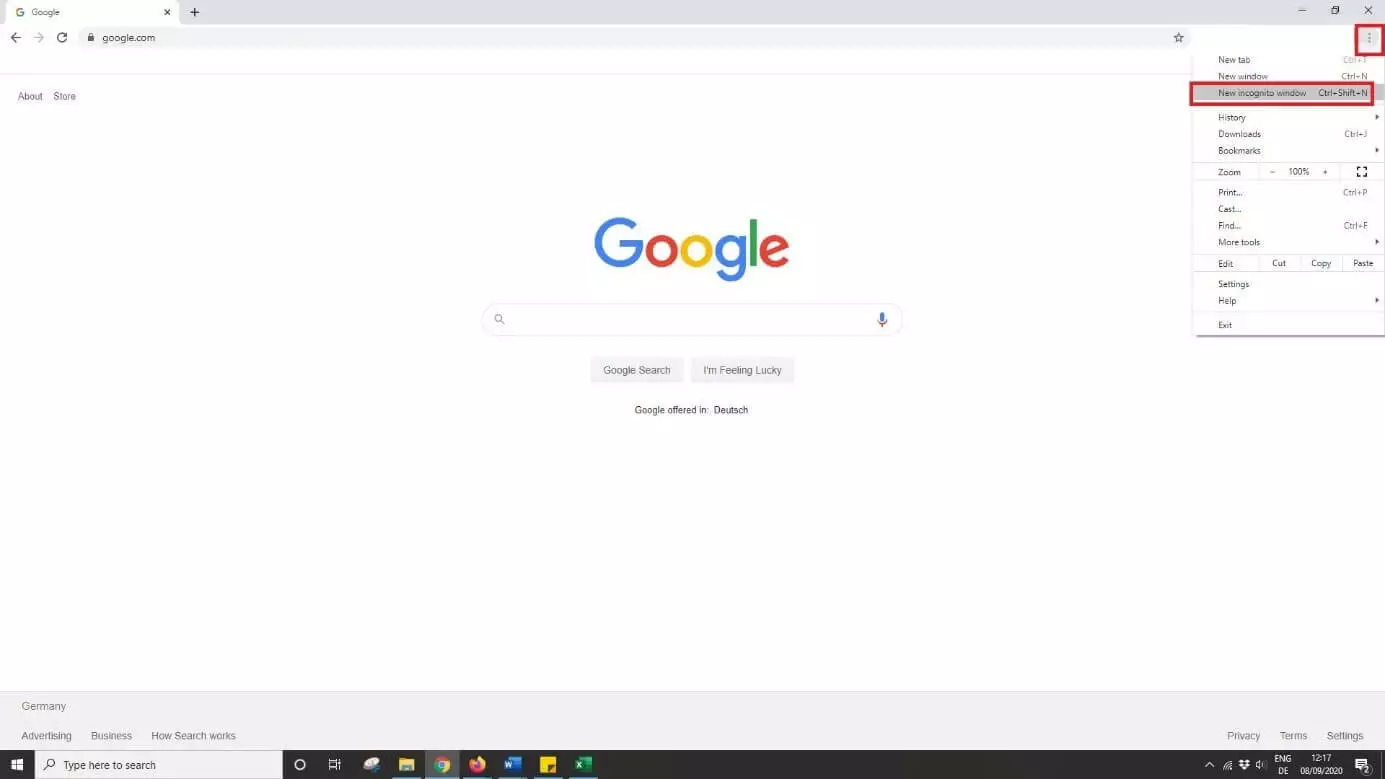
How to go incognito in Google Chrome
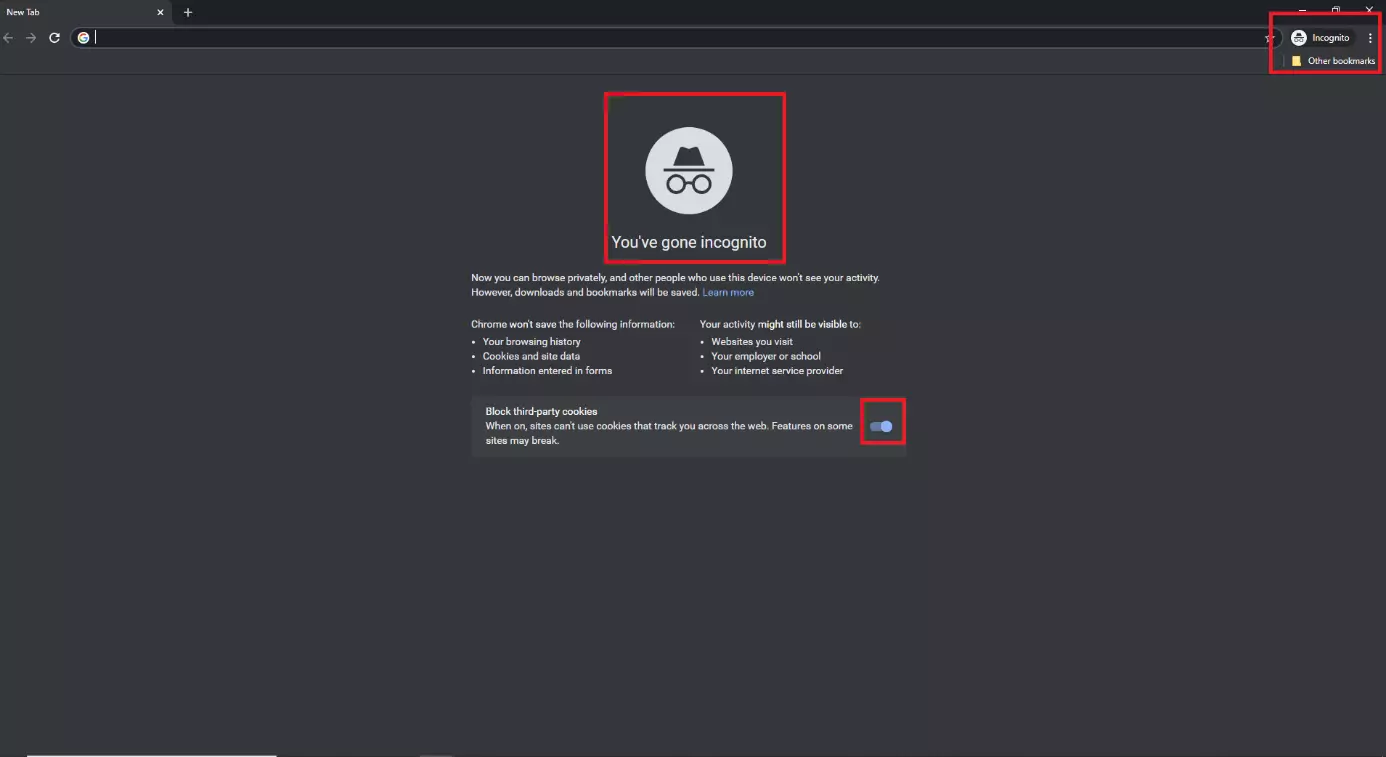
Private mode in Google Chrome is clearly marked with the incognito symbol.
The following data are not stored on Google Chrome when using private mode:
- Browser history
- Cookies and other website data
- Data entered into online forms
Find out how to delete your browser history in Chrome in our dedicated article on the topic.
However, your surfing history can still be viewed by third parties, more specifically:
- Websites you’ve visited
- Your Internet provider
- Network administrators, if your computer is part of a network
Generally, this allows employers or educational institutions to track browsing activities, even if a user is browsing in incognito mode.
Cookies by third-party providers which track surfing behaviours across multiple websites have to be deactivated separately in Google Chrome.
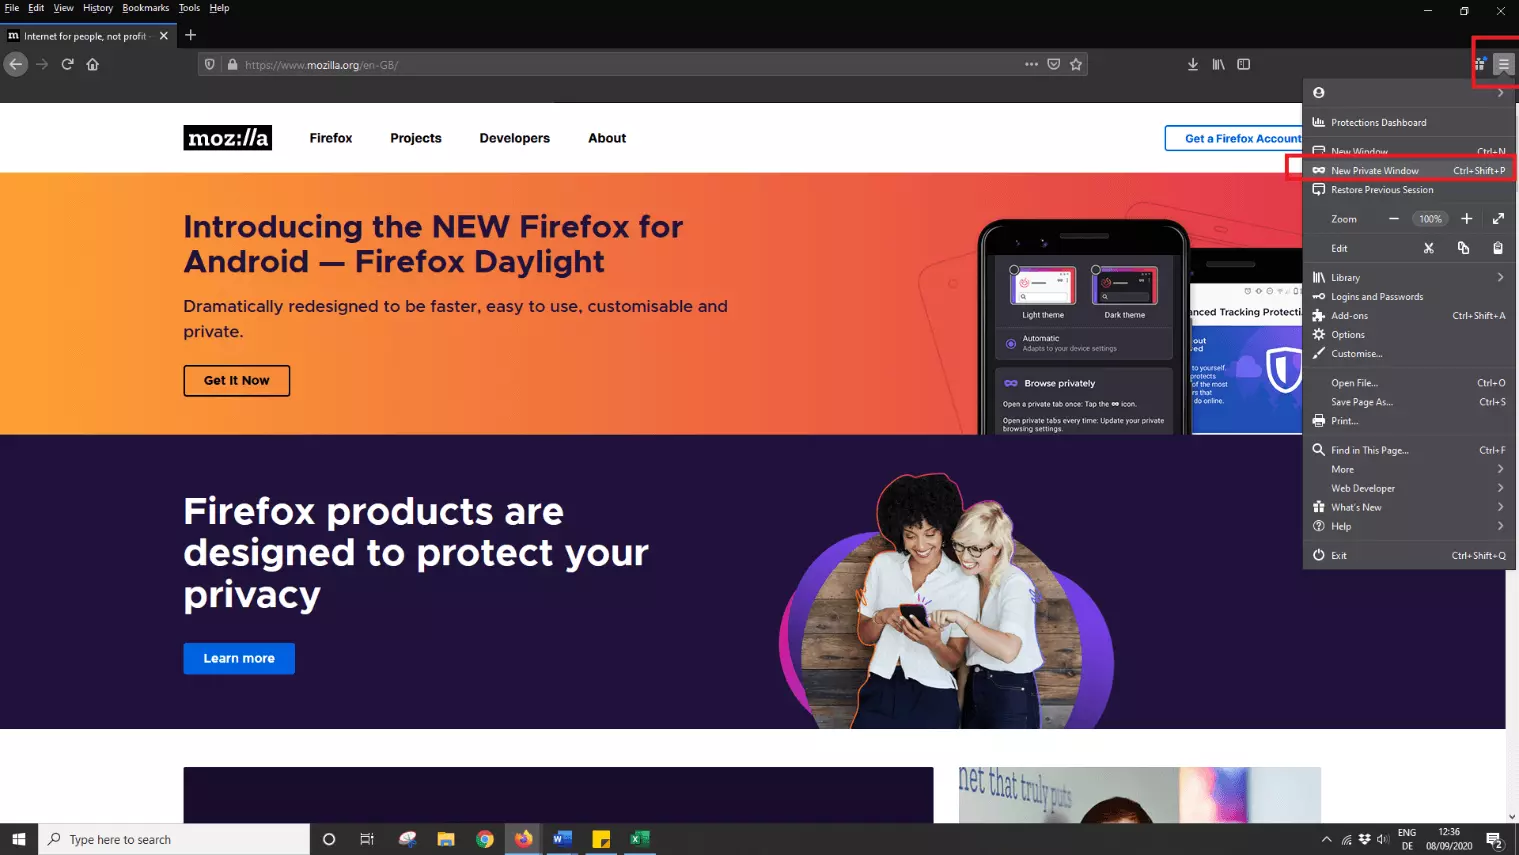
Launch private mode in Mozilla Firefox
The mask symbol at the top right of the window shows you that you are using Mozilla Firefox in private mode. Using incognito mode in Firefox means you won’t leave any easy-to-follow traces on the computer, such as:
- Browser history
- Cookies and other website data
- Data entered into online forms
Find out how to quickly and easily delete your browser history in Firefox löschen.
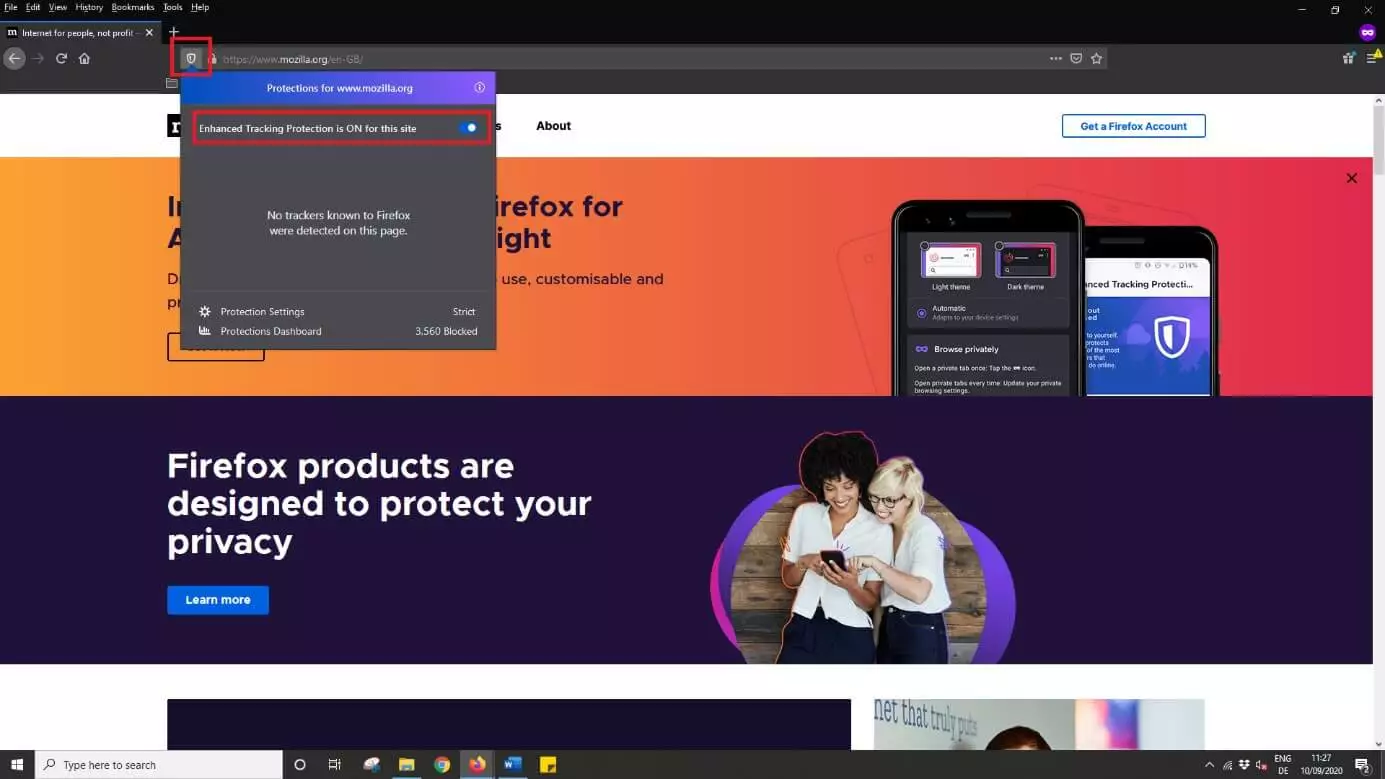
The shield symbol on the left of the address bar lets users check how confidential their browsing activities are. The colour of the symbol identifies the level of confidentiality provided.
- Purple: Some trackers and/or malicious scripts are blocked. Click the violet shield symbol to check which ones they are. Because many websites are using professional tracking and analytical tools today the symbol will be purple in most cases.
- Gray: Mozilla recognises no trackers or malicious scripts on the visited website.
- Gray, crossed-out: Extended security has been deactivated for the website. To reactivate security, click on the shield symbol again and operate the switch to activate.
All recent Firefox versions provide improved security against activity tracking. Whether you’re using Mozilla Firefox to surf incognito or not, the browser automatically blocks a range of trackable elements such as:
- Tools to track activity via social networks
- Cookies by third parties used to track activities on other websites
- Identifiers such as finger printer
- Crypto miner (secret digital currency calculators)
- Hidden tracking codes to track surf behaviour in incognito mode
It should be mentioned that Firefox does not provide 100% protection against tracking of activities, because websites, shop systems, and platforms use a wide range of different tracking and analysis tools, and regularly continue extending them.
Even if security against tracking is fairly high with Mozilla Firefox, Internet providers and network administrators (e.g. employers) can monitor which websites a person visited using a certain computer.
Launch InPrivate window in Microsoft Edge
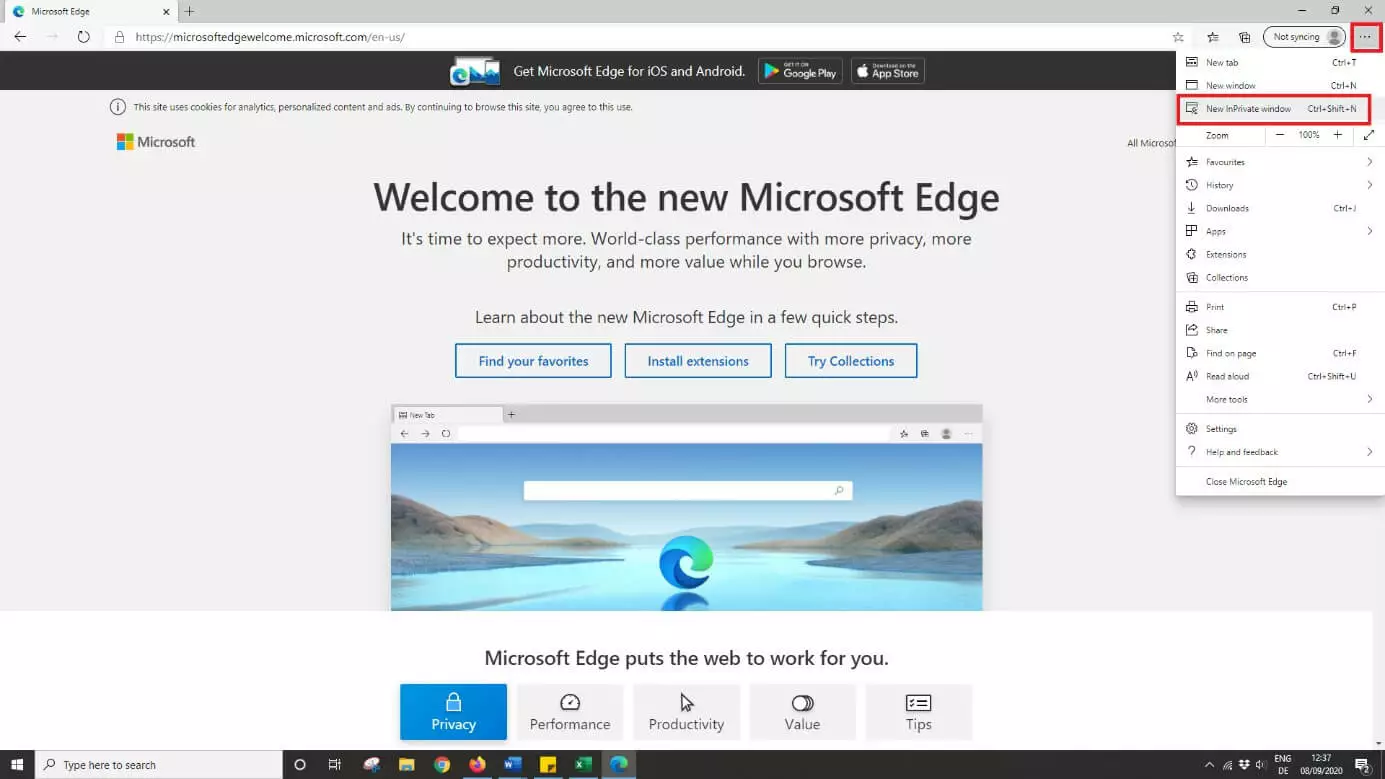
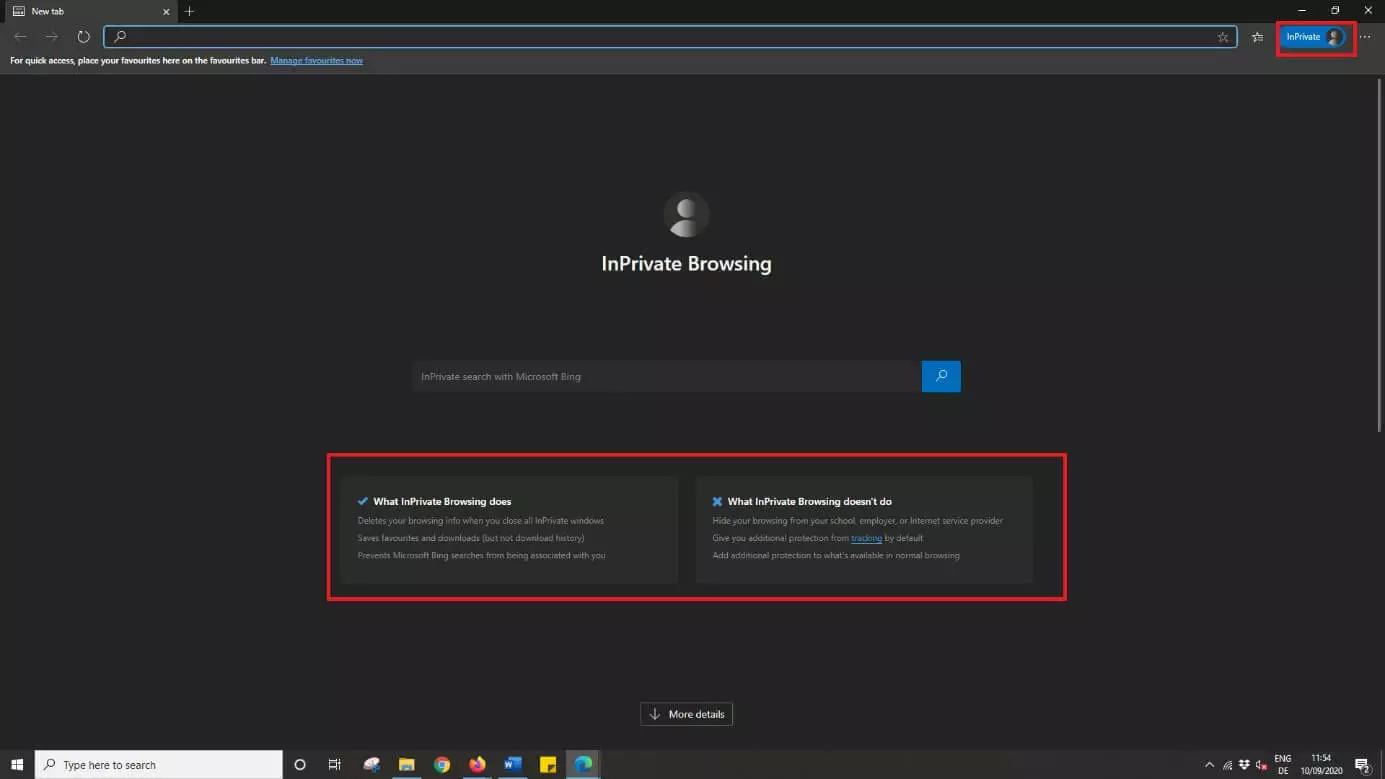
Once you’ve made your selection, the InPrivate window launches and you can browse incognito. To continue to surf the web, simply enter a website address. As long as you’re using Microsoft Edge in private mode, ‘InPrivate’ will be displayed on the left top of the browser.
As is the case with Google Chrome or Mozilla Firefox, Microsoft Edge incognito mode ensures that browser data can’t be viewed by other users sharing a single workstation. This includes:
- Browser history
- Cookies and other website data
- Data entered into online forms
Surfing in InPrivate mode does not mean that all your browsing activities are secure from tracking. Once again, employers or websites utilising dedicated tracking methods can follow your browsing history.
If you’re using an older standard Microsoft browser, you can find out how to delete your Internet Explorer browser history in our dedicated article.
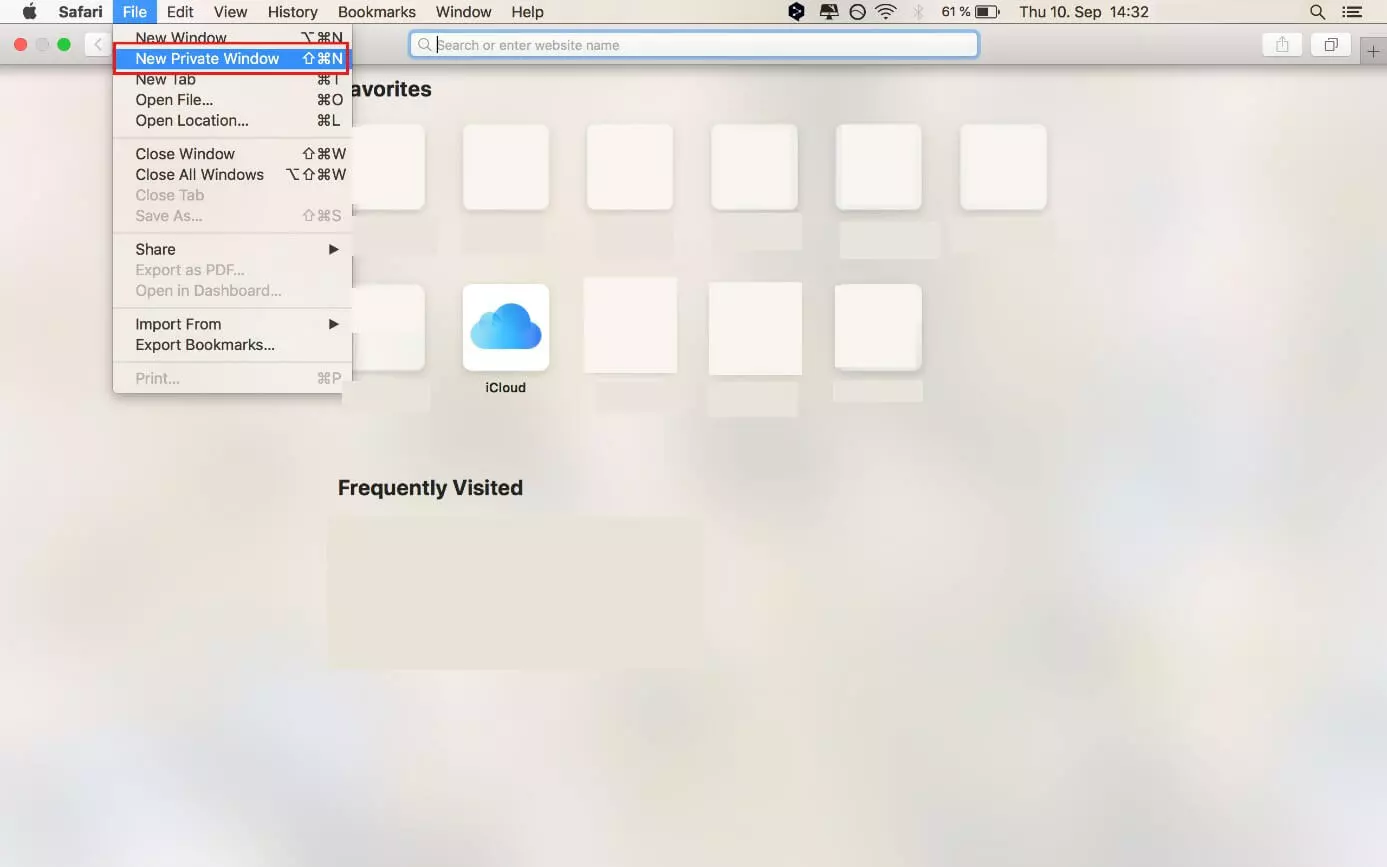
Enable private surfing in Apple Safari
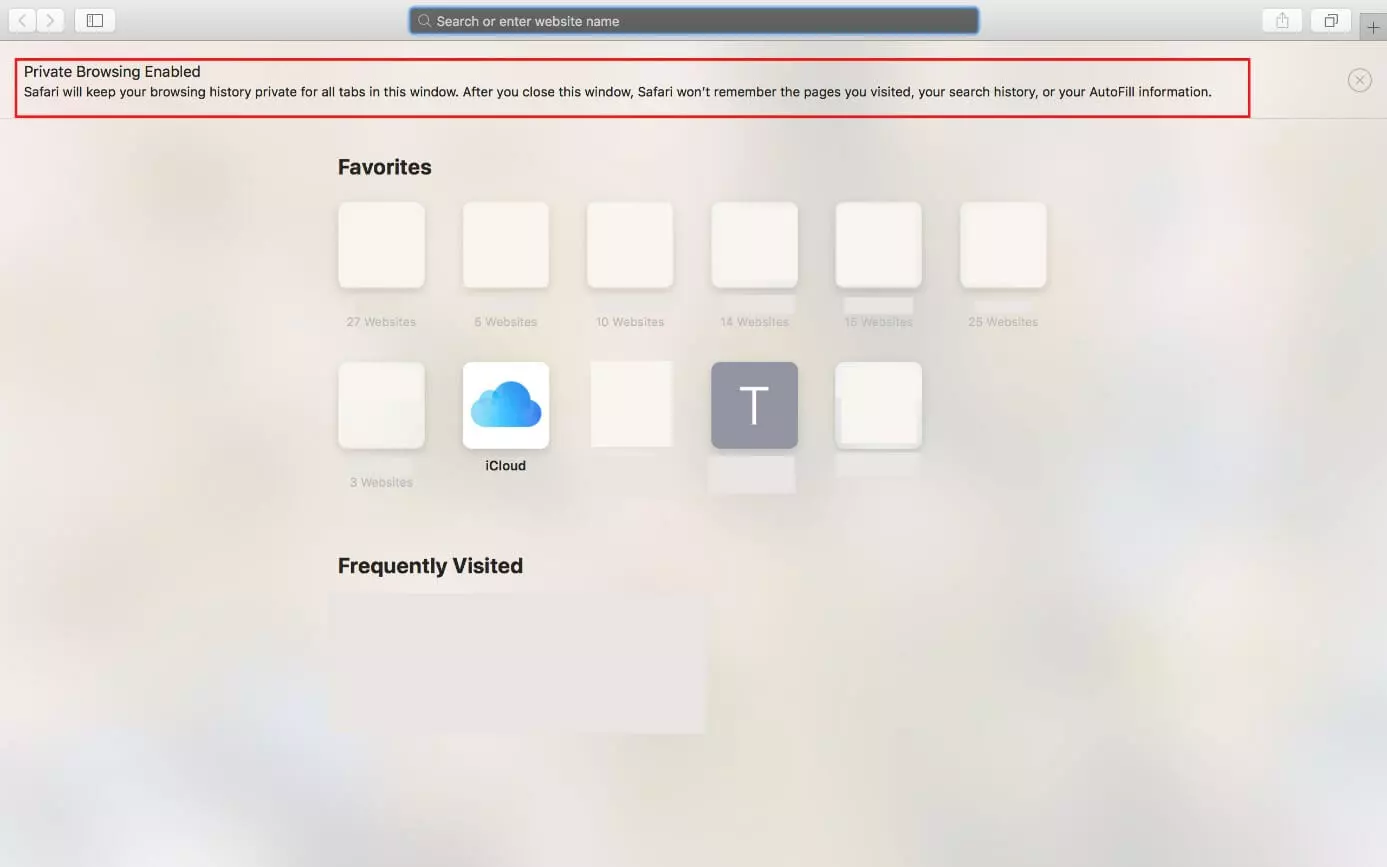
In the first instance, Safari private mode hinders tracking of browsing activities on computers shared by multiple people. Web pages that are viewed in private mode or information entered into web formula are not stored. Changes made to cookies aren’t stored either when using the browser incognito. In comparison to regular mode, open websites aren’t stored in the cloud and won’t be shared to other Apple devices.
The incognito mode in Safari doesn’t provide anonymity from Internet providers, network administrators, or employers. A more restrictive use of cookies can be adopted via the settings in Apple Safari.
Are you looking to delete your browser history in Safari? Find out how in our step-by-step guide.
Activate incognito mode in Safari on iPhone
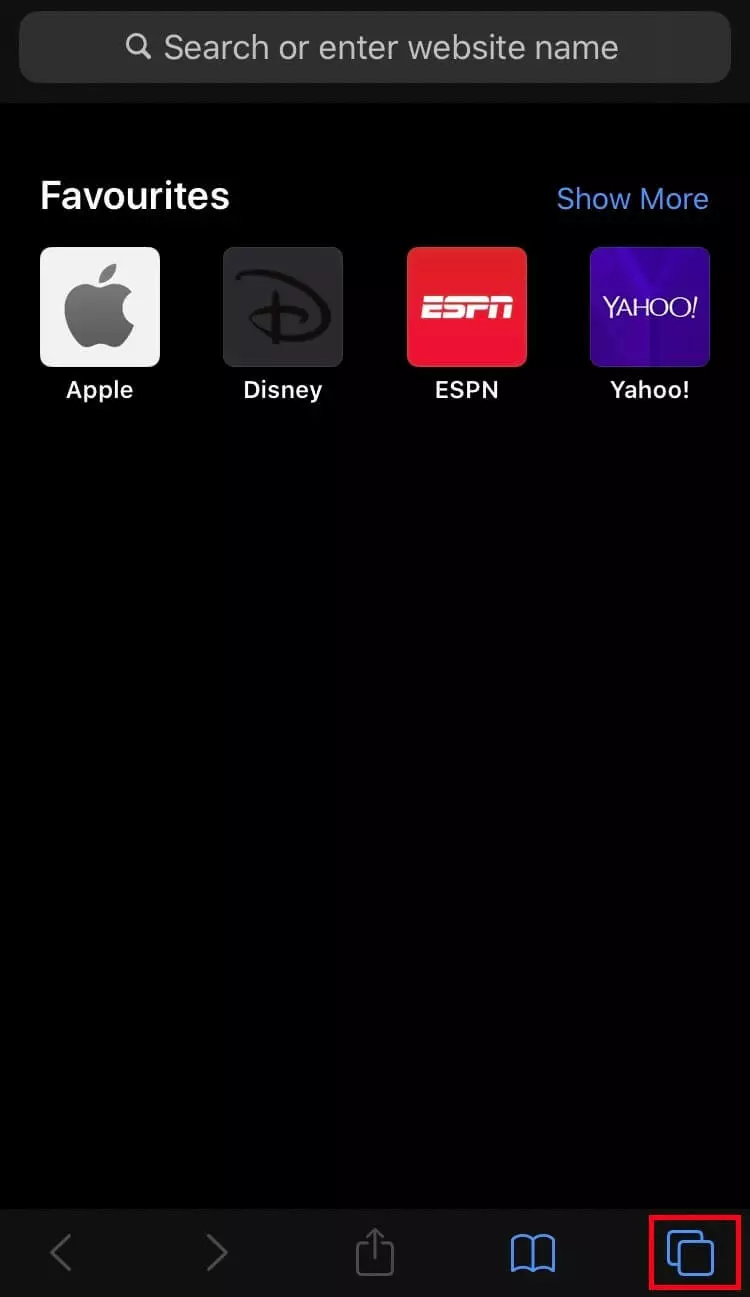
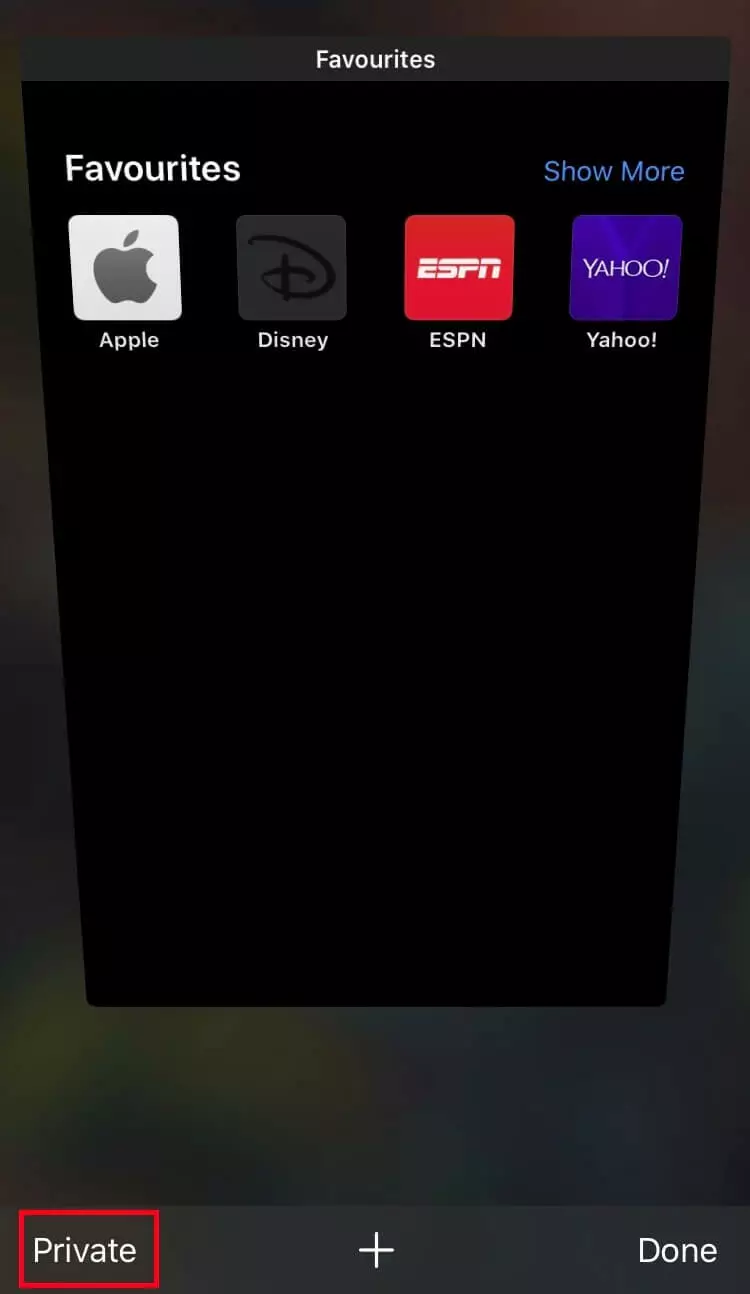
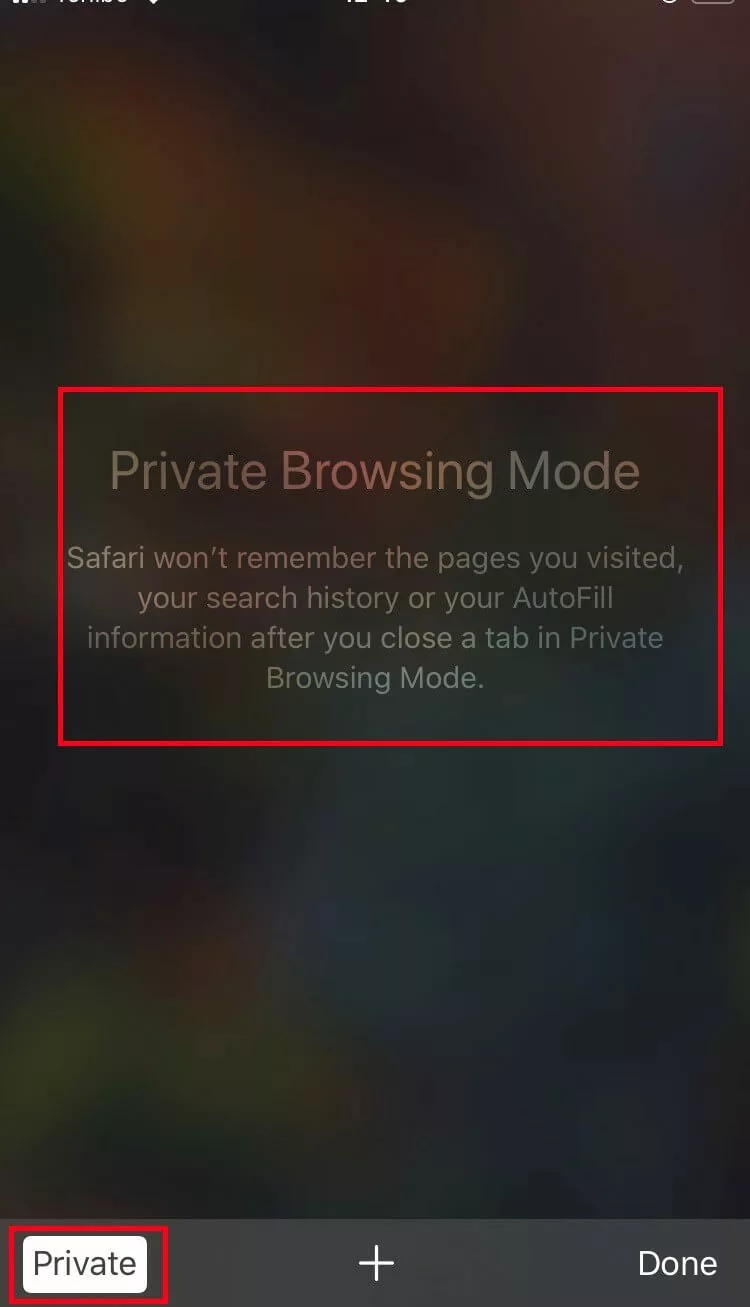
Incognito mode on the iPhone operates similarly to Safari on Apple desktops and laptops. Visited pages, browsing histories, and information entered into formulas isn’t stored. Cookies are not automatically blocked in private surf mode. But they can be configured further via ‘Settings’ and ‘Block all cookies’. Blocking all cookies can result in certain websites no longer displaying correctly.
Not surfing incognito but would like to regularly clean your browser from unnecessary data? Our Digital Guide shows you how to delete cookies, delete your entire search history or delete your Google search history.


