How to install and setup WinSCP
As a free client program, WinSCP is geared towards users who do not want to leave anything to chance when it comes to the safety of their data and login information. WinSCP is designed for an encrypted data transfer via SCP (secure copy) and SFTP (SSH file transfer protocol), making it a safe alternative to conventional FTP clients such as FileZilla or Total Commander. The software is quick to install and has two clearly designed user interfaces as well as a series of practical functions, including an integrated text editor and the automatic synchronisation of two directories.
Installation
The open-source software is covered by the GNU general public license, so it is free for both private and corporate use, editing and distribution from the official WinSCP website. Download the installation package and save the file in a local folder of your choice.
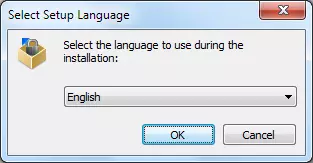
Setup language
License agreement
The set up assistant will start after clicking ‘OK’. You will then be prompted to close all applications currently in use before continuing with the installation. This is followed by the license agreements. Read the terms and conditions thoroughly and click ‘Accept’ to confirm and continue with the installation.
Selecting an installation type
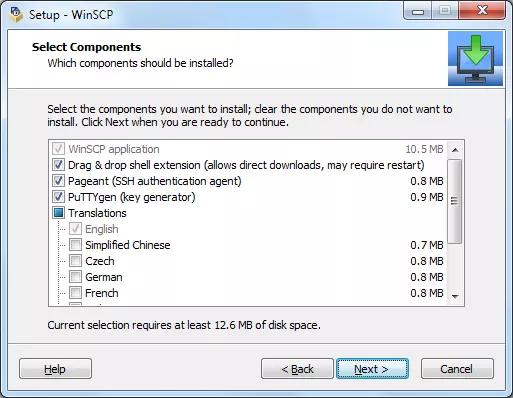
Next you can choose an installation type. As well as a standard installation, it is also possible to create a custom installation. The latter allows you to define the installation path and the individual components. The following are generally needed for an encrypted data transfer:
- WinSCP application
- Drag and drop extension
- Pageant (SSH authentication agent)
- PuTTYgen (key generator)
You also have the option to create different shortcuts to WinSCP such as a desktop icon.
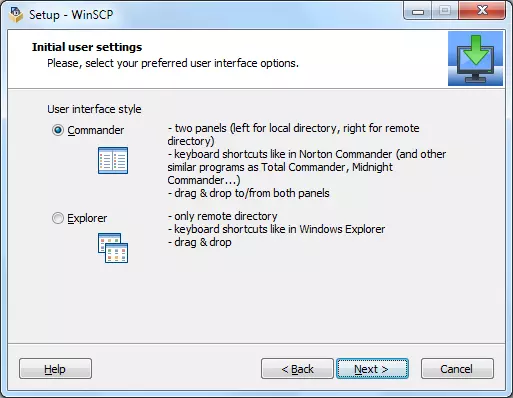
Choosing the user interface
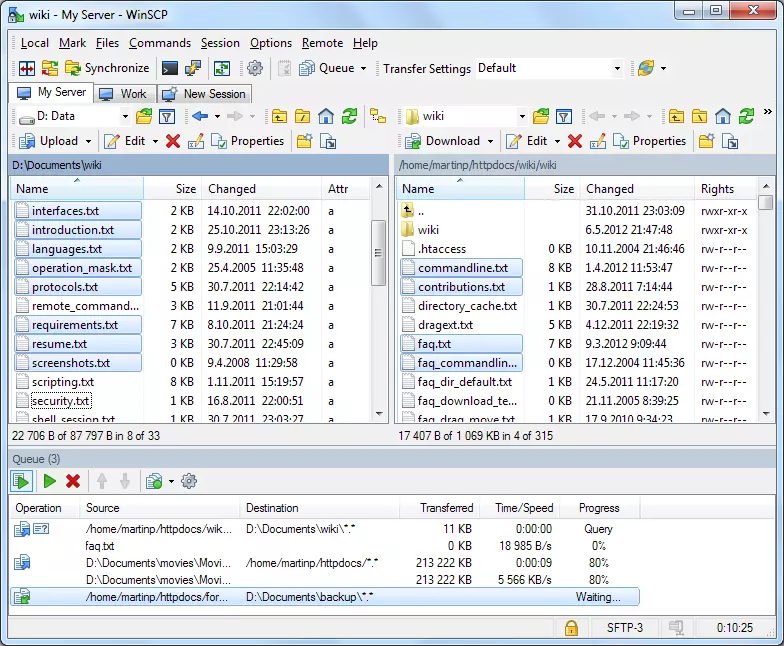
In the next step, you will be asked to choose a user interface for WinSCP. Here, you can choose between the commander interface and the explorer interface. The commander interface presents local file systems as well as the web server directory, organised into two parallel folder views; meanwhile, the explorer interface leans toward the structure of Windows Explorer. Should you wish to select commander interface, for example, check the corresponding option, as shown here:
After choosing the user interface, click ‘Next’ and start the installation. WinSCP is then ready to be connected to the network.
Connecting WinSCP to a web server
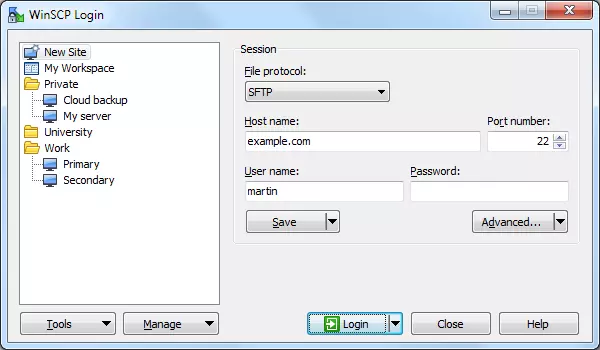
To connect WinSCP to your server, open the program by double clicking the program icon. A log-in window will pop up. To establish a connection to a web server, click on ‘New site’. Then choose the desired transfer protocol and give the host name as well as your username and the corresponding password for server access. If you prefer, you can give the IP address of the server rather than the host name. The port number is produced automatically as a result of the choice of transfer protocol. Setting up an encrypted SSH connection generally also requires exchanging an SSH key pair.
Data exchange with WinSCP
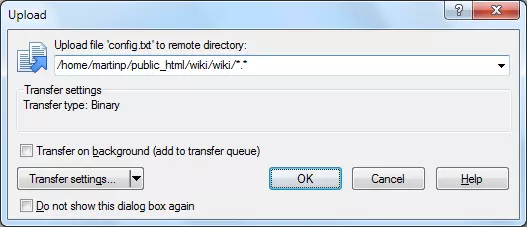
If you would like to load a file from one location into another, drag and drop the file in the intended position in the folder structure. The size and type of file play no role here. Individual files and entire folders can both be transferred in this way. Before the data transfer starts, a transfer window will appear. If you do not want to make any changes to the standard setting, click ‘OK’ to confirm.
As well as uploading and downloading files, WinSCP allows you to delete and move files on the web server. Properties such as the file name and the access or group rights can also be customised via remote access. In addition, WinSCP offers the possibility to edit text-based files directly on the server.
Edit files directly on the server
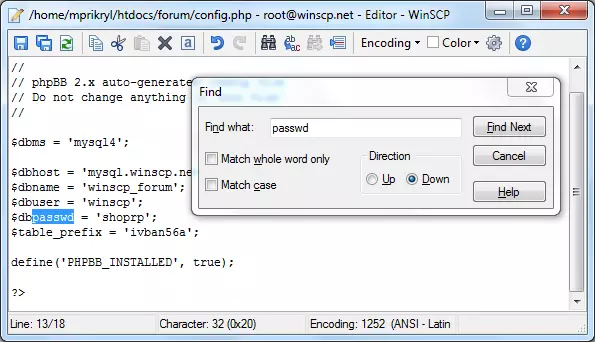
WinSCP has an integrated text editor specifically for editing text-based files such as HTML, PHP, and CSS documents. To open a document, you just have to double click on the file icon. The editor’s functions correspond to those of the Windows Notepad. Both text input and standard commands such as ‘Cut’, ‘Copy’, and ‘Paste’ are supported, as well as a search tool and an undo function. These actions are carried out via the toolbar or standard Windows shortcuts.
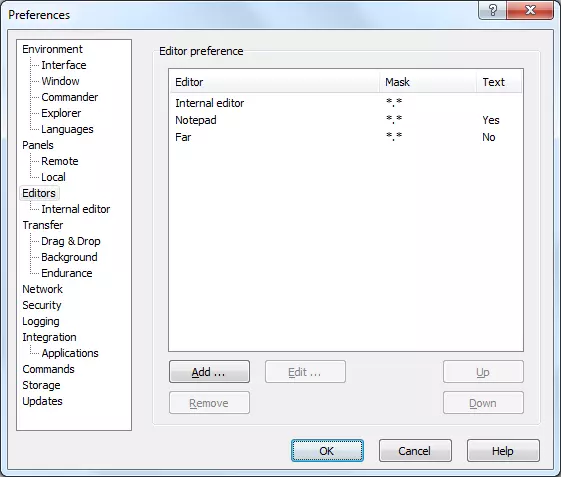
As well as the internal text editor, WinSCP also supports the integration of external editors such as Eclipse or Notepad++. These generally offer a larger spectrum of functions, for example syntax highlighting or auto-complete and auto-correct. To use an external editor, click ‘View’, followed by ‘Settings’, and then choose ‘Editors’ in the settings directory.
If no alternative editors appear in the list, you can add them by clicking the ‘Add’ button.
Keep folders synchronised
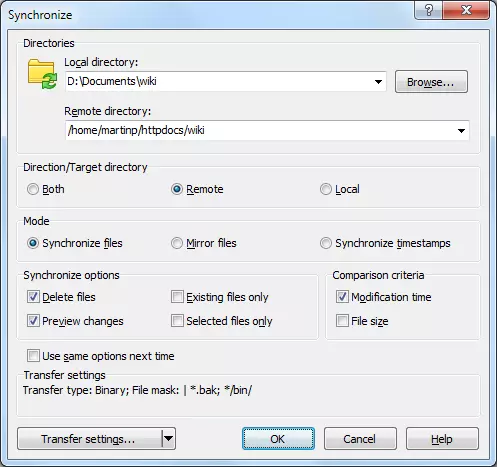
Due to its extensive synchronisation functions, WinSCP is particularly popular amongst administrators. The program automatically syncs two directories, transfers edited files and keeps data files up-to-date on the web server. If you would like to sync folders with local data sets on your server, find the corresponding directories (this works for the commander interface) and select ‘Commands’ and then ‘Synchronise’ in the main menu. A synchronisation window will pop up. If you’re using the Explorer interface, the local directory will now be selected.
With the synchronisation window, you can choose between three different modes for handling files with identical names in the source and in the target.
- Sync files: in standard mode, two directories are synchronised by overwriting older files in the target directory with newer files from the source directory
- Mirror files: any file in the target directory that is different from the source directory will be overwritten, even if it is newer
- Sync timestamps: this mode only updates the timestamps of the target files
An automatic synchronisation can be configured by selecting ‘Commands’ and ‘Keep remote directory up-to-date’ on the main menu.


