How to create an online store with WordPress and WooCommerce
Whether you’re selling actual products or providing digital content in the form of downloads, you can’t do it without a modern online shop in the age of Web 2.0. In order to assure long-term survival on the marketplace and to continue increasing the levels of your publicity, you should set up an online shop. This doesn’t only strengthen the company’s brand, but also generates more customers by increasing its reach. By creating your own online shop and running it successfully, you can also strengthen customer loyalty, manage business operations more efficiently, and generate more sales.
On the internet, you will find numerous software solutions – including CMS-supported options. On the basis of these systems, it’s possible to create functional online shops with WordPress.
Why it’s worth creating an online shop
As a professional supplier of quality products, you want to offer your customers not only access to your range, but also to impress them so that they make a purchase. Mobile internet means that users can order products wherever they are and at whatever time it happens to be. Such behaviour is becoming more and more popular. By designing a mobile-optimised online shop, you’re adapting to this changing buyer behaviour and can reach even more potential customers. A web shop with professional features enables you to flexibly manage your own product range, coordinate customer orders and delivery, practise marketing, and also make your online shop more attractive with SEO measures for search engines. This makes it easier for users to find you online.
If you’re fine to work with content management systems, you have the opportunity to create your own online shop with the globally-used CMS, WordPress. If you run your online shop on WordPress, you can make the most of a popular world-wide system with versatile functions when you opt for this open-source CMS. The dashboard enables you to set up, edit, and expand your shop with extensions, known as plugins.
Even though a CMS isn’t technically an e-commerce platform, it can still be worthwhile creating a shop with WordPress. One of the most common methods that connects the CMS to a shop system is to create an online shop with the WordPress plugin, WooCommerce.
The free shop plugin, WooCommerce, is easily downloadable, doesn’t require complex installation, and can be set up directly via the CMS menu. According to WordPress itself, it is one of the most popular e-commerce systems with around 30% of all online shops currently operating on it. Even the free version offers numerous features for running a professional shop. You can then expand these features if needs be by upgrading to the paid version. If you accept that there will be a few restrictions you can set up a decent shop using just the basic features. We explain how this works and how you can create a functional WordPress online shop with WooCommerce.
Step 1: Install your WordPress shop with WooCommerce
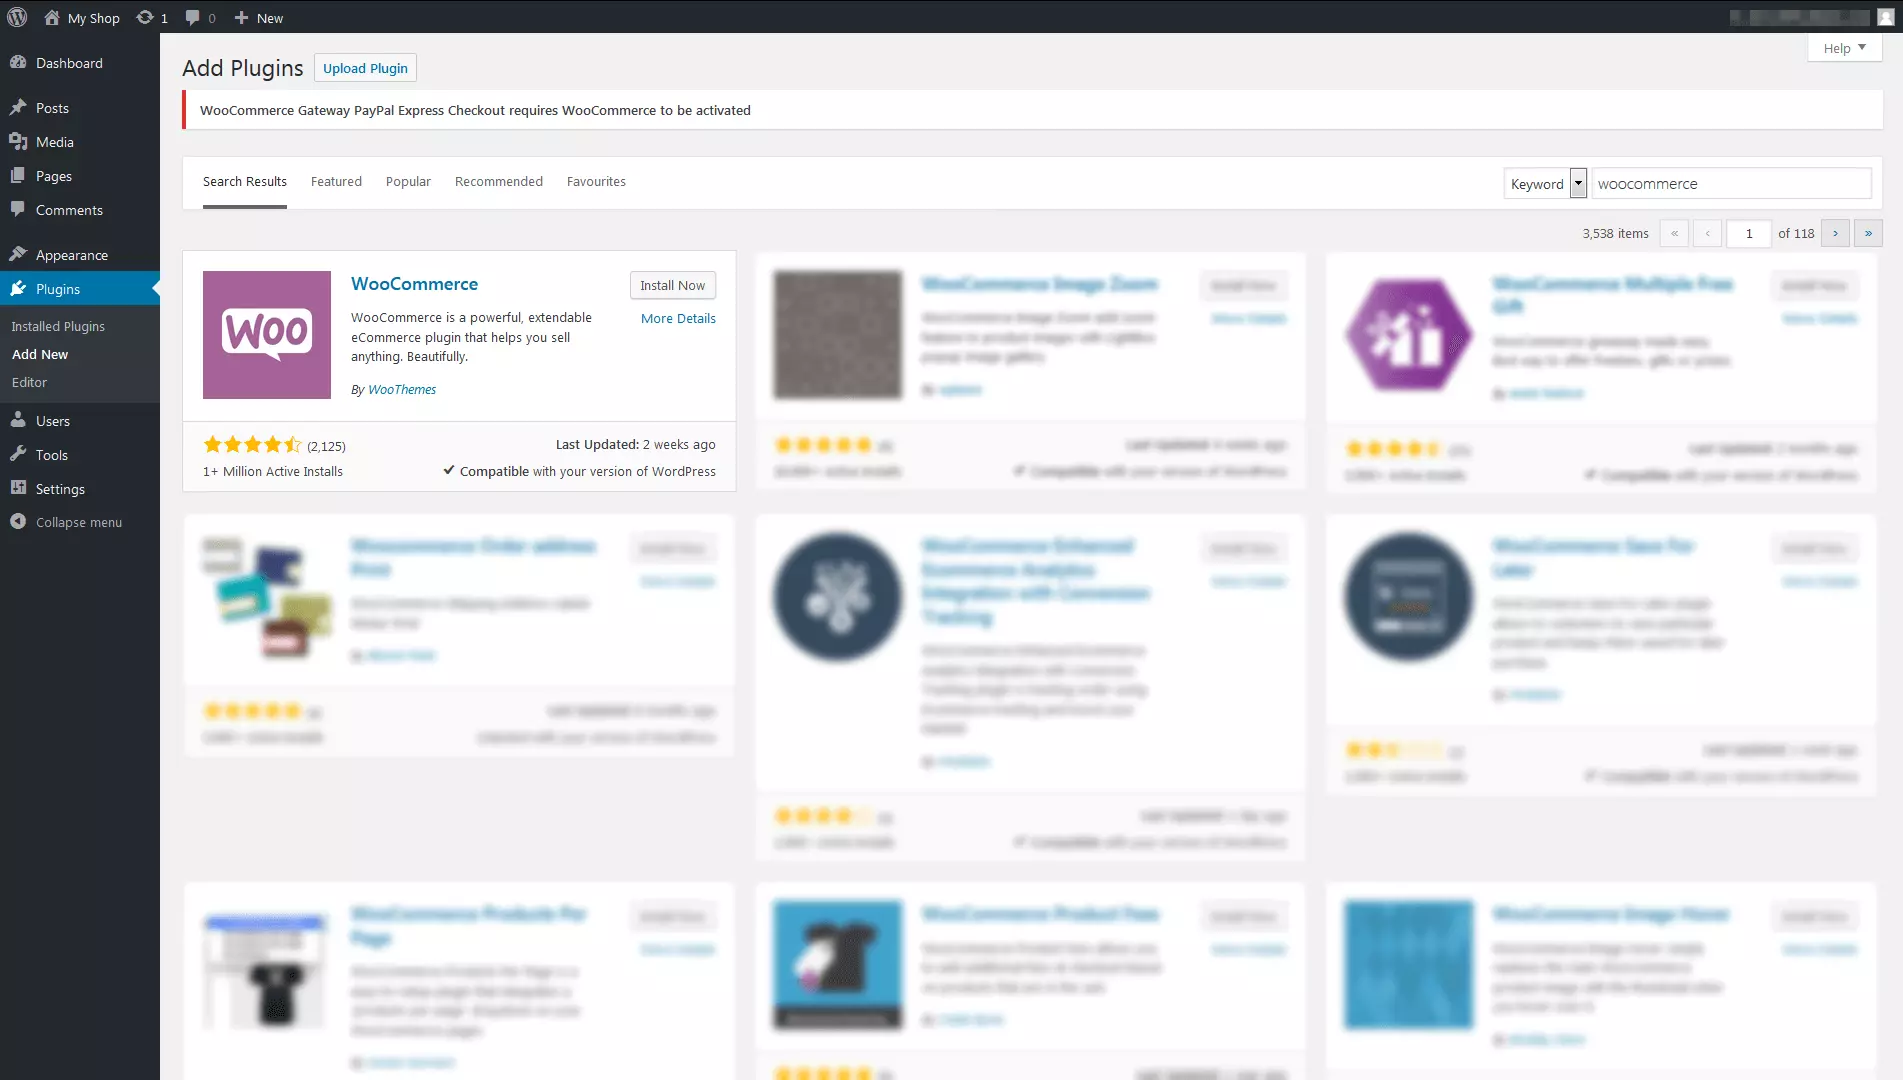
If you want to set up a WordPress online shop with WooCommerce, you first need to install the plugin. You will find the installable plugins in the WordPress sidebar. In the menu, select 'plugins' and then 'install'. Search for 'WooCommerce', then start the download by clicking on 'install now' followed by 'activate'. For beginners, it is recommended to start the integrated installation wizard by clicking on the pink button 'run setup wizard'. This guides you through the setup step by step. The final step is to click on the pink button entitled 'create your first product!'.
You can, of course, change and adjust the basic settings you have selected at any time during the setup. This applies to the following areas:
- Location (head office)
- Currency used (e.g. 'Pounds' (£))
- Unit for product weights (e.g. grams 'g')
- Unit for product dimensions (e.g. centimetres 'cm')
- Product delivery with delivery charges (domestic/international)
- VAT increase for products, amount needs to be indicated
- Authorisation of payments via bank transfer, cash on delivery, cheque, PayPal
- Activate options for offline payments (cheque, cash on delivery, bank transfer)
Step 2: Set up an online shop (general options)
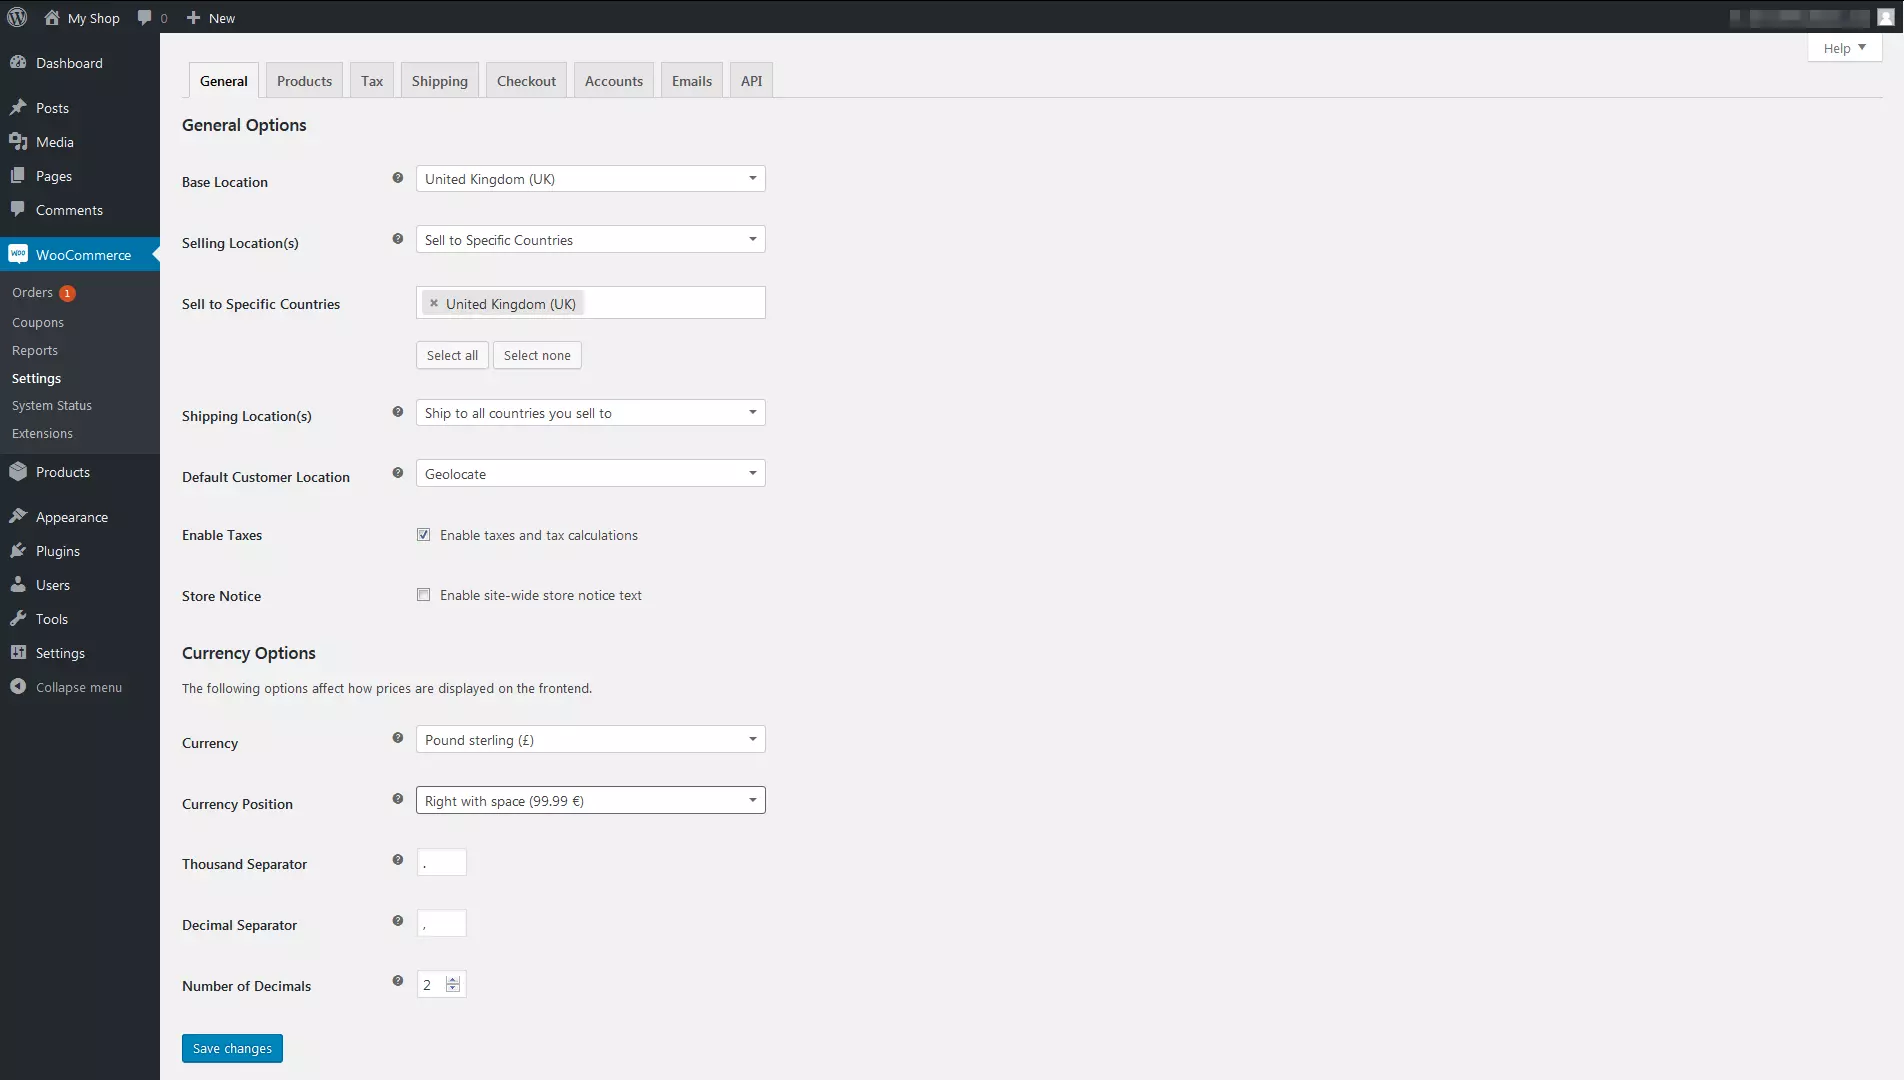
WooCommerce offers those, which use WordPress to create their online shop, the possibility to edit a variety of basic functions independently. The most important basic settings can be found in the sidebar under 'settings' and then 'general'. You can enter basic information such as the title of the website, the web address (URL), time zone, and language. Under the menu item 'WooCommerce', you will find the menu item, 'settings' where you can select and organise the most important elements of your WordPress shop infrastructure.
General
This tab enables you to make changes to the headquarters location, the sales region, currency, and delivery locations.
Products
Here you can configure product-specific settings: units of measurement, ratings, display options (shop and product pages as well as images), warehouse management, and downloadable products.
Tax
This menu allows you to specify various options for tax rates (e.g. filtered by country, city, and delivery terms).
Shipping
In this menu, you can determine the terms of delivery for an unlimited number of countries and regions - including delivery areas, charges, delivery destination, and grouped delivery classes.
Checkout
Options for the payment process can be set up via the 'checkout' tab. Here you can regulate the process for customers from when they order to when they pay: from settling individual vouchers or coupons to being redirected to the shopping cart, and from checkout and general terms and conditions to the URL endings for the transaction pages and how the payment methods should be displayed (transfer, cheque, cash on delivery, PayPal, and PayPal Express Checkout).
Accounts
The registration of customer accounts can be easily managed in the settings menu: under the tab 'accounts', you can specify how and when users are redirected to a page where they can log in or sign up for a customer account. You’re free to choose the end part of the URL for individual commands and subpages (display orders, reset password, unsubscribe, etc.).
Emails
Under 'emails' you can configure individual e-mail notifications for customer transactions: the type of notification (e.g. new, cancelled, failed, as well as adding comments or creating new accounts) and the recipients can be chosen as you wish. In addition, you can also change the layout of the e-mails (name of sender, header and footers, as well as individual colours for text and background).
Step 3: Design the navigation and layout of your online shop
To make it as easy as possible for users to navigate your shop and find what they’re looking for, it’s possible to customise the navigation on your WordPress online shop’s user interface. The WooCommerce installation wizard automatically generates a central navigation interface with four menu options:
- Shop (product overview and details)
- Shopping cart (digital collection of all customer orders)
- Checkout (payment page for processing purchases)
- My account (customer account with order overview and contact information)
In the sidebar, you will also find the 'pages' tab where you can create additional pages for your shop. If you click on 'edit' when you’re on a certain page, it’s possible to position this page anywhere in the site hierarchy and publish it. Parent pages can be selected by clicking on 'parents' in the 'page attribute' window.
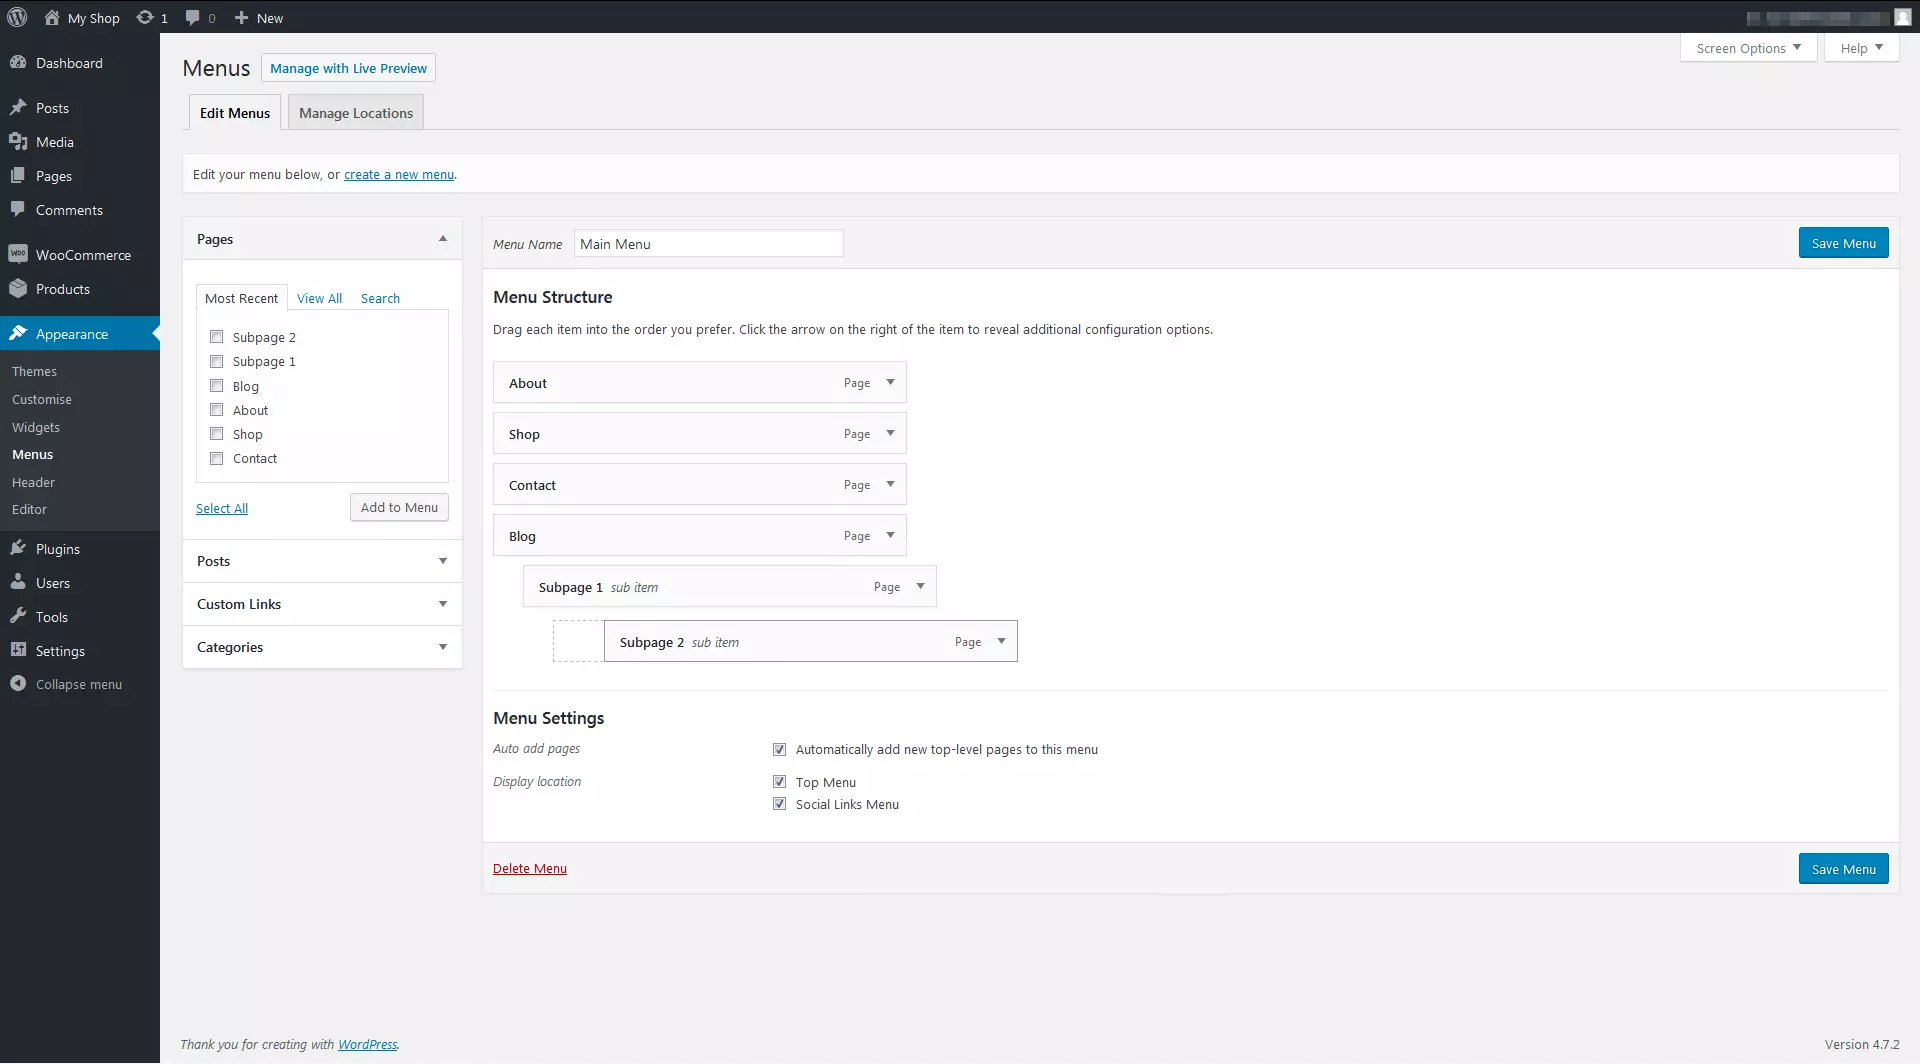
In the dashboard, you can then expand, modify, and manage the navigation menu of your shop page under 'design'. In order to do this, you must enter the desired name of the new menu under 'menu' (the first one is already named as 'main menu'). To the left of the 'menu structure' window, you can add the desired pages to the menu by checking each one and saving your settings (button called 'save menu'). Main pages can be made into subpages using the drag and drop feature.
Depending on the chosen WordPress interface (theme), you can also customise the design (e.g. colours and layout) of your online shop as well as the menu structure. There is a wide range of industry-related, mostly free templates. The type of web design that is the most suited to your shopdepends on your sector, your range of products, and, of course, your target group’s tastes.
Step 4: Products, texts, and images for your WordPress online shop
If you want to create your online shop with WooCommerce and for it to be a success, it’s not enough to simply create the design and menu structure for the shop website: your content needs to be displayed and products sold in your WordPress online shop. Using the WordPress dashboard, you can also set up images, text information, and other content.
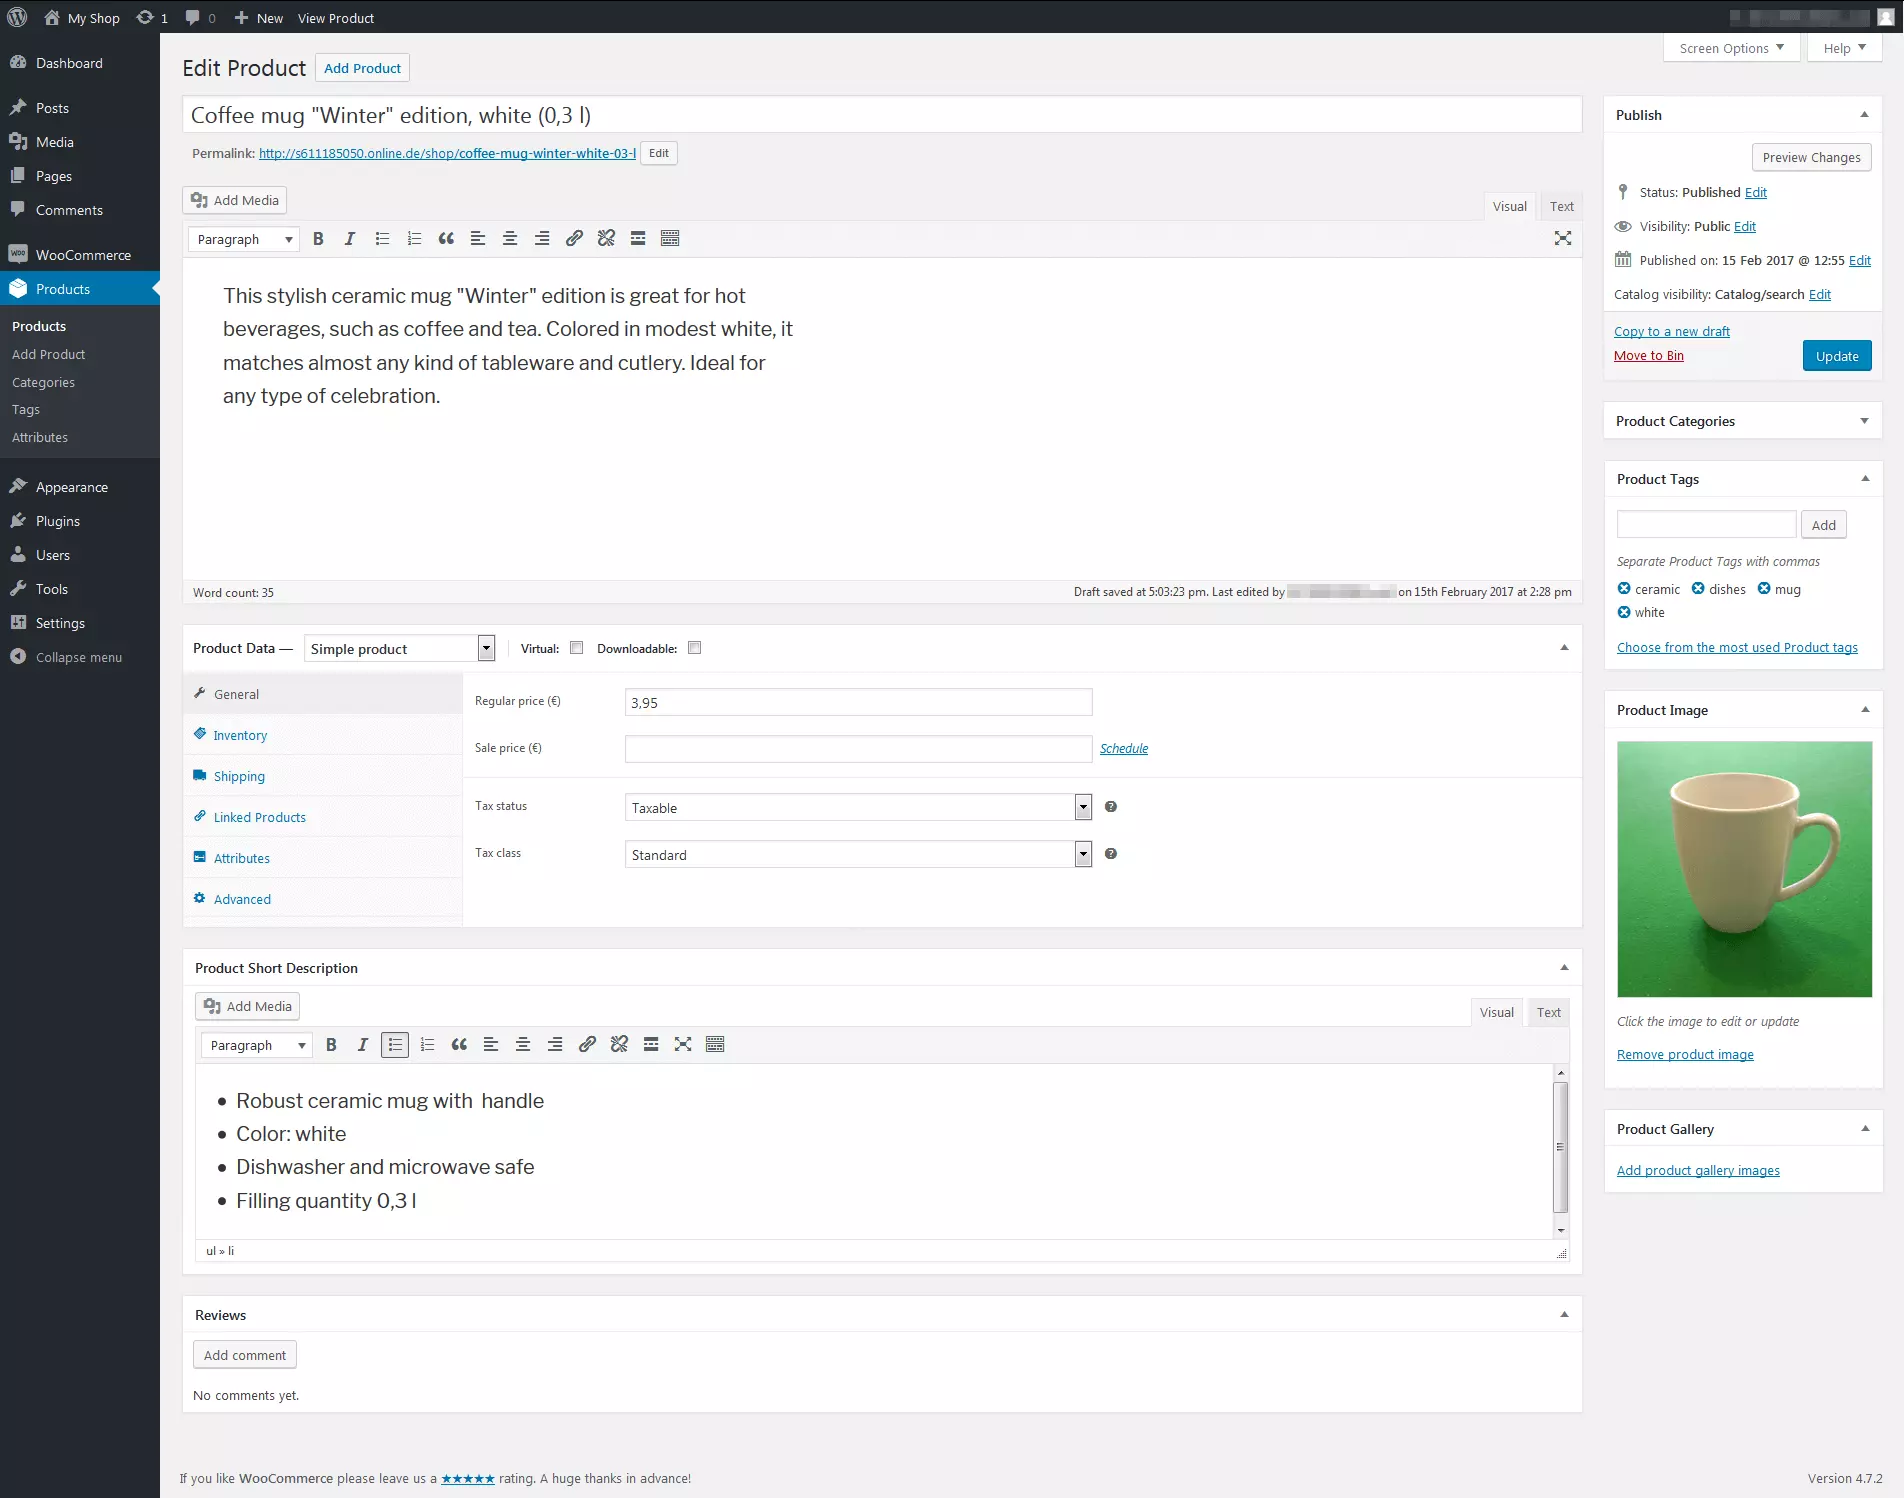
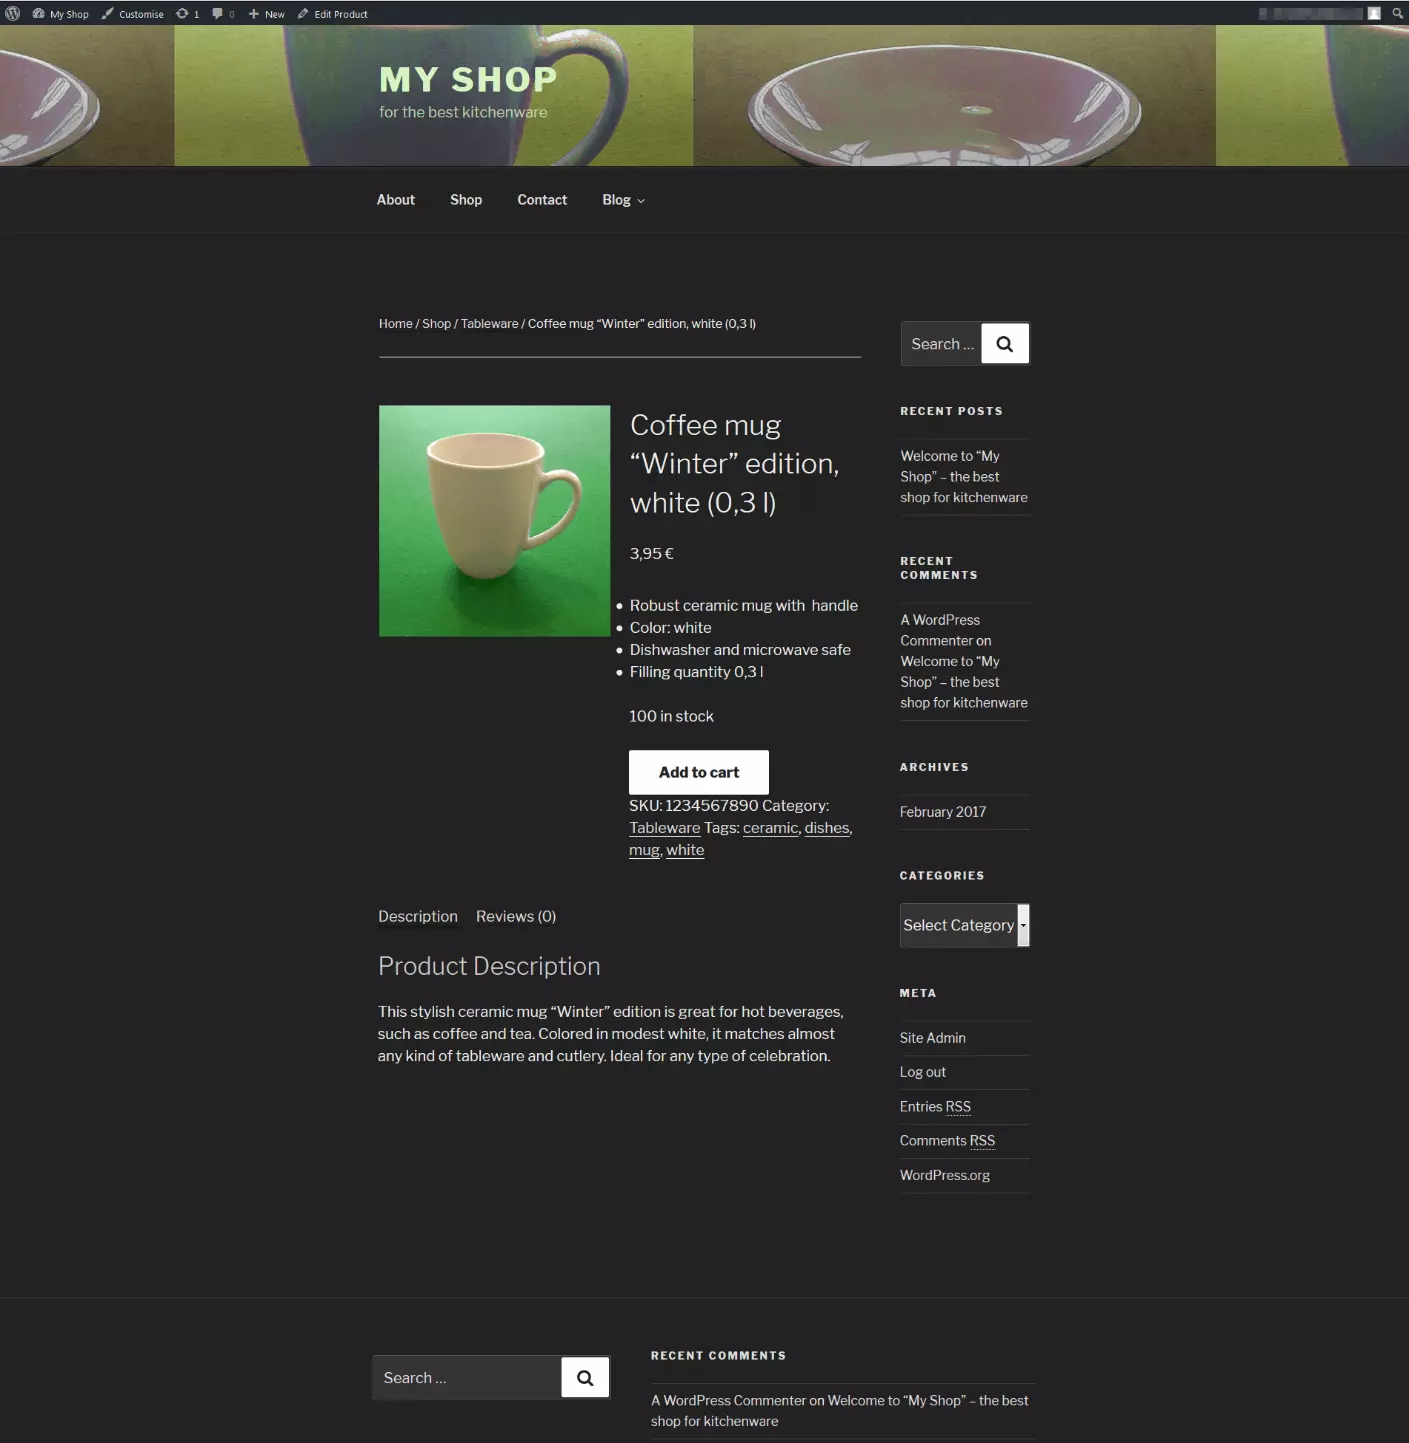
To add a product to your range, select 'add product' from the dashboard, which is located under the 'product' tab. For product data, for example, you can choose between a 'simple product' or a 'variable product' (e.g. single items of different colours or sizes). If it is a product that can’t be physically sent, make sure to classify the item as a download product by checking the 'virtual' or 'downloadable' box. You can now add the product name, product descriptions, photos, galleries, and tags that will enable your customers to find your products quickly.
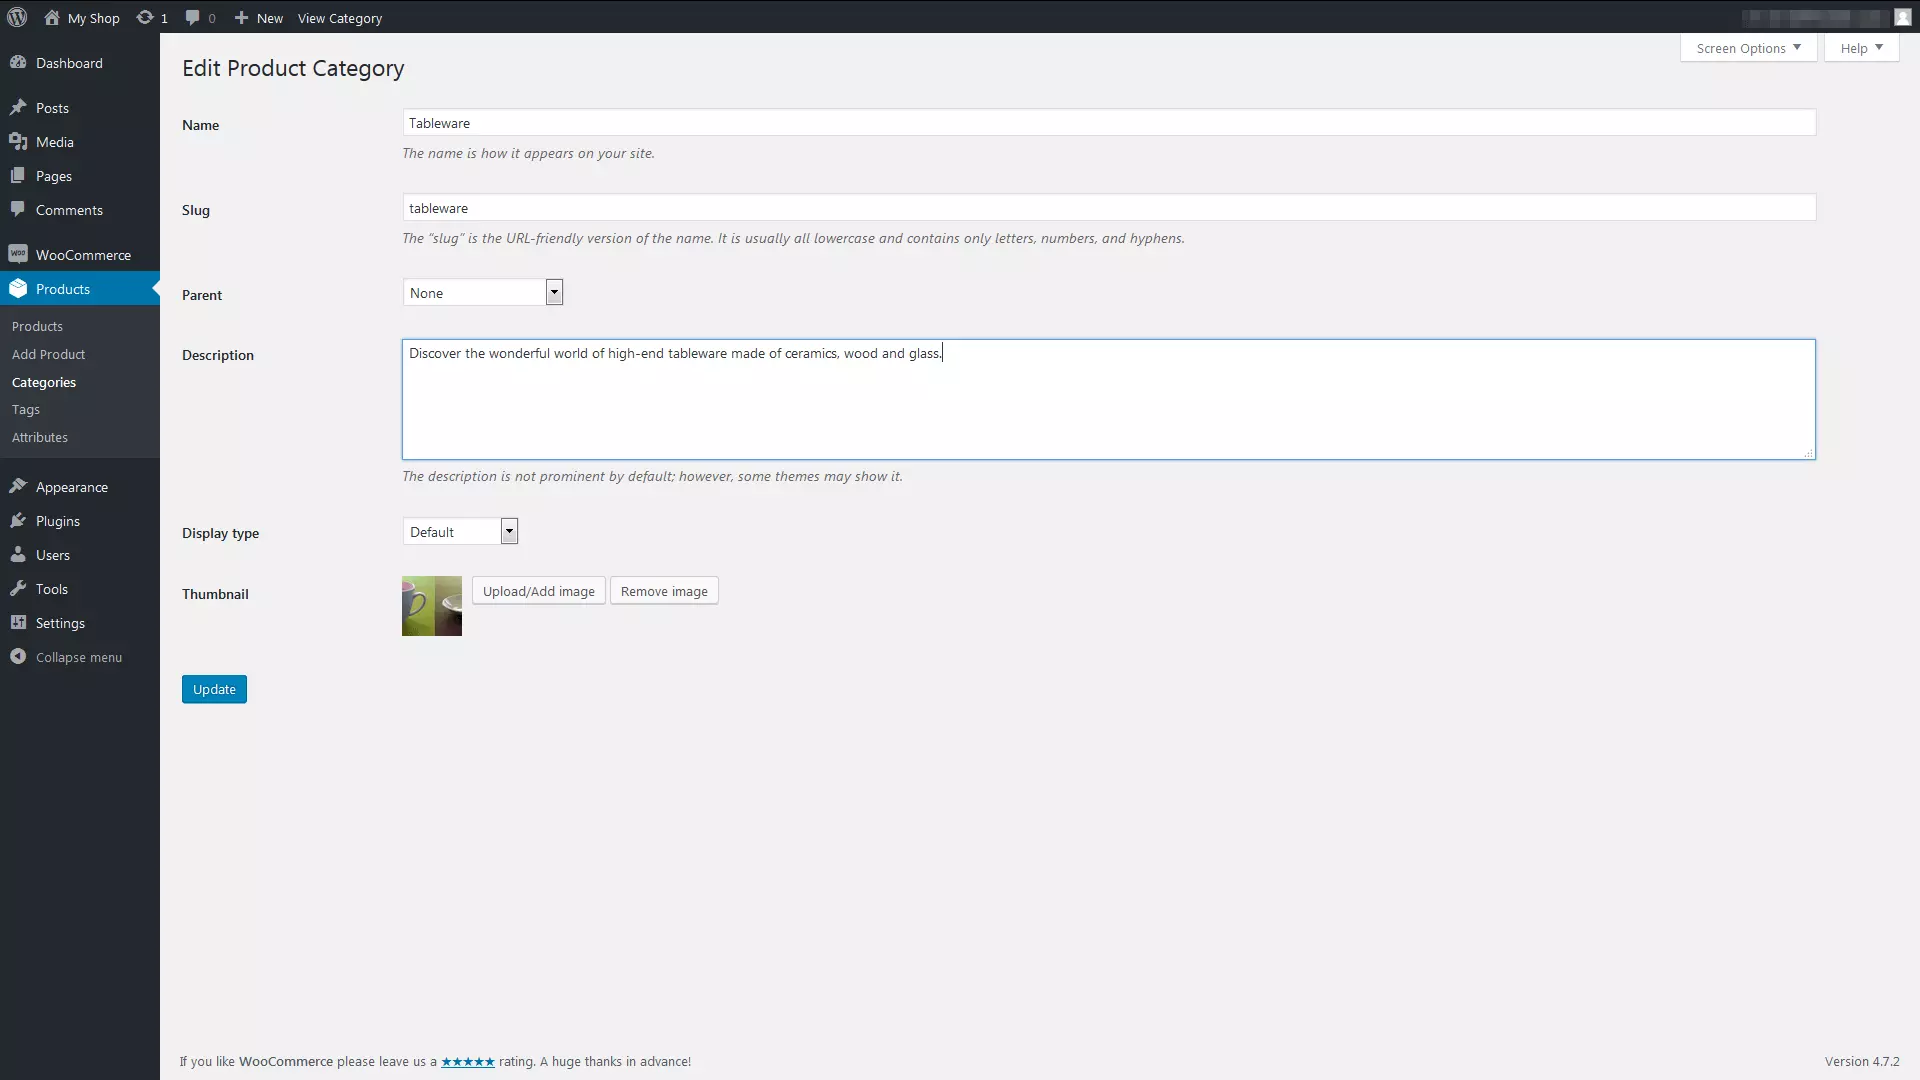
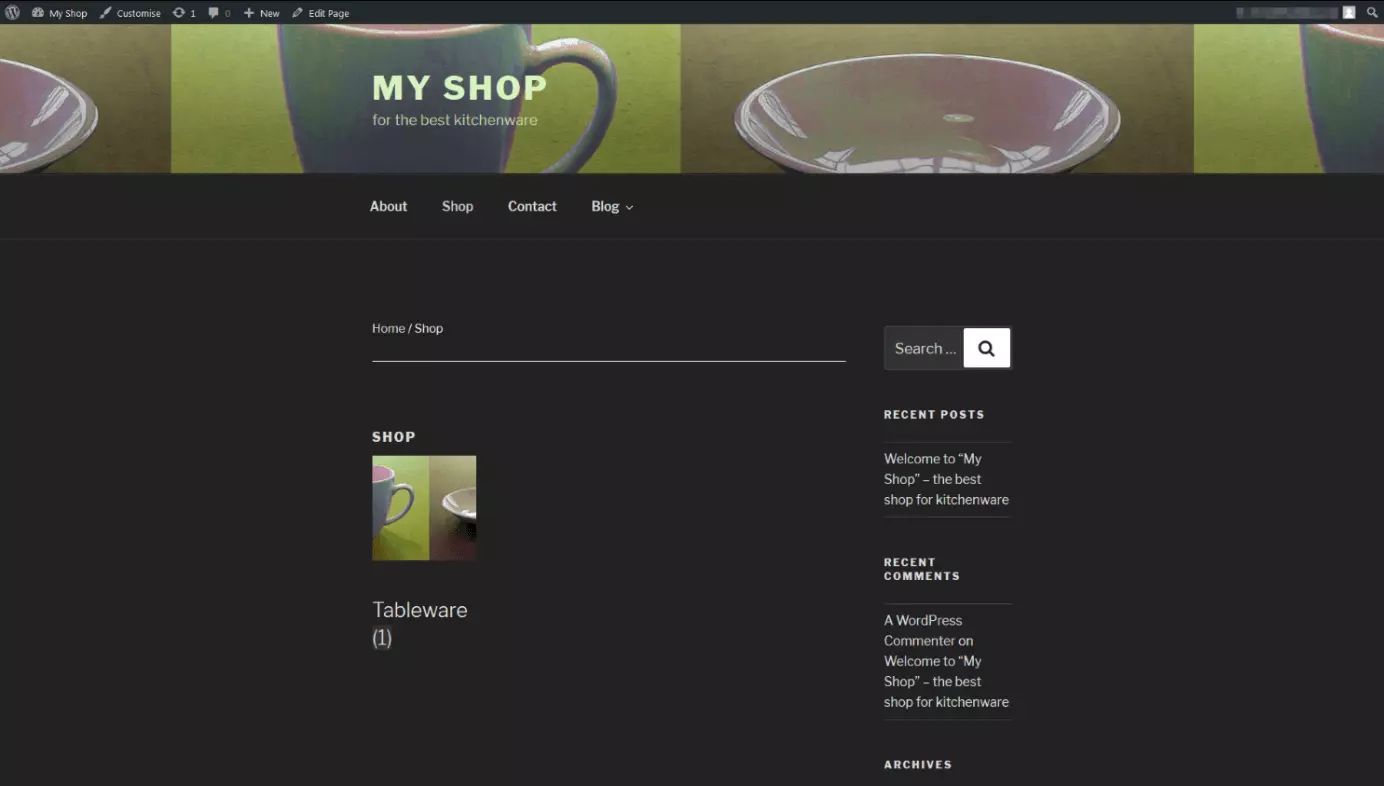
In order to classify products in your category pages, select 'categories' under the menu item 'products' and enter the name and URL variant of your category e.g. 'crockery'. You then need to provide a description and thumbnail, then finally click on 'add product category'.
Now, in the editing menu for the desired product, check the box under 'product categories'. By clicking on 'publish' or 'update', you can add the product to the category ('crockery') within the shop. To see what the product page looks like for customers, click on the 'preview changes' in the top right-hand corner.
You should always give as much information as possible (i.e. clear URLs/permalinks, clear titles, clear product info and short descriptions) so that these are quickly recognised and found by both potential customers and search engines. A clear structure, optimal navigation, appealing design, and obvious names are important in connection with the keywords and metadata that match your offer. It’s especially important for search engine optimisation since these details influence the position of your WordPress shop on search engines such as Google and Bing.
Step 5: Additional features for your online shop with WooCommerce
Since the plugin features of WooCommerce in WordPress are very extensive, it’s only possible to introduce a few in this article: the most important ones can be selected in the sidebar under the 'WooCommerce' menu item:
Orders
As soon as you have gained paying customers, you can manage and edit all customer orders in the 'orders' section. It’s possible to view the exact status as well as all relevant information on orders (contact details, order date, status, invoice and delivery information, product overview, prices, and totals).
Coupons
An additional incentive is to offer vouchers that customers can buy or gift to others. You can add this option via the 'coupon' menu. Specify the type of discount (cart discount, cart % discount, product discount, or product % discount), select the voucher amount, decide on delivery options, and state the expiry date. In addition, you can also define usage restrictions, order value limits, as well as including or excluding certain products that the voucher cannot be used to purchase.
Reports
Under 'reports', you can check the progress of orders and revenue for your online shop. A chart enables you to see values such as gross and net turnover, received orders, sold products, refunds, delivery costs, and voucher values. A flexible timetable lets you check the values of last year, last month, last week, or you can even define your own time period. You can also filter the chart by product type, category, or voucher date. This means you always have an overview of the main figures.
Creating an online shop with WordPress: Starting simply in e-commerce
Creating your online shop with WordPress makes it easier to manage your offer online. It could mean that you have to make compromises on performance, range, and number of features when using free CMSs like WordPress (as opposed to integrated shop systems such as Shopware or Magento). For beginners with a manageable range of products, it is definitely worthwhile, however, to design an online shop with WordPress.
The plugin WooCommerce is a useful extension thanks to its ease of use and wide range of settings. If you have finished setting up and equipping your shop, you should perform a test run as if you’re the customer so that you can perform a security check and make sure all shop elements (search, order, checkout, etc.) are working as planned. You can then launch your WordPress shop and continue making design changes as you go along.
WordPress online shop with WooCommerce: Advantages and disadvantages
| Advantages | Disadvantages |
|---|---|
| Free installation and quick set up using the CMS | Limited performance for shops with large product ranges |
| Central administration and full control over all major e-commerce processes | No integrated merchandise management features |
| Simple and flexible operation | Solid introduction to content management necessary |
| Numerous themes and extensions can be integrated | Many plugins are fee-based |
| Particularly useful for smaller product ranges and digital products |


