Using Gmail with a custom domain: A how-to guide
Using an email address with your own domain comes with a number of advantages. For one, the recipient will easily be able to see who the email is from. And most importantly, if you’re sending business emails, using your own domain makes you look more professional. If you use Gmail, you can connect your Gmail account with your own domain in just a few easy steps.
Purchasing a custom domain for Gmail
The first thing you’ll need is a domain name that properly reflects your business. It can often happen that the domain you want is already taken. In this case, you’ll have to get a bit creative. Alternatively, you can consider using less conventional domain extensions, such as .fitness, .shop, .ninja, or pretty much whatever your heart desires.
Example purchase at IONOS
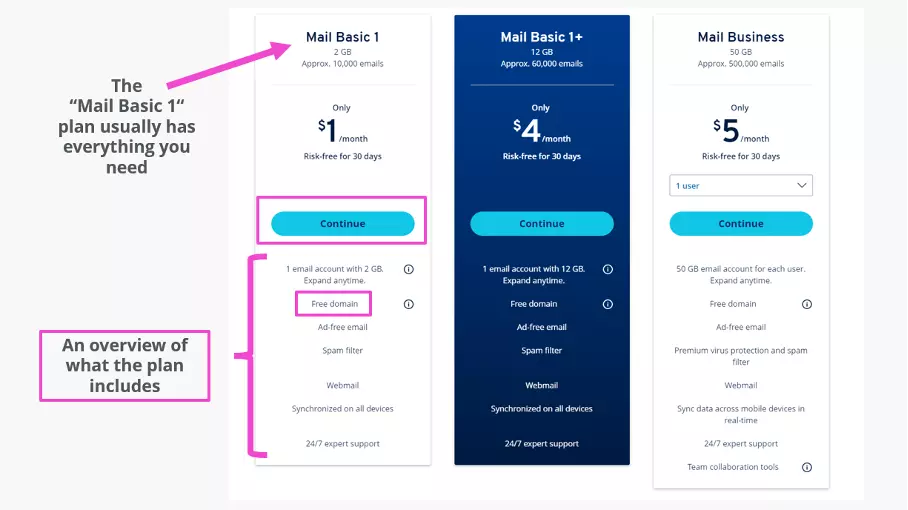
You can purchase your own domain with IONOS in just a few clicks. Go to https://ionos.co.uk, click on ‘Email & Office’, then select ‘Professional Email Address’. When the page opens, scroll down to view the different price packages.
The features included in the Mail Basic 1 package will suit most users’ needs. In addition to the free domain, it also comes with a spam filter and an inbox with 2 GB (as of March 2022).
After you’ve decided on a package, continue to the next step to choose your domain name.
The availability of your preferred domain name will be shown in real time. Once you’ve found a domain that’s free, you can complete the purchase.
Once you’re done, you can set up your email address. Simply enter your preferred username before ‘@yourdomain.com’. You’ll then see a confirmation, some notes on security, and further down the page a link to instructions for setting up your email in different email programs. Make a note of the password listed there and store it in a secure place. You can then retrieve the new email address in the IONOS webmail client or in an email program. When you open your inbox, you’ll have an email with information you’ll need for setting up your address with Gmail.
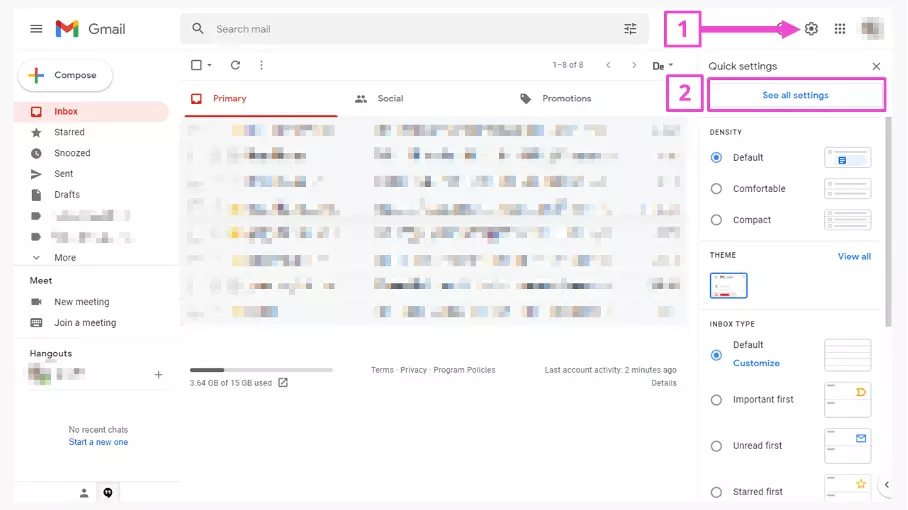
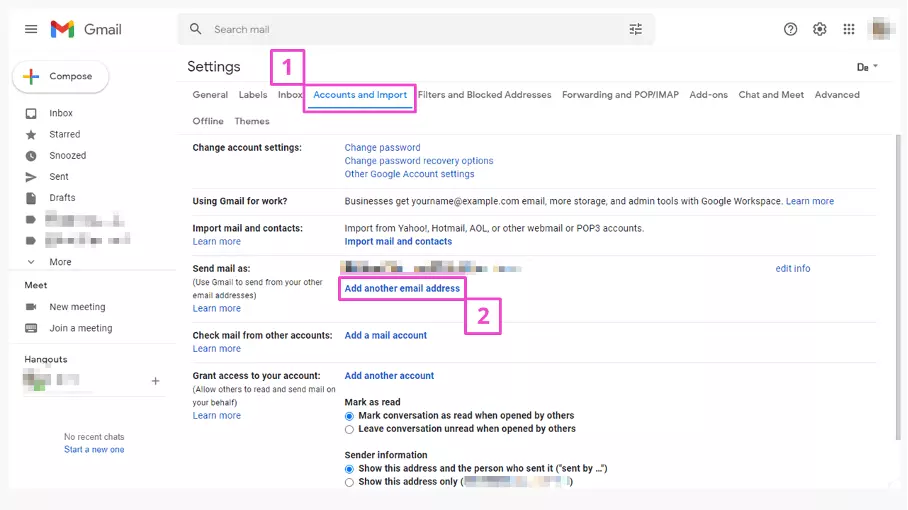
Using your custom domain in Gmail
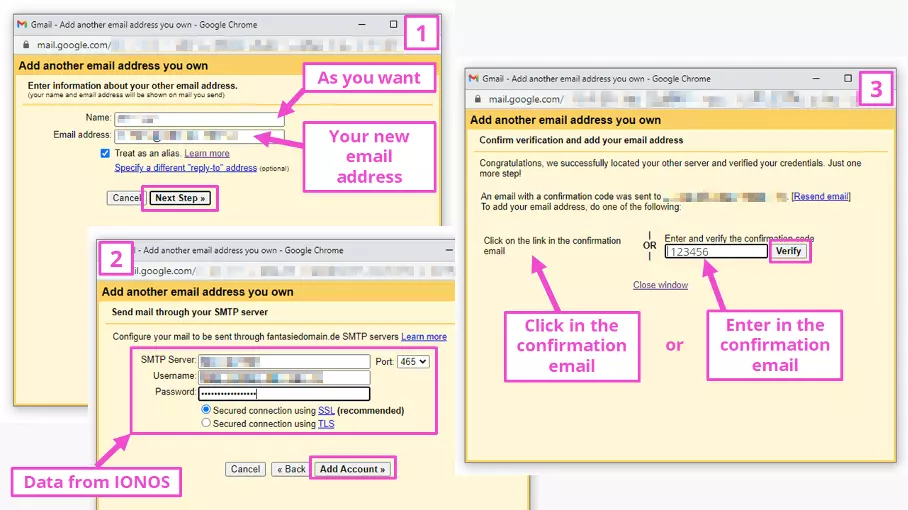
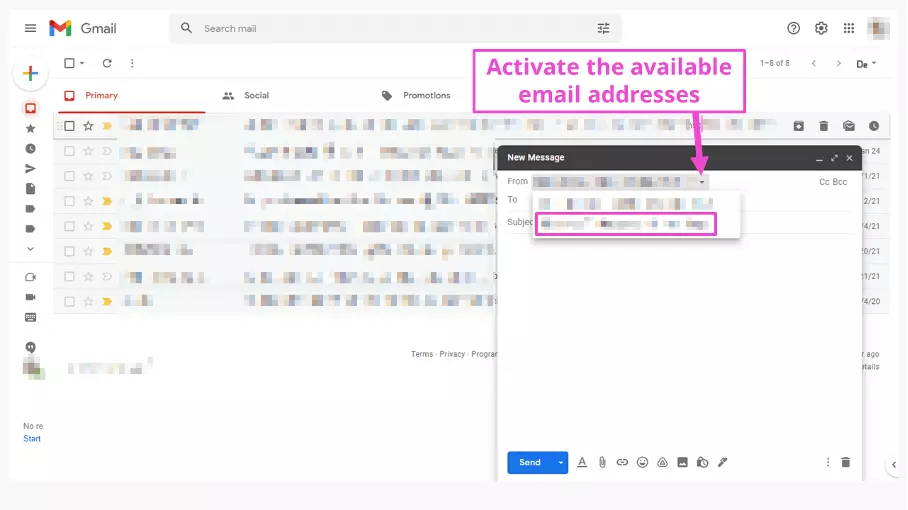
In the new window, you’ll complete three more steps:
- Enter the new email address. Under ‘Name’, choose the name that you want to be displayed with the email address in recipients’ inboxes.
- You’ll find everything you need to know about the SMTP server in your IONOS account. Note that you need to enter the entire email address under ‘Username’. For ‘Password’ enter the password that was listed when you set up your email address with IONOS.
- After you click on ‘Add Account’, you’ll be asked to verify the email address. Open up your inbox in the IONOS webmail client or another program and click on the link in the confirmation email. Alternatively, you can manually enter the code into the Gmail window. After that, you’re done!
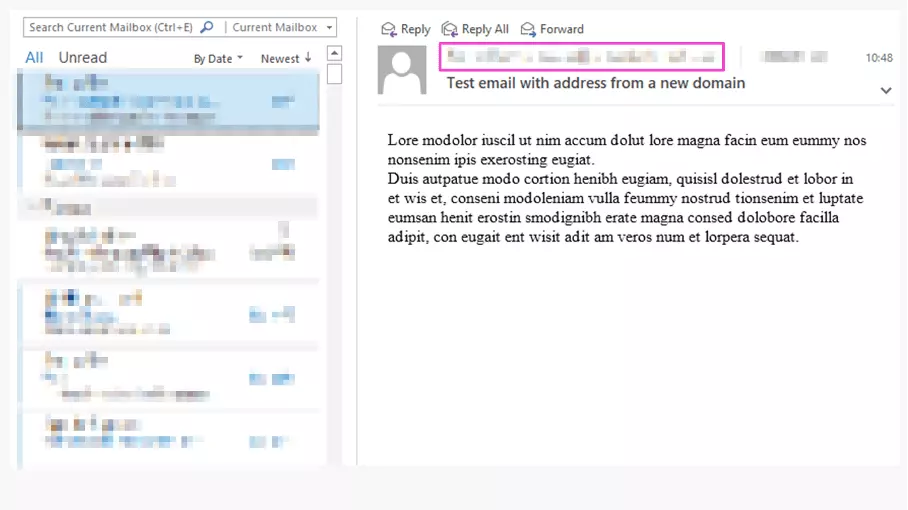
The result is an email sent from your own domain and the name you chose in Gmail. Just like that, you can use Gmail with your custom domain. And by the way, you can add up to 99 additional email addresses in Gmail.
If you don’t want to use Gmail, you can choose from one of the many Gmail alternatives or delete your Gmail account.


