How to change Outlook views
If you don’t like the default appearance of your Outlook mailbox, you can customise it. We’ll show you how to change your Outlook layout by adjusting the settings for different parts of Outlook.
A quick overview of how to change the settings for different views in Outlook
- Change the views for different parts of Outlook like email, calendar, contacts and tasks via the View tab. Here you can click on the option View Settings.
- Find more configuration options for your Office design under File > Office account > Office design. You can also adjust how emails are displayed using the Reading pane option located in the menu ribbon.
What are the most important settings for changing Outlook views?
If you have Outlook as your default mail client, you can customise themes and Outlook rules. Our article on customising Outlook goes over the settings in Microsoft 365. The instructions in this article can also be applied to Outlook 2021, 2019 and 2016.
Email view
Once you’ve launched Outlook, you’ll see the default view that includes your emails, the Outlook menu and navigation elements. These elements can be configured in just a few clicks:
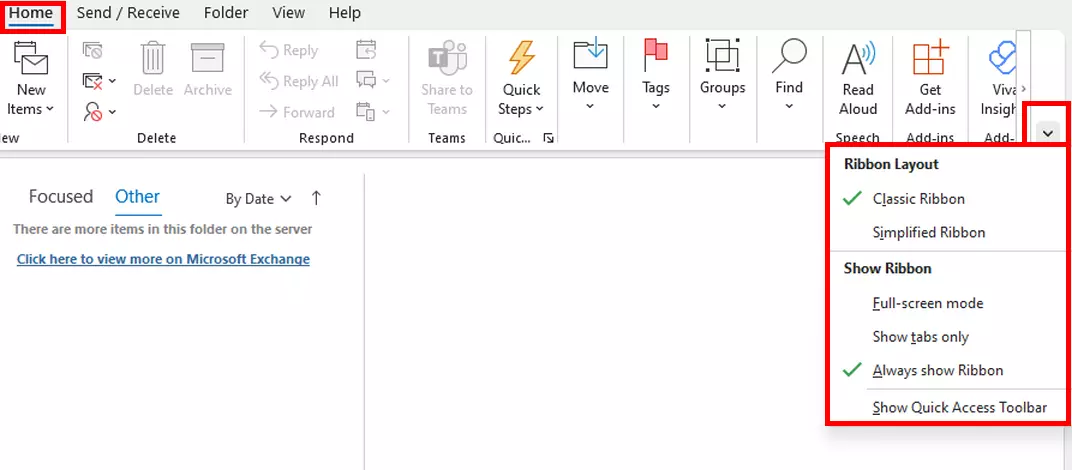
- Menu ribbon: Here you’ll find important functions for composing, deleting and forwarding emails. Click on the arrow symbol on the right side of the ribbon to open the context menu. Choose between the Classic Ribbon and the Simplified Ribbon. The classic view offers the standard view. The simplified view, on the other hand, collapses the ribbon, making it appear as a simplified context menu.
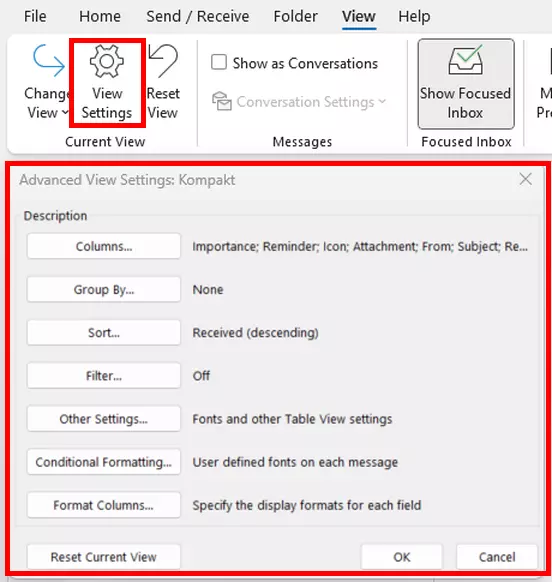
- View Settings: Above the ribbon, you’ll find the View tab. Click the subitem View Settings to open advanced setting options. Here you’ll find a list with descriptions like Columns, Grouping and Sorting. In Columns, you can organise your email inbox into columns, which can then be grouped into categories such as Sent, Read, Task Subject or Due On. You can find more settings under Conditional formatting. For example, you can use conditional formatting to define the font, font size and font colour for unread, overdue or expired emails.
- Folder or Navigation Pane: in the left pane of your mailbox, you’ll find the folder or navigation pane. This includes default email folders and accounts as well as ones you have created. Similar to the ribbon, you’ll find an arrow in the top menu area here. Click it to collapse the folder pane. When minimised, the context menu appears as a narrow bar.
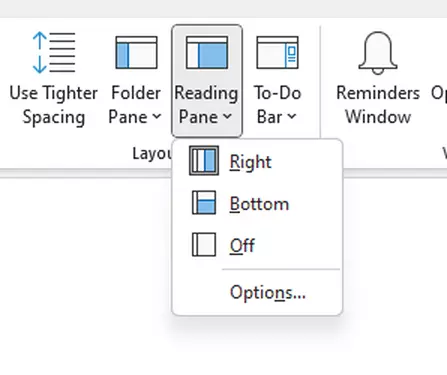
- Reading Pane: in the View tab, you’ll find the item Reading Pane. This feature lets you display email messages on different parts of your screen. You can choose Right, which will display the email to the right of the list, Bottom, which displays email messages at the bottom of the screen, or Off, which removes the reading pane from your email view.
Calendar view
For effective task planning, a well-organised calendar is important. Outlook offers the following options for a custom calendar view:
- Quick navigation with [Alt] key: in the Outlook calendar, you can use the combination [Alt] key + any number from [1] to [9] to display a select number of days. For example, press [Alt] + [3] to see three days at a time.
- Show calendar in days and weeks: from the Home tab, you can use the Day, Work week, Week or Month options to adjust the calendar view.
- Multiple calendars at the same time: with the My Calendars option, you can display multiple calendars at the same time or superimpose them. Simply place a check mark next to the calendars you need. To show one calendar inside another, click the arrow next to the calendar name.
- Display tasks in calendar: tasks and calendars are closely related. You can display tasks in the calendar view by going to Daily task list in the View tab.
People view
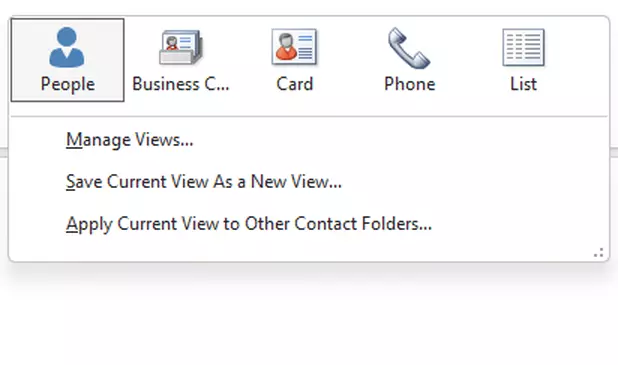
It’s easy to lose oversight if you have an Outlook account with lots of contacts. Settings such as Select business card or Select map allow you to organise this view. These options can be found in the Start tab under Current View. Contacts are listed alphabetically, with an option to customise the sorting rule.
Task view
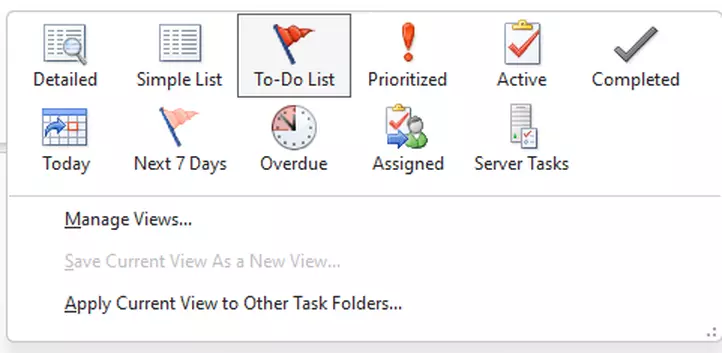
Your tasks in Outlook can be found in the Home tab. Switch to the View tab once you’re in the Tasks area and go to Change View. Specify how you want your tasks to be displayed. The default view is a simple list. Other views include:
- Detail view
- By priority
- By completed tasks
- Tasks in the next seven days
- Overdue tasks
For companies that value secure, networked collaboration, IONOS offers the groupware solution Hosted Microsoft Exchange and Microsoft 365 Business packages with the all-in-one suite from Microsoft.
What other settings can I use to change Outlook views?
In addition to primary customisation options for a personalised appearance, Outlook provides an array of additional configurations. Here’s an overview:
Use Outlook in dark mode
Dark mode is standard in most applications and Outlook alternatives. To activate the dark mode in Outlook, go to File > Office Account > Office Theme. Set the dark mode by choosing Dark grey or Black.
Change font for messages
To change the default Outlook font or set a font size for messages, navigate to File > Options > Mail > Stationery and Font Size. From here you can set the default font, font colour and font size for your messages.
User-defined view
Rather than customising existing Outlook default views, you can also configure a new one. To do this, go to the View tab and then to Current View. Click on Change View, then Manage View and New. Now name your new view and choose from view types like table, timescale, map or contacts.
Display density
With display density, you can determine the number of emails you see and how much of a message is shown in the inbox column. To do this, go to the View tab. Below Layout, you can adapt the display density by choosing from the following options:
- Full: messages with sender image and preview for attachments and text (subject, part of first line, sender).
- Medium: preview text with space between messages
- Compact: minimum spacing with preview text

