How to set up a custom Substack domain
You can publish your newsletter on Substack using the domain of your choice. For this fee-based option, all you need is your own web address and a corresponding CNAME entry with your provider.
What are the requirements for a Substack custom domain?
Newsletters and podcasts created with Substack come with a default web address that typically looks like this: user.substack.com. For a one-time fee, however, you can publish your site under a unique address and stand out from the competition. All you have to do is register a domain with a domain registrar and create a CNAME record that points to it.
Registering a Substack domain with an IONOS account
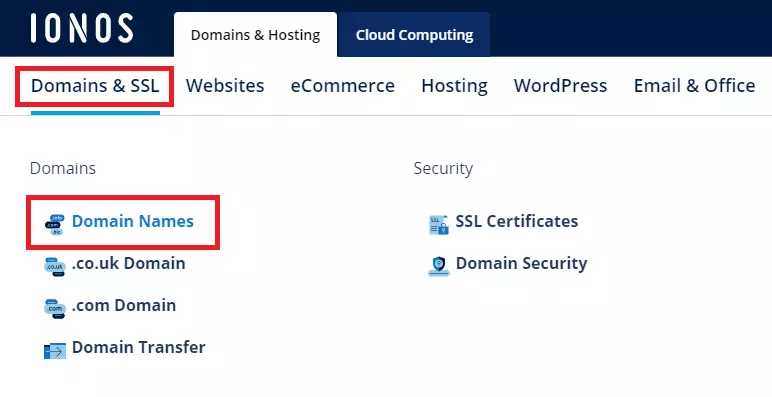
If you want to use a custom domain on Substack, you’ll need your own web address, which you can purchase from the IONOS website. To do this, click on the Domains & SSL tab and then Domain Names in the menu that opens.

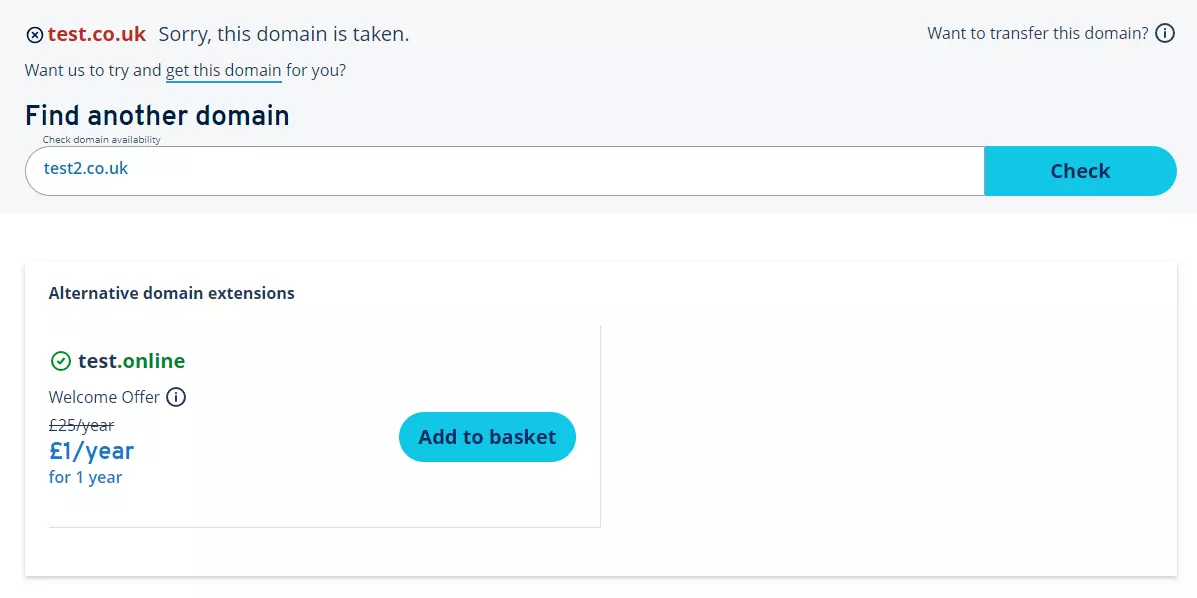
Next, use the domain checker to see if the domain name you want is available. Enter the name you’d like in the search field where it says Find your domain now and click Check.
The tool will then check whether the domain is available. If the address is taken, the checker will suggest options with alternative domain extensions. There are many alternatives to the .co.uk domain, which means there’s a good chance you’ll be able to find a variation of the name you want if your initial choice is already taken. Otherwise, keep using the domain checker until you find a name that is both suitable and available.

As soon as you have found a domain for your Substack site, click on Add to basket. There you have the option to combine the domain with other IONOS products such as web hosting. As you only need a domain, click on Continue and then Domain only. To complete the purchase, create an IONOS account or select payment via PayPal instead.
How to set up a custom Substack domain step by step with IONOS
As soon as you have your own domain, you can connect it to your Substack profile at any time. Below we explain how to set this up using a IONOS domain as an example.
Step 1: Unlock your own domain in Substack
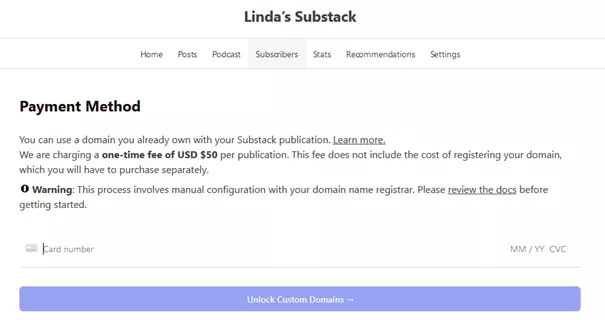
If you want to publish under your own domain on Substack, you’ll first have to pay a fee of approx. £50 (Last updated: January 2024). To unlock this feature, follow the steps below.
- Log in to your Substack profile and open the dashboard.
- Click on Settings.
- Select Domain.
- Click on Add custom domain
- Enter your credit card number and the expiration date. Click on Unlock Custom Domains to complete the purchase process.

Step 2: Create CNAME entry
As soon as you have unlocked the option for custom domains in Substack, you can link your Substack to the domain you just purchased. Instead of using the Unlock feature, you can insert your domain in the field that appears after clicking Add custom domain. You will then receive information for your CNAME record from Substack. Here’s how to create the entry if you have a domain from IONOS:
- Log in to your IONOS customer account via the login page.
- Open the product category Domains & SSL.
- Select the domain registered for Substack.
- Click on the DNS tab in the top menu of the domain.
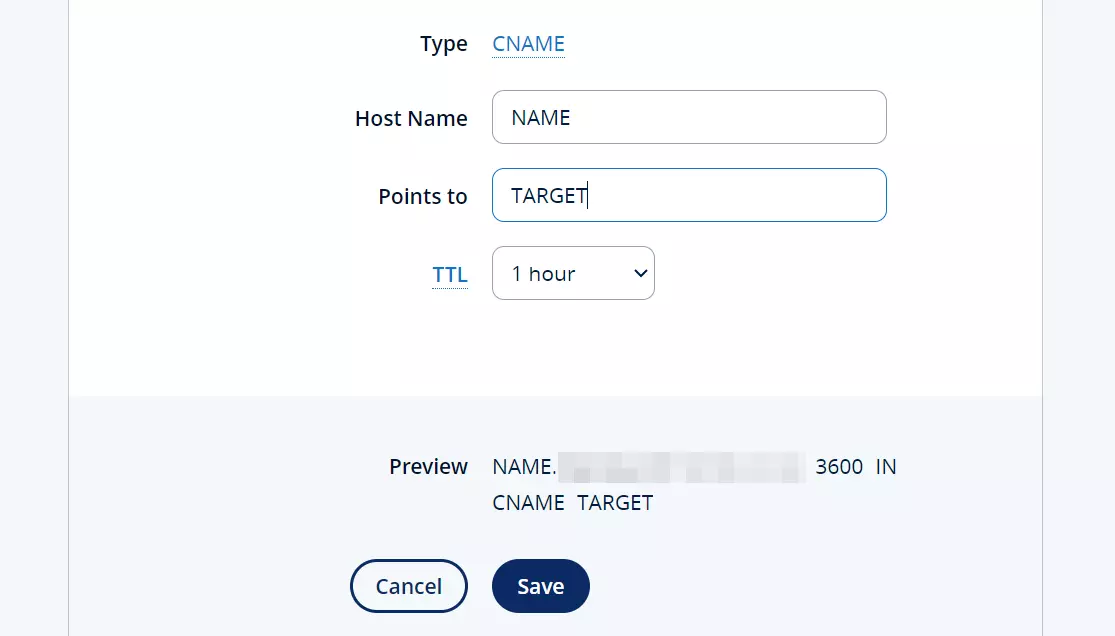
- Click Add record and then select CNAME in the field labelled Type.
- Enter the CNAME information you received and click Save.

The names for the individual fields in the CNAME record differ from provider to provider. For IONOS, enter the name you received from Substack in the Host Name field. The target value must be entered in the Points to field.
Step 3: Check the status of your Substack domain
After linking your Substack to your custom domain, it can take up to 36 hours to complete the configuration. You can check the progress at any time in the Domain menu of your Substack settings. Use the Check status button to do this.
In our Digital Guide, you can also learn how to connect Gmail with a custom domain.

