How to use a custom domain with iCloud
With the paid premium subscription iCloud+, users can add additional security and convenience features to the popular storage service. One of these features is the option to run the iCloud Mail inbox via a custom domain. We explain the advantages of having a personal address and how to link iCloud with your own domain.
Quick guide on how to link a custom domain to iCloud email
- Sign into iCloud Mail with your Apple ID on the iCloud login page (create an Apple ID first, if necessary). A paid iCloud+ subscription is required.
- Under Account Settings, click Manage in the Custom Email Domain section.
- Select the account type (personal or family account), enter the existing domain (if necessary, register the domain with a provider beforehand) and click Continue.
- Open the account with your domain provider and adjust the domain settings. For iCloud, select Update your domain registrar’s settings. Click on View and transfer the values to the account you have with the provider.
- Click Finish setup and a message will appear indicating whether the setup was successful. Then set up the email addresses you want to use.
What are the benefits of having an iCloud email with a custom domain?
With the new paid subscription for Apple’s cloud service, users can now freely design their iCloud email address how they want. So instead of using standard addresses that follow the same pattern name@icloud.com, it’s now possible to use custom domains like name@desireddomain.com. You can use this domain to send iCloud emails as you normally would.
Linking the iCloud to your personal domain can pay off for a variety of reasons:
- Companies can gain respectability by using personalised domains.
- Emails from a custom account appear more professional than emails from an icloud.com address.
- A custom domain offers maximum flexibility when it comes to hosting.
- You can use your own email domain with iCloud and also with any other mail platform.
- You can decide which provider you register your address with.
Looking for a suitable provider that you can buy a custom domain for iCloud from? When you register a domain with IONOS, you also receive a domain lock and an SSL/TLS wildcard certificate.
Step-by-step guide on how to connect iCloud Mail to your custom domain
To be able to send iCloud emails via a custom domain, you’ll first need your own domain. If you already have your own unique internet address, you are already one step ahead. Otherwise, the first step will be to purchase a domain from a trusted provider.
Once you have a personal domain, simply follow the instructions below to link the iCloud+ email service with your custom domain.
Step 1: Sign into iCloud Mail
The first step is to sign into the iCloud Mail service with your account. Use the iCloud login page for this.

Step 2: Go into the settings for Custom Email Domain
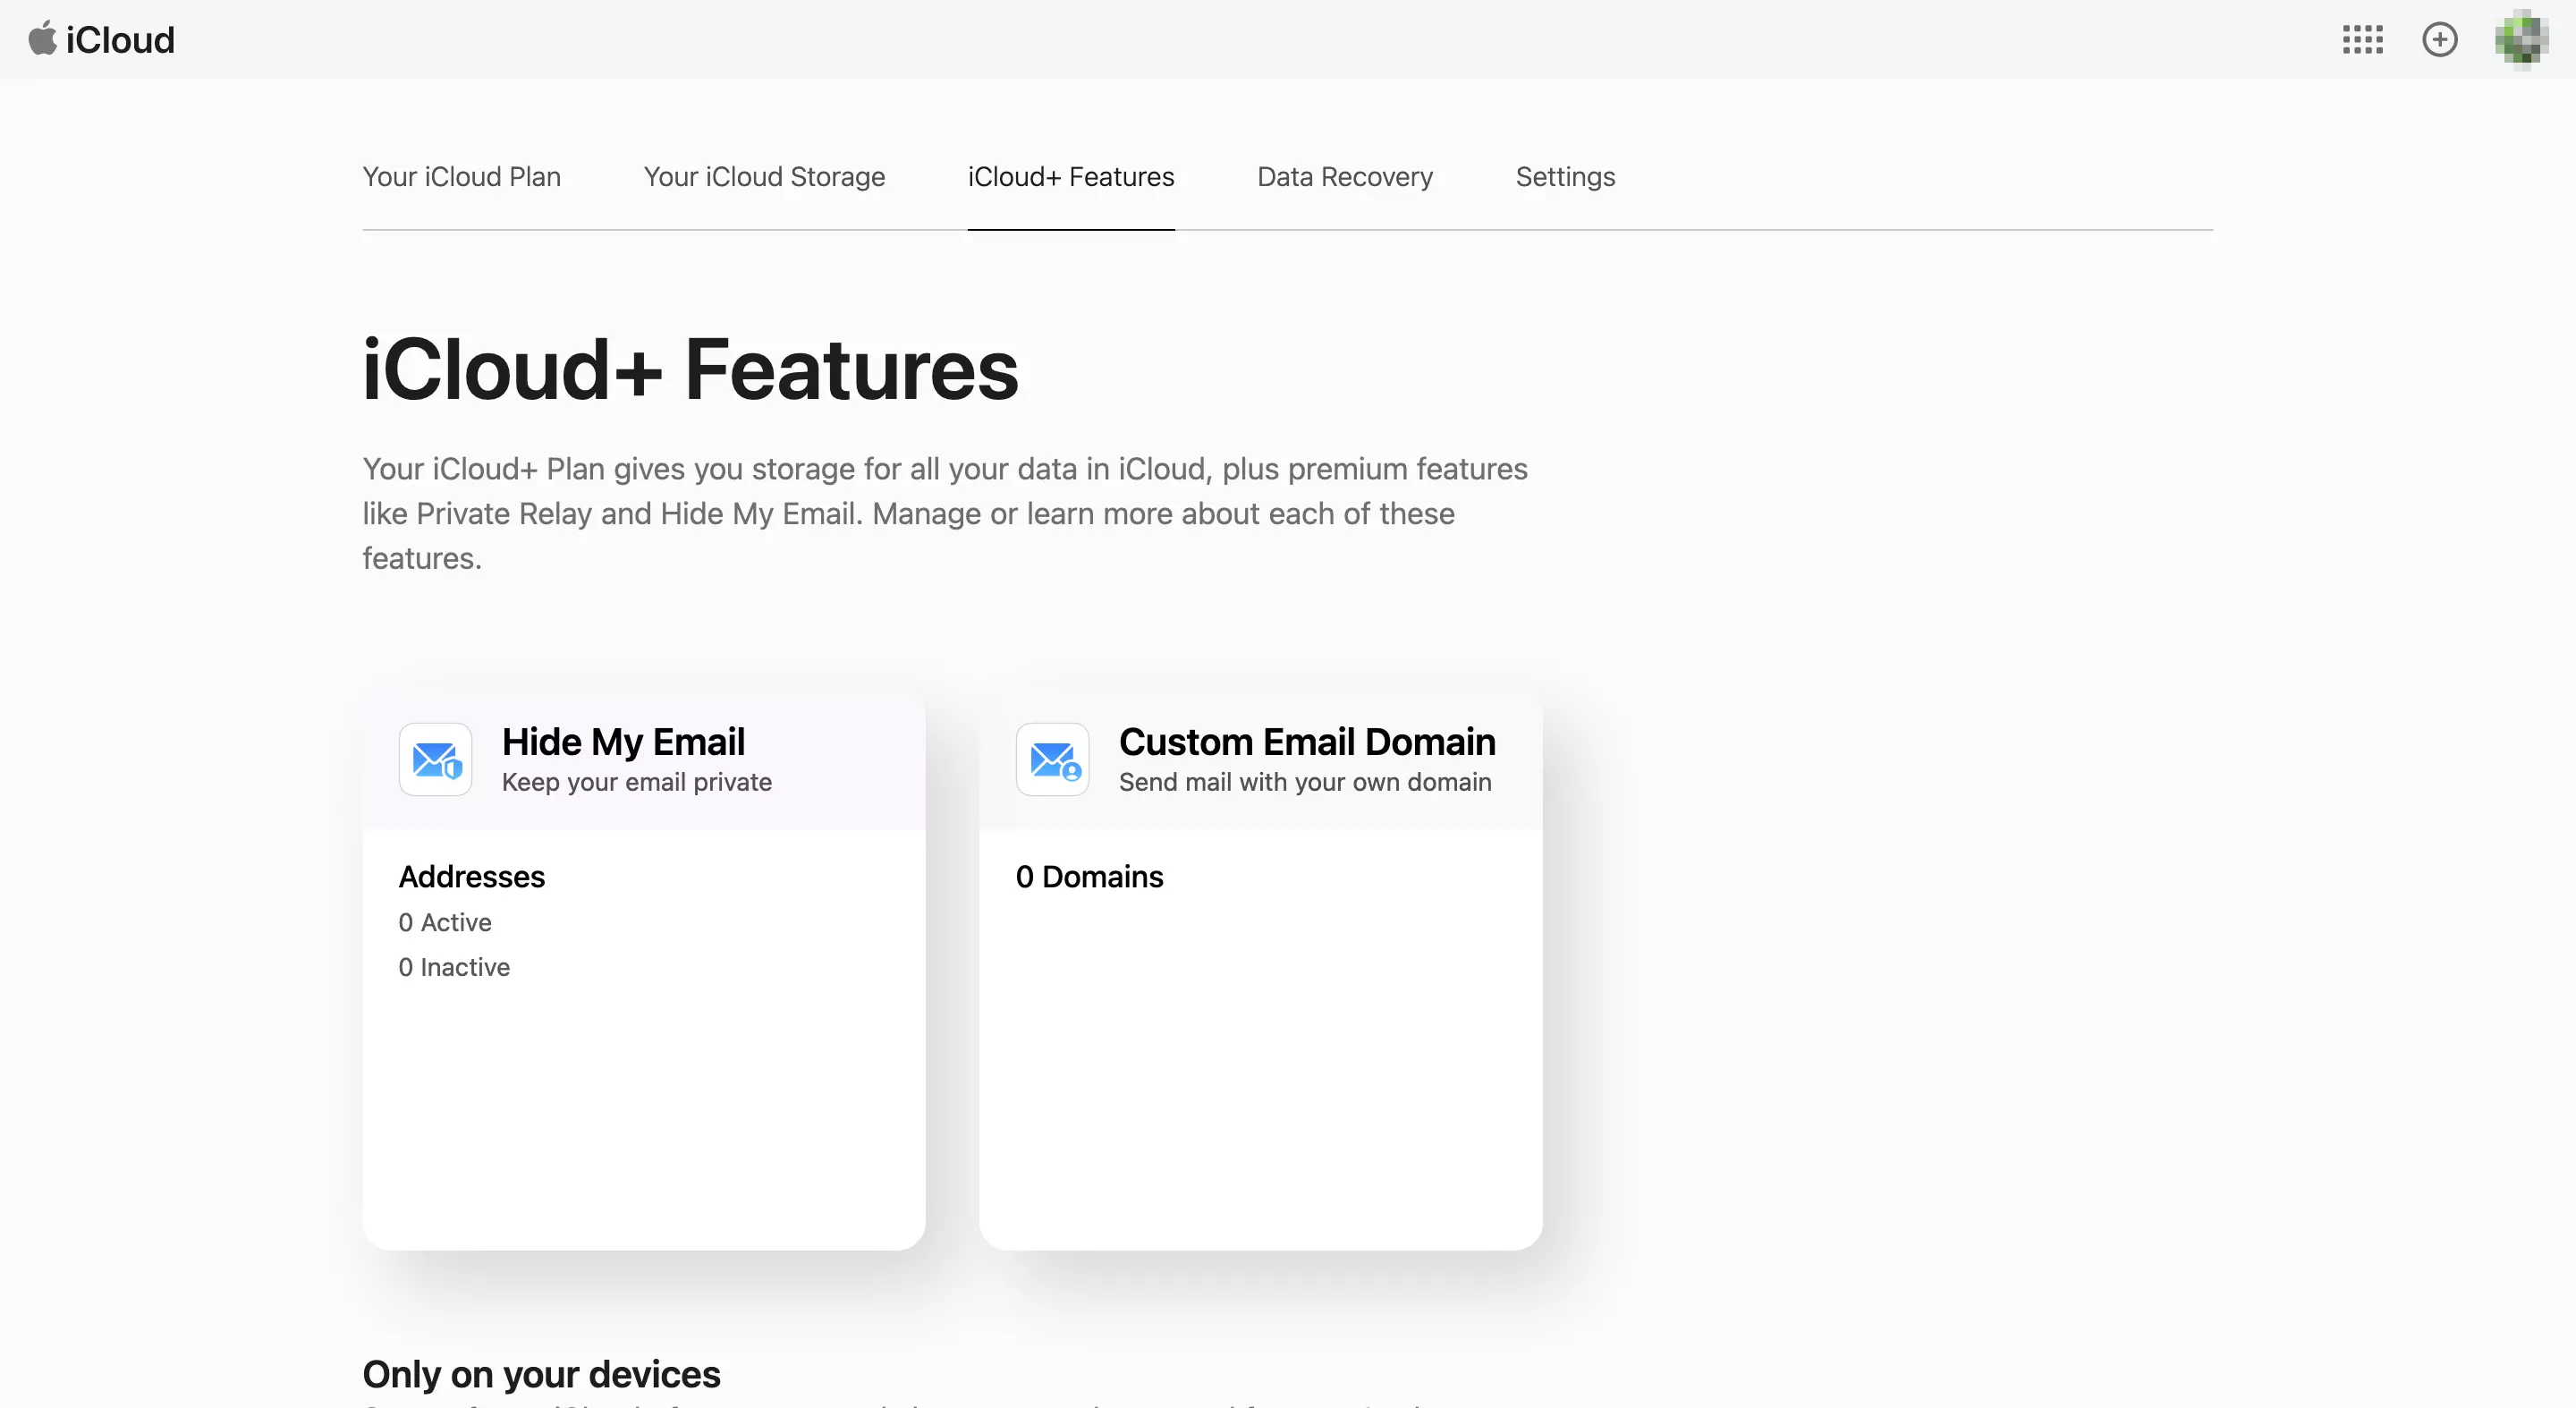
On the iCloud login screen, press the Settings button and then access the menu for linking iCloud and a custom domain by pressing the iCloud+ Features button in the Custom Email Domain section:

Step 3: Select the type of email account and specify the domain
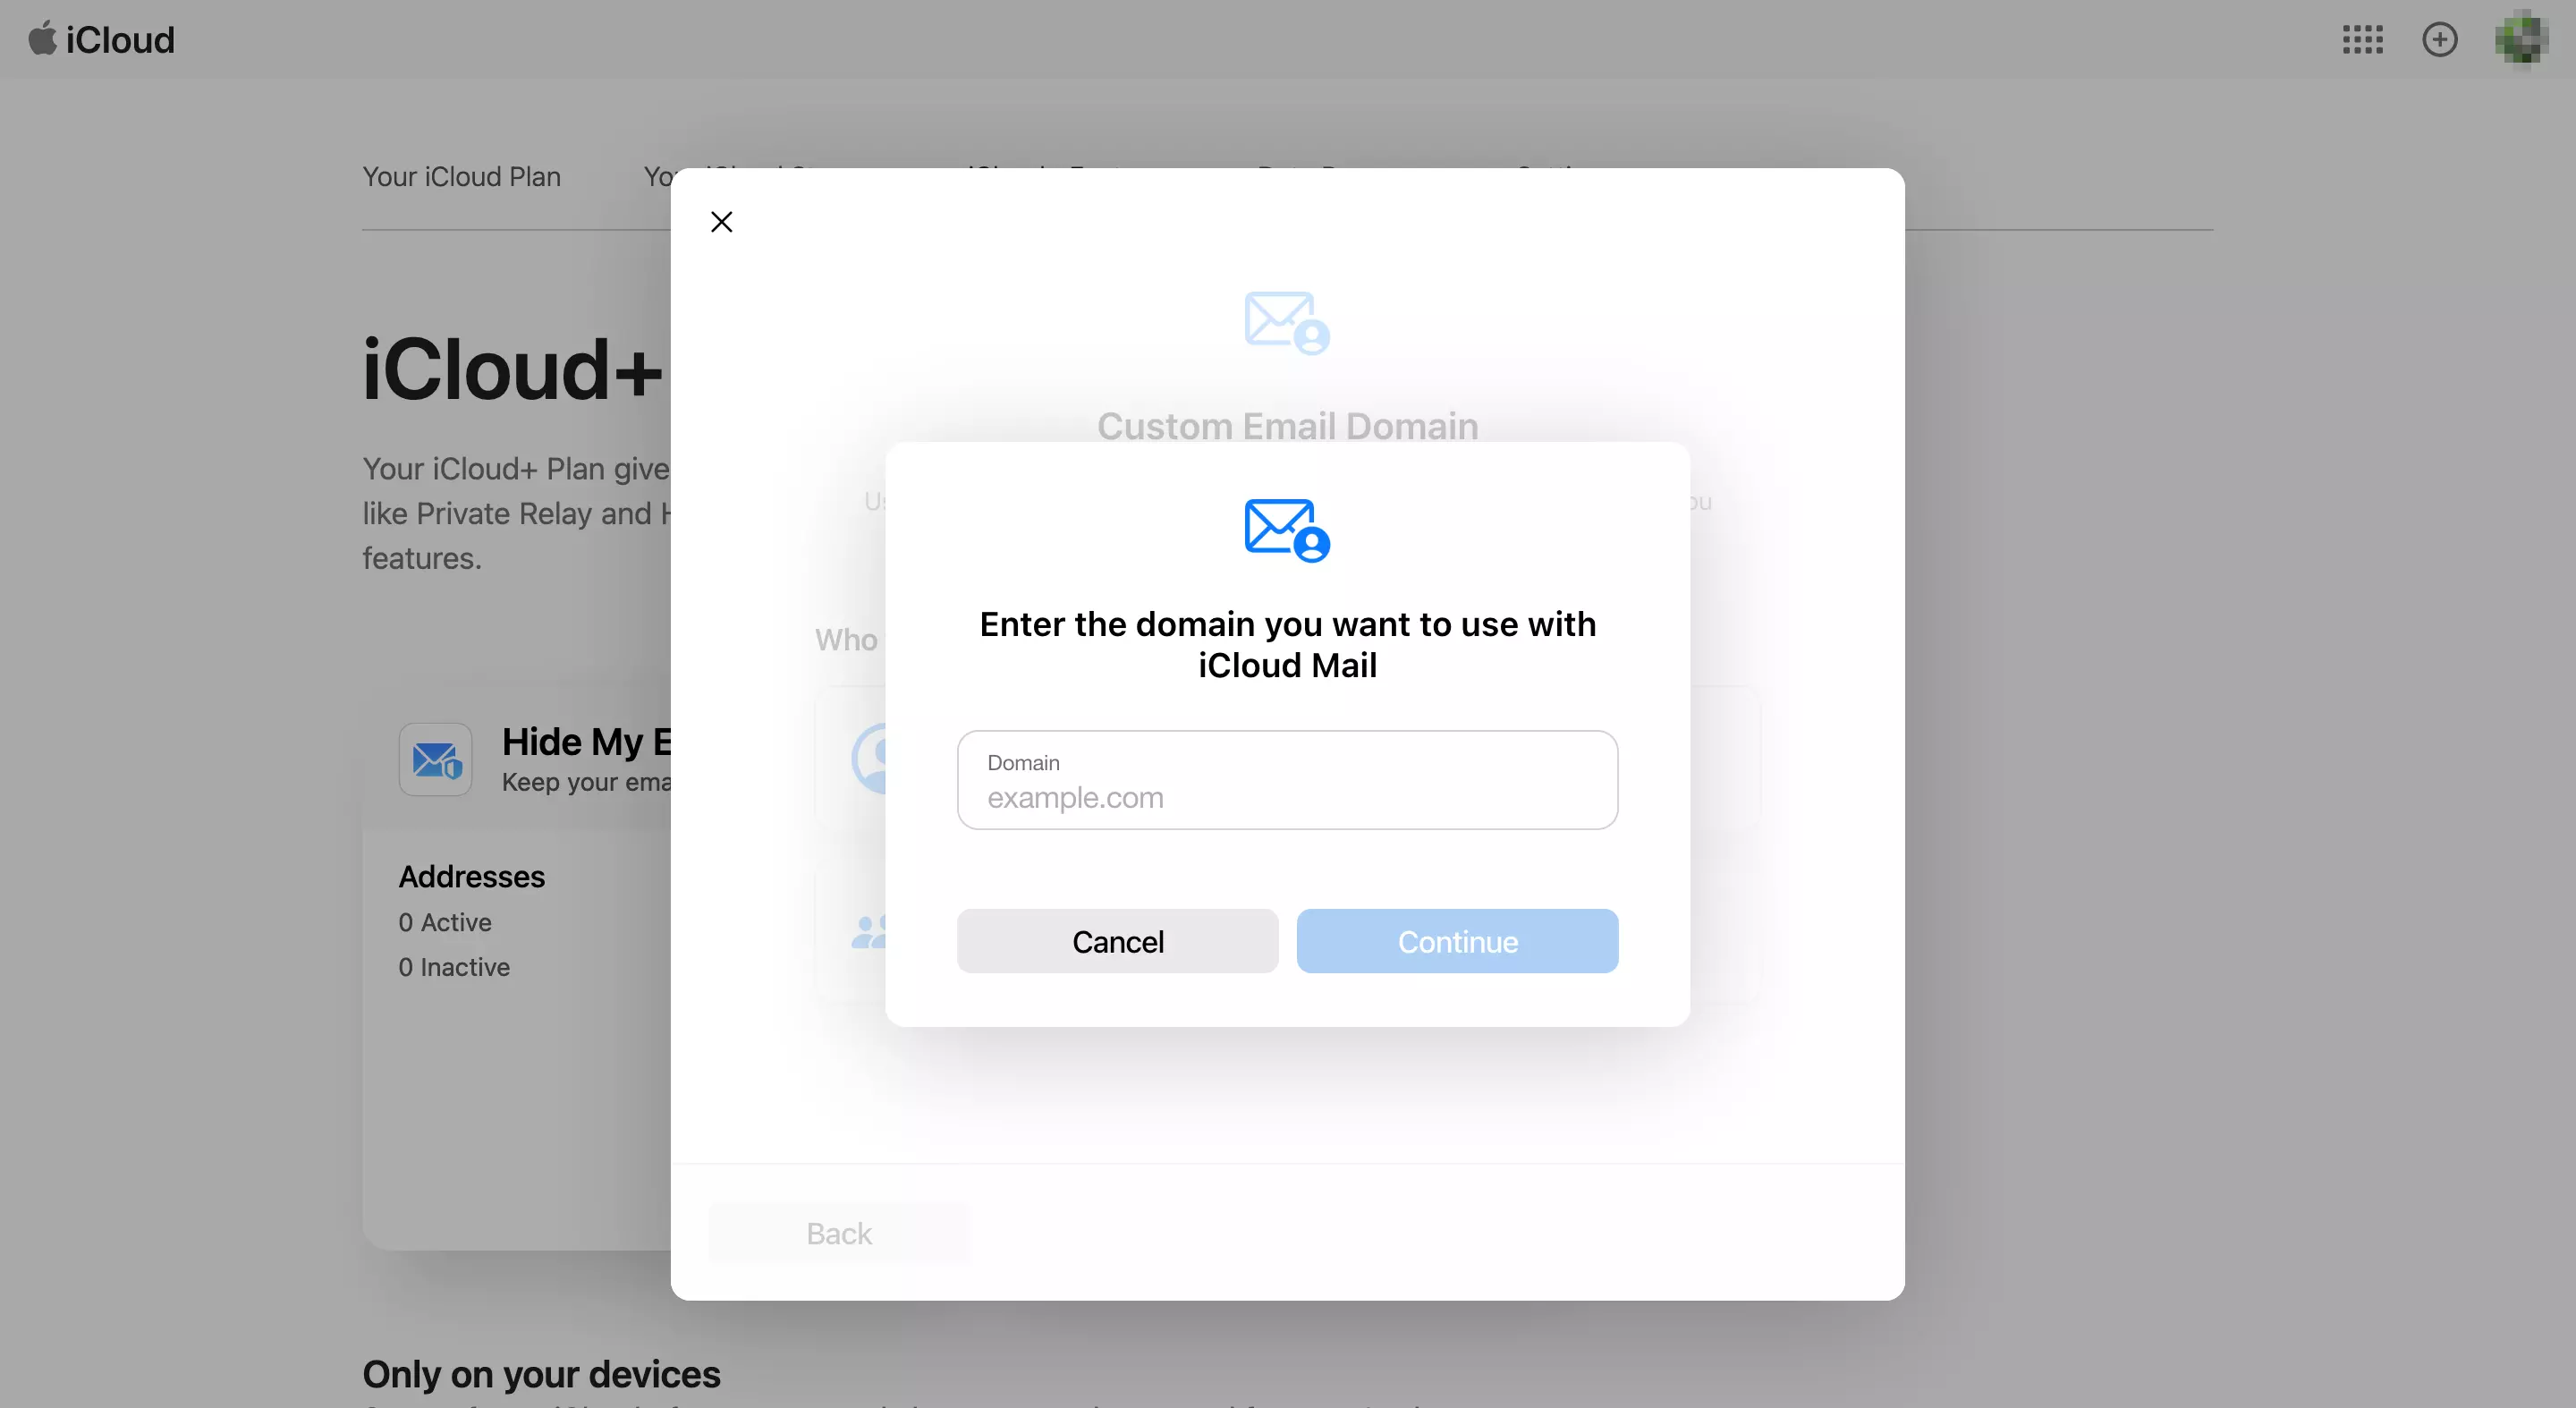
Now, you need to decide whether the new domain for your iCloud account should be available exclusively for you (Only You) or also for your family members (You and Your Family). After you have made your selection, specify your custom email domain that you want to connect with iCloud and then continue the setup process by clicking Continue.

Step 4: Update the settings with the domain registrar
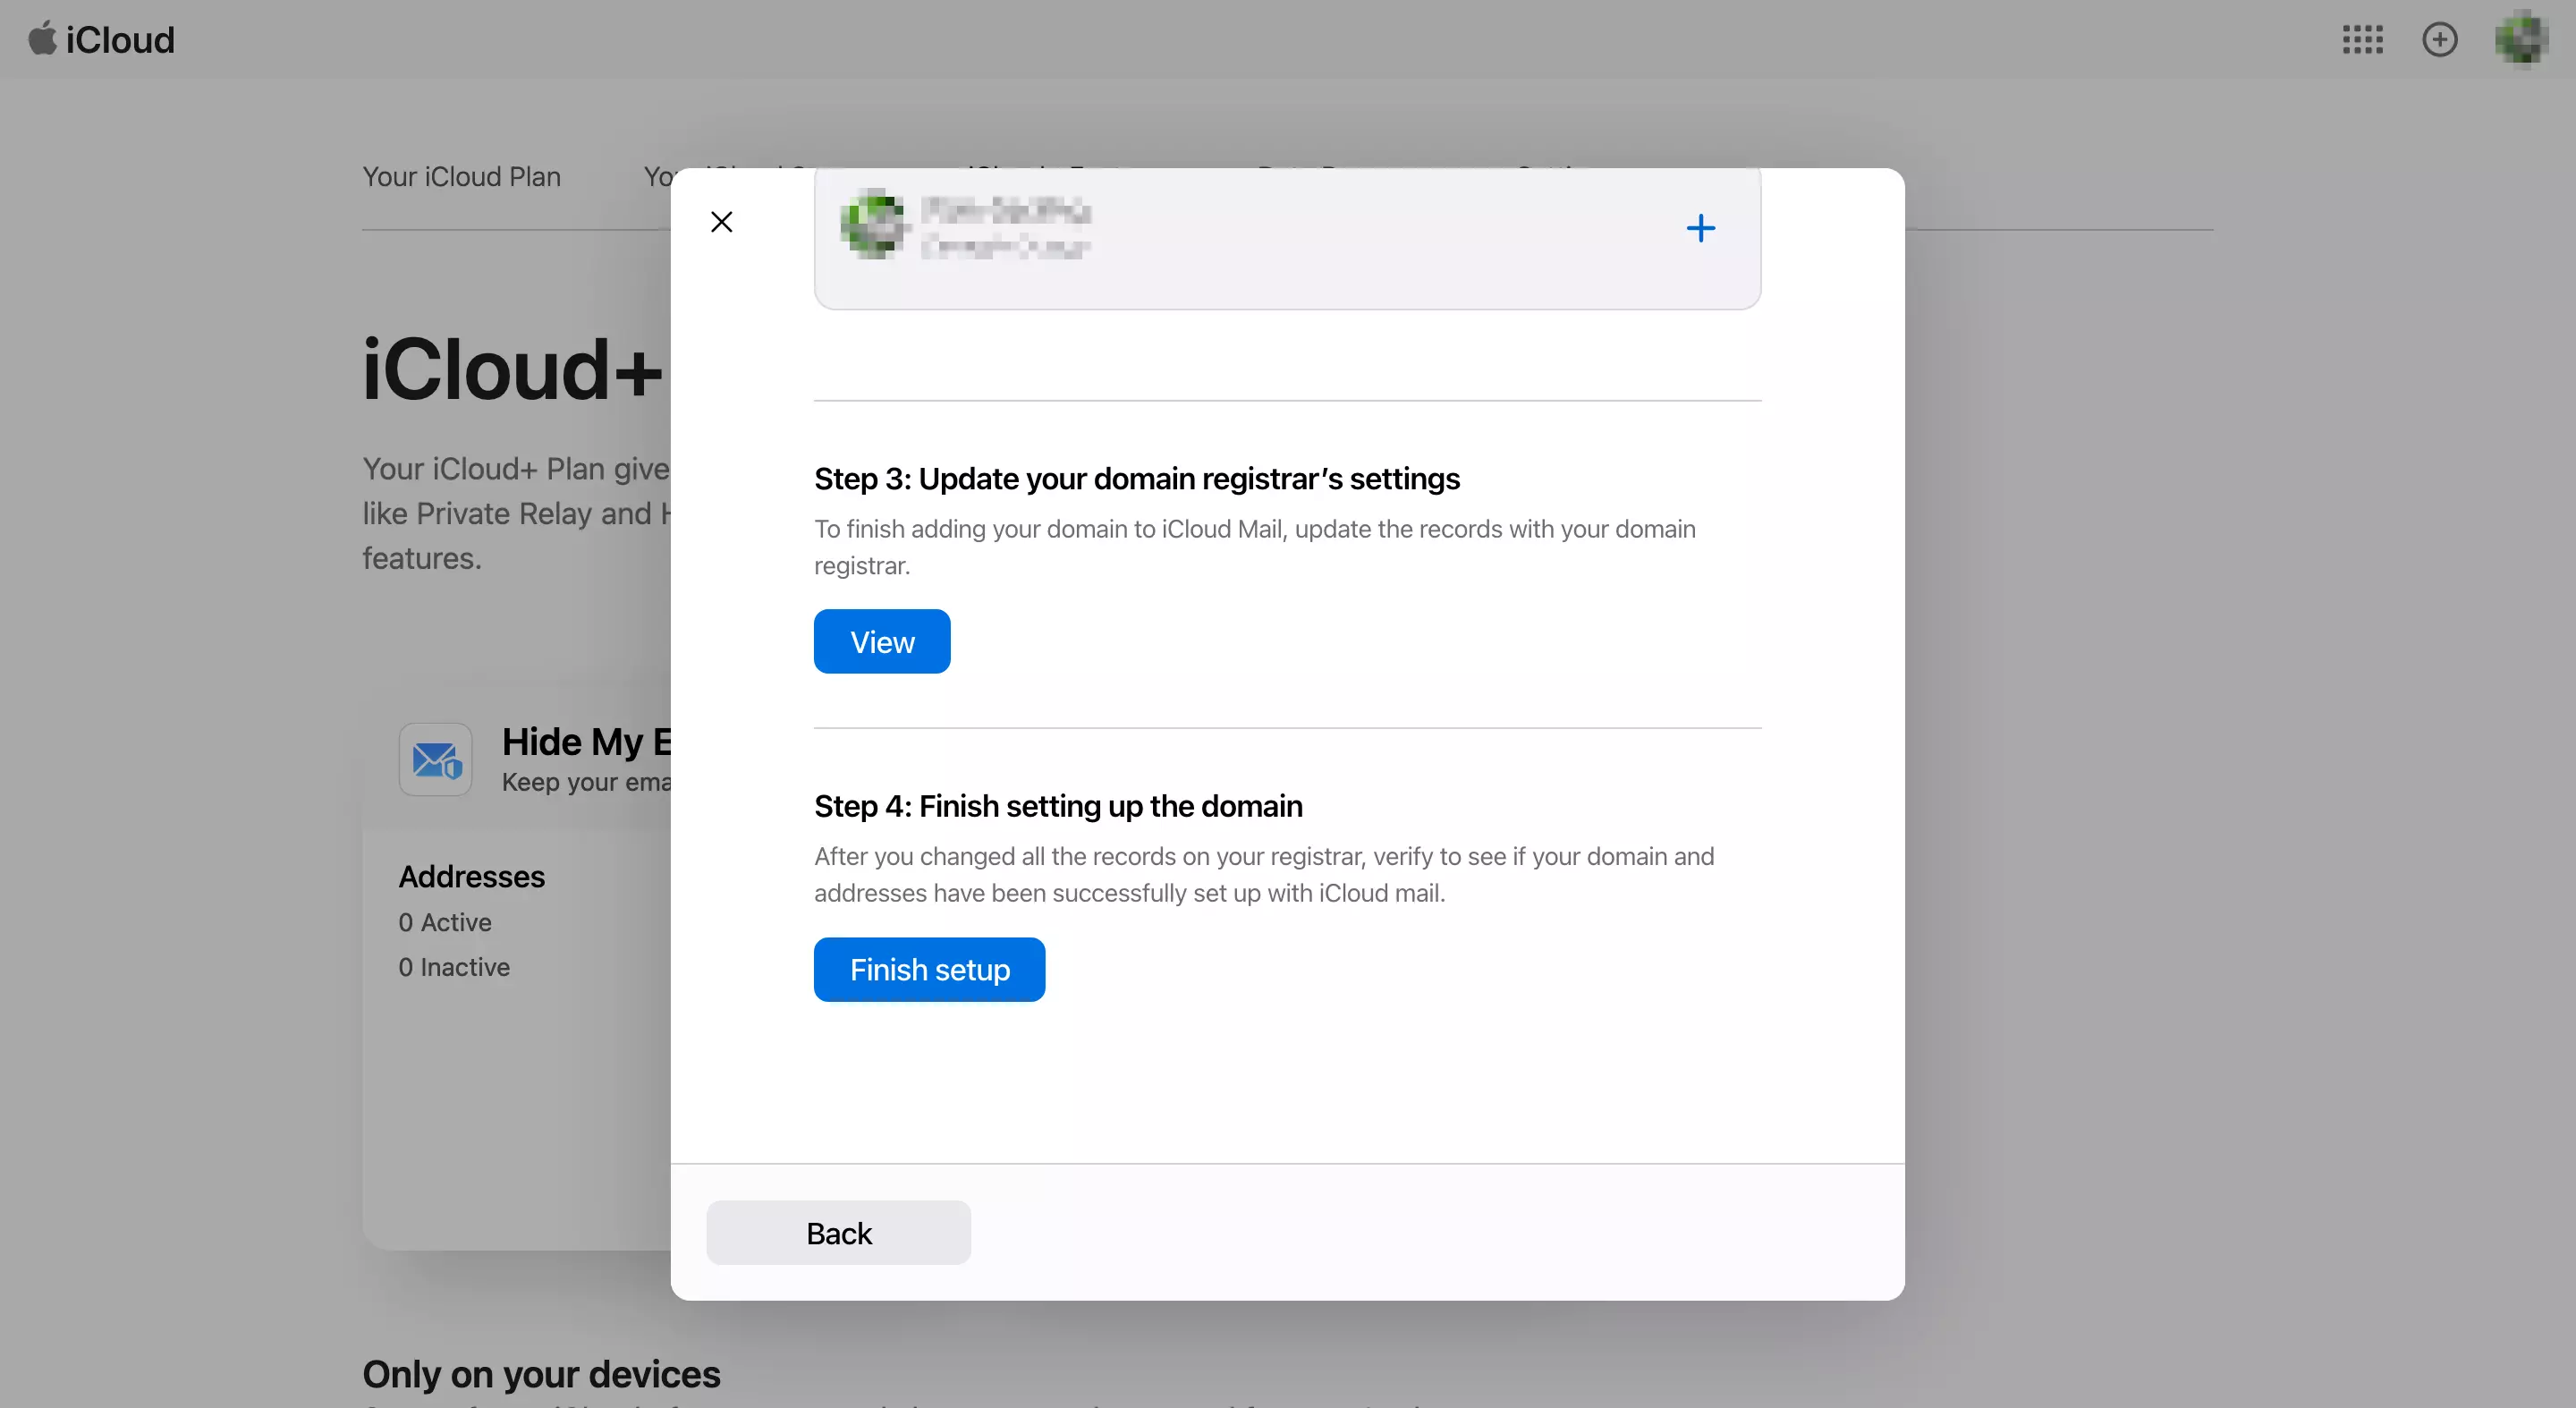
Now you need to adjust a few settings in your domain provider’s account. Specifically, you’ll need to change the settings for MX Records, TXT Records and CNAME Records. To do this, click View in the iCloud menu under Update your domain registrar’s settings and transfer the corresponding values to your domain provider’s account.
The Domain Connect Protocol is an open-source standard that helps developers connect their domain to external services and easily manage their DNS settings. You can find out more information in our article on the topic.
With some providers, iCloud Mail automatically helps with the setup. In this case, all you need to do is click Done. If you log in to your provider afterwards, the entries will be adjusted automatically.

Step 5: Finish the setup
In the last step, press the Finish setup button to finish linking the iCloud and your personal domain. If the setup was successful, you will receive a message saying so. Click on Next and add the email address you want to use under your own domain.
Every domain registered with IONOS automatically has the CNAME DNS record _domainconnect. This simplifies the connection of your domain to external services. Learn more about the CNAME record _domainconnect in the IONOS Help Centre.
How does domain registration actually work?
As mentioned above, linking iCloud email and a custom domain is only possible if you have purchased a domain beforehand. This involves registering a domain, which you can choose to do with a registrar or service provider. Here’s the process in a nutshell:
- Decide on a registrar or provider that you want to register your domain with.
- Think of a meaningful name and a suitable domain extension for your domain, which you can later use, for example, as the basis for your custom email domain with iCloud.
- Use the verification tool of the provider you’ve chosen to check the availability of the domain you want to use.
- Register the domain if it’s available.
- Verify the domain purchase within 15 days.
For a detailed guide on registering a domain, look no further than our article ‘How to buy a domain’. Here, you’ll find many useful tips and tricks for domain registration.

