How to link a Google Site with a custom domain
You can replace the subdomain sites.google.com in Google Sites with a custom domain to give your website more individuality. What are the requirements for this? And how do you link a Google site and your own custom domain?
How to register a custom domain on Google Sites
You need to own a domain before you can link Google Sites and a custom address. You can purchase this from a domain registrar such as IONOS. You should think about the name and the top-level domain (domain extension) that you want to have. It is a good idea to choose a web address that matches your Google Sites website to represent your project well.
Check out our articles in the Digital Guide to find out what a domain costs and the alternatives to a .co.uk domain!
How to register a domain with IONOS
You can also register a domain for your Google Sites website with IONOS. Simply open the IONOS website and click ‘Domains & SSL’, followed by ‘Domain Names’.
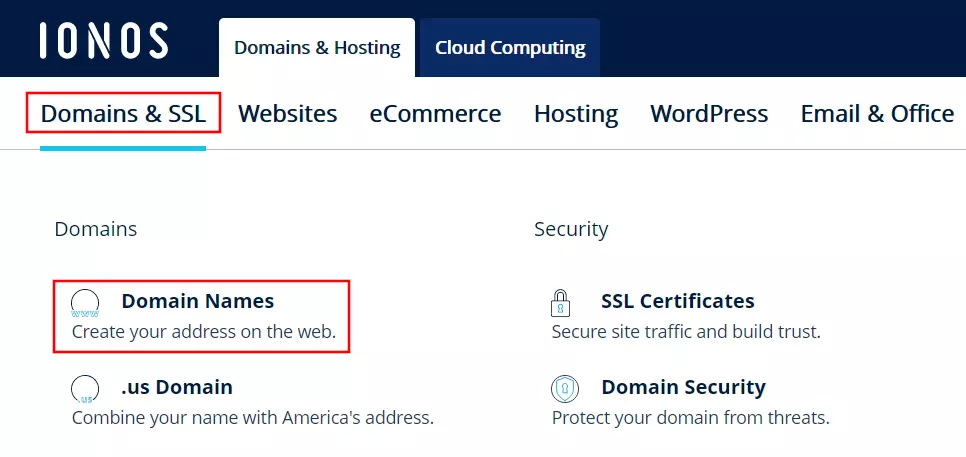
You can check whether the domain name and domain extension are available using the domain checker. Enter the address you have in mind and click ‘Check’.
You will receive a message if the domain is available. You can start the registration process by clicking ‘Select’. Otherwise, use the domain checker again to find another available domain.

You can add more addresses to the selected domain or complement the domain with a IONOS product, such as web hosting. You can also just register the web address without adding anything else to your basket.
You can create an IONOS customer account or pay for the domain directly using PayPal to register your own domain for your Google Sites website.
Are you interested in your own Google site domain? Then go to IONOS and register your individual domain for a great price, including SSL wildcard certificate, domain lock and an email inbox!
How to connect Google Sites with your own domain
Once you have registered a domain for your Google site, you can go to Google’s website service to establish the link. Log in with your Google account and follow the instructions below to set up the web address.
Step 1: Initiate switch to custom URL
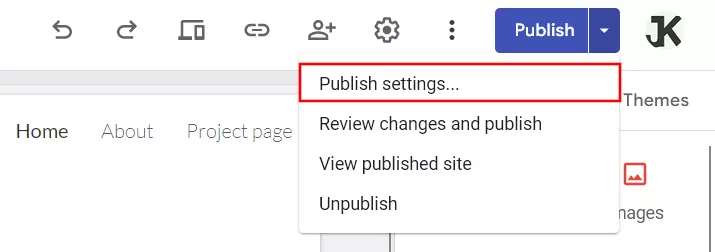
Sign into the Google Sites service and select the Google Site you want to associate with the domain. Click on the drop-down menu next to ‘Publish’ and select ‘Publish settings…’.
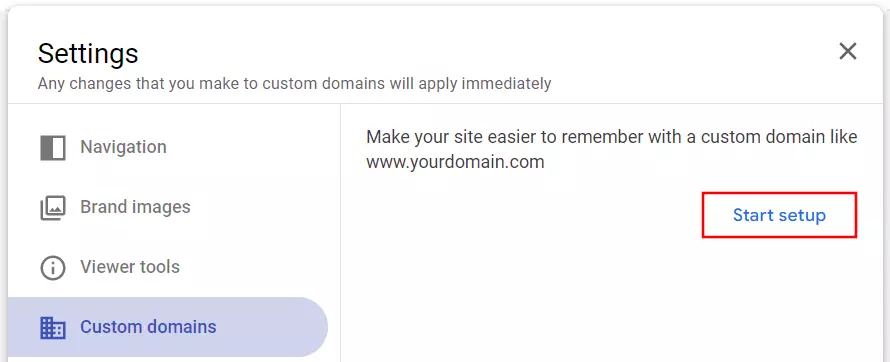
Under ‘Custom domains’, click ‘Start setup’.
Step 2: Verify domain
You can choose between two options after starting the setup:
- Use a third-party domain: Have you registered a domain with another provider as we have been describing? Then choose this option.
- Purchase a domain: If you haven’t purchased a domain for your Google site, you can select this option to purchase an address from Google Domains.
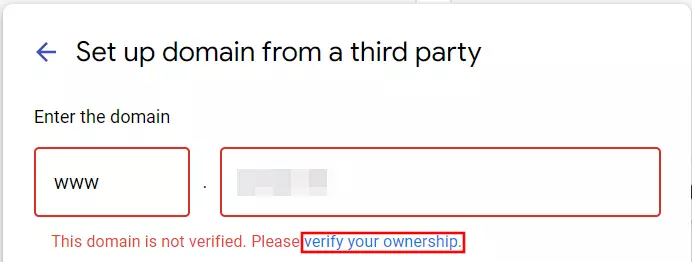
Since you already own a domain, choose the first option ‘Set up domain from a third party’ and enter the domain. You will receive a message that this domain is not verified, proceed by clicking on the ‘verify your ownership’ link.
You will be automatically redirected to the Google Search Console. Keep the property type ‘Domain’ by clicking ‘Next’. Google will determine which registrar you purchased your Google Sites domain from and automatically redirect you to their site after you click ‘Start Confirmation’.
Log in with your customer information and press ‘Connect’.
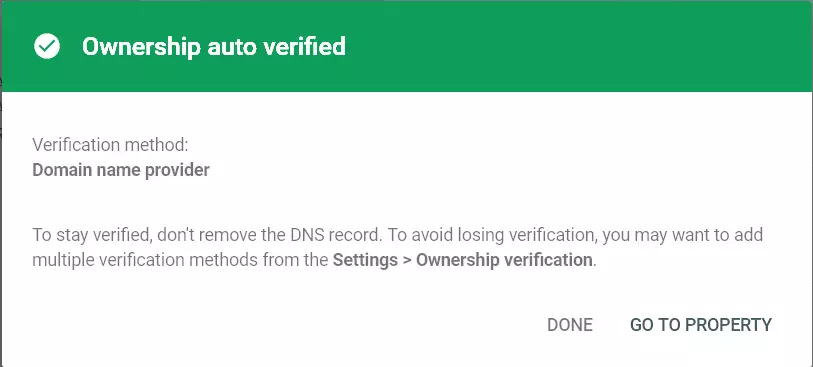
You must grant Google access by clicking ‘Allow’ in the last step. A short verification process will follow. You will receive the following message upon successful verification.
Step 3: Link Google Sites and your own domain
You can now set up the custom domain on Google Sites. You can proceed by clicking ‘Next’ as the unverified domain message will not appear anymore.
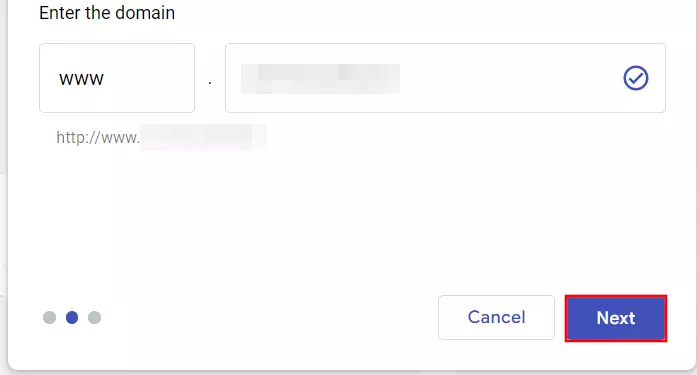
Note that it is mandatory to specify your domain here in the version with www. A setup without www is not possible. If you additionally want to use your domain without www, you have to set up a redirect for this version. To do this, follow step 4 below.
Another window with the final instructions for setting up the Google site domain will appear. Keep this window open during the next steps:
- Open a new tab in your browser and go to provider page where you registered the domain. For example, go to the login page in the IONOS Cloud Panel and enter your customer information.
- Open the DNS settings for the registered domain. Select ‘Domains & SSL’ in the IONOS Customer Centre, click on the desired domain and click on ‘DNS’.
- Create a new CNAME record (‘Add Record’).
- Enter
wwwas CNAME value (‘Hostname’). - Select
ghs.googlehosted.com.as the CNAME destination (‘Points to’), including the full stop. - Save the entry.
Switch back to the Google Sites tab and click ‘Done’ in the window that is still open. This short setup process links your Google Sites site and the custom domain and allows you to access your site from the custom web address. Keep in mind that it may take up to 48 hours for your Google Sites web page to be accessible under your new domain.
Not only can you make your Google Sites project stand out with a unique domain, you can also learn how to link your custom domain with Gmail in the Digital Guide for a more serious and professional appearance for your email communication or to choose an address that is even easier to remember.
Step 4: Set up a HTTP redirect if required
After you have linked your web page to your domain, it is only available under the version with the ’www’ subdomain. This means, for example, that the website is available under the URL https://www.website.com, but not under https://website.com. The problem can be quickly solved with a HTTP redirect. With IONOS you can set this up very easily via the Cloud Panel:
- Log in to your customer account again at
https://login.ionos.com. - Navigate to the ‘Domains & SSL’ page > [your domain] and select the ‘Details’ tab.
- In the ‘Usage Type” category, click on ‘Customize Usage Type’. On the next page, select the domain redirect option.
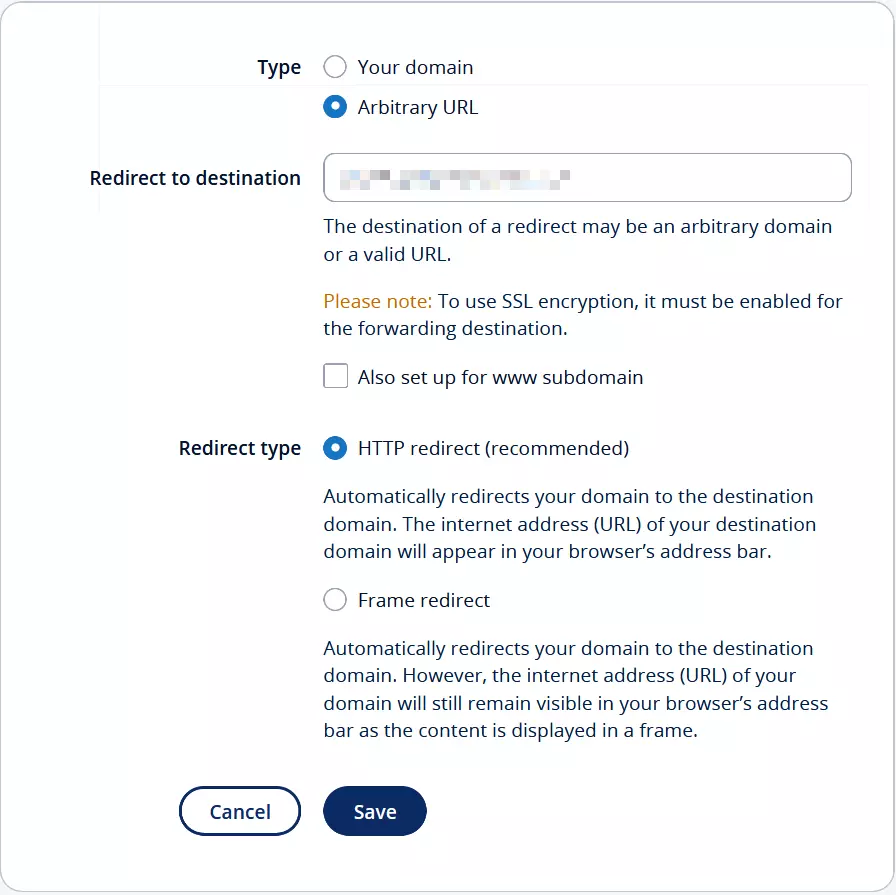
- For ‘Type’, select ‘Arbitrary URL’, and specify your domain with www as the forwarding destination. So if your domain is
example.com, enterwww.example.comhere. - For ‘Redirect type’, click on ‘HTTP redirect’ and save your changes. In a few minutes, your website should also be accessible under the address without www.
Your domain registrar doesn’t have a web console where you can set up HTTP redirects in just a few clicks? Our article on HTTP 301 redirects explains how to solve the problem.

